2023 ALFA ROMEO GIULIA engine
[x] Cancel search: enginePage 96 of 248
STARTING AND OPERATING
94
“RACE” Mode (Quadrifoglio Only)
Activation
It is activated by rotating the selector to position
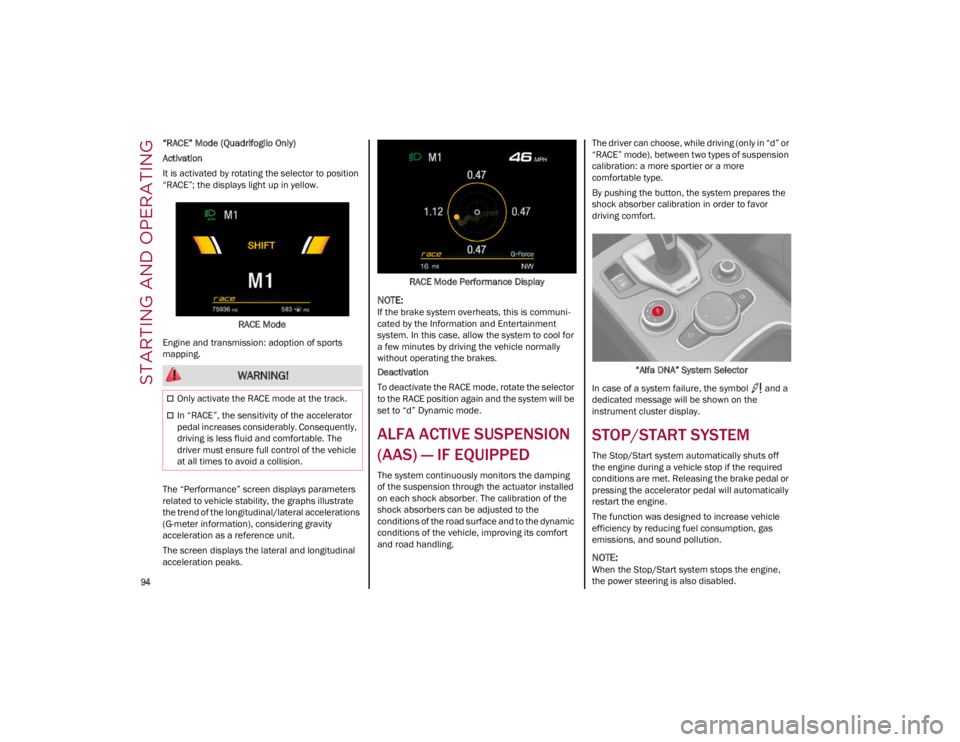
“RACE”; the displays light up in yellow.RACE Mode
Engine and transmission: adoption of sports
mapping.
The “Performance” screen displays parameters
related to vehicle stability, the graphs illustrate
the trend of the longitudinal/lateral accelerations
(G-meter information), considering gravity
acceleration as a reference unit.
The screen displays the lateral and longitudinal
acceleration peaks. RACE Mode Performance Display
NOTE:
If the brake system overheats, this is communi
-
cated by the Information and Entertainment
system. In this case, allow the system to cool for
a few minutes by driving the vehicle normally
without operating the brakes.
Deactivation
To deactivate the RACE mode, rotate the selector
to the RACE position again and the system will be
set to “d” Dynamic mode.
ALFA ACTIVE SUSPENSION
(AAS) — IF EQUIPPED
The system continuously monitors the damping
of the suspension through the actuator installed
on each shock absorber. The calibration of the
shock absorbers can be adjusted to the
conditions of the road surface and to the dynamic
conditions of the vehicle, improving its comfort
and road handling. The driver can choose, while driving (only in “d” or
“RACE” mode), between two types of suspension
calibration: a more sportier or a more
comfortable type.
By pushing the button, the system prepares the
shock absorber calibration in order to favor
driving comfort.
“Alfa DNA” System Selector
In case of a system failure, the symbol and a
dedicated message will be shown on the
instrument cluster display.
STOP/START SYSTEM
The Stop/Start system automatically shuts off
the engine during a vehicle stop if the required
conditions are met. Releasing the brake pedal or
pressing the accelerator pedal will automatically
restart the engine.
The function was designed to increase vehicle
efficiency by reducing fuel consumption, gas
emissions, and sound pollution.
NOTE:
When the Stop/Start system stops the engine,
the power steering is also disabled.
WARNING!
Only activate the RACE mode at the track.
In “RACE”, the sensitivity of the accelerator
pedal increases considerably. Consequently,
driving is less fluid and comfortable. The
driver must ensure full control of the vehicle
at all times to avoid a collision.
23_GA_OM_EN_USC_t.book Page 94
Page 97 of 248
95
OPERATING MODE
Stopping the Engine
With the vehicle at a standstill and brake pedal
pressed, the Stop/Start system shuts off the
engine if the gear selector is in a position other
than REVERSE (R).
The system does not operate when the gear
selector is in REVERSE (R), in order to make
parking maneuvers easier.
In the event of uphill stops, the Stop/Start system
is disabled to make the “Hill Start Assist” function
available (works only with running engine).
NOTE:
The engine can only be automatically stopped
after having run at about 6 mph (10 km/h). After
an automatic restart, the vehicle only needs to
exceed a speed of 0.3 mph (0.5 km/h) to stop the
engine.
Engine stopping is signaled by the symbol
lighting up on the instrument cluster display.
Restarting the Engine
To restart the engine, release the brake pedal or
turn the steering wheel slightly (if equipped).
With the brake pressed and the transmission in
automatic mode DRIVE (D), the engine will restart
by shifting to REVERSE (R), to PARK (P) or to
“AutoStick”.
With the brake pressed while the gear selector is
in “AutoStick” mode, the engine will restart by
shifting to PARK (P) or by moving the selector
to + or -.
SYSTEM MANUAL ACTIVATION/
D
EACTIVATION
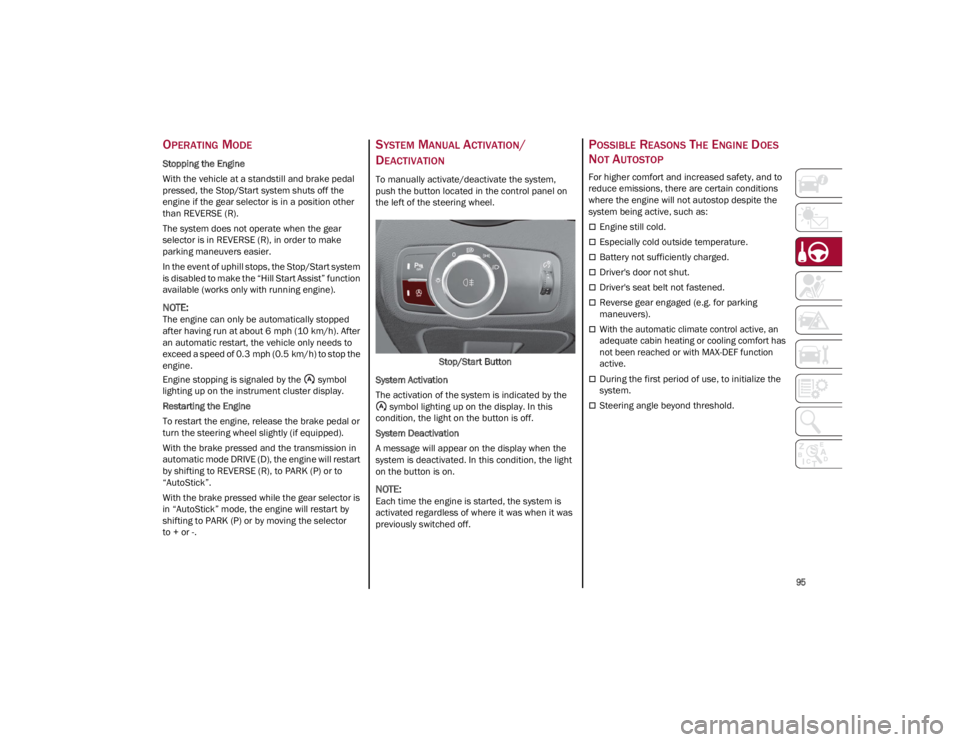
To manually activate/deactivate the system,
push the button located in the control panel on
the left of the steering wheel.
Stop/Start Button
System Activation
The activation of the system is indicated by the symbol lighting up on the display. In this
condition, the light on the button is off.
System Deactivation
A message will appear on the display when the
system is deactivated. In this condition, the light
on the button is on.
NOTE:
Each time the engine is started, the system is
activated regardless of where it was when it was
previously switched off.
POSSIBLE REASONS THE ENGINE DOES
N
OT AUTOSTOP
For higher comfort and increased safety, and to
reduce emissions, there are certain conditions
where the engine will not autostop despite the
system being active, such as:
Engine still cold.
Especially cold outside temperature.
Battery not sufficiently charged.
Driver's door not shut.
Driver's seat belt not fastened.
Reverse gear engaged (e.g. for parking
maneuvers).
With the automatic climate control active, an
adequate cabin heating or cooling comfort has
not been reached or with MAX-DEF function
active.
During the first period of use, to initialize the
system.
Steering angle beyond threshold.
23_GA_OM_EN_USC_t.book Page 95
Page 98 of 248

STARTING AND OPERATING
96
ENGINE RESTARTING CONDITIONS
Due to comfort, emission control and safety
reasons, the engine can restart automatically
without any action by the driver, under special
conditions, such as:
Battery not sufficiently charged.
Vehicle moving (e.g. when driving on roads
with a grade).
Engine stopping by the Stop/Start system for
more than approximately three minutes.
With the automatic climate control active, an
adjustment in cabin heating or cooling is made
or with MAX-DEF function active.
SAFETY FUNCTIONS
When the engine is stopped through the Stop/
Start system, if the driver releases their seat belt,
opens the driver's or passenger's door, or opens
the hood from inside the vehicle, the engine can
be restarted only by using the ignition.
This condition is indicated to the driver both
through a buzzer and a message on the
instrument cluster display.
IRREGULAR OPERATION
In the event of malfunction, the Stop/Start
system is deactivated.
For further information on failure indications
Ú
page 70.
VEHICLE INACTIVITY
In the event of vehicle inactivity (or if the battery
is replaced), special attention must be paid to the
disconnection of the battery power supply.
Proceed as follows:
Remove connector from socket to disconnect
sensor (battery status monitoring) installed on
the negative pole of the battery. This sensor
should never be disconnected from the pole
except if the battery is replaced.Battery Power Supply
NOTE:
After setting the ignition to OFF and having closed
the driver side door, wait at least one minute
before disconnecting the electrical supply from
the battery. When reconnecting the electrical
supply to the battery, make sure that the ignition
is in the OFF position and the driver side door is
closed.
SPEED LIMITER
DESCRIPTION
This feature allows the driver to program the
maximum speed of the vehicle.
NOTE:
The maximum set speed can be exceeded by
continuing to press the accelerator pedal.
The maximum speed can be set with the vehicle
stationary or in motion. The minimum speed that
can be set is 18 mph (30 km/h).
When this feature is active, the vehicle speed
depends on the pressing of the accelerator pedal
until the programmed speed limit is reached
Ú
page 97.
1 — Socket
2 — Sensor
3 — Connector
23_GA_OM_EN_USC_t.book Page 96
Page 103 of 248

101
Activating Adaptive Cruise Control (ACC)
The minimum set speed for the ACC system is
19 mph (30 km/h) and the maximum is 110 mph
(180 km/h).
The system cannot be activated:
When pressing the brake pedal.
When the brakes are overheated.
When the Electric Park Brake has been
operated.
When either PARK, REVERSE or NEUTRAL is
engaged.
When the engine RPM is above a maximum
threshold.
When the vehicle speed is not within the
operational speed range.
When the Electronic Stability Control (ESC) (or
Anti-Lock Brake System (ABS) or other stability
control systems) are operating or have just
operated.
When the ESC system is off.
When the Forward Collision Warning system (if
equipped) is braking automatically.
In the event of a system failure.
When the engine is off.
In case of obstruction of the radar sensor (in
this case the bumper area where it is located
must be cleaned).
If the system is set, the conditions described
above also cause a cancellation or deactivation
of the system. These situations may vary
according to the conditions.
NOTE:
The system will not be deactivated when speeds
higher than those set are reached by pressing the
accelerator pedal above 110 mph (180 km/h). In
these situations, the system may not work
correctly and it is recommended to deactivate it.
The driver should always obey traffic laws and
speed limits. Never drive above applicable speed
limit restrictions.
To Activate/Deactivate
The system has four operating states:
Enabled (speed not set)
Activated (speed set)
Paused
Deactivated
To Activate
To enable the system, push and release the on/
off button located on the left side on the steering
wheel.
On/Off Button
•
Cannot take street, traffic, and weather
conditions into account, and may be limited upon adverse sight distance conditions.
• Does not always fully recognize complex
driving conditions, which can result in wrong or missing distance warnings.
• Will bring the vehicle to a complete stop
while following a vehicle ah ead and hold
the ve
hicle for approximately two
minutes in the stop position. If the vehicle ahead does not start movingwithin two minutes, the parking brakewill be activated and the ACC system will be canceled.
You should switch off the ACC system:
• When driving in fog, heavy rain, heavy
snow, sleet, heavy traffic, and complex driving situations (i.e., in highwayconstruction zones).
• When entering a turn lane or highway
off-ramp; w hen driving on roads that are
win d
ing, icy, snow-covered, slippery, or
have steep uphill or downhill slopes.
• When circumstances do not allow safe
driving at a constant speed.
WARNING!
23_GA_OM_EN_USC_t.book Page 101
Page 104 of 248
STARTING AND OPERATING
102
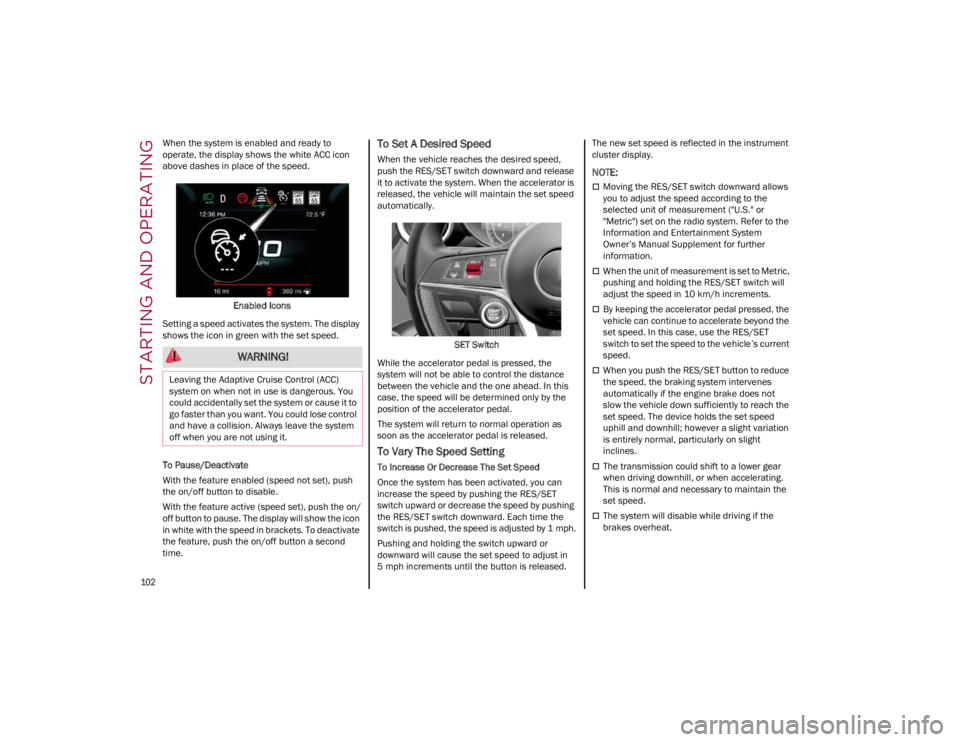
When the system is enabled and ready to
operate, the display shows the white ACC icon
above dashes in place of the speed.Enabled Icons
Setting a speed activates the system. The display
shows the icon in green with the set speed.
To Pause/Deactivate
With the feature enabled (speed not set), push
the on/off button to disable.
With the feature active (speed set), push the on/
off button to pause. The display will show the icon
in white with the speed in brackets. To deactivate
the feature, push the on/off button a second
time.To Set A Desired Speed
When the vehicle reaches the desired speed,
push the RES/SET switch downward and release
it to activate the system. When the accelerator is
released, the vehicle will maintain the set speed
automatically.
SET Switch
While the accelerator pedal is pressed, the
system will not be able to control the distance
between the vehicle and the one ahead. In this
case, the speed will be determined only by the
position of the accelerator pedal.
The system will return to normal operation as
soon as the accelerator pedal is released.
To Vary The Speed Setting
To Increase Or Decrease The Set Speed
Once the system has been activated, you can
increase the speed by pushing the RES/SET
switch upward or decrease the speed by pushing
the RES/SET switch downward. Each time the
switch is pushed, the speed is adjusted by 1 mph.
Pushing and holding the switch upward or
downward will cause the set speed to adjust in
5 mph increments until the button is released. The new set speed is reflected in the instrument
cluster display.
NOTE:
Moving the RES/SET switch downward allows
you to adjust the speed according to the
selected unit of measurement ("U.S." or
"Metric") set on the radio system. Refer to the
Information and Entertainment System
Owner’s Manual Supplement for further
information.
When the unit of measurement is set to Metric,
pushing and holding the RES/SET switch will
adjust the speed in 10 km/h increments.
By keeping the accelerator pedal pressed, the
vehicle can continue to accelerate beyond the
set speed. In this case, use the RES/SET
switch to set the speed to the vehicle’s current
speed.
When you push the RES/SET button to reduce
the speed, the braking system intervenes
automatically if the engine brake does not
slow the vehicle down sufficiently to reach the
set speed. The device holds the set speed
uphill and downhill; however a slight variation
is entirely normal, particularly on slight
inclines.
The transmission could shift to a lower gear
when driving downhill, or when accelerating.
This is normal and necessary to maintain the
set speed.
The system will disable while driving if the
brakes overheat.
WARNING!
Leaving the Adaptive Cruise Control (ACC)
system on when not in use is dangerous. You
could accidentally set the system or cause it to
go faster than you want. You could lose control
and have a collision. Always leave the system
off when you are not using it.
23_GA_OM_EN_USC_t.book Page 102
Page 119 of 248

117
If several obstacles are detected simultaneously
in the front and rear area, the display will show all
of them, regardless of the area in which they were
detected.
It is not possible to exit from the display screen
while the vehicle is in REVERSE.
Acoustic Signal
In the presence of an obstacle at the front or the
rear of the vehicle, an acoustic signal with
variable frequency will sound:
The acoustic signal increases in frequency as
the distance between the vehicle and the
obstacle decreases.
The acoustic signal becomes continuous when
the distance between the vehicle and the
obstacle is less than 11 inches (30 cm), and
stops if the distance increases.
The acoustic signal is constant if the distance
between the vehicle and the obstacle is
unchanged.
NOTE:
If the sensors detect several front and rear obsta-
cles, the closest obstacle is considered. An inter -
mittent signal will sound if the obstacles are at
the same distance (front and rear).
When the system emits an acoustic signal, the
volume of the radio system, if activated, is
automatically lowered.
An acoustic signal will not sound if the vehicle is
in PARK.
ENABLING AND DISABLING PARKSENSE
For vehicles only equipped with rear sensors, to
turn the system off, push the ParkSense button
located to the left of the headlight switch. The
indicator light within the button will illuminate
when the system is turned off. Pushing the button
a second time will turn the system back on, and
the indicator light will turn off.
ParkSense On/Off Switch
For vehicles equipped with front and rear
sensors, to turn the front parking sensors off,
push the ParkSense button located to the left of
the headlight switch. The indicator light within the
switch will illuminate when the system is turned
off. Pushing the button a second time will turn the
front sensors back on, and the indicator light will
turn off.
NOTE:
Deactivation of both the front and rear parking
sensors can only be done through the radio
system. The indicator light within the ParkSense system
switch will also be on in case of system failure. If
the switch is pushed with a system failure, the
indicator light will flash for approximately five
seconds. The light will then stay on constantly.
NOTE:
When the ignition is placed in the ON/RUN posi
-
tion, the ParkSense system keeps the last state
when the engine was stopped (activated or deac -
tivated) in its memory.
PARKSENSE WARNING DISPLAY
Parking sensor faults, if any, will be indicated
when REVERSE is engaged by a message on the
instrument cluster display
Ú
page 70.
In case of system failure, a dedicated message
appears on the instrument cluster for about five
seconds.
Cleaning The Front Or Rear Sensors : If the
display shows a message requiring the
sensors to be cleaned, make sure that the
outer surface and the underside of the front
and rear fascias/bumpers are free of debris
(e.g. snow, mud, ice, etc.). Once these areas
are clear, place the ignition in the OFF position,
then return it to ON/RUN. If the message is still
displayed, contact an authorized dealer.
Audio System Not Available : If the display
shows a message that the audio system is not
available, it means that the acoustic signal will
be emitted by the instrument panel, and not
through the vehicle’s speakers.
23_GA_OM_EN_USC_t.book Page 117
Page 122 of 248
STARTING AND OPERATING
120
Left Lane Departure — Both Lanes Detected
When the system is active, both lane lines on the
display illuminate in white to indicate that both of
the lane markings have been detected.
When lane markings are detected, the system is
ready to provide indications in case the driver
unintentionally leaves the lane (turn signal not
activated).
As the Lane Departure Warning system detects
the lane markings while the vehicle is in motion,
it will adjust the display accordingly (from white to
yellow and vice versa, and increase their
thickness).
If a lane line is crossed, the driver is alerted by an
audible signal as well as the visual indication in
the instrument cluster. The signal is emitted
through the speakers on the side of the lane
marking which is being crossed (e.g. if the vehicle
is exceeding the left line of the lane, the audible
signal will come from the speakers on the left of
the vehicle).
Limited Operation Warning
If a message appears on the display, a condition
limiting the Lane Departure Warning system
operation may have occurred. This could be an
obstruction of the camera view, or a fault in the
system.
If an obstruction is detected, clean the area of the
windshield by the interior rearview mirror.
Although the vehicle can still be driven in normal
conditions, the system may not function properly.
When the conditions limiting the system are
corrected, it will go back to normal operation.
Should a fault persist, contact an authorized
dealer.System Failure Warning
If the system turns off and the warning light
appears on the display, it means that there is a
system fault.
In this case, it is still possible to drive the vehicle,
but you are advised to contact an authorized
dealer as soon as possible.
CHANGING LANE DEPARTURE WARNING
S
TATUS
The system's sensitivity can be set through the
radio system. Sensitivity “High” or “Low” can be
selected.
To access the function, from the main menu
select the following in order:
1. Driver Assistance
2. Lane Departure Warning
3. Sensitivity
LANE KEEPING ASSIST
(LKA) SYSTEM —
IF EQUIPPED
The Lane Keeping Assist (LKA) system uses a
camera located on the windshield to detect the
lane markings and calculate the position of the
vehicle within such markings, in order to make
sure that the vehicle remains inside the lane. This
is an active system that will apply torque to the
steering wheel if it senses that the vehicle is
drifting out of the lane. When one or both lane markings are detected
and the vehicle passes over one without a turn
signal being applied, the system will apply torque
to the steering wheel and a visual signal will be
displayed in the instrument cluster display. An
audible signal may also sound.
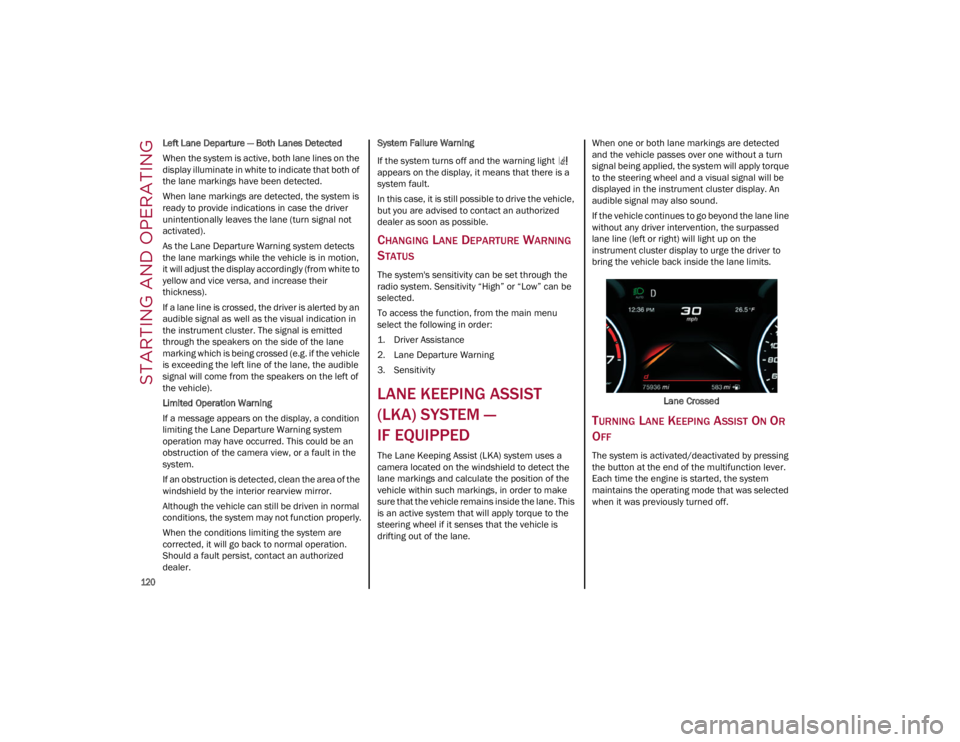
If the vehicle continues to go beyond the lane line
without any driver intervention, the surpassed
lane line (left or right) will light up on the
instrument cluster display to urge the driver to
bring the vehicle back inside the lane limits.
Lane Crossed
TURNING LANE KEEPING ASSIST ON OR
O
FF
The system is activated/deactivated by pressing
the button at the end of the multifunction lever.
Each time the engine is started, the system
maintains the operating mode that was selected
when it was previously turned off.
23_GA_OM_EN_USC_t.book Page 120
Page 126 of 248
STARTING AND OPERATING
124
(Continued)
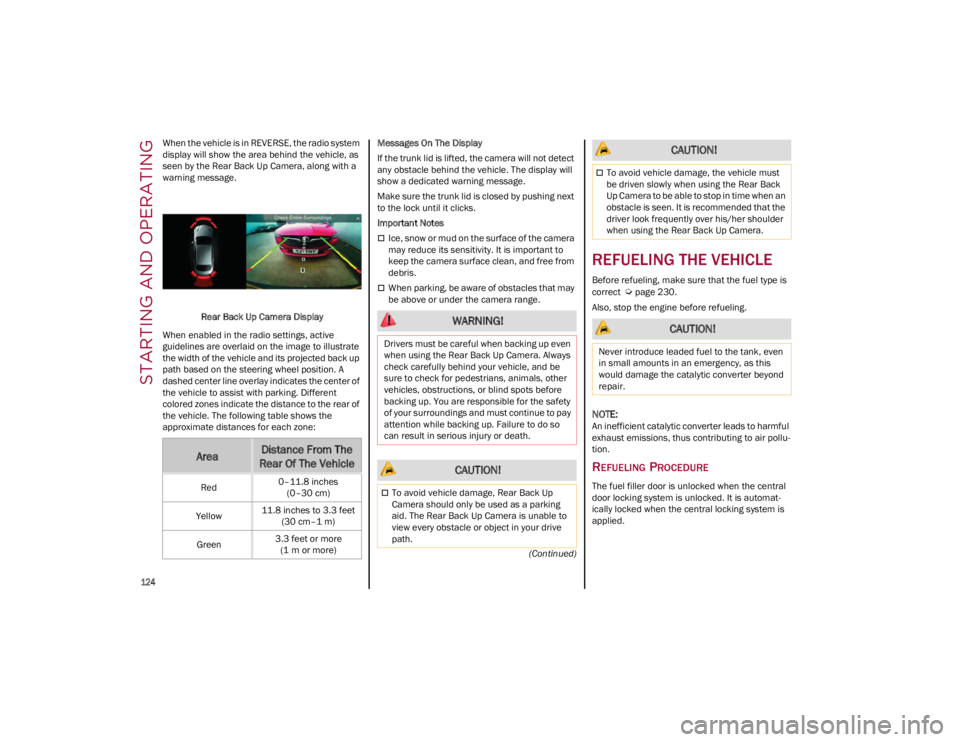
When the vehicle is in REVERSE, the radio system
display will show the area behind the vehicle, as
seen by the Rear Back Up Camera, along with a
warning message.
Rear Back Up Camera Display
When enabled in the radio settings, active
guidelines are overlaid on the image to illustrate
the width of the vehicle and its projected back up
path based on the steering wheel position. A
dashed center line overlay indicates the center of
the vehicle to assist with parking. Different
colored zones indicate the distance to the rear of
the vehicle. The following table shows the
approximate distances for each zone: Messages On The Display
If the trunk lid is lifted, the camera will not detect
any obstacle behind the vehicle. The display will
show a dedicated warning message.
Make sure the trunk lid is closed by pushing next
to the lock until it clicks.
Important Notes
Ice, snow or mud on the surface of the camera
may reduce its sensitivity. It is important to
keep the camera surface clean, and free from
debris.
When parking, be aware of obstacles that may
be above or under the camera range.
REFUELING THE VEHICLE
Before refueling, make sure that the fuel type is
correct
Ú
page 230.
Also, stop the engine before refueling.
NOTE:
An inefficient catalytic converter leads to harmful
exhaust emissions, thus contributing to air pollu -
tion.
REFUELING PROCEDURE
The fuel filler door is unlocked when the central
door locking system is unlocked. It is automat -
ically locked when the central locking system is
applied.
AreaDistance From The
Rear Of The Vehicle
Red 0–11.8 inches
(0–30 cm)
Yellow 11.8 inches to 3.3 feet
(30 cm–1 m)
Green 3.3 feet or more
(1 m or more)
WARNING!
Drivers must be careful when backing up even
when using the Rear Back Up Camera. Always
check carefully behind your vehicle, and be
sure to check for pedestrians, animals, other
vehicles, obstructions, or blind spots before
backing up. You are responsible for the safety
of your surroundings and must continue to pay
attention while backing up. Failure to do so
can result in serious injury or death.
CAUTION!
To avoid vehicle damage, Rear Back Up
Camera should only be used as a parking
aid. The Rear Back Up Camera is unable to
view every obstacle or object in your drive
path.
To avoid vehicle damage, the vehicle must
be driven slowly when using the Rear Back
Up Camera to be able to stop in time when an
obstacle is seen. It is recommended that the
driver look frequently over his/her shoulder
when using the Rear Back Up Camera.
CAUTION!
Never introduce leaded fuel to the tank, even
in small amounts in an emergency, as this
would damage the catalytic converter beyond
repair.
CAUTION!
23_GA_OM_EN_USC_t.book Page 124