2023 ALFA ROMEO GIULIA rear view mirror
[x] Cancel search: rear view mirrorPage 125 of 248

123
(Continued)
System Failure Signaling
If the system turns off and appears on the
display, it means that there is a system fault.
In this case, it is still possible to drive the vehicle,
but you are advised to contact an authorized
dealer as soon as possible.
REAR BACK UP CAMERA /
DYNAMIC GRIDLINES
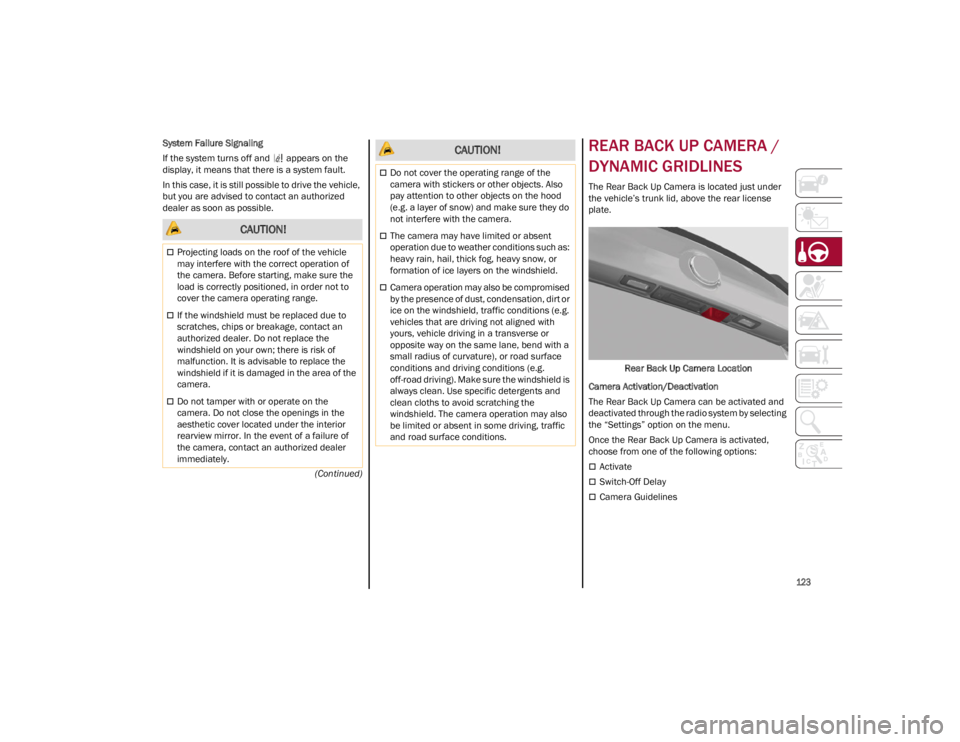
The Rear Back Up Camera is located just under
the vehicle’s trunk lid, above the rear license
plate.
Rear Back Up Camera Location
Camera Activation/Deactivation
The Rear Back Up Camera can be activated and
deactivated through the radio system by selecting
the “Settings” option on the menu.
Once the Rear Back Up Camera is activated,
choose from one of the following options:
Activate
Switch-Off Delay
Camera Guidelines
CAUTION!
Projecting loads on the roof of the vehicle
may interfere with the correct operation of
the camera. Before starting, make sure the
load is correctly positioned, in order not to
cover the camera operating range.
If the windshield must be replaced due to
scratches, chips or breakage, contact an
authorized dealer. Do not replace the
windshield on your own; there is risk of
malfunction. It is advisable to replace the
windshield if it is damaged in the area of the
camera.
Do not tamper with or operate on the
camera. Do not close the openings in the
aesthetic cover located under the interior
rearview mirror. In the event of a failure of
the camera, contact an authorized dealer
immediately.
Do not cover the operating range of the
camera with stickers or other objects. Also
pay attention to other objects on the hood
(e.g. a layer of snow) and make sure they do
not interfere with the camera.
The camera may have limited or absent
operation due to weather conditions such as:
heavy rain, hail, thick fog, heavy snow, or
formation of ice layers on the windshield.
Camera operation may also be compromised
by the presence of dust, condensation, dirt or
ice on the windshield, traffic conditions (e.g.
vehicles that are driving not aligned with
yours, vehicle driving in a transverse or
opposite way on the same lane, bend with a
small radius of curvature), or road surface
conditions and driving conditions (e.g.
off-road driving). Make sure the windshield is
always clean. Use specific detergents and
clean cloths to avoid scratching the
windshield. The camera operation may also
be limited or absent in some driving, traffic
and road surface conditions.
CAUTION!
23_GA_OM_EN_USC_t.book Page 123
Page 135 of 248

133
While driving, the system monitors the detection
zone to check whether it is necessary to send a
signal to the driver on both sides. The system
monitors this detection zone in three different
situations:
When you are being overtaken by a vehicle.
When you are overtaking a vehicle.
When a vehicle approaches from the side.
NOTE:
The system does not alert the driver of the
presence of fixed objects (e.g. safety barriers,
poles, walls, etc.). However, in some circum-
stances, the system may activate in the
presence of these objects. This is normal and
does not indicate a system malfunction.
The system does not alert the driver about the
presence of vehicles coming from the opposite
direction, in the adjacent lanes.
If a trailer is hitched to the car, the system
automatically deactivates.
Rear View
The system detects vehicles coming from the rear
part of your vehicle on both sides and entering the rear detection area with a difference in speed
of less than 25 mph (40 km/h) in relation to your
vehicle.
Overtaking Vehicles
If another vehicle is overtaken slowly, with a
difference in speed of less than 15 mph (25 km/h)
and the vehicle stays in the blind spot for approxi
-
mately 1.5 seconds, the warning light on the door
mirror of the corresponding side illuminates.
If the difference in speed between the two
vehicles is greater than 15 mph (25 km/h), the
warning light does not illuminate
Ú
page 239.
Rear Cross Path Detection (RCP) System
The RCP system assists the driver during reverse
maneuvers in the case of reduced visibility.
The RCP system monitors the rear detection
areas on both sides of the vehicle to detect
objects moving toward the sides of the vehicle,
with a minimum speed between 1 mph (1 km/h)
and 2 mph (3 km/h) and objects moving at a
maximum speed of 21 mph (35 km/h), in areas such as parking lots.
The system activation is signaled to the driver by
an audible warning.
NOTE:
If the sensors are covered by objects or
vehicles, the system may not work as intended.
For the system to operate correctly, the rear
fascia/bumper area where the radar sensors
are located must stay free from snow, ice and
dirt gathered from the road surface.
Do not cover the rear fascia/bumper area
where the radar sensors are located with any
object (e.g. adhesives, bike rack, etc.). Operating Mode
The system may be activated/deactivated via the
radio system. To access the function, select the
following items on the main menu in sequence:
1. “Settings”
2. “Passive Safety”
3. “Blind Spot Alert”
“Blind Spot Alert”, “Visual” Mode
When the system is enabled, the warning light
within the door mirror on the side of the detected
object illuminates.
The visual warning on the mirror will blink if the
driver activates the turn signals, indicating a lane
change.
The warning light will be constant if the driver
stays in the same lane.
WARNING!
The Blind Spot Monitoring system is only an
aid to help detect objects in the blind spot
zones. The BSM system is not designed to
detect pedestrians, bicyclists, or animals. Even
if your vehicle is equipped with the BSM
system, always check your vehicle’s mirrors,
glance over your shoulder, and use your turn
signal before changing lanes. Failure to do so
can result in serious injury or death.
WARNING!
Rear Cross Path Detection (RCP) is not a back
up aid system. It is intended to be used to help
a driver detect an oncoming vehicle in a
parking lot situation. Drivers must be careful
when backing up, even when using RCP.
Always check carefully behind your vehicle,
look behind you, and be sure to check for
pedestrians, animals, other vehicles,
obstructions, and blind spots before backing
up. Failure to do so can result in serious injury
or death.
23_GA_OM_EN_USC_t.book Page 133
Page 171 of 248

169
Have a flat tire or a burnt-out bulb?
At times, a problem such as these may interfere
with your driving experience.
The section on emergencies can help you to deal
with critical situations independently.
HAZARD WARNING
FLASHERS
The Hazard Warning Flashers button is located in
the switch bank below the radio screen.
Push the button once to turn the Hazard Warning
Flashers on. When the button is activated, all
directional turn signals will flash on and off to
warn oncoming traffic of an emergency. Push the
button a second time to turn the Hazard Warning
Flashers off.
This is an emergency warning system and it
should not be used when the vehicle is in motion.
Use it only when your vehicle is disabled or
signaling a safety hazard warning for other
motorists.
When you must leave the vehicle to seek
assistance, the Hazard Warning Flashers will
continue to operate even though the ignition is
cycled to OFF.Hazard Warning Flashers Button
SOS EMERGENCY CALL —
IF EQUIPPED
Your vehicle has an on-board assistance feature
that is designed to provide support in case of an
accident and/or emergency. This feature is
automatically activated by air bag intervention, or
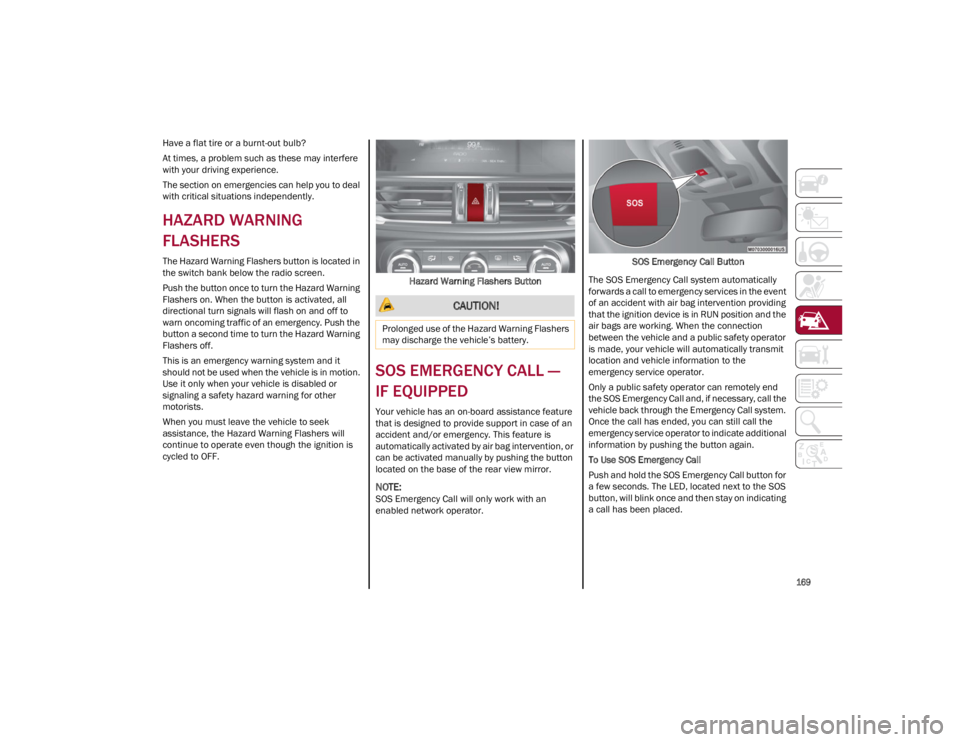
can be activated manually by pushing the button
located on the base of the rear view mirror.
NOTE:
SOS Emergency Call will only work with an
enabled network operator. SOS Emergency Call Button
The SOS Emergency Call system automatically
forwards a call to emergency services in the event
of an accident with air bag intervention providing
that the ignition device is in RUN position and the
air bags are working. When the connection
between the vehicle and a public safety operator
is made, your vehicle will automatically transmit
location and vehicle information to the
emergency service operator.
Only a public safety operator can remotely end
the SOS Emergency Call and, if necessary, call the
vehicle back through the Emergency Call system.
Once the call has ended, you can still call the
emergency service operator to indicate additional
information by pushing the button again.
To Use SOS Emergency Call
Push and hold the SOS Emergency Call button for
a few seconds. The LED, located next to the SOS
button, will blink once and then stay on indicating
a call has been placed.
CAUTION!
Prolonged use of the Hazard Warning Flashers
may discharge the vehicle’s battery.
23_GA_OM_EN_USC_t.book Page 169
Page 244 of 248

242
INDEX
J
Jump Starting ............................................. 175
K
Keyless Enter 'n Go™ ................................... 26Passive Entry ............................................ 26
Keys .............................................................. 19
L
Lane Change And Turn Signals ................... 45
Lane Change Assist...................................... 45
Lane Keeping Assist System .....................120
LaneSense ..................................................118
Lap/Shoulder Belts ....................................145
Latches .......................................................168
Leaks, Fluid ................................................168
Life Of Tires.................................................215
Light Bulbs ..................................................168
Lights .......................................................... 168 Air Bag ...........................................150, 167
Ambient .................................................... 46
Brake Warning .................................. 71, 72Courtesy/Reading ............................. 45, 46Daytime Running ..................................... 43
Electronic Stability Program (ESP) Indicator ............................................... 75
Exterior ............................................ 42, 168
Fog ............................................................ 44
Hazard Warning Flasher ........................ 169
High Beam/Low Beam Select ................. 43
Interior ...................................................... 45
Low Fuel ................................................... 76
Malfunction Indicator (Check Engine) .... 73 Park ........................................................ 44, 74
Seat Belt Reminder ..................................71
Turn Signals .............................. 45, 74, 168
Types Of Bulbs ....................................... 202
Warning Instrument Cluster Descriptions .................................. 74, 75
Loading Vehicle ......................................... 125 Tires........................................................ 209
Locks Automatic Door.........................................28
Child Protection ........................................ 28
M
Maintenance .................................................60
Malfunction Indicator Light (Check
Engine) ..........................................................73
Manual Service ................................................... 238
Memory Feature (Memory Seats) ................30
Memory Seat.................................................30
Methanol .................................................... 230
Mirrors Automatic Dimming..................................37
Electric Powered.......................................38
Exterior Folding.........................................38
Heated ...................................................... 39
Rearview ...................................................37
Vanity ..................................................... 204
O
Occupant Restraints.................................. 144
Oil Pressure Light .........................................75
Oil, Engine Pressure Warning Light............................75 Onboard Diagnostic System........................ 79
Opener, Garage Door (Homelink) ............... 39
Operator Manual
Owner's Manual ..................................... 238
P
Paintwork (Cleaning And Maintenance) ... 221
Panic Brake Assist (PBA) System.............. 131
ParkSense System ..................................... 115
Passive Entry ................................................ 26
Performance (Top Speed) ......................... 235
Pets ............................................................. 166
Pinch Protection ........................................... 59
Placard, Tire And Loading Information ..... 209
Power Deck Lid Release ..................................... 61
Outlet (Auxiliary Electrical Outlet) ........... 56
Seats ........................................................ 34
Sunroof..................................................... 58Windows ................................................... 57
Power Seats Forward ..............................................31, 34
Rearward............................................31, 34
Recline ...............................................31, 34
Power Supply.............................................. 225
Pregnant Women And Seat Belts ............. 148
Pretensioners Seat Belts ............................................... 148
Programmable Settings ............................... 69
Prolonged Vehicle Inactivity ...................... 220
R
Radial Ply Tires........................................... 214
Radio Transmitters And Mobile Phones ........4
Rear Camera .............................................. 123
23_GA_OM_EN_USC_t.book Page 242