Page 87 of 176

8-12
8
Do not ride in areas posted “no trespassing”.
Do not ride on private property without getting
permission. Select a large, flat, unpaved area to become famil-
iar with your ATV. Make sure that this area is free
of obstacles and other riders. You should practice
control of the throttle, brakes, shifting procedures,
and turning techniques in this area before trying
more difficult terrain.
Shift to the park position and follow the instruction
on page 7-1 to start the engine. Once it has
warmed up you are ready to begin riding your
ATV. With the engine idling, shift the drive select
lever into the low-range position or the high-range
position. Apply the throttle slowly and smoothly.
The centrifugal clutch will engage and you will
start to accelerate. If the throttle is applied too
abruptly, the front wheels may lift off the ground,
resulting in a loss of directional control. Avoid
higher speeds until you are thoroughly familiar
with the operation of your ATV.
When slowing down or stopping, release the
throttle and apply the brakes smoothly and evenly.
Improper use of the brakes can cause the tires to
lose traction, reducing control and increasing the
possibility of an accident.
UBLT60E0.book Page 12 Tuesday, July 13, 2021 9:16 AM
Page 94 of 176
8-19
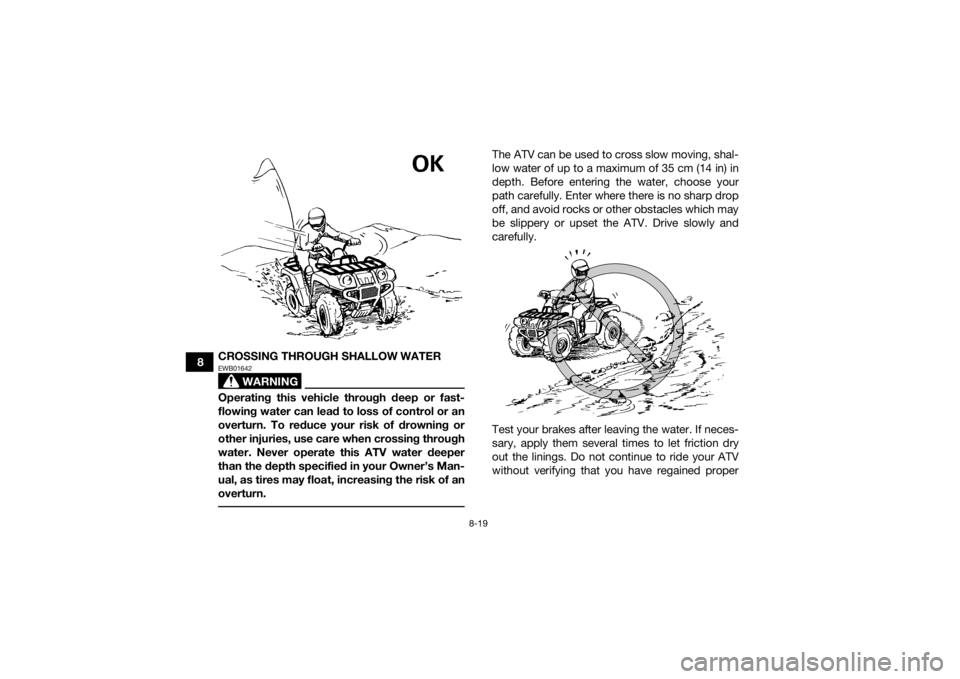
8CROSSING THROUGH SHALLOW WATER
WARNING
EWB01642Operating this vehicle through deep or fast-
flowing water can lead to loss of control or an
overturn. To reduce your risk of drowning or
other injuries, use care when crossing through
water. Never operate this ATV water deeper
than the depth specified in your Owner’s Man-
ual, as tires may float, increasing the risk of an
overturn.
The ATV can be used to cross slow moving, shal-
low water of up to a maximum of 35 cm (14 in) in
depth. Before entering the water, choose your
path carefully. Enter where there is no sharp drop
off, and avoid rocks or other obstacles which may
be slippery or upset the ATV. Drive slowly and
carefully.
Test your brakes after leaving the water. If neces-
sary, apply them several times to let friction dry
out the linings. Do not continue to ride your ATV
without verifying that you have regained proper
UBLT60E0.book Page 19 Tuesday, July 13, 2021 9:16 AM
Page 105 of 176

9-6
9
3*Rear brake • Check operation and correct if necessary.
• Check brake pedal free play and adjust if neces-
sary.
• Check fluid level and ATV for fluid leakage, and correct if necessary. √√√√√
• Replace brake pads. Whenever worn to the limit
4 *Brake hoses • Check for cracks or other damage, and replace if
necessary. √√√√
• Replace. Every 4 years
5 *Brake fluid • Change. Every 2 years
6 *Wheels • Check runout and for damage, and replace if nec-
essary. √ √√√
7 *Tires • Check tread depth and for damage, and replace if
necessary.
• Check air pressure and balance, and correct if necessary. √ √√√
8 *Wheel hub bearings • Check for looseness or damage, and replace if
necessary. √ √√√
9 *V- b e l t • Check for wear, cracks or other damage, and re-
place if necessary. √ √√√
10 *Chassis fasteners • Make sure that all nuts, bolts, and screws are
properly tightened. √√√√√
NO.
ITEM CHECK OR MAINTENANCE
JOB INITIAL
EVERY
Whichev- er comes first month136612
km (mi) 240
(150) 1300
(800) 2500
(1600) 2500
(1600) 5000
(3200)
hours 15 80 160 160 320
UBLT60E0.book Page 6 Tuesday, July 13, 2021 9:16 AM
Page 167 of 176
10-3
10
6. Put the frame on stands or blocks to raise all
wheels off the ground. (Alternatively, turn the
wheels each month to prevent the tires from
degrading in one spot.)
7. Cover the muffler outlet with a plastic bag to prevent moisture from entering it.
8. Remove the battery and fully charge it. (See page 9-52.)
UBLT60E0.book Page 3 Tuesday, July 13, 2021 9:16 AM
Page 174 of 176

13-2
13
LLabel locations ............................................................... 2-1
Light switch .................................................................. 5-12
Low-range indicator light ............................................... 5-2MMain switch .................................................................... 5-1
Maintenance chart, emission control system ................ 9-3
Maintenance chart, general maintenance and lubrication .................................................................... 9-5
Model label ..................................................................... 1-1
Multi-function display .....................................................5-5NNeutral indicator light .....................................................5-2OOn-Command drive switch “4WD/LOCK” ................... 5-14
Override switch ............................................................ 5-12
Owner’s Manuals and Tool Kit ....................................... 9-2PPanels, removing and installing ................................... 9-10
Park indicator light ......................................................... 5-2
Parking ........................................................................... 7-4
Parking on a slope ......................................................... 7-5
Part locations ................................................................. 4-1RRear knuckle pivots, lubricating ................................... 9-51
Reverse indicator light ................................................... 5-2
Riding your ATV ............................................................. 8-1SSafety information .......................................................... 3-1
Seat .............................................................................. 5-21 Shock absorber assemblies, adjusting the front and
rear ............................................................................. 5-26
Spark arrester, cleaning ............................................... 9-40
Spark plug, checking ................................................... 9-18
Specifications .............................................................. 11-1
Speed limiter ................................................................ 5-16
Stabilizer bushes, checking ......................................... 9-51
Starting the engine ......................................................... 7-1
Start switch .................................................................. 5-12
Steering shaft, lubricating ............................................ 9-52
Storage ........................................................................ 10-2
Storage compartments ................................................ 5-22
TThrottle lever ........................................................ 5-16, 6-5
Throttle lever free play, adjusting ................................. 9-42
Tires ............................................................................... 6-5
Trailer hitch .................................................................. 5-28
Troubleshooting ........................................................... 9-63
Troubleshooting charts ................................................ 9-64VValve clearance ............................................................ 9-42
V-belt case drain plug .................................................. 9-41
Vehicle identification number ......................................... 1-1WWheel hub bearings, checking ..................................... 9-51
Wheel, installing ........................................................... 9-62
Wheel, removing .......................................................... 9-61
Winch ........................................................................... 5-28
Winch switch ................................................................ 5-12YYamalube ..................................................................... 9-24
UBLT60E0.book Page 2 Tuesday, July 13, 2021 9:16 AM