2022 VOLKSWAGEN T-ROC warning light
[x] Cancel search: warning lightPage 86 of 502
When pushing the vehicle by hand, do not press on the tail light clusters, the rear spoiler or large
panels. This could damage the vehicle and the rear spoiler could become detached.
The 12-volt vehicle battery will discharge if the hazard warning lights are left on over a long period of
time even when the ignition is switched off.
Depending on the vehicle equipment, the brake lights flash rapidly if you brake sharply or initiate full
braking at a speed of more than 80 km/h (50 mph). This is a particularly effective way of attracting
the attention of vehicles behind you. If you then continue to brake, the hazard warning lights will be
switched on automatically at speeds under approximately 10 km/h (6 mph). Once you start to
accelerate, the hazard warning lights will switch off again automatically.
Equipment for an emergency
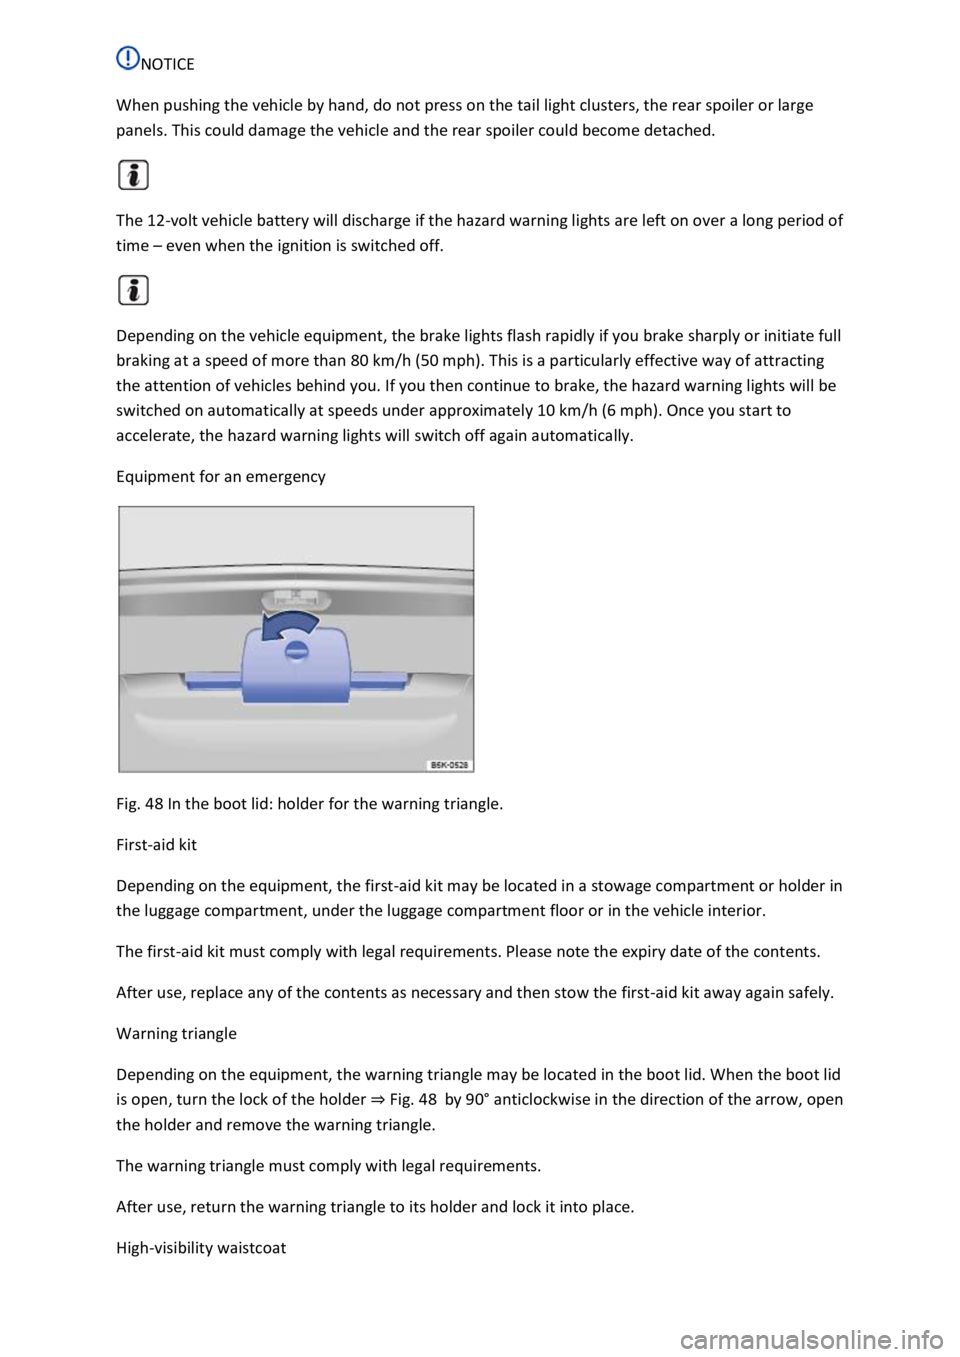
Fig. 48 In the boot lid: holder for the warning triangle.
First-aid kit
Depending on the equipment, the first-aid kit may be located in a stowage compartment or holder in
the luggage compartment, under the luggage compartment floor or in the vehicle interior.
The first-aid kit must comply with legal requirements. Please note the expiry date of the contents.
After use, replace any of the contents as necessary and then stow the first-aid kit away again safely.
Warning triangle
Depending on the equipment, the warning triangle may be located in the boot lid. When the boot lid
is open, turn the lock of the holder Fig. 48by 90
Page 96 of 502

the inside using the central locking button. This may mean that people lock themselves in the
vehicle. People locked in the vehicle may be subjected to very high or very low temperatures.
Temperatures inside a locked vehicle may become extremely hot or cold, depending on the season.
This can cause serious injuries and illness or fatalities, especially in the case of small children.
Never leave anyone inside a locked vehicle. People in the vehicle could become trapped in an
emergency and will not be able to get themselves to safety.
NOTICE
When carrying out manual opening or closing, remove parts carefully and install them again
correctly in order to avoid damage to the vehicle.
Indicator lamp in the driver door
First read and observe the introductoryinformation and safety warnings
The central locking indicator lamp is located in the driver door Vehicle overviews
Vehicle is locked: a red LED flashes for approximately two seconds, firstly at short intervals and then
more slowly. The indicator lamp does not flash if the vehicle was locked with the central locking
button in the driver door Central locking button
Automatic locking and unlocking
First read and observe the introductoryinformation and safety warnings
Settings for central locking can be made in the Vehicle settings menu in the Infotainment system
Infotainment system controls and displays
Automatic locking (Auto Lock)
The vehicle can lock itself automatically at speeds above approximately 15 km/h (9 mph). The
indicator lamp in the central locking button will light up yellow when the vehicle is locked.
Automatic unlocking (Auto Unlock)
If one of the following conditions applies, all doors and the boot lid will be automatically unlocked:
The vehicle is at a standstill and the vehicle key has been removed.
In vehicles with DSG
Page 97 of 502
Depending on the settings made for central locking in the Infotainment system, it may be the case
that all of the doors and the boot lid are unlocked only when the button has been pressed twice.
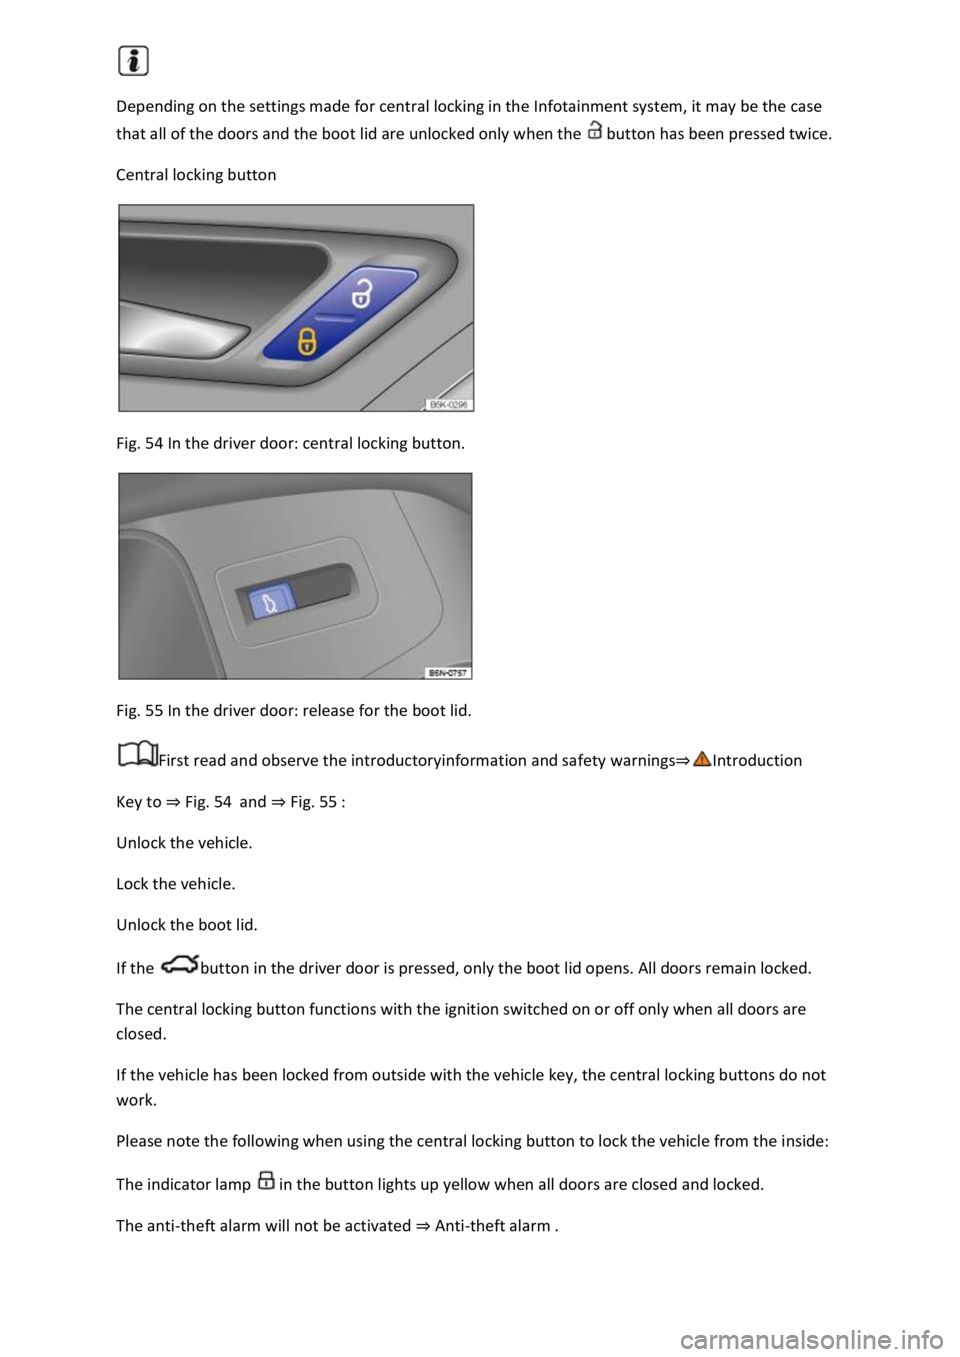
Central locking button
Fig. 54 In the driver door: central locking button.
Fig. 55 In the driver door: release for the boot lid.
First read and observe the introductoryinformation and safety warnings
Key to Fig. 54and Fig. 55
Unlock the vehicle.
Lock the vehicle.
Unlock the boot lid.
If the button in the driver door is pressed, only the boot lid opens. All doors remain locked.
The central locking button functions with the ignition switched on or off only when all doors are
closed.
If the vehicle has been locked from outside with the vehicle key, the central locking buttons do not
work.
Please note the following when using the central locking button to lock the vehicle from the inside:
The indicator lamp in the button lights up yellow when all doors are closed and locked.
The anti-theft alarm will not be activated Anti-theft alarm
Page 101 of 502

SAFELOCK deactivates the door release levers if the vehicle has been locked. This makes it more
difficult to break into the vehicle. The doors can no longer be opened from the inside
Press the button on the vehicle key once.
Press the button on the vehicle key twice in quick succession.
Vehicles with the Keyless Access locking and starting system: touch the sensor on the outside of the
door handle twiceUnlocking or locking the vehicle with Keyless Access
OR: press the central locking button in the driver door once Central locking button
There may be an indication of the activated SAFELOCK in the display of the instrument cluster
(SAFELOCK).
Deactivating SAFELOCK
Switch on the ignition.
OR: deactivate interior monitoring and the anti-tow alarm Temporarily switching off the interior
monitoring system and anti-tow alarm
Before locking the vehicle, temporarily deactivate the interior monitoring and the anti-tow alarm in
the Vehicle Settings menu in the Infotainment system Infotainment sy
The following applies when SAFELOCK is deactivated:
The interior monitoring and the anti-tow alarm are activated and deactivated in the Vehicle settings
menu in the Infotainment system Infotainment system controls and display
WARNING
Careless or unsupervised use of SAFELOCK can cause serious injuries.
Never leave other persons in the vehicle if the vehicle has been locked using the vehicle key. The
doors can no longer be opened from the inside once SAFELOCK is activated.
If you unlock the driver door mechanically using the vehicle key, only the driver door is unlocked,
and not the whole vehicle. The doors are released (but not unlocked) and the central locking button
is activated only when the ignition is switched on.
Troubleshooting
First read and observe the introductoryinformation and safety warnings
Indicator lamp lights up continuously
The red LED in the vehicle door flashes at short intervals and then lights up continuously.
Page 109 of 502
button again moves the boot lid back into the starting position.
Signal tones
If the boot lid is opened or closed from the vehicle interior or using the vehicle key, signal tones will
sound.
Changing and storing the opening angle
If the area behind or above the vehicle is smaller than the path of the boot lid, the opening angle of
the boot lid can be changed.
Stop the opening procedure at the desired open position (at least half open).
In the boot lid, press and hold the button Fig. 63until the hazard warning lights flash.
The changed opening angle will be stored.
The hazard warning lights flash and an acoustic signal sounds to confirm that the changed opening
angle has been stored.
Resetting and storing the opening angle
The opening angle must be reset and stored again in order for the boot lid to open fully again.
Push the opened boot lid up as far as it will go by hand. You will need to use increased force for this.
In the boot lid, press and hold the button Fig. 63until the hazard warning lights flash.
The opening angle will be reset.
The hazard warning lights flash and an acoustic signal sounds to confirm that the opening angle has
been reset.
NOTICE
Before opening or closing the boot lid, please check that there is enough space to open and close it,
for example when in a garage.
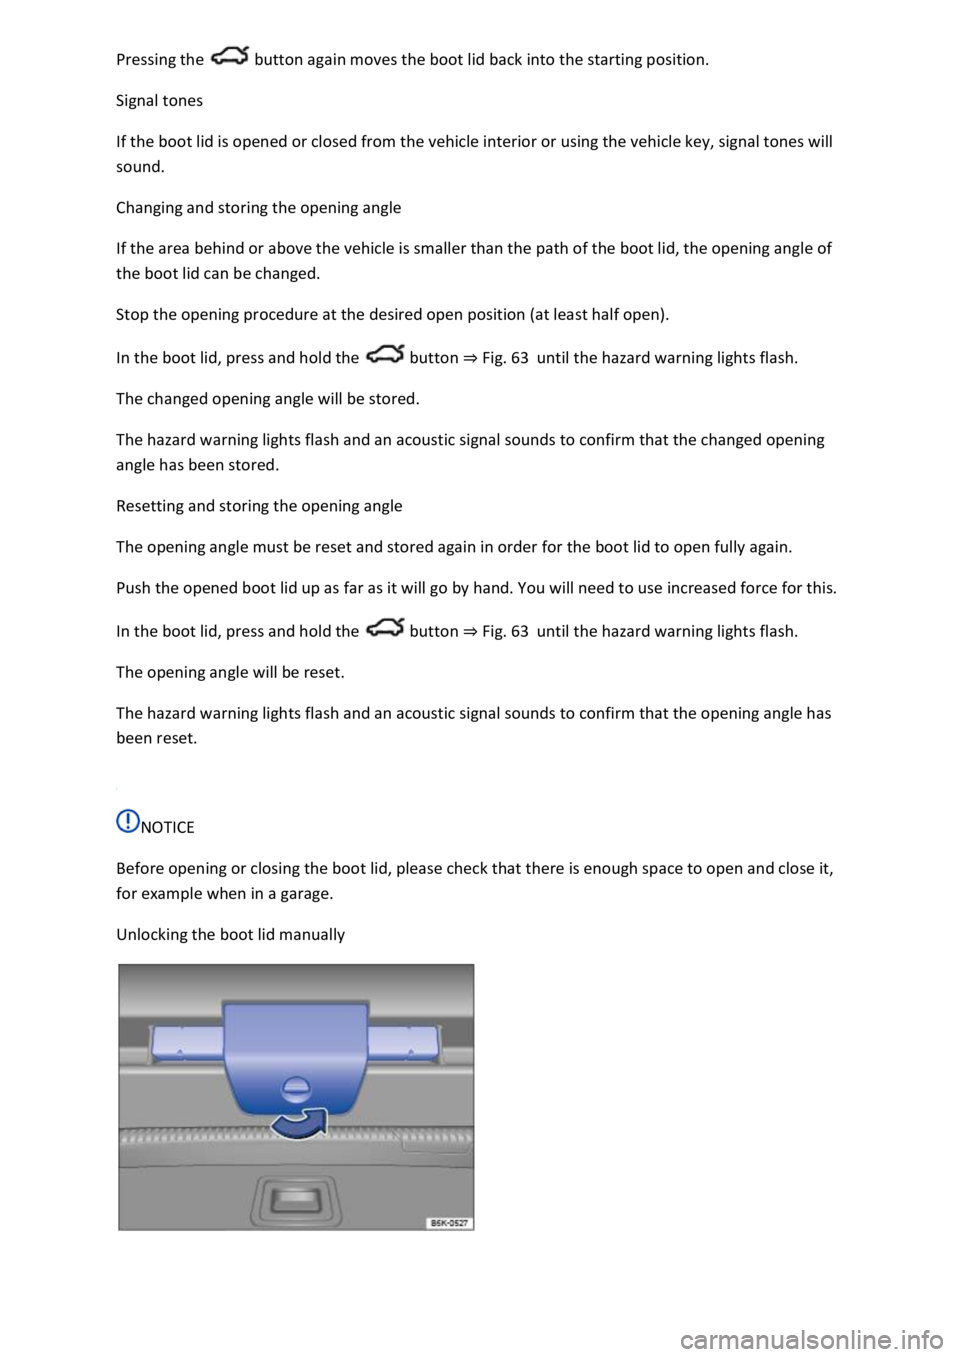
Unlocking the boot lid manually
Page 117 of 502
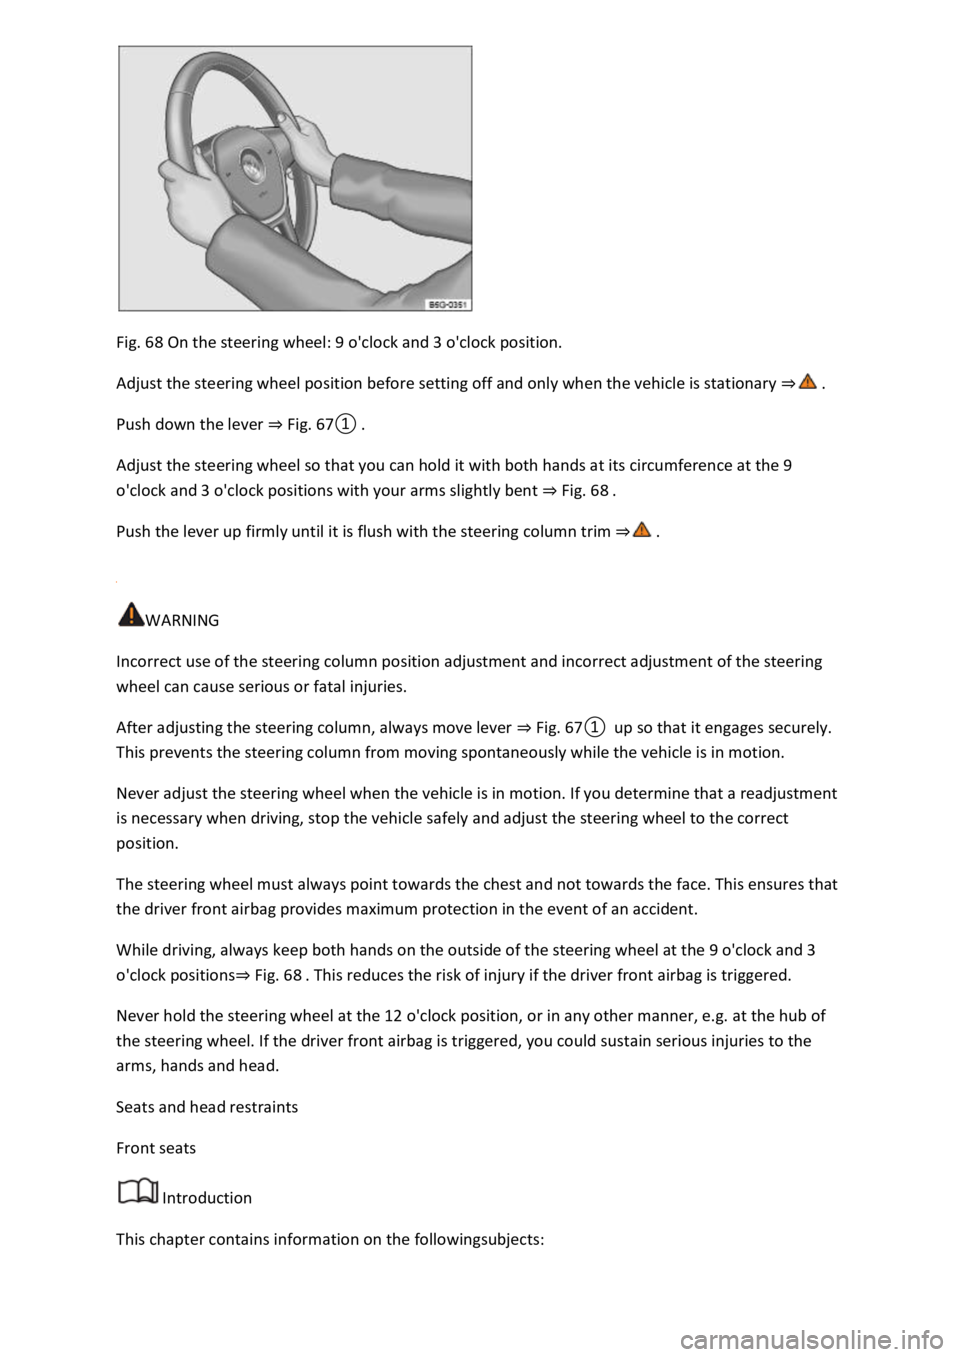
Fig. 68 On the steering wheel: 9 o'clock and 3 o'clock position.
Adjust the steering wheel position before setting off and only when the vehicle is stationary
Push down the lever Fig.
0
Adjust the steering wheel so that you can hold it with both hands at its circumference at the 9
o'clock and 3 o'clock positions with your arms slightly bent Fig. 68
Push the lever up firmly until it is flush with the steering column trim
WARNING
Incorrect use of the steering column position adjustment and incorrect adjustment of the steering
wheel can cause serious or fatal injuries.
After adjusting the steering column, always move lever Fig.
0up so that it engages securely.
This prevents the steering column from moving spontaneously while the vehicle is in motion.
Never adjust the steering wheel when the vehicle is in motion. If you determine that a readjustment
is necessary when driving, stop the vehicle safely and adjust the steering wheel to the correct
position.
The steering wheel must always point towards the chest and not towards the face. This ensures that
the driver front airbag provides maximum protection in the event of an accident.
While driving, always keep both hands on the outside of the steering wheel at the 9 o'clock and 3
o'clock positionsFig. 68
Never hold the steering wheel at the 12 o'clock position, or in any other manner, e.g. at the hub of
the steering wheel. If the driver front airbag is triggered, you could sustain serious injuries to the
arms, hands and head.
Seats and head restraints
Front seats
Introduction
This chapter contains information on the followingsubjects:
Page 118 of 502

Mechanically adjusting the front seat
Folding the front passenger seat backrest forwards
The following section describes the options for adjusting the front seats. Always ensure that you
adjust the correct sitting position Sitting position
WARNING
Always adjust the front seats to their correct position before any journey and ensure that all
passengers have fastened their seat belts.
Push the front passenger seat as far back as possible.
Adjust the driver seat so that there is at least 25 cm between your breastbone and the hub of the
steering wheel. Adjust the driver seat by moving it forwards or backwards so that you are able to
press the pedals to the floor with your knees still slightly angled and the distance to the dash panel
in the knee area is at least 10 cm. If your build makes it impossible to fulfil this requirement, you
must contact a qualified workshop so they can make any necessary modifications.
Never travel with the backrest tilted far back. The further back the backrest is tilted, the greater the
risk of injury caused by incorrect seat belt routing or an incorrect sitting position.
Never travel with the backrest tilted far forwards. When a front airbag is triggered, it could force the
seat backrest backwards and injure vehicle occupants on the rear seats.
Adopt and maintain the greatest possible distance from the steering wheel and dash panel.
You should always sit upright with your back against the seat backrest with the front seats properly
adjusted. Do not position any body part too close to where the airbags are fitted.
The risk of serious injury is increased for passengers on the rear seat if they are not sitting upright
because the seat belts are incorrectly positioned.
WARNING
Incorrect adjustment of the seats can cause accidents and serious injuries.
The seats must be adjusted only when the vehicle is stationary, or else the seat could change
position unexpectedly while the vehicle is in motion, leading to a loss of control of the vehicle.
Furthermore, an incorrect seating position is adopted while adjusting the seat.
Adjust the height and tilt of the seat or move it forwards and backwards only when the area around
the seat is clear.
The adjustment range of the seats must not be restricted by any items.
Adjust the tilt angle of the rear seats or move them forwards and backwards only when the area
around the seats is clear.
The adjustment and locking areas of the seats must not be soiled.
Page 119 of 502
WARNING
Cigarette lighters left in the vehicle can become damaged or may ignite unnoticed. This can cause
serious burns and vehicle damage.
Before adjusting the seats, always make sure that there is no lighter on or near the moveable parts
of the seat.
Before closing stowage areas or compartments, always make sure that there is no lighter in the way.
Never stow lighters in stowage areas, compartments or on other surfaces in the vehicle. Cigarette
lighters may self-ignite as a result of high surface temperatures, particularly in summer.
NOTICE
Sharp edges can damage the seats.
Do not touch the seats with sharp-edged objects. Sharp-edged objects such as zips, rivets on clothing
or belts can damage surfaces. Open Velcro fasteners can also cause damage.
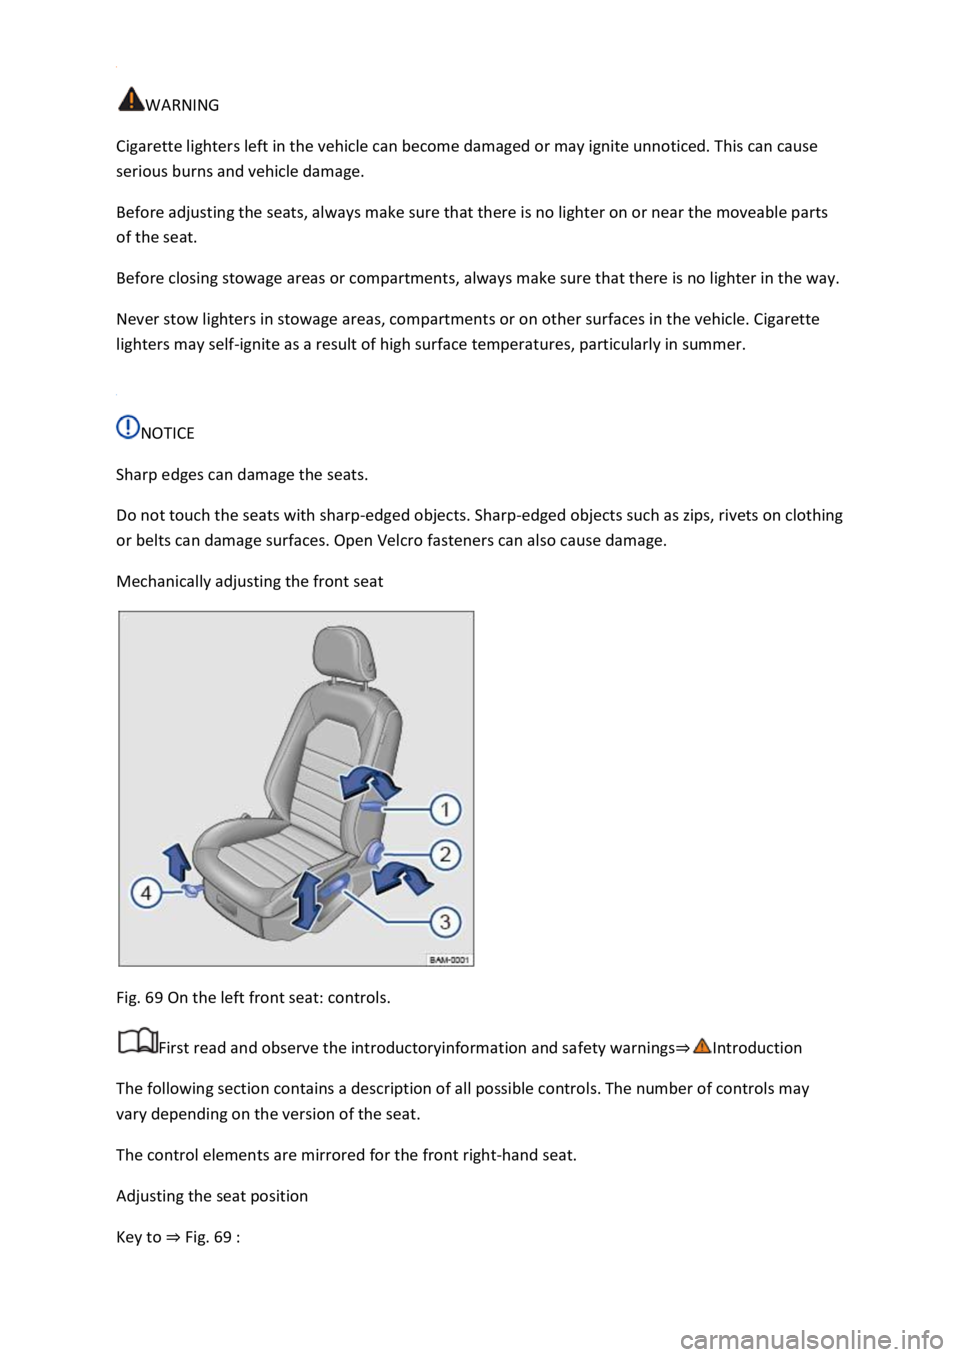
Mechanically adjusting the front seat
Fig. 69 On the left front seat: controls.
First read and observe the introductoryinformation and safety warnings
The following section contains a description of all possible controls. The number of controls may
vary depending on the version of the seat.
The control elements are mirrored for the front right-hand seat.
Adjusting the seat position
Key to Fig.