2022 VOLKSWAGEN T-ROC gearbox
[x] Cancel search: gearboxPage 200 of 502

106 Selector lever in Tiptronic position (left-hand drive). Mirror image for right-hand drive
vehicles.
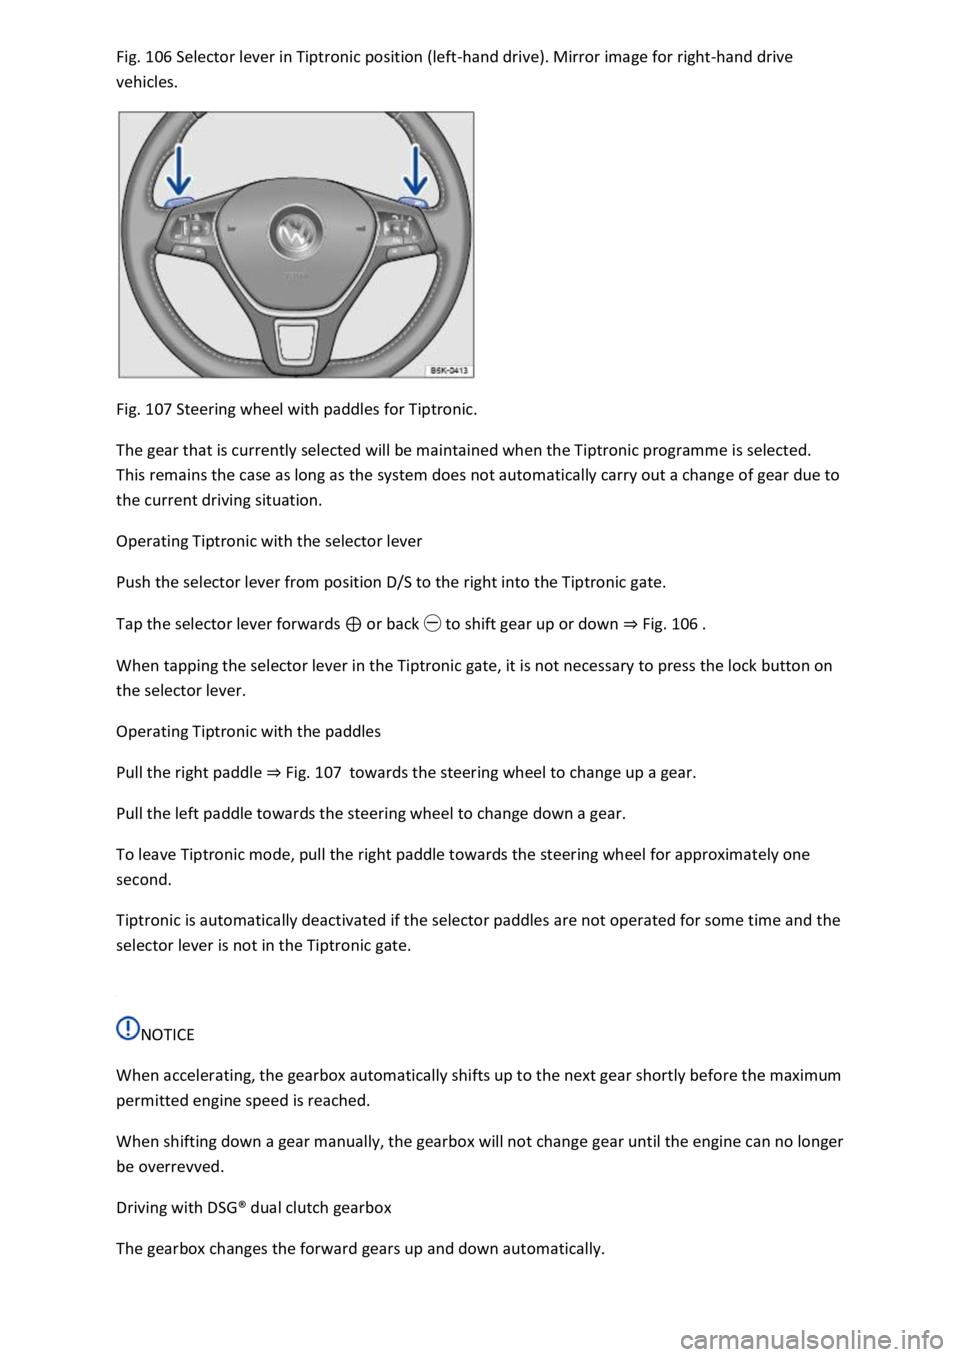
Fig. 107 Steering wheel with paddles for Tiptronic.
The gear that is currently selected will be maintained when the Tiptronic programme is selected.
This remains the case as long as the system does not automatically carry out a change of gear due to
the current driving situation.
Operating Tiptronic with the selector lever
Push the selector lever from position D/S to the right into the Tiptronic gate.
Tap the selector lever forwards or back to shift gear up or down Fig. 106
When tapping the selector lever in the Tiptronic gate, it is not necessary to press the lock button on
the selector lever.
Operating Tiptronic with the paddles
Pull the right paddle Fig. 107towards the steering wheel to change up a gear.
Pull the left paddle towards the steering wheel to change down a gear.
To leave Tiptronic mode, pull the right paddle towards the steering wheel for approximately one
second.
Tiptronic is automatically deactivated if the selector paddles are not operated for some time and the
selector lever is not in the Tiptronic gate.
NOTICE
When accelerating, the gearbox automatically shifts up to the next gear shortly before the maximum
permitted engine speed is reached.
When shifting down a gear manually, the gearbox will not change gear until the engine can no longer
be overrevved.
Driving with DSG
Page 202 of 502

The kickdown function enables maximum acceleration in the selector lever position D/S or in the
Tiptronic position.
If the accelerator is depressed fully, the gearbox will automatically shift to a lower gear, depending
on the speed and engine speed. This will make use of the full vehicle acceleration.
With the kickdown function, the gearbox does not shift up to the next gear until the engine reaches
the maximum engine speed for the gear.
When the Eco driving profile is selected in vehicles with driving profile selection Driving profile
selection and 4MOTION Active Controland the accelerator is depressed fully beyond the pressure
point, the engine output is automatically regulated to ensure maximum vehicle acceleration.
WARNING
Rapid acceleration can cause loss of traction and skidding, particularly on slippery roads. This can
cause you to lose control of the vehicle, which can lead to accidents and serious injuries.
Always adjust your driving style in accordance with the flow of traffic.
Use the kickdown function or fast acceleration only if visibility, weather, road and traffic conditions
permit, and if other road users are not put at risk due to the acceleration and the driving style.
Please note that the driven wheels could start to spin and the vehicle could skid if the TCS is
switched off and especially if the road is slippery.
WARNING
Never let the brakes rub too often and for too long or operate the brake pedal too often or for too
long. Constant braking will cause the brakes to overheat. This will considerably reduce the braking
power, significantly increase the braking distance and could cause the brake system to fail
completely.
NOTICE
Never let the brakes rub by applying light pressure when it is not necessary. This will increase levels
of wear.
Troubleshooting
Page 204 of 502

The warning lamp lights up red.
Brake request by ACC Adaptive Cruise Control (ACC)
The brake pedal was not depressed or not fully depressed.
Brake immediately.
Gearbox overheated
The indicator lamp lights up yellow.
A signal tone may also be given. A text message may also be shown on the instrument cluster
display.
The DSG
Page 206 of 502

ext message and signal tone are repeated approximately every 10 seconds, park the vehicle
safely as soon as possible and switch the engine off. Allow the gearbox to cool down.
Do not drive on until the signal tone stops in order to avoid damage to the gearbox. You should not
pull away or drive the vehicle at very low speeds while the gearbox is overheated.
Downhill speed control
The downhill speed control system helps when braking and travelling downhill in vehicles with a
DSG
Page 222 of 502

ot on the clutch when driving offroad. When travelling over
uneven ground, you could press the clutch by mistake and lose control of the vehicle. This also
prevents power being transferred between the engine and the gearbox. In addition, driving with the
clutch partially engaged causes premature wear to the clutch lining.
Useful accessories for offroad driving
First read and observe the introductoryinformation and safety warnings
The checklist contains just a few items of equipment that can be very useful for offroad driving. If
you have an instruction manual or fitting instructions for these accessories, you should always take
them with you and observe them as necessary when driving offroad.
Checklist
Useful items when driving offroad:
Water, compass, maps and torch with spare batteries.
Winch, tow bar or rope with sufficient strength.
Mobile telephone, shovel, blankets and rubber boots.
Electrical air compressor for connection to the 12-volt sockets in the vehicle to inflate the tyres.
A wooden board approx. 4 cm thick and approx. 1 metre long or an aluminium frame of similar size:
this can be used to free a vehicle stuck in the mud and provide a platform for a vehicle jack.
Snow chains, additional spare wheels, a breakdown set, jack and box spanner.
Changing gear correctly
First read and observe the introductoryinformation and safety warnings
The correct choice of gear depends on the offroad terrain.
Before attempting to drive through difficult terrain it can be helpful to stop and consider which gear
you should select. After several trips offroad, you will learn which gear to select in conjunction with
the step-down ratio and differential locks for different types of terrain.
General rules
Page 240 of 502

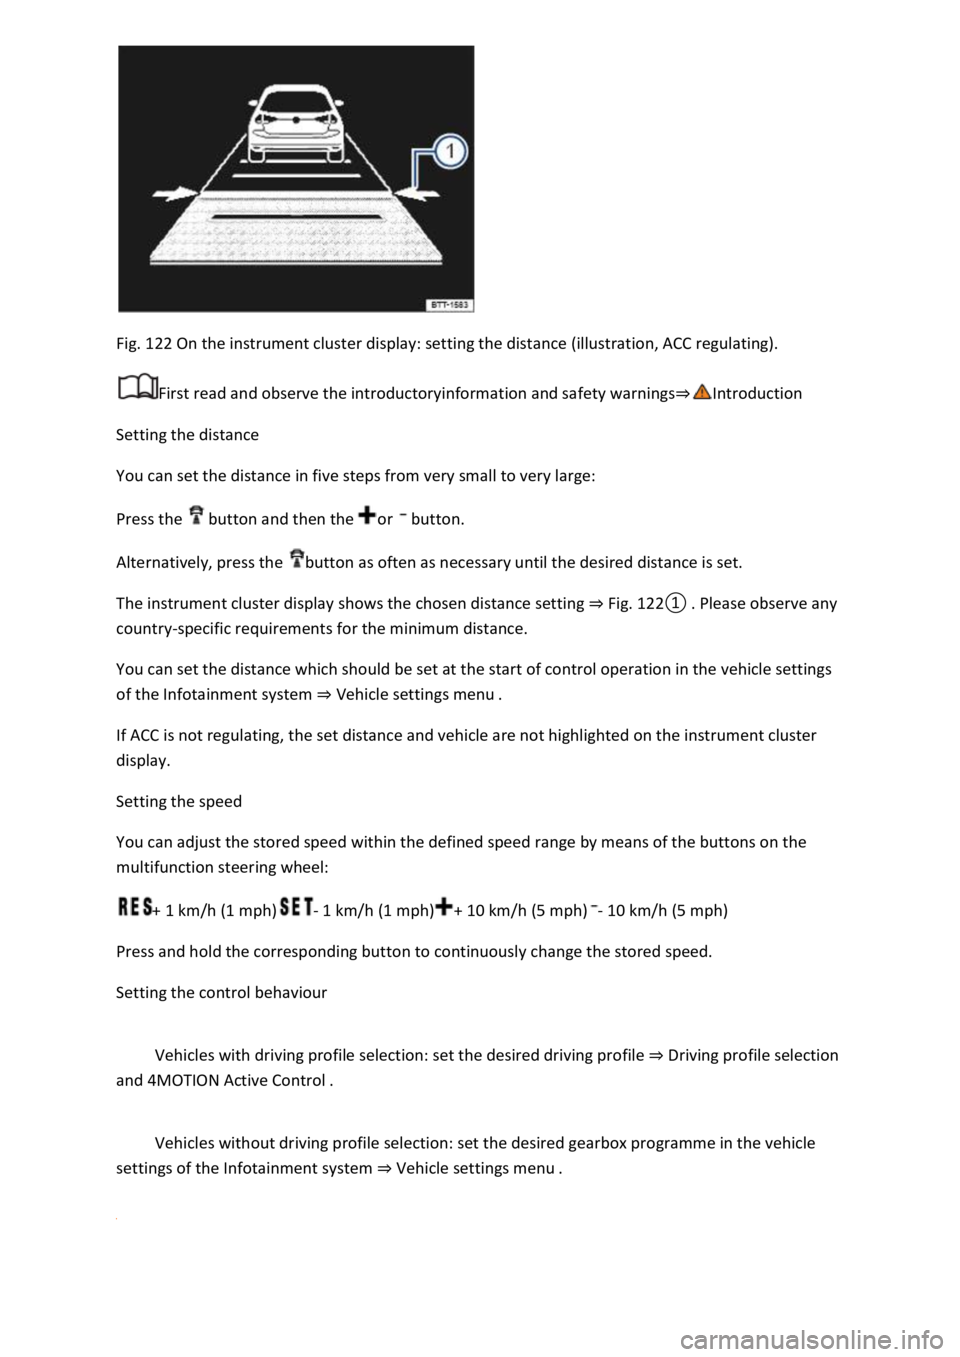
Fig. 122 On the instrument cluster display: setting the distance (illustration, ACC regulating).
First read and observe the introductoryinformation and safety warnings
Setting the distance
You can set the distance in five steps from very small to very large:
Press the button and then the or button.
Alternatively, press the button as often as necessary until the desired distance is set.
The instrument cluster display shows the chosen distance setting Fig.
0lease observe any
country-specific requirements for the minimum distance.
You can set the distance which should be set at the start of control operation in the vehicle settings
of the Infotainment system Vehicle settings menu
If ACC is not regulating, the set distance and vehicle are not highlighted on the instrument cluster
display.
Setting the speed
You can adjust the stored speed within the defined speed range by means of the buttons on the
multifunction steering wheel:
+ 1 km/h (1 mph)- 1 km/h (1 mph)+ 10 km/h (5 mph)- 10 km/h (5 mph)
Press and hold the corresponding button to continuously change the stored speed.
Setting the control behaviour
Vehicles with driving profile selection: set the desired driving profile Driving profile selection
and 4MOTION Active Control
Vehicles without driving profile selection: set the desired gearbox programme in the vehicle
settings of the Infotainment system Vehicle settings menu
Page 242 of 502

kes have overheated, control was interrupted automatically. Allow the brakes to cool down
and check functioning again.
If the problem persists, go to a qualified workshop.
Control cannot be started.
A forward gear other than first gear is selected (manual gearbox) or the selector lever is in selector
lever position D/S or the Tiptronic gate.
The speed is at least 25 km/h (16 mph) in the case of vehicles with manual gearbox.
The brake lights on the vehicle and trailer are working.
ESC is not regulating.
The brake pedal is not depressed.
Unusual noises during automatic braking.
This is normal and is not a fault.
Area monitoring system (Front Assist)
Introduction
This chapter contains information on the followingsubjects:
Warning levels and braking intervention
Limits of Front Assist
Pedestrian Monitoring
Operating the area monitoring system (Front Assist)
Troubleshooting
The area monitoring system (Front Assist) with City Emergency Braking System and Pedestrian
Monitoring can help to avoid accidents.
Within the limits of the system, Front Assist can warn the driver about imminent collisions, prepare
the vehicle for emergency braking, assist with braking, and initiate automatic braking. The warning
time varies depending on the traffic situation and driver behaviour.
Front Assist is not a substitute for the full concentration of the driver.
Driving with Front Assist
You can cancel the automatic braking interventions of Front Assist by steering or pressing the
accelerator.
Automatic braking
Front Assist can decelerate the vehicle to a standstill. The vehicle will then not be held permanently.
Depress the brake pedal.
Page 257 of 502

Clean the radar sensors or remove stickers or accessories from the radar sensors, mirrors and
bumper Caring for and cleaning the vehicle exterior
Check whether any damage is visible.
The system is not responding as expected
The radar sensors are dirty. The sensor visibility may be impaired by dirt and snow or also residue
from cleaning agents or coatings Caring for and cleaning the vehicle exterior
The prerequisites for system operation must be met System limits
The radar sensors are covered by water.
The vehicle is damaged in the area of the radar sensors, e.g. caused by parking collisions.
The detection ranges of the radar sensors are blocked by add-on parts, e.g. bicycle carriers.
Changes have been made to the paintwork in the area of the radar sensors or structural
modifications have been made, e.g. on the vehicle front end or the running gear.
Only Volkswagen-approved vehicle paints may be used on the rear bumper. Other vehicle paints can
restrict the function of the system or cause faults.
Tinting foils have been retrofitted on the side windows.
Parking and manoeuvring
Parking
Stopping and parking the vehicle
The actions should be carried out only in the given order:
Stop the vehicle on a suitable surface
Depress and hold the brake pedal until the engine has stopped.
Switch on the electronic parking brake Electronic parking brake is
switched on when the indicator lamp in the button Fig. 125lights up yellow and the indicator
lamp in the instrument cluster display lights up red.
On vehicles with a manual gearbox, either fully depress or disengage the clutch.
With an automatic gearbox, move the selector lever to position P.
Switch off the engine and take your foot off the brake pedal.
Turn the steering wheel slightly if necessary to engage the steering lock mechanism.
With a manual gearbox, select first gear for flat ground and uphill gradients, or reverse gear for
downhill gradients, and then release the clutch.
Please ensure that all occupants, in particular children, leave the vehicle.