2022 VOLKSWAGEN T-ROC tow
[x] Cancel search: towPage 53 of 502
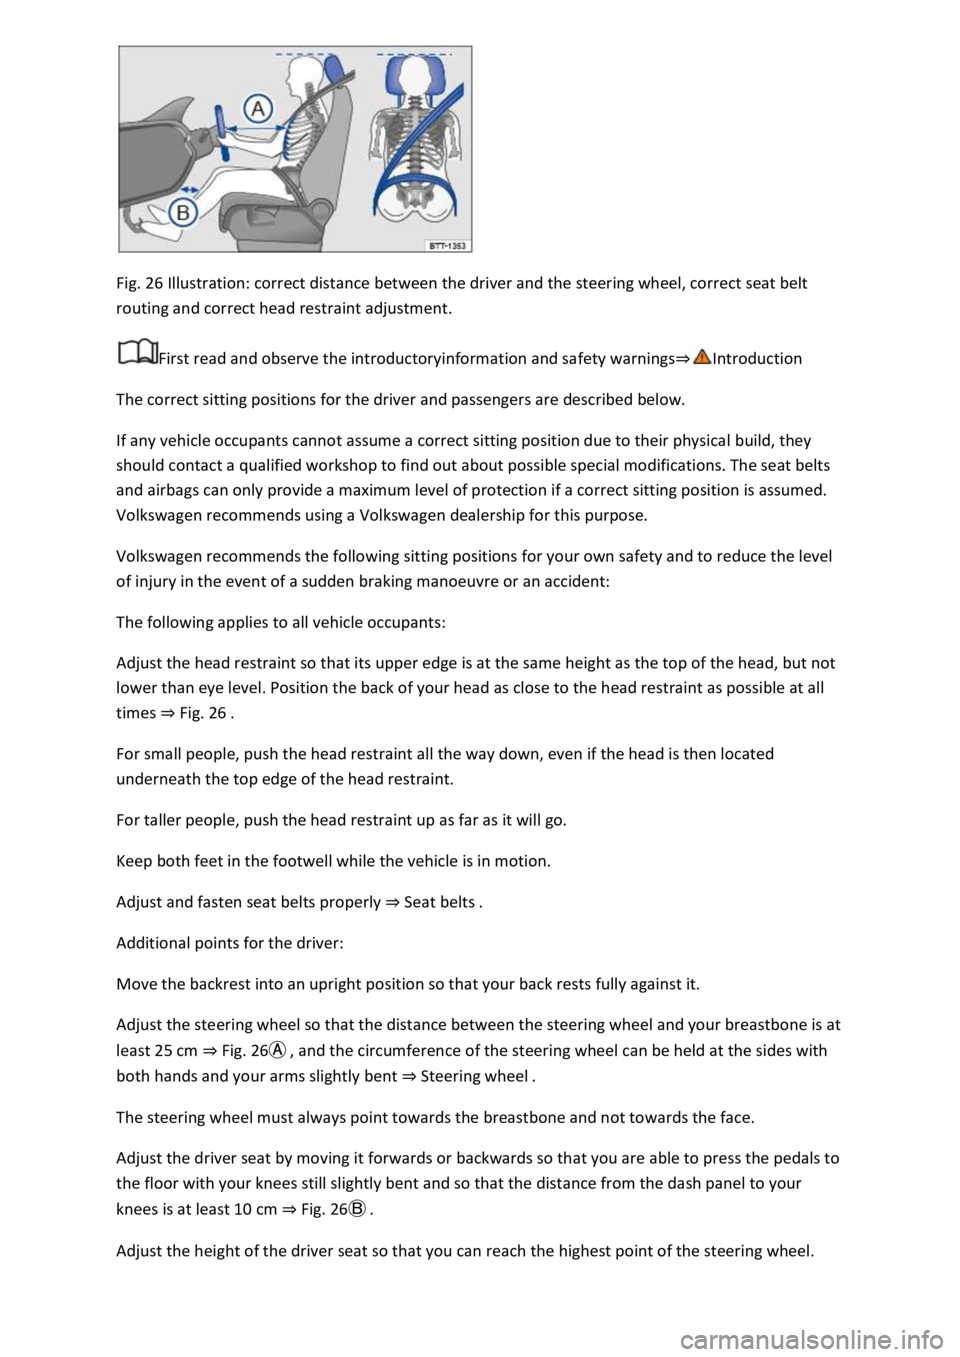
Fig. 26 Illustration: correct distance between the driver and the steering wheel, correct seat belt
routing and correct head restraint adjustment.
First read and observe the introductoryinformation and safety warnings
The correct sitting positions for the driver and passengers are described below.
If any vehicle occupants cannot assume a correct sitting position due to their physical build, they
should contact a qualified workshop to find out about possible special modifications. The seat belts
and airbags can only provide a maximum level of protection if a correct sitting position is assumed.
Volkswagen recommends using a Volkswagen dealership for this purpose.
Volkswagen recommends the following sitting positions for your own safety and to reduce the level
of injury in the event of a sudden braking manoeuvre or an accident:
The following applies to all vehicle occupants:
Adjust the head restraint so that its upper edge is at the same height as the top of the head, but not
lower than eye level. Position the back of your head as close to the head restraint as possible at all
times Fig. 26
For small people, push the head restraint all the way down, even if the head is then located
underneath the top edge of the head restraint.
For taller people, push the head restraint up as far as it will go.
Keep both feet in the footwell while the vehicle is in motion.
Adjust and fasten seat belts properly Seat belts
Additional points for the driver:
Move the backrest into an upright position so that your back rests fully against it.
Adjust the steering wheel so that the distance between the steering wheel and your breastbone is at
least 25 cm Fig. 26
both hands and your arms slightly bent Steering wheel
The steering wheel must always point towards the breastbone and not towards the face.
Adjust the driver seat by moving it forwards or backwards so that you are able to press the pedals to
the floor with your knees still slightly bent and so that the distance from the dash panel to your
knees is at least 10 cm Fig. 26
Adjust the height of the driver seat so that you can reach the highest point of the steering wheel.
Page 57 of 502
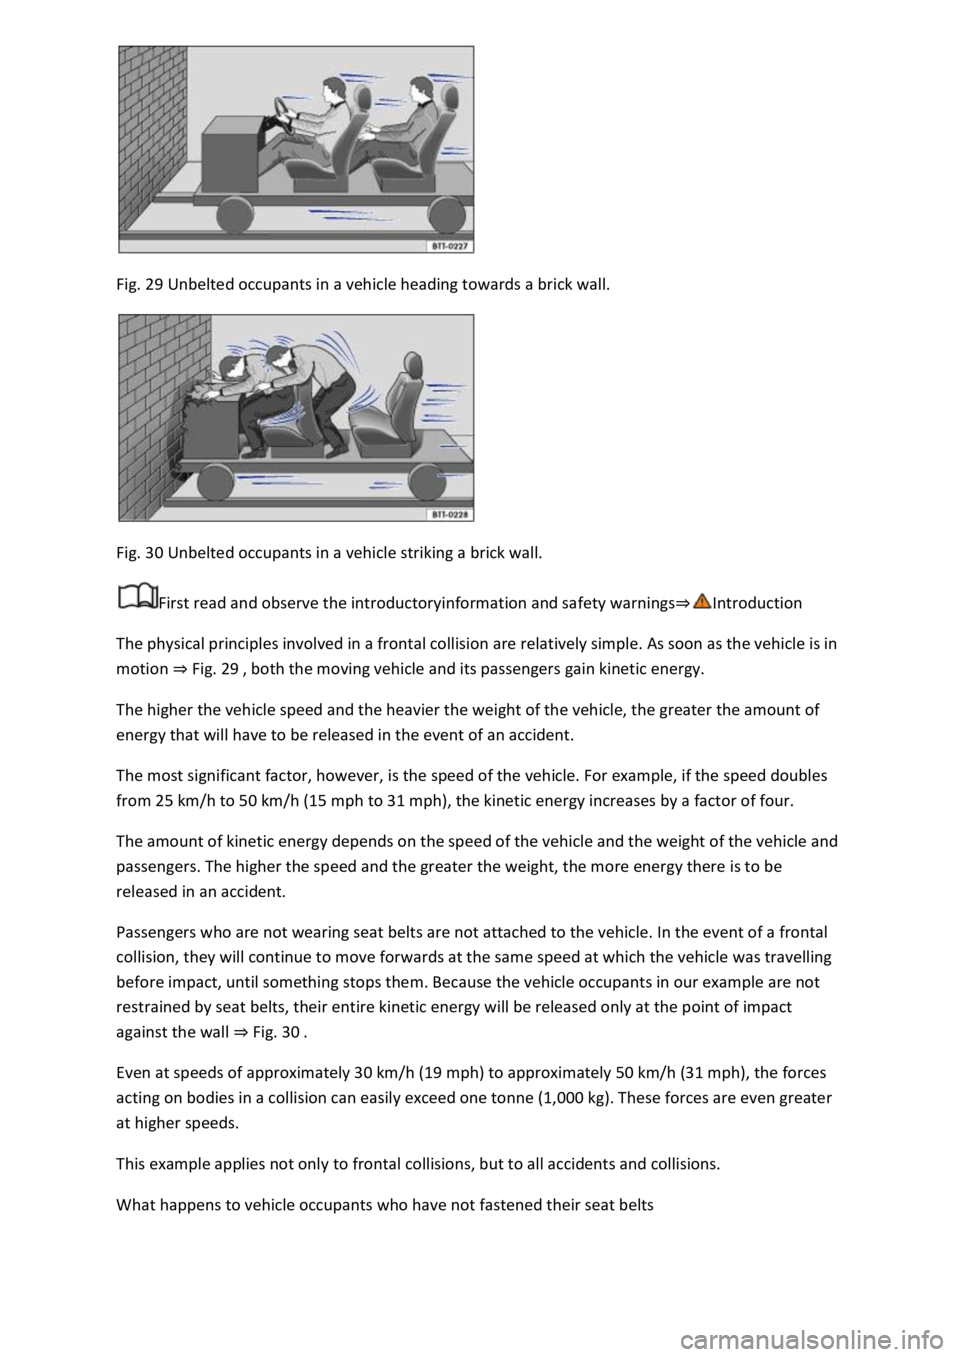
Fig. 29 Unbelted occupants in a vehicle heading towards a brick wall.
Fig. 30 Unbelted occupants in a vehicle striking a brick wall.
First read and observe the introductoryinformation and safety warnings
The physical principles involved in a frontal collision are relatively simple. As soon as the vehicle is in
motion Fig. 29
The higher the vehicle speed and the heavier the weight of the vehicle, the greater the amount of
energy that will have to be released in the event of an accident.
The most significant factor, however, is the speed of the vehicle. For example, if the speed doubles
from 25 km/h to 50 km/h (15 mph to 31 mph), the kinetic energy increases by a factor of four.
The amount of kinetic energy depends on the speed of the vehicle and the weight of the vehicle and
passengers. The higher the speed and the greater the weight, the more energy there is to be
released in an accident.
Passengers who are not wearing seat belts are not attached to the vehicle. In the event of a frontal
collision, they will continue to move forwards at the same speed at which the vehicle was travelling
before impact, until something stops them. Because the vehicle occupants in our example are not
restrained by seat belts, their entire kinetic energy will be released only at the point of impact
against the wall Fig. 30
Even at speeds of approximately 30 km/h (19 mph) to approximately 50 km/h (31 mph), the forces
acting on bodies in a collision can easily exceed one tonne (1,000 kg). These forces are even greater
at higher speeds.
This example applies not only to frontal collisions, but to all accidents and collisions.
What happens to vehicle occupants who have not fastened their seat belts
Page 79 of 502
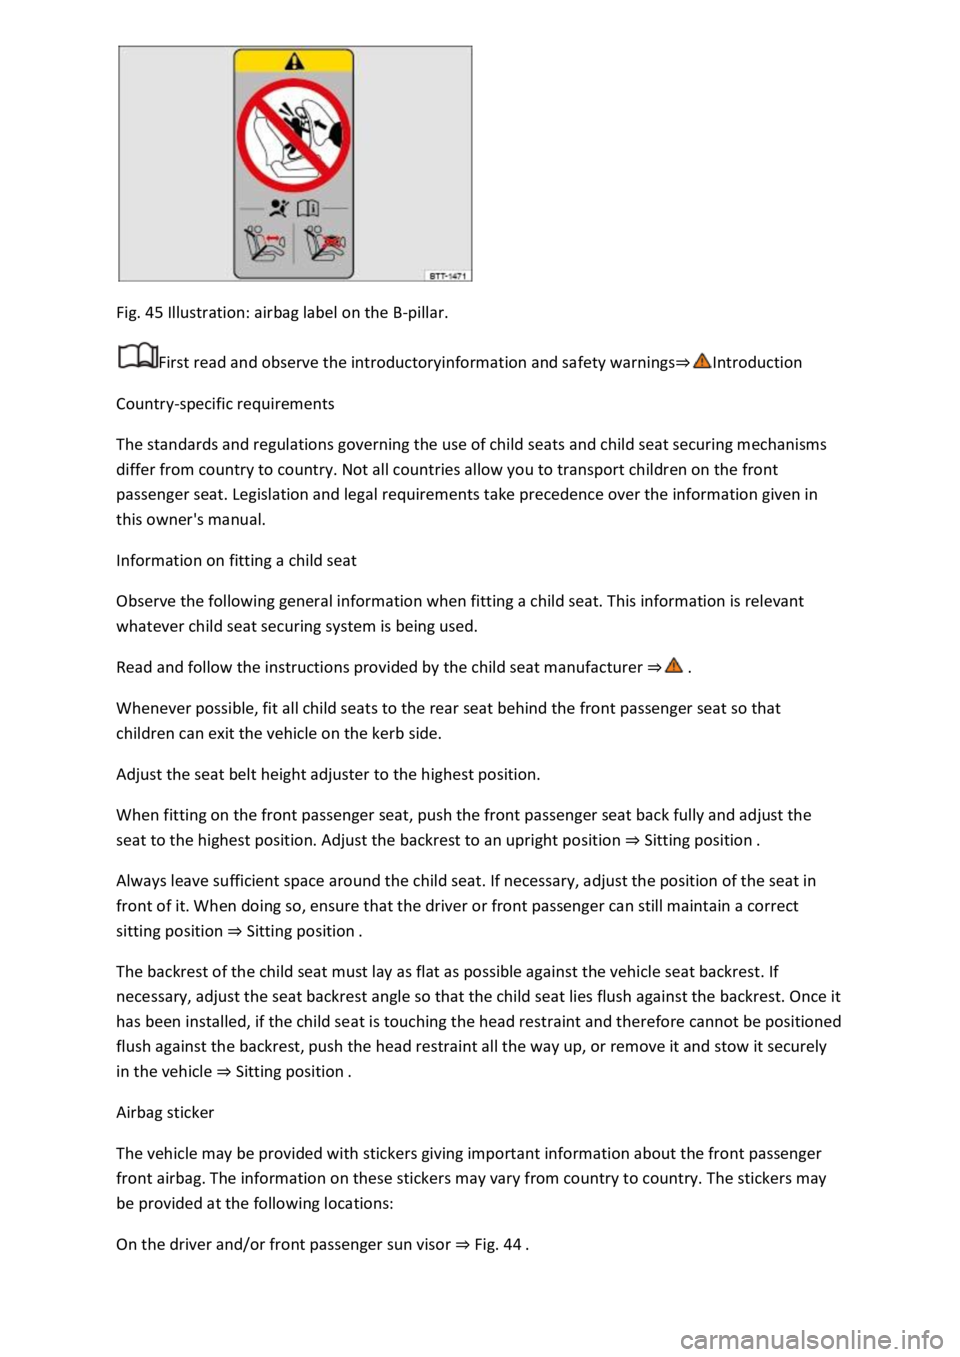
Fig. 45 Illustration: airbag label on the B-pillar.
First read and observe the introductoryinformation and safety warnings
Country-specific requirements
The standards and regulations governing the use of child seats and child seat securing mechanisms
differ from country to country. Not all countries allow you to transport children on the front
passenger seat. Legislation and legal requirements take precedence over the information given in
this owner's manual.
Information on fitting a child seat
Observe the following general information when fitting a child seat. This information is relevant
whatever child seat securing system is being used.
Read and follow the instructions provided by the child seat manufacturer
Whenever possible, fit all child seats to the rear seat behind the front passenger seat so that
children can exit the vehicle on the kerb side.
Adjust the seat belt height adjuster to the highest position.
When fitting on the front passenger seat, push the front passenger seat back fully and adjust the
seat to the highest position. Adjust the backrest to an upright position Sitting position
Always leave sufficient space around the child seat. If necessary, adjust the position of the seat in
front of it. When doing so, ensure that the driver or front passenger can still maintain a correct
sitting position Sitting position
The backrest of the child seat must lay as flat as possible against the vehicle seat backrest. If
necessary, adjust the seat backrest angle so that the child seat lies flush against the backrest. Once it
has been installed, if the child seat is touching the head restraint and therefore cannot be positioned
flush against the backrest, push the head restraint all the way up, or remove it and stow it securely
in the vehicle Sitting position
Airbag sticker
The vehicle may be provided with stickers giving important information about the front passenger
front airbag. The information on these stickers may vary from country to country. The stickers may
be provided at the following locations:
On the driver and/or front passenger sun visor Fig. 44
Page 85 of 502

indicate a change in direction or lane change by operating the turn signal. The hazard warning lights
will be interrupted temporarily.
Switch on the hazard warning lights, e.g. in the following situations:
When traffic ahead suddenly starts moving more slowly or you reach the tail end of a traffic jam to
warn vehicles behind you.
There is an emergency situation.
The vehicle has broken down.
When tow-starting or towing.
Always follow local regulations on the use of the hazard warning lights.
If the hazard warning lights are not working, you must use an alternative method of drawing
attention to the broken-down vehicle. This method must comply with traffic legislation.
WARNING
Any broken-down vehicle poses a high accident risk for the vehicle occupants and for other road
users.
Stop the vehicle as soon as possible and when safe to do so.
Park the vehicle at a safe distance from moving traffic.
Switch on the hazard warning lights.
Never leave other persons alone in the vehicle, particularly children or people requiring assistance.
This applies in particular when the doors are locked. People locked in the vehicle may be subjected
to very high or very low temperatures.
WARNING
Ignoring any of the items on this important safety checklist can lead to accidents and severe injuries.
Always follow the instructions in the checklist and observe the general safety procedures.
WARNING
The components of the exhaust system become very hot. This can cause fires and serious injuries.
Park the vehicle so that no part of the exhaust system can come into contact with any inflammable
material underneath the vehicle, e.g. dry grass, fuel.
Page 86 of 502
When pushing the vehicle by hand, do not press on the tail light clusters, the rear spoiler or large
panels. This could damage the vehicle and the rear spoiler could become detached.
The 12-volt vehicle battery will discharge if the hazard warning lights are left on over a long period of
time even when the ignition is switched off.
Depending on the vehicle equipment, the brake lights flash rapidly if you brake sharply or initiate full
braking at a speed of more than 80 km/h (50 mph). This is a particularly effective way of attracting
the attention of vehicles behind you. If you then continue to brake, the hazard warning lights will be
switched on automatically at speeds under approximately 10 km/h (6 mph). Once you start to
accelerate, the hazard warning lights will switch off again automatically.
Equipment for an emergency
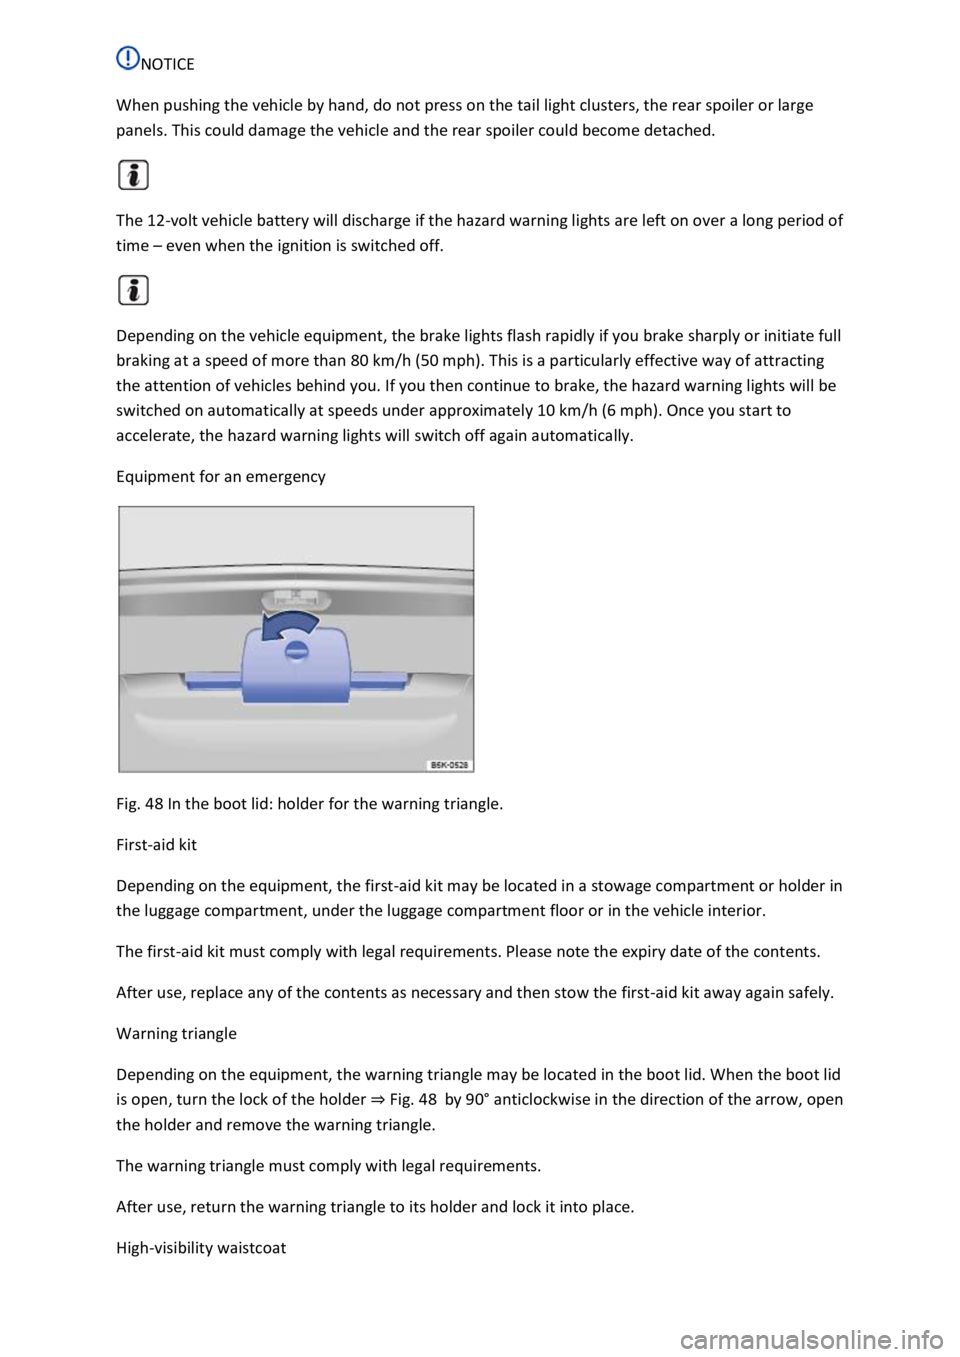
Fig. 48 In the boot lid: holder for the warning triangle.
First-aid kit
Depending on the equipment, the first-aid kit may be located in a stowage compartment or holder in
the luggage compartment, under the luggage compartment floor or in the vehicle interior.
The first-aid kit must comply with legal requirements. Please note the expiry date of the contents.
After use, replace any of the contents as necessary and then stow the first-aid kit away again safely.
Warning triangle
Depending on the equipment, the warning triangle may be located in the boot lid. When the boot lid
is open, turn the lock of the holder Fig. 48by 90
Page 87 of 502
-visibility waistcoat may be located in a stowage
compartment in the front door trim or in the stowage compartment on the front passenger side
Driver doorFr
The high-visibility waistcoat must comply with legal requirements.
Fire extinguisher
Depending on the equipment, a fire extinguisher may be located in a holder in the footwell under
the front passenger seat.
The fire extinguisher must meet legal requirements, be ready for use at all times and be checked on
a regular basis (see inspection seal on the fire extinguisher).
WARNING
In the event of a sudden driving or braking manoeuvre or accident, loose objects could be flung
though the vehicle and cause severe injuries.
Always secure the first-aid kit, warning triangle and fire extinguisher safely in the holders in the
vehicle.
Stow the high-visibility waistcoat in the stowage compartments so that it can be easily accessed.
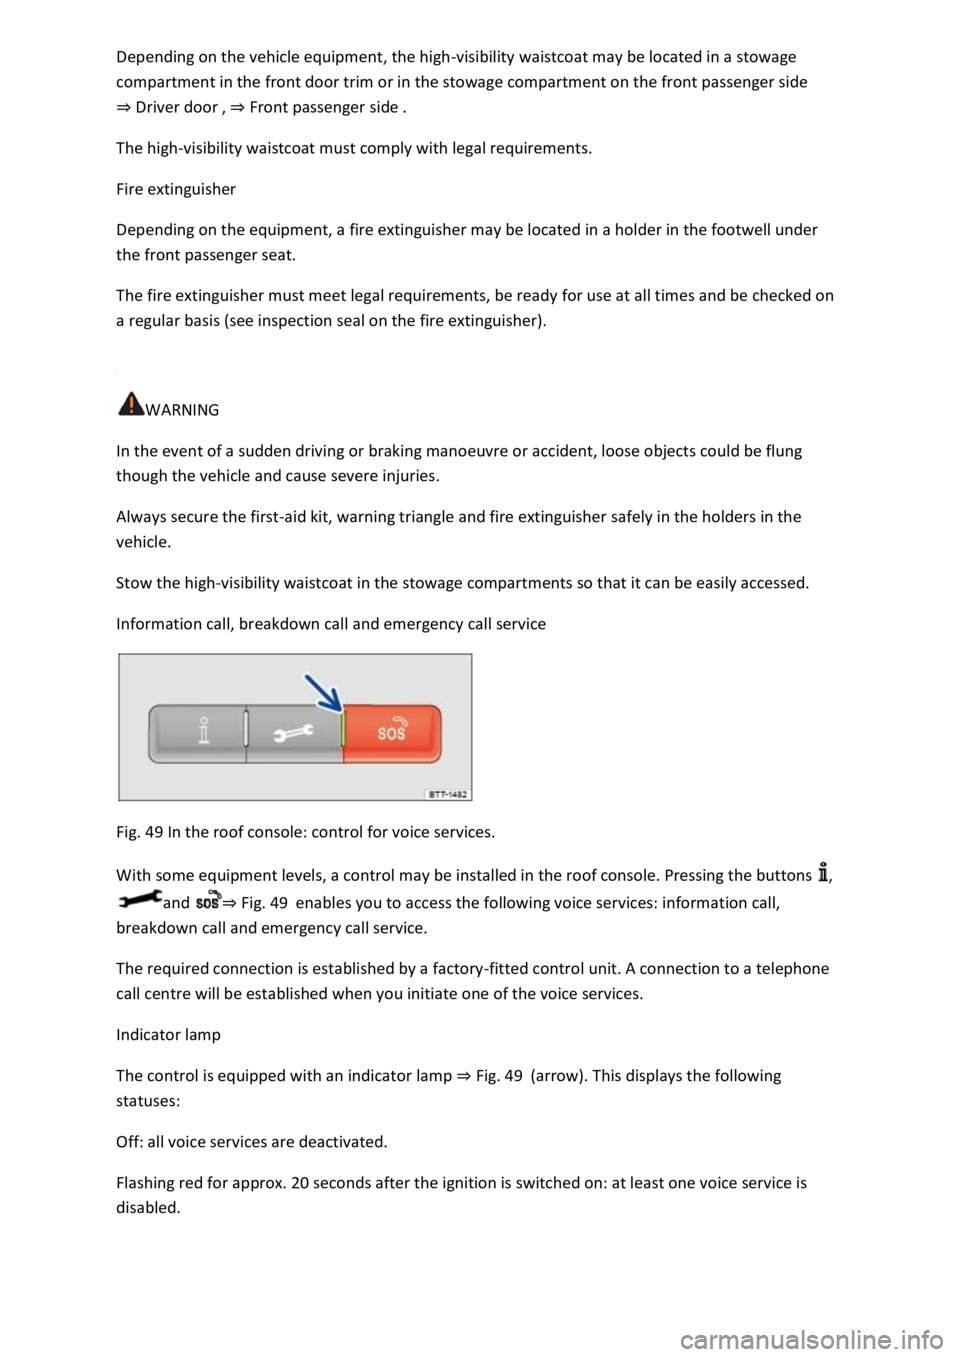
Information call, breakdown call and emergency call service
Fig. 49 In the roof console: control for voice services.
With some equipment levels, a control may be installed in the roof console. Pressing the buttons ,
and Fig. 49enables you to access the following voice services: information call,
breakdown call and emergency call service.
The required connection is established by a factory-fitted control unit. A connection to a telephone
call centre will be established when you initiate one of the voice services.
Indicator lamp
The control is equipped with an indicator lamp Fig.
Off: all voice services are deactivated.
Flashing red for approx. 20 seconds after the ignition is switched on: at least one voice service is
disabled.
Page 101 of 502

SAFELOCK deactivates the door release levers if the vehicle has been locked. This makes it more
difficult to break into the vehicle. The doors can no longer be opened from the inside
Press the button on the vehicle key once.
Press the button on the vehicle key twice in quick succession.
Vehicles with the Keyless Access locking and starting system: touch the sensor on the outside of the
door handle twiceUnlocking or locking the vehicle with Keyless Access
OR: press the central locking button in the driver door once Central locking button
There may be an indication of the activated SAFELOCK in the display of the instrument cluster
(SAFELOCK).
Deactivating SAFELOCK
Switch on the ignition.
OR: deactivate interior monitoring and the anti-tow alarm Temporarily switching off the interior
monitoring system and anti-tow alarm
Before locking the vehicle, temporarily deactivate the interior monitoring and the anti-tow alarm in
the Vehicle Settings menu in the Infotainment system Infotainment sy
The following applies when SAFELOCK is deactivated:
The interior monitoring and the anti-tow alarm are activated and deactivated in the Vehicle settings
menu in the Infotainment system Infotainment system controls and display
WARNING
Careless or unsupervised use of SAFELOCK can cause serious injuries.
Never leave other persons in the vehicle if the vehicle has been locked using the vehicle key. The
doors can no longer be opened from the inside once SAFELOCK is activated.
If you unlock the driver door mechanically using the vehicle key, only the driver door is unlocked,
and not the whole vehicle. The doors are released (but not unlocked) and the central locking button
is activated only when the ignition is switched on.
Troubleshooting
First read and observe the introductoryinformation and safety warnings
Indicator lamp lights up continuously
The red LED in the vehicle door flashes at short intervals and then lights up continuously.
Page 103 of 502

steam if a valid vehicle key is simultaneously within the operating range. If at least one window is
open and sensor surfaces on the door handles are continuously activated, all windows will close. All
windows could open if the jet of water or steam is moved away from the door handle sensors briefly
and then moved back again
It may not be possible to lock or unlock the vehicle using the Keyless Access if the 12-volt vehicle
battery or button cell in the vehicle key is weak or discharged. The vehicle can be locked or unlocked
manually
If there is no valid vehicle key in the vehicle or if it is not detected, a corresponding message will be
shown on the instrument cluster display. This may occur if the vehicle key is exposed to interference
from another radio signal or is covered by another item, e.g. an aluminium case Starting and
stopping the engine
Anti-theft alarm
Depending on the vehicle equipment level, the vehicle may have an anti-theft alarm.
The anti-theft alarm is activated automatically when the vehicle is locked using the vehicle key.
The anti-theft alarm outputs acoustic and visual warning signals for up to five minutes.
When does the system trigger an alarm?
If a door is opened.
If the bonnet is opened.
If the boot lid is opened.
If the ignition is switched on with a valid vehicle key. (The alarm may sound briefly.)
If the 12-volt vehicle battery is disconnected.
If there is movement inside the vehicle (in vehicles with interior monitoring) Interior monitoring
system and anti-tow alarm
If the vehicle is lifted or towed (vehicles with anti-tow alarm) Interior monitoring system and anti-
tow alarm
If the vehicle is transported on a car ferry or by rail (vehicles with anti-tow alarm or interior
monitoring) Interior monitoring system and anti-tow alarm
If a trailer that is connected to the anti-theft alarm system is removed Trailer towing
Switching off the alarm
Unlock the vehicle using the unlocking button on the vehicle key.