2022 TOYOTA PROACE VERSO EV brake
[x] Cancel search: brakePage 185 of 360
185
Driving
6
“Cruise control active”, no vehicle detected.“Cruise control active”, vehicle detected.
“Cruise control active and speed adjusted”, vehicle detected too close or at a slower speed.“Cruise control active and speed adjusted”, automatic deactivation
imminent following a cruise control limit being reached.“Cruise control paused”, automatic deactivation following speed limit adjustment being exceeded and no reaction from the driver.
Operating limits
The regulation range is limited to a maximum difference of 19 mph (30 km/h) between the cruise speed setting and the speed of the vehicle in front.Above this, the system pauses itself if the safety distance becomes too short.The adaptive cruise control uses only engine braking to slow the vehicle. Consequently the vehicle loses speed slowly, as when releasing the accelerator pedal.The system is paused automatically:– if the vehicle in front slows down too much or too suddenly, and the driver does not brake,– if a vehicle comes between your vehicle and the vehicle in front,
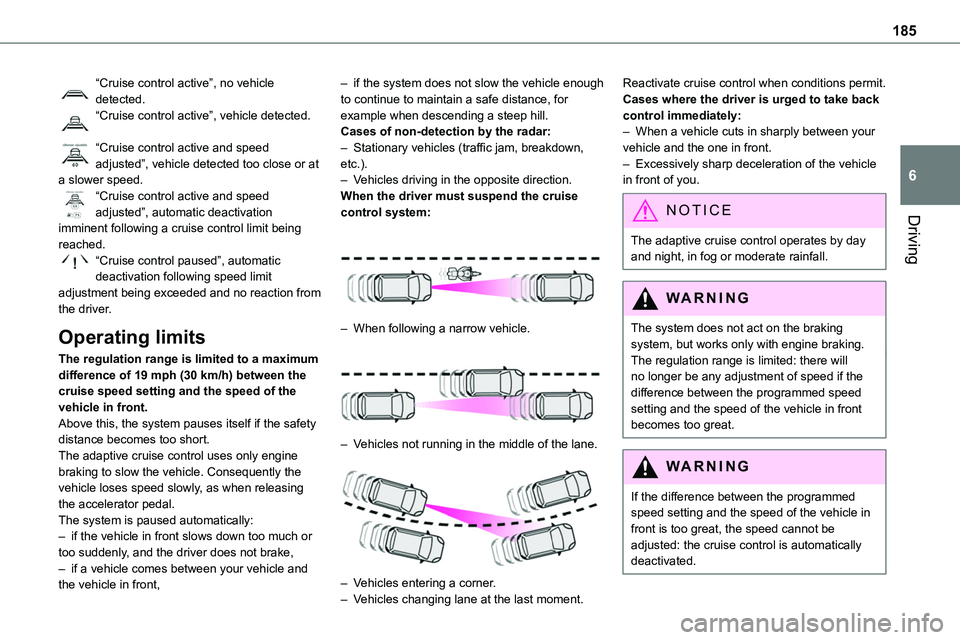
– if the system does not slow the vehicle enough to continue to maintain a safe distance, for example when descending a steep hill.Cases of non-detection by the radar:– Stationary vehicles (traffic jam, breakdown, etc.).– Vehicles driving in the opposite direction.When the driver must suspend the cruise control system:
– When following a narrow vehicle.
– Vehicles not running in the middle of the lane.
– Vehicles entering a corner.– Vehicles changing lane at the last moment.
Reactivate cruise control when conditions permit.Cases where the driver is urged to take back control immediately:– When a vehicle cuts in sharply between your vehicle and the one in front.– Excessively sharp deceleration of the vehicle in front of you.
NOTIC E
The adaptive cruise control operates by day and night, in fog or moderate rainfall.
WARNI NG
The system does not act on the braking system, but works only with engine braking.The regulation range is limited: there will no longer be any adjustment of speed if the difference between the programmed speed setting and the speed of the vehicle in front becomes too great.
WARNI NG
If the difference between the programmed speed setting and the speed of the vehicle in front is too great, the speed cannot be adjusted: the cruise control is automatically deactivated.
Page 186 of 360
186
Malfunction
In the event of a malfunction with the adaptive cruise control, you will be alerted by an audible signal and the display of the message "Driving aid functions fault".Have it checked by any authorized Toyota retailer or Toyota authorized repairer, or any reliable repairer.
Active Safety Brake with
Collision Risk Alert and
Intelligent emergency
braking assistance
WARNI NG
Refer to the General recommendations on the use of driving and manoeuvring aids.
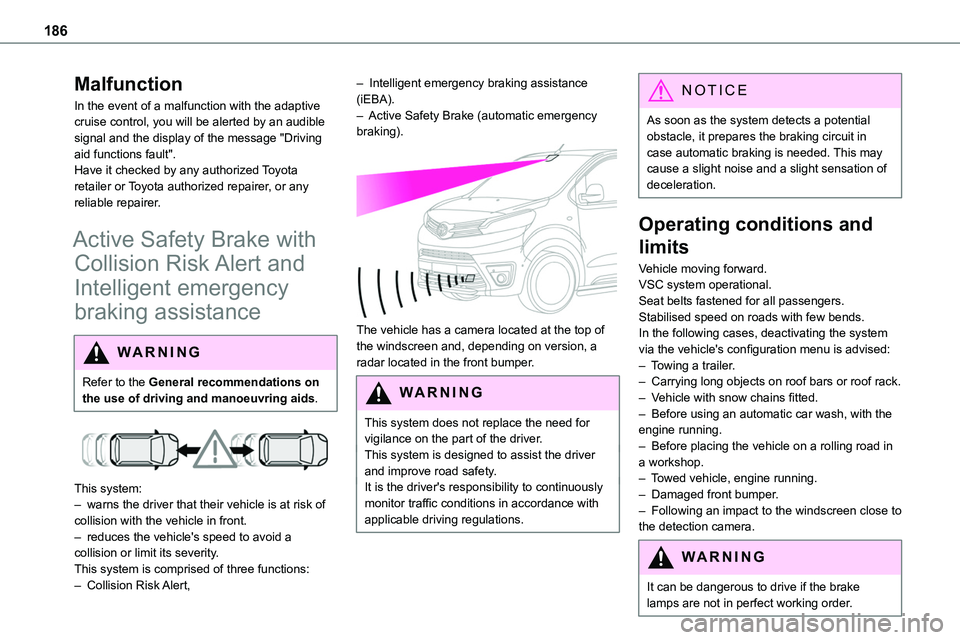
This system:– warns the driver that their vehicle is at risk of collision with the vehicle in front.– reduces the vehicle's speed to avoid a collision or limit its severity.This system is comprised of three functions:– Collision Risk Alert,
– Intelligent emergency braking assistance (iEBA).– Active Safety Brake (automatic emergency braking).
The vehicle has a camera located at the top of the windscreen and, depending on version, a radar located in the front bumper.
W ARNI NG
This system does not replace the need for vigilance on the part of the driver.This system is designed to assist the driver and improve road safety.It is the driver's responsibility to continuously monitor traffic conditions in accordance with applicable driving regulations.
NOTIC E
As soon as the system detects a potential obstacle, it prepares the braking circuit in case automatic braking is needed. This may cause a slight noise and a slight sensation of deceleration.
Operating conditions and
limits
Vehicle moving forward.VSC system operational.Seat belts fastened for all passengers.Stabilised speed on roads with few bends.In the following cases, deactivating the system via the vehicle's configuration menu is advised:– Towing a trailer.– Carrying long objects on roof bars or roof rack.– Vehicle with snow chains fitted.– Before using an automatic car wash, with the engine running.– Before placing the vehicle on a rolling road in a workshop.– Towed vehicle, engine running.– Damaged front bumper.– Following an impact to the windscreen close to the detection camera.
WARNI NG
It can be dangerous to drive if the brake lamps are not in perfect working order.
Page 187 of 360
187
Driving
6
WARNI NG
It is possible that warnings are not given, are given too late or seem unjustified.The driver must always stay in control of the vehicle and be prepared to react at any time to avoid an accident.
WARNI NG
Following an impact, the system is automatically deactivated.Have it checked by any authorized Toyota retailer or Toyota authorized repairer, or any reliable repairer.
Collision Risk Alert
This function warns the driver that their vehicle is at risk of a collision with the vehicle in front, or with a pedestrian or cyclist present in their traffic lane.
Modifying the alert trigger threshold
This trigger threshold determines the sensitivity with which the function warns of the risk of collision.The threshold is set via the vehicle
configuration menu with the audio system or touch screen.► Select one of the three pre-defined thresholds: "Far", "Normal" or "Close".
The last threshold selected is memorised when the ignition is switched off.
Operation
Depending on the degree of risk of collision detected by the system and the alert trigger threshold chosen by the driver, several different levels of alert may be triggered and displayed on the instrument panel.
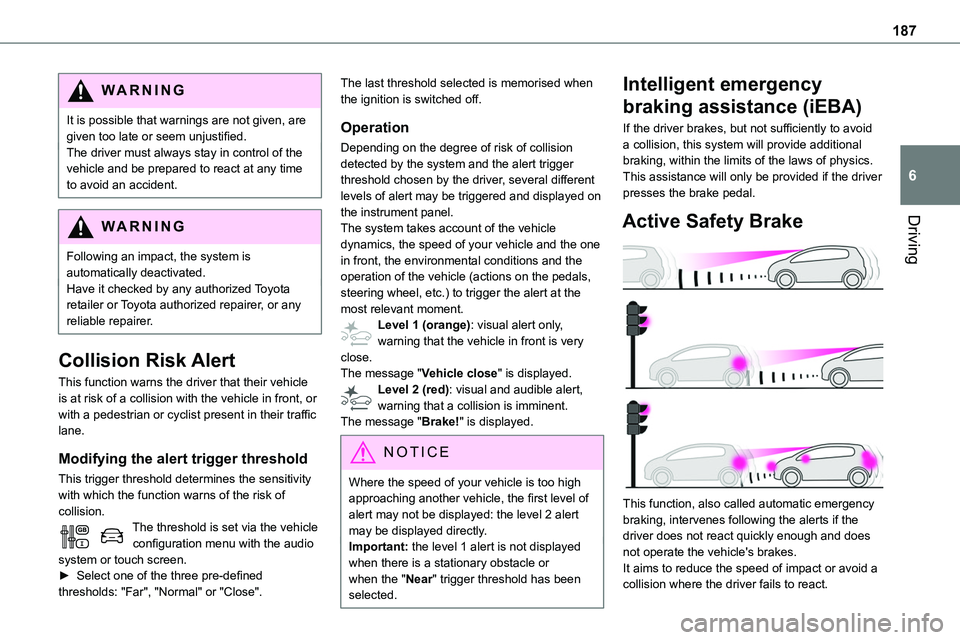
The system takes account of the vehicle dynamics, the speed of your vehicle and the one in front, the environmental conditions and the operation of the vehicle (actions on the pedals, steering wheel, etc.) to trigger the alert at the most relevant moment.Level 1 (orange): visual alert only, warning that the vehicle in front is very close.The message "Vehicle close" is displayed.Level 2 (red): visual and audible alert, warning that a collision is imminent.The message "Brake!" is displayed.
NOTIC E
Where the speed of your vehicle is too high approaching another vehicle, the first level of alert may not be displayed: the level 2 alert may be displayed directly.
Important: the level 1 alert is not displayed when there is a stationary obstacle or when the "Near" trigger threshold has been selected.
Intelligent emergency
braking assistance (iEBA)
If the driver brakes, but not sufficiently to avoid a collision, this system will provide additional braking, within the limits of the laws of physics.This assistance will only be provided if the driver presses the brake pedal.
Active Safety Brake
This function, also called automatic emergency braking, intervenes following the alerts if the driver does not react quickly enough and does not operate the vehicle's brakes.It aims to reduce the speed of impact or avoid a collision where the driver fails to react.
Page 188 of 360
188
Operation
The system operates subject to the following conditions:– The vehicle's speed does not exceed 37 mph (60 km/h) when a pedestrian is detected.– The vehicle's speed does not exceed 50 mph (80 km/h) when a stationary vehicle or a cyclist is detected.– The vehicle's speed is between 6 mph and
53 mph (10 km/h and 85 km/h) (versions with camera only) or 87 mph (140 km/h) (versions with camera and radar) when a moving vehicle is detected.This warning lamp flashes (for approximately 10 seconds) as soon as the function applies the vehicle’s brakes.With an automatic gearbox, in the event of automatic emergency braking bringing the vehicle to a complete stop, keep the brake pedal depressed to prevent the vehicle from moving off again.With a manual gearbox, in the event of automatic emergency braking bringing the vehicle to a complete stop, the engine may stall.
NOTIC E
The driver can maintain control of the vehicle
at any time by firmly turning the steering wheel and/or firmly depressing the accelerator pedal.
NOTIC E
Operation of the function may be felt by slight vibration in the brake pedal.If the vehicle comes to a complete stop, automatic braking is maintained for 1 to 2 seconds.
Deactivation/Activation
By default, the system is automatically activated at every engine start.It is set via the vehicle configuration menu.Deactivation of the system is signalled by the illumination of this warning lamp, accompanied by the display of a message.
Malfunction
In the event of a malfunction, this warning lamp comes on on the instrument panel, accompanied by the display of a message and an audible signal.Have it checked by any authorized Toyota retailer or Toyota authorized repairer, or any reliable repairer.If these warning lamps come on after the engine has been switched off and then restarted, contact any authorized Toyota retailer or Toyota authorized repairer, or any reliable repairer to have the system checked.
These warning lamps light up on the instrument panel to indicate that the driver's and/or front passenger's seat belt is not fastened (depending on version).
Lane departure warning
system
WARNI NG
Refer to the General recommendations on the use of driving and manoeuvring aids.
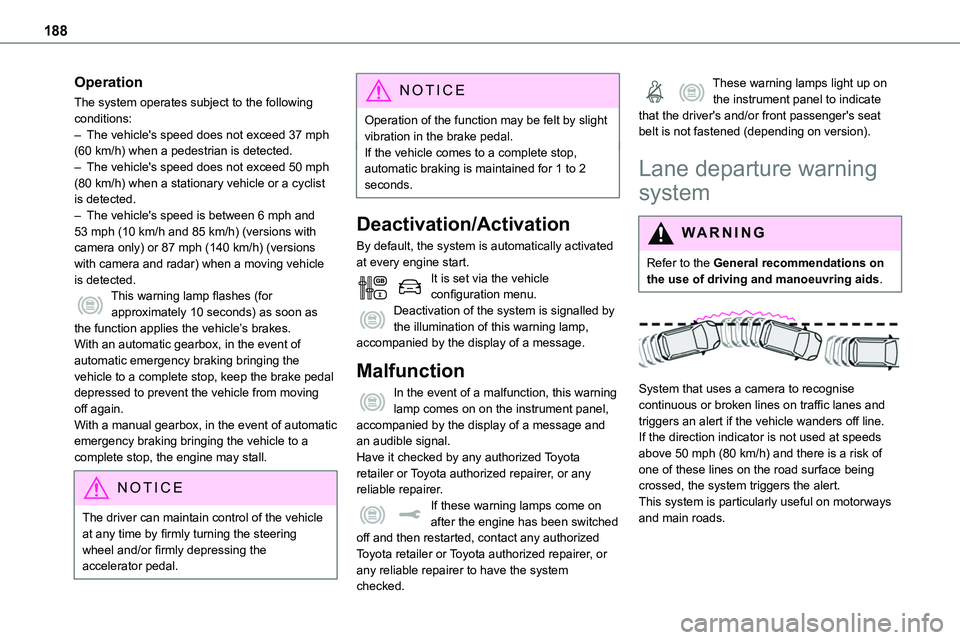
System that uses a camera to recognise continuous or broken lines on traffic lanes and triggers an alert if the vehicle wanders off line. If the direction indicator is not used at speeds above 50 mph (80 km/h) and there is a risk of one of these lines on the road surface being crossed, the system triggers the alert.This system is particularly useful on motorways and main roads.
Page 213 of 360

213
Practical information
7
Installation tips
► If you have to fit the chains during a journey, stop the vehicle on a flat surface on the side of the road.► Apply the parking brake and position any wheel chocks under the wheels to prevent movement of your vehicle.► Fit the chains following the instructions provided by the manufacturer.
► Move off gently and drive for a few moments, without exceeding 50 km/h (31 mph).► Stop your vehicle and check that the snow chains are correctly tightened.
NOTIC E
It is strongly recommended that before you leave, you practise fitting the snow chains on a level and dry surface.
WARNI NG
Avoid driving with snow chains on roads that have been cleared of snow to avoid damaging your vehicle's tyres and the road surface. If your vehicle is fitted with alloy wheels, check that no part of the chain or its fixings is in contact with the wheel rim.
Towing device
Load distribution► Distribute the load in the trailer so that the heaviest items are as close as possible to the axle and the nose weight approaches the maximum permitted without exceeding it.Air density decreases with altitude, thus reducing engine performance. The maximum towed load
must be reduced by 10 % for every 1,000 metres (3,280 ft) of altitude.
NOTIC E
Use towing devices and their unmodified harnesses approved by TOYOTA. It is recommended that the installation be performed by any authorized Toyota retailer or Toyota authorized repairer, or any reliable repairer.If the towing device is not fitted by any authorized Toyota retailer or Toyota authorized repairer, or any reliable repairer, it must still be fitted in accordance with the vehicle manufacturer's instructions.Certain driving assistance or manoeuvring assistance functions are automatically disabled if an approved towbar is used.
WARNI NG
Observe the maximum authorised towable weight, indicated on your vehicle's registration certificate, the manufacturer's label as well as in the Technical data section of this guide.Complying with the maximum authorised nose weight (towball) also includes the use of accessories (bicycle carriers, tow
boxes, etc.).
WARNI NG
Observe the legislation in force in the country in which you are driving.
NOTIC E
Electric motorAn electric vehicle may be fitted with a towing device.It is therefore possible to tow a trailer or caravan.Contact any authorized Toyota retailer or Toyota authorized repairer, or any reliable repairer for more information and to obtain a suitable towing device.
Page 216 of 360

216
Opening
► Open the door.
► Pull the release lever 1, located at the bottom of the door frame, towards you.► Tilt the safety catch 2 upwards, then raise the bonnet.► Unclip the stay 3 from its housing and place it in the support slot to hold the bonnet open.
* Depending on engine.
Closing
► Hold the bonnet and pull out the stay from the support slot.► Clip the stay in its housing.► Lower the bonnet and release it near the end of its travel.► Pull on the bonnet to check that it is locked correctly.
WARNI NG
Because of the presence of electrical equipment under the bonnet, it is recommended that exposure to water (rain, washing, etc.) be limited.
Engine compartment
The engine shown here is an example for illustrative purposes only.The locations of the following components may vary:– Air filter.– Engine oil dipstick.– Engine oil filler cap.– Priming pump.
Diesel engine
1.Screenwash fluid reservoir
2.Engine coolant reservoir
3.Brake fluid reservoir
4.Battery
5.Remote earth point (-)
6.Fusebox
7.Air filter
8.Engine oil filler cap
9.Engine oil dipstick
10.Priming pump*
11 .Power steering fluid reservoir
WARNI NG
Diesel fuel systemThis system is under very high pressure.All work must be carried out only by any authorized Toyota retailer or Toyota authorized repairer, or any reliable repairer.
Page 217 of 360

217
Practical information
7
Electric motor
1.Screenwash fluid reservoir
2.Engine coolant reservoir (level only)
3.Brake fluid reservoir
4.Battery/Fuses
5.Remote earth point (-)
6.Fusebox
7.400 V electrical circuit
8.Emergency circuit-breaker for emergency services and maintenance technicians
9.Power steering fluid reservoir
For more information on the Charging system (Electric), refer to the corresponding section.
Checking levels
Check all of the following levels regularly in accordance with the manufacturer's service schedule. Top them up if required, unless otherwise indicated.If a level drops significantly, have the corresponding system checked by any authorized Toyota retailer or Toyota authorized
repairer, or any reliable repairer.
WARNI NG
The fluids must comply with the manufacturer's requirements and with the vehicle's engine.
WARNI NG
Take care when working under the bonnet, as certain areas of the engine may be extremely hot (risk of burns) and the cooling fan could start at any time (even with the ignition off).
Used products
WARNI NG
Avoid prolonged contact of used oil or fluids with the skin.Most of these fluids are harmful to health and very corrosive.
ECO
Do not discard used oil or fluids into sewers or onto the ground.Empty used oil into the containers reserved for this purpose at any authorized Toyota retailer or Toyota authorized repairer, or any reliable repairer.
Engine oil
The level is checked, with the engine having been switched off for at least 30 minutes and on level ground, either using the oil level indicator in the instrument panel when the ignition is switched on (for vehicles equipped with an electric gauge), or using the dipstick.It is normal to top up the oil level between two services (or oil changes). It is recommended that you check the level, and top up if necessary, every 5,000 km (3,000 miles).
Page 218 of 360
218
WARNI NG
In order to maintain the reliability of the engine and emissions control system, never use additives in the engine oil.
Checking using the dipstick
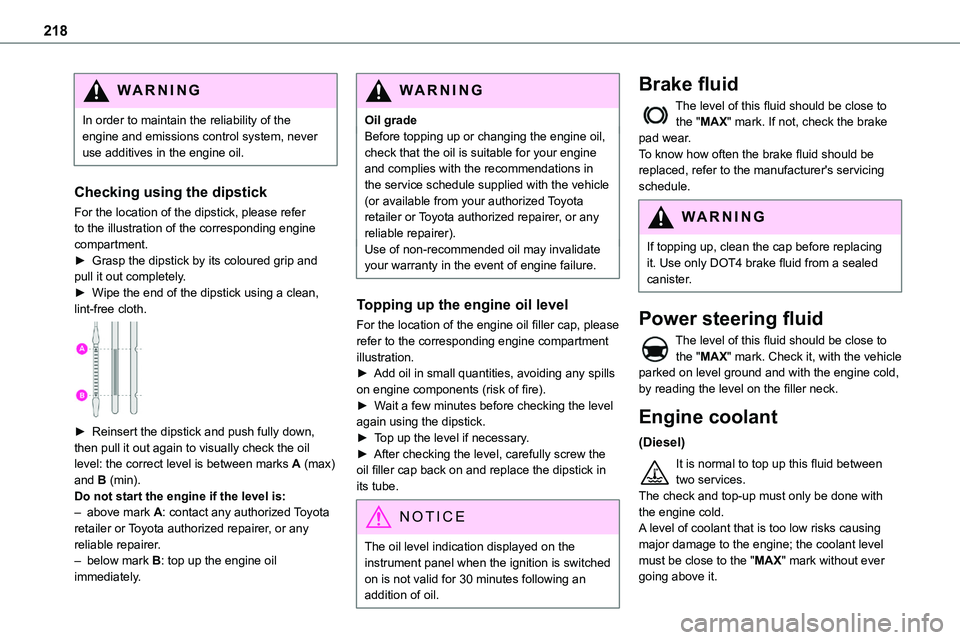
For the location of the dipstick, please refer
to the illustration of the corresponding engine compartment.► Grasp the dipstick by its coloured grip and pull it out completely.► Wipe the end of the dipstick using a clean, lint-free cloth.
► Reinsert the dipstick and push fully down, then pull it out again to visually check the oil level: the correct level is between marks A (max) and B (min). Do not start the engine if the level is:– above mark A: contact any authorized Toyota retailer or Toyota authorized repairer, or any reliable repairer.– below mark B: top up the engine oil immediately.
WARNI NG
Oil gradeBefore topping up or changing the engine oil, check that the oil is suitable for your engine and complies with the recommendations in the service schedule supplied with the vehicle (or available from your authorized Toyota retailer or Toyota authorized repairer, or any
reliable repairer).Use of non-recommended oil may invalidate your warranty in the event of engine failure.
Topping up the engine oil level
For the location of the engine oil filler cap, please refer to the corresponding engine compartment illustration.► Add oil in small quantities, avoiding any spills on engine components (risk of fire).► Wait a few minutes before checking the level again using the dipstick.► Top up the level if necessary.► After checking the level, carefully screw the oil filler cap back on and replace the dipstick in its tube.
NOTIC E
The oil level indication displayed on the instrument panel when the ignition is switched on is not valid for 30 minutes following an addition of oil.
Brake fluid
The level of this fluid should be close to the "MAX" mark. If not, check the brake pad wear.To know how often the brake fluid should be replaced, refer to the manufacturer's servicing schedule.
WARNI NG
If topping up, clean the cap before replacing it. Use only DOT4 brake fluid from a sealed canister.
Power steering fluid
The level of this fluid should be close to the "MAX" mark. Check it, with the vehicle parked on level ground and with the engine cold, by reading the level on the filler neck.
Engine coolant
(Diesel)
It is normal to top up this fluid between two services.The check and top-up must only be done with the engine cold.A level of coolant that is too low risks causing
major damage to the engine; the coolant level must be close to the "MAX" mark without ever going above it.