2022 TOYOTA PROACE CITY VERSO radio controls
[x] Cancel search: radio controlsPage 3 of 320
3
Contents
Speed Limit Recognition and Recommendation 156Speed limiter 159Fixed speed limiter 161Cruise control - particular recommendations 162Programmable cruise control 162Adaptive Cruise Control 165Memorising speeds 169Active Safety Brake with Collision Risk Alert and Intelligent emergency braking assistance 169Active Lane Departure Warning System 173Blind Spot Monitoring System 176Distraction detection 178Parking sensors 179Reversing Camera 182Surround Rear Vision 183Top Rear Vision 186Park Assist 188
7Practical information
Compatibility of fuels 192Refuelling 192Misfuel prevention (Diesel) 194Charging system (Electric) 195Charging the traction battery (Electric) 202Energy economy mode 206Snow chains 206Very cold climate screen 207Towing device 208Overload indicator 209Roof bars / Roof rack 210Bonnet 2 11Engine compartment 212Checking levels 213Speed checks 215
AdBlue® (Diesel engines) 217Free-wheeling 220Advice on care and maintenance 221
8In the event of a breakdown
Running out of fuel (Diesel) 223Tool kit 223Temporary puncture repair kit 225Spare wheel 227Changing a bulb 230Fuses 23612 V battery / Accessory battery 237Towing 241
9Technical data
Dimensions 243Engine technical data and towed loads 248Petrol motors 249Diesel motors 251Electric motor 253Identification markings 254
10 Touch screen BLUETOOTH audio system
First steps 255Steering mounted controls 256Menus 256Radio 258DAB (Digital Audio Broadcasting) radio 259Media 259Telephone 261Settings 262Frequently asked questions 263
11TOYOTA Connect Radio
First steps 265Steering mounted controls 266Menus 267Applications 268Radio 268DAB (Digital Audio Broadcasting) radio 270Media 271Telephone 272Settings 275Frequently asked questions 277
12TOYOTA Connect Nav
First steps 279Steering mounted controls 280Menus 280Voice commands 282Navigation 286Connected navigation 288Applications 291Radio 294DAB (Digital Audio Broadcasting) radio 295Media 296Telephone 297Settings 300Frequently asked questions 303
■Alphabetical index
Page 4 of 320
4
Presentation
Presentation
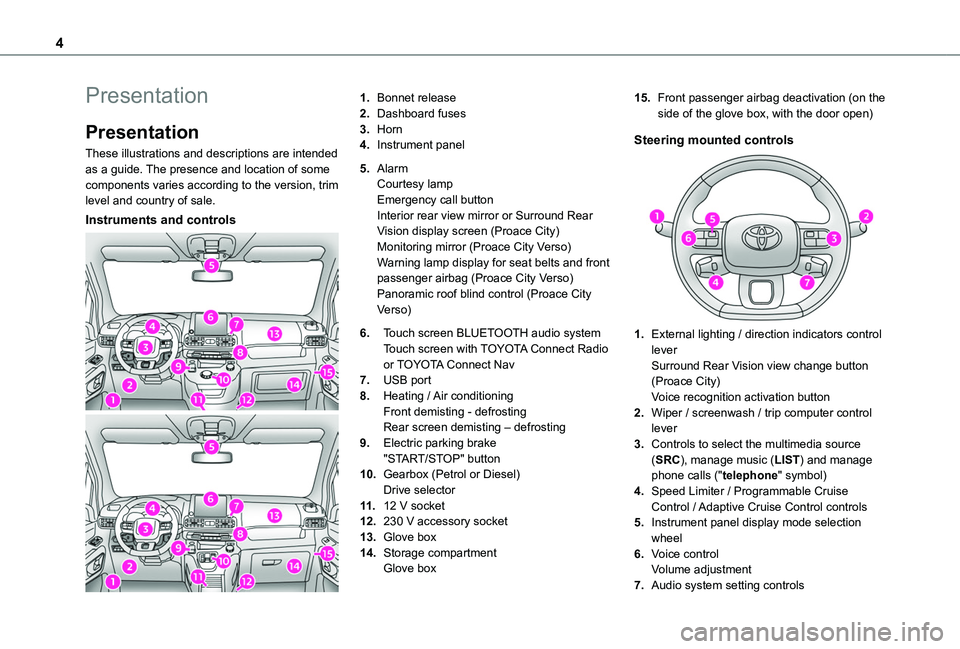
These illustrations and descriptions are intended as a guide. The presence and location of some components varies according to the version, trim level and country of sale.
Instruments and controls
1.Bonnet release
2.Dashboard fuses
3.Horn
4.Instrument panel
5.AlarmCourtesy lampEmergency call buttonInterior rear view mirror or Surround Rear Vision display screen (Proace City)Monitoring mirror (Proace City Verso)Warning lamp display for seat belts and front passenger airbag (Proace City Verso)Panoramic roof blind control (Proace City Verso)
6.Touch screen BLUETOOTH audio systemTouch screen with TOYOTA Connect Radio or TOYOTA Connect Nav
7.USB port
8.Heating / Air conditioningFront demisting - defrostingRear screen demisting – defrosting
9.Electric parking brake"START/STOP" button
10.Gearbox (Petrol or Diesel)Drive selector
11 .12 V socket
12.230 V accessory socket
13.Glove box
14.Storage compartmentGlove box
15.Front passenger airbag deactivation (on the side of the glove box, with the door open)
Steering mounted controls
1.External lighting / direction indicators control leverSurround Rear Vision view change button (Proace City)Voice recognition activation button
2.Wiper / screenwash / trip computer control lever
3.Controls to select the multimedia source
(SRC), manage music (LIST) and manage phone calls ("telephone" symbol)
4.Speed Limiter / Programmable Cruise Control / Adaptive Cruise Control controls
5.Instrument panel display mode selection wheel
6.Voice controlVolume adjustment
7.Audio system setting controls
Page 29 of 320
29
Instruments
1
Current consumption
(mpg or l/100 km or km/l)(miles/kWh or kWh/100 km or km/kWh) (Electric) / Calculated during the last few seconds.This function is only displayed at speeds above 19 mph (30 km/h) (Diesel).
Average consumption
(mpg or l/100 km or km/l)(miles/kWh or kWh/100 km or km/kWh) (Electric) / Calculated since the last trip computer reset.
Average speed
(mph or km/h)Calculated since the last trip computer reset.
Distance travelled
(km or miles)Calculated since the last trip computer reset.
Stop & Start time counter
(minutes/seconds or hours/minutes)
If your vehicle is fitted with Stop & Start, a time counter calculates the time spent in STOP mode during a journey.It resets to zero every time the ignition is switched on.
Touch screen
BLUETOOTH audio
system
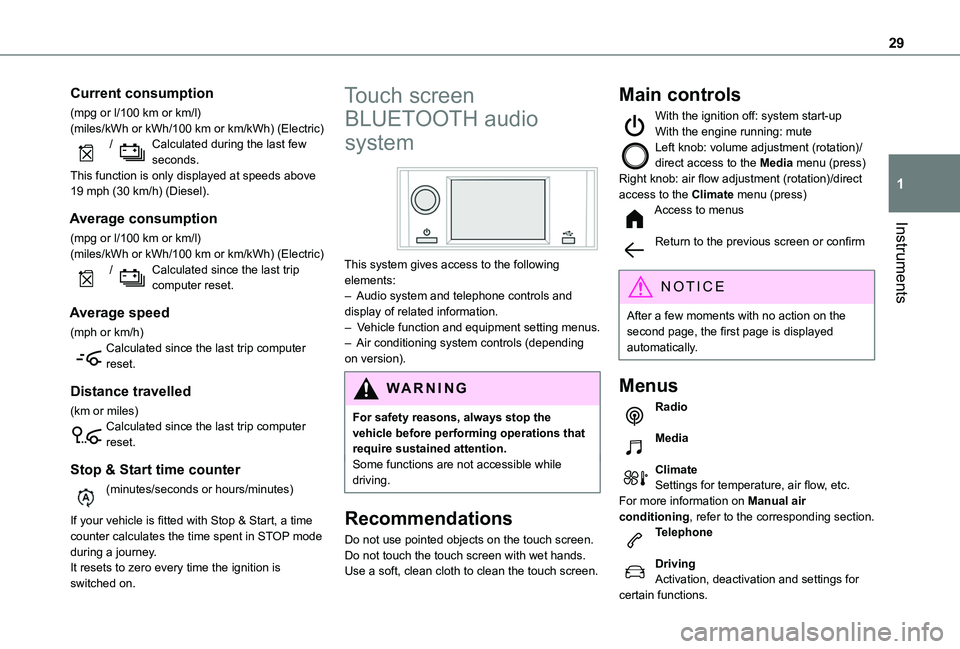
This system gives access to the following elements:– Audio system and telephone controls and display of related information.– Vehicle function and equipment setting menus.– Air conditioning system controls (depending on version).
W ARNI NG
For safety reasons, always stop the vehicle before performing operations that require sustained attention.Some functions are not accessible while driving.
Recommendations
Do not use pointed objects on the touch screen.
Do not touch the touch screen with wet hands.Use a soft, clean cloth to clean the touch screen.
Main controls
With the ignition off: system start-upWith the engine running: muteLeft knob: volume adjustment (rotation)/direct access to the Media menu (press)Right knob: air flow adjustment (rotation)/direct access to the Climate menu (press)Access to menus
Return to the previous screen or confirm
NOTIC E
After a few moments with no action on the second page, the first page is displayed automatically.
Menus
Radio
Media
ClimateSettings for temperature, air flow, etc.For more information on Manual air conditioning, refer to the corresponding section.Telephone
DrivingActivation, deactivation and settings for certain functions.
Page 30 of 320
30
SettingsMain system settings.
NOTIC E
For more information about the menus, refer to the sections describing the audio and telematics systems.
Touch screen
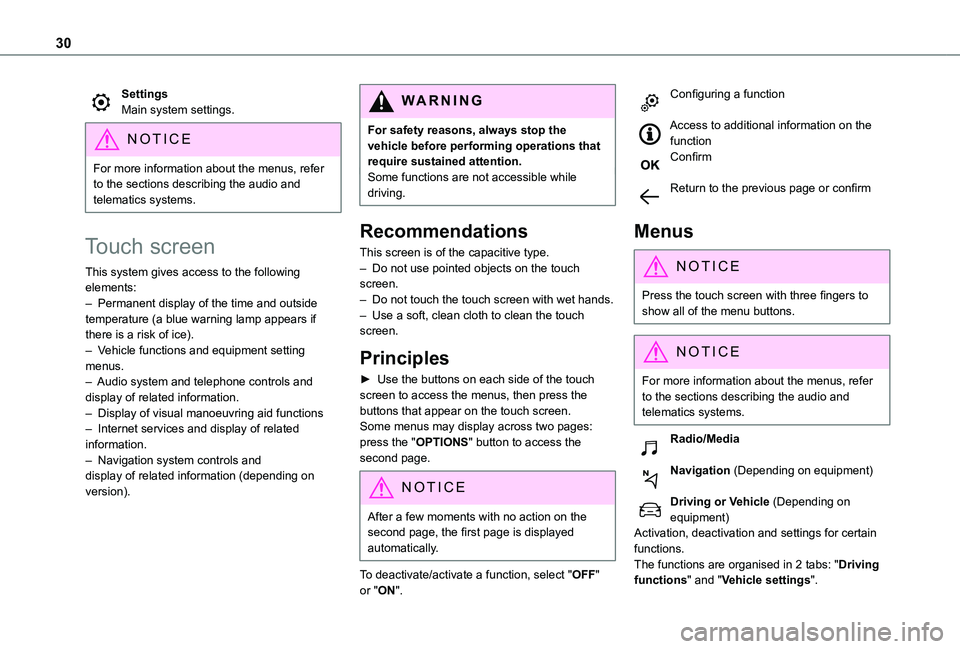
This system gives access to the following elements:– Permanent display of the time and outside temperature (a blue warning lamp appears if there is a risk of ice).– Vehicle functions and equipment setting menus.– Audio system and telephone controls and display of related information.– Display of visual manoeuvring aid functions– Internet services and display of related information.– Navigation system controls and display of related information (depending on version).
WARNI NG
For safety reasons, always stop the vehicle before performing operations that require sustained attention.Some functions are not accessible while driving.
Recommendations
This screen is of the capacitive type.– Do not use pointed objects on the touch screen.– Do not touch the touch screen with wet hands.– Use a soft, clean cloth to clean the touch screen.
Principles
► Use the buttons on each side of the touch screen to access the menus, then press the buttons that appear on the touch screen.Some menus may display across two pages: press the "OPTIONS" button to access the
second page.
NOTIC E
After a few moments with no action on the second page, the first page is displayed automatically.
To deactivate/activate a function, select "OFF" or "ON".
Configuring a function
Access to additional information on the functionConfirm
Return to the previous page or confirm
Menus
NOTIC E
Press the touch screen with three fingers to show all of the menu buttons.
NOTIC E
For more information about the menus, refer to the sections describing the audio and telematics systems.
Radio/Media
Navigation (Depending on equipment)
Driving or Vehicle (Depending on equipment)Activation, deactivation and settings for certain
functions.The functions are organised in 2 tabs: "Driving functions" and "Vehicle settings".
Page 67 of 320
67
Ease of use and comfort
3
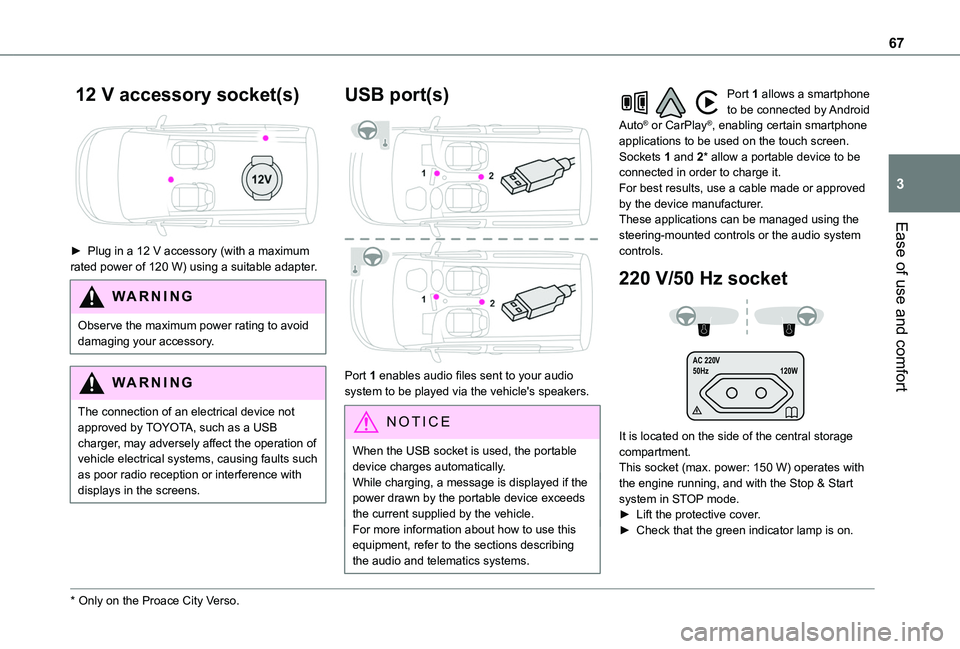
12 V accessory socket(s)
► Plug in a 12 V accessory (with a maximum rated power of 120 W) using a suitable adapter.
WARNI NG
Observe the maximum power rating to avoid damaging your accessory.
WARNI NG
The connection of an electrical device not approved by TOYOTA, such as a USB charger, may adversely affect the operation of vehicle electrical systems, causing faults such as poor radio reception or interference with
displays in the screens.
* Only on the Proace City Verso.
USB port(s)
Port 1 enables audio files sent to your audio system to be played via the vehicle's speakers.
N OTIC E
When the USB socket is used, the portable device charges automatically.While charging, a message is displayed if the power drawn by the portable device exceeds the current supplied by the vehicle.For more information about how to use this
equipment, refer to the sections describing the audio and telematics systems.
Port 1 allows a smartphone to be connected by Android Auto® or CarPlay®, enabling certain smartphone applications to be used on the touch screen.Sockets 1 and 2* allow a portable device to be connected in order to charge it.For best results, use a cable made or approved by the device manufacturer.These applications can be managed using the steering-mounted controls or the audio system controls.
220 V/50 Hz socket
AC 220 V
50Hz 120W
It is located on the side of the central storage compartment.This socket (max. power: 150 W) operates with the engine running, and with the Stop & Start system in STOP mode.► Lift the protective cover.► Check that the green indicator lamp is on.
Page 256 of 320
256
Steering mounted controls
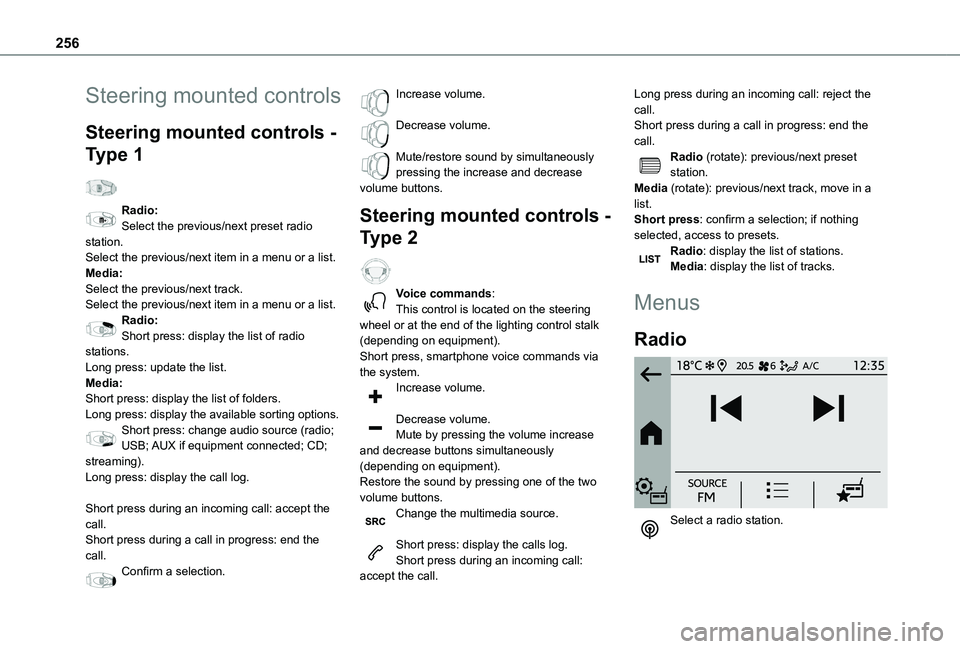
Steering mounted controls -
Type 1
Radio:Select the previous/next preset radio station.Select the previous/next item in a menu or a list.Media:Select the previous/next track.Select the previous/next item in a menu or a list.Radio:Short press: display the list of radio stations.Long press: update the list.Media:Short press: display the list of folders.Long press: display the available sorting options.Short press: change audio source (radio;
USB; AUX if equipment connected; CD; streaming).Long press: display the call log.
Short press during an incoming call: accept the call.Short press during a call in progress: end the call.Confirm a selection.
Increase volume.
Decrease volume.
Mute/restore sound by simultaneously pressing the increase and decrease volume buttons.
Steering mounted controls -
Type 2
Voice commands:This control is located on the steering wheel or at the end of the lighting control stalk (depending on equipment).Short press, smartphone voice commands via the system.Increase volume.
Decrease volume.Mute by pressing the volume increase
and decrease buttons simultaneously (depending on equipment).Restore the sound by pressing one of the two volume buttons.Change the multimedia source.
Short press: display the calls log.Short press during an incoming call: accept the call.
Long press during an incoming call: reject the call.Short press during a call in progress: end the call.Radio (rotate): previous/next preset station.Media (rotate): previous/next track, move in a list.Short press: confirm a selection; if nothing selected, access to presets.Radio: display the list of stations.Media: display the list of tracks.
Menus
Radio
Select a radio station.
Page 259 of 320
259
Touch screen BLUETOOTH audio system
10
DAB (Digital Audio
Broadcasting) radio
Terrestrial Digital Radio
Choosing the DAB radio
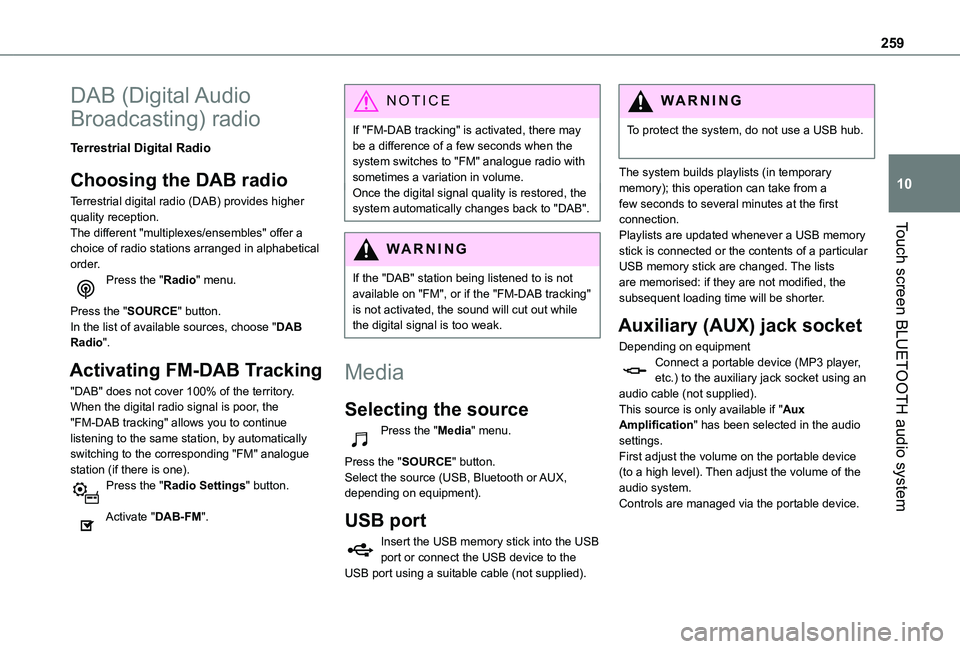
Terrestrial digital radio (DAB) provides higher quality reception.The different "multiplexes/ensembles" offer a choice of radio stations arranged in alphabetical order.Press the "Radio" menu.
Press the "SOURCE" button.In the list of available sources, choose "DAB Radio".
Activating FM-DAB Tracking
"DAB" does not cover 100% of the territory.When the digital radio signal is poor, the "FM-DAB tracking" allows you to continue listening to the same station, by automatically
switching to the corresponding "FM" analogue station (if there is one).Press the "Radio Settings" button.
Activate "DAB-FM".
NOTIC E
If "FM-DAB tracking" is activated, there may be a difference of a few seconds when the system switches to "FM" analogue radio with sometimes a variation in volume.Once the digital signal quality is restored, the system automatically changes back to "DAB".
WARNI NG
If the "DAB" station being listened to is not available on "FM", or if the "FM-DAB tracking" is not activated, the sound will cut out while the digital signal is too weak.
Media
Selecting the source
Press the "Media" menu.
Press the "SOURCE" button.Select the source (USB, Bluetooth or AUX, depending on equipment).
USB port
Insert the USB memory stick into the USB port or connect the USB device to the USB port using a suitable cable (not supplied).
WARNI NG
To protect the system, do not use a USB hub.
The system builds playlists (in temporary memory); this operation can take from a few seconds to several minutes at the first connection.Playlists are updated whenever a USB memory stick is connected or the contents of a particular USB memory stick are changed. The lists are memorised: if they are not modified, the subsequent loading time will be shorter.
Auxiliary (AUX) jack socket
Depending on equipmentConnect a portable device (MP3 player, etc.) to the auxiliary jack socket using an audio cable (not supplied).This source is only available if "Aux Amplification" has been selected in the audio settings.
First adjust the volume on the portable device (to a high level). Then adjust the volume of the audio system.Controls are managed via the portable device.
Page 260 of 320
260
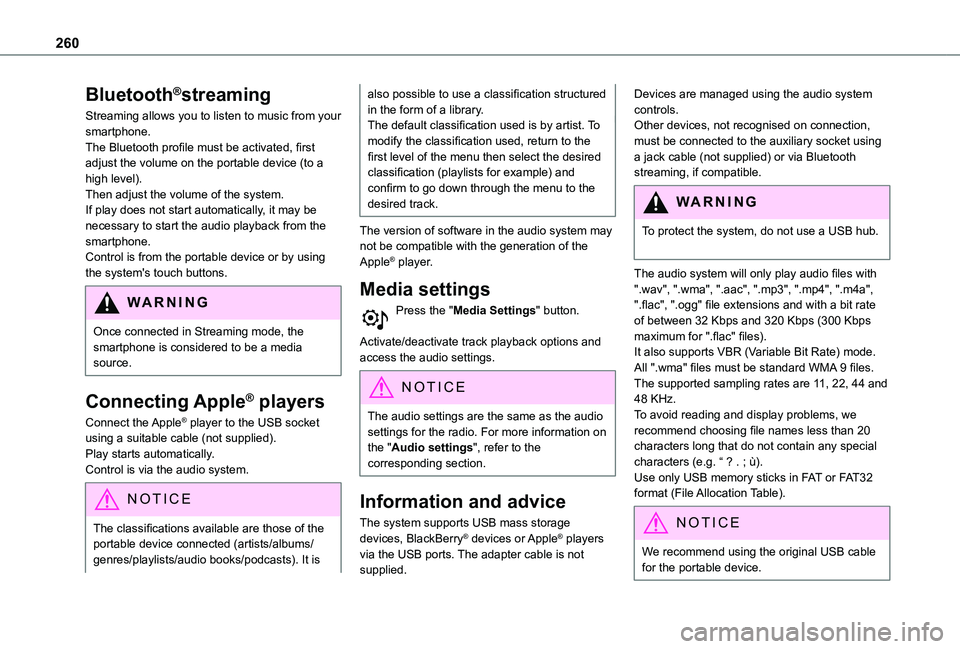
Bluetooth®streaming
Streaming allows you to listen to music from your smartphone.The Bluetooth profile must be activated, first adjust the volume on the portable device (to a high level).Then adjust the volume of the system.If play does not start automatically, it may be necessary to start the audio playback from the smartphone.Control is from the portable device or by using the system's touch buttons.
WARNI NG
Once connected in Streaming mode, the smartphone is considered to be a media source.
Connecting Apple® players
Connect the Apple® player to the USB socket using a suitable cable (not supplied).Play starts automatically.Control is via the audio system.
NOTIC E
The classifications available are those of the portable device connected (artists/albums/
genres/playlists/audio books/podcasts). It is
also possible to use a classification structured in the form of a library.The default classification used is by artist. To modify the classification used, return to the first level of the menu then select the desired classification (playlists for example) and confirm to go down through the menu to the desired track.
The version of software in the audio system may not be compatible with the generation of the Apple® player.
Media settings
Press the "Media Settings" button.
Activate/deactivate track playback options and access the audio settings.
NOTIC E
The audio settings are the same as the audio settings for the radio. For more information on the "Audio settings", refer to the corresponding section.
Information and advice
The system supports USB mass storage devices, BlackBerry® devices or Apple® players via the USB ports. The adapter cable is not supplied.
Devices are managed using the audio system controls.Other devices, not recognised on connection, must be connected to the auxiliary socket using a jack cable (not supplied) or via Bluetooth streaming, if compatible.
WARNI NG
To protect the system, do not use a USB hub.
The audio system will only play audio files with ".wav", ".wma", ".aac", ".mp3", ".mp4", ".m4a", ".flac", ".ogg" file extensions and with a bit rate of between 32 Kbps and 320 Kbps (300 Kbps maximum for ".flac" files).It also supports VBR (Variable Bit Rate) mode.All ".wma" files must be standard WMA 9 files.The supported sampling rates are 11, 22, 44 and 48 KHz.To avoid reading and display problems, we recommend choosing file names less than 20 characters long that do not contain any special characters (e.g. “ ? . ; ù).Use only USB memory sticks in FAT or FAT32 format (File Allocation Table).
NOTIC E
We recommend using the original USB cable for the portable device.