2022 TOYOTA PROACE CITY VERSO buttons
[x] Cancel search: buttonsPage 162 of 320
162
Cruise control - particular
recommendations
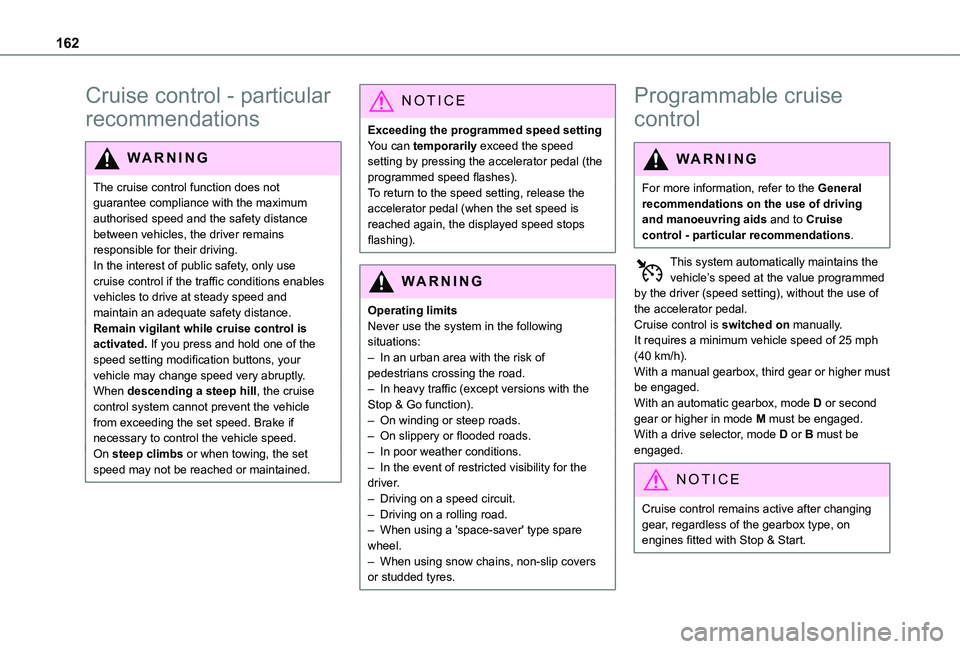
WARNI NG
The cruise control function does not guarantee compliance with the maximum authorised speed and the safety distance between vehicles, the driver remains
responsible for their driving.In the interest of public safety, only use cruise control if the traffic conditions enables vehicles to drive at steady speed and maintain an adequate safety distance.Remain vigilant while cruise control is activated. If you press and hold one of the speed setting modification buttons, your vehicle may change speed very abruptly.When descending a steep hill, the cruise control system cannot prevent the vehicle from exceeding the set speed. Brake if necessary to control the vehicle speed.On steep climbs or when towing, the set speed may not be reached or maintained.
NOTIC E
Exceeding the programmed speed settingYou can temporarily exceed the speed setting by pressing the accelerator pedal (the programmed speed flashes).To return to the speed setting, release the accelerator pedal (when the set speed is reached again, the displayed speed stops flashing).
WARNI NG
Operating limitsNever use the system in the following situations:– In an urban area with the risk of pedestrians crossing the road.– In heavy traffic (except versions with the Stop & Go function).– On winding or steep roads.– On slippery or flooded roads.
– In poor weather conditions.– In the event of restricted visibility for the driver.– Driving on a speed circuit.– Driving on a rolling road.– When using a 'space-saver' type spare wheel.– When using snow chains, non-slip covers or studded tyres.
Programmable cruise
control
WARNI NG
For more information, refer to the General recommendations on the use of driving and manoeuvring aids and to Cruise control - particular recommendations.
This system automatically maintains the vehicle’s speed at the value programmed by the driver (speed setting), without the use of the accelerator pedal.Cruise control is switched on manually.It requires a minimum vehicle speed of 25 mph (40 km/h).With a manual gearbox, third gear or higher must be engaged.With an automatic gearbox, mode D or second gear or higher in mode M must be engaged.With a drive selector, mode D or B must be
engaged.
NOTIC E
Cruise control remains active after changing gear, regardless of the gearbox type, on engines fitted with Stop & Start.
Page 166 of 320
166
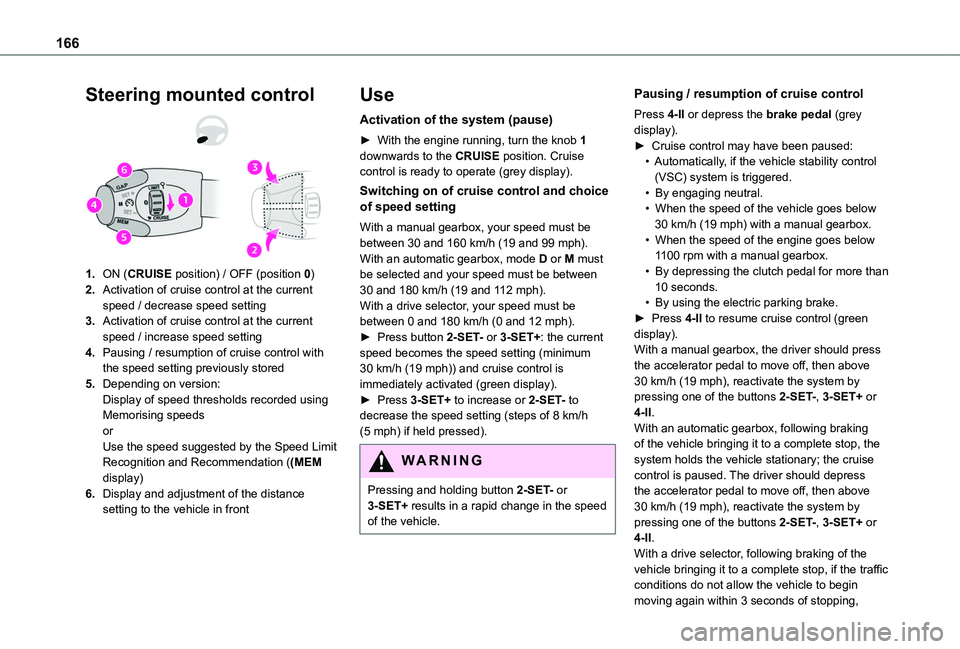
Steering mounted control
1.ON (CRUISE position) / OFF (position 0)
2.Activation of cruise control at the current speed / decrease speed setting
3.Activation of cruise control at the current speed / increase speed setting
4.Pausing / resumption of cruise control with the speed setting previously stored
5.Depending on version:Display of speed thresholds recorded using Memorising speedsorUse the speed suggested by the Speed Limit Recognition and Recommendation ((MEM display)
6.Display and adjustment of the distance setting to the vehicle in front
Use
Activation of the system (pause)
► With the engine running, turn the knob 1 downwards to the CRUISE position. Cruise control is ready to operate (grey display).
Switching on of cruise control and choice of speed setting
With a manual gearbox, your speed must be between 30 and 160 km/h (19 and 99 mph).With an automatic gearbox, mode D or M must be selected and your speed must be between 30 and 180 km/h (19 and 112 mph).With a drive selector, your speed must be between 0 and 180 km/h (0 and 12 mph).► Press button 2-SET- or 3-SET+: the current speed becomes the speed setting (minimum 30 km/h (19 mph)) and cruise control is immediately activated (green display).► Press 3-SET+ to increase or 2-SET- to decrease the speed setting (steps of 8 km/h (5 mph) if held pressed).
WARNI NG
Pressing and holding button 2-SET- or 3-SET+ results in a rapid change in the speed of the vehicle.
Pausing / resumption of cruise control
Press 4-II or depress the brake pedal (grey display).► Cruise control may have been paused:• Automatically, if the vehicle stability control (VSC) system is triggered.• By engaging neutral.• When the speed of the vehicle goes below 30 km/h (19 mph) with a manual gearbox.• When the speed of the engine goes below 1100 rpm with a manual gearbox.• By depressing the clutch pedal for more than 10 seconds.• By using the electric parking brake.► Press 4-II to resume cruise control (green display).With a manual gearbox, the driver should press the accelerator pedal to move off, then above 30 km/h (19 mph), reactivate the system by pressing one of the buttons 2-SET-, 3-SET+ or 4-II.With an automatic gearbox, following braking of the vehicle bringing it to a complete stop, the
system holds the vehicle stationary; the cruise control is paused. The driver should depress the accelerator pedal to move off, then above 30 km/h (19 mph), reactivate the system by pressing one of the buttons 2-SET-, 3-SET+ or 4-II.With a drive selector, following braking of the vehicle bringing it to a complete stop, if the traffic conditions do not allow the vehicle to begin
moving again within 3 seconds of stopping,
Page 209 of 320
209
Practical information
7
Overload indicator
The overload indicator is a driving aid and informs you that the maximum authorised weight has been exceeded; this may be either the gross vehicle weight (GVW) or the maximum authorised weight on either axle (front and rear) (GAWR).
WARNI NG
The indicator does not relieve the user from their responsibility.
NOTIC E
Even if you correctly measure the weight of the vehicle's load, any factor that may vary this weight (driver/additional passengers seated or taking on additional fuel) after the measurement may put the vehicle into the overload condition.
WARNI NG
The load includes the weight of the items stored in the loading area (including any fittings such as shelves), but also the weight of all persons on board the vehicle, the amount of fuel and various equipment fitted on the vehicle.For optimal performance, the vehicle must be parked and loaded on level ground (avoid the following conditions: parking on a slope or straddling a pavement).
WARNI NG
Attaching a trailer to your vehicle may affect the operation of the system.
Operation
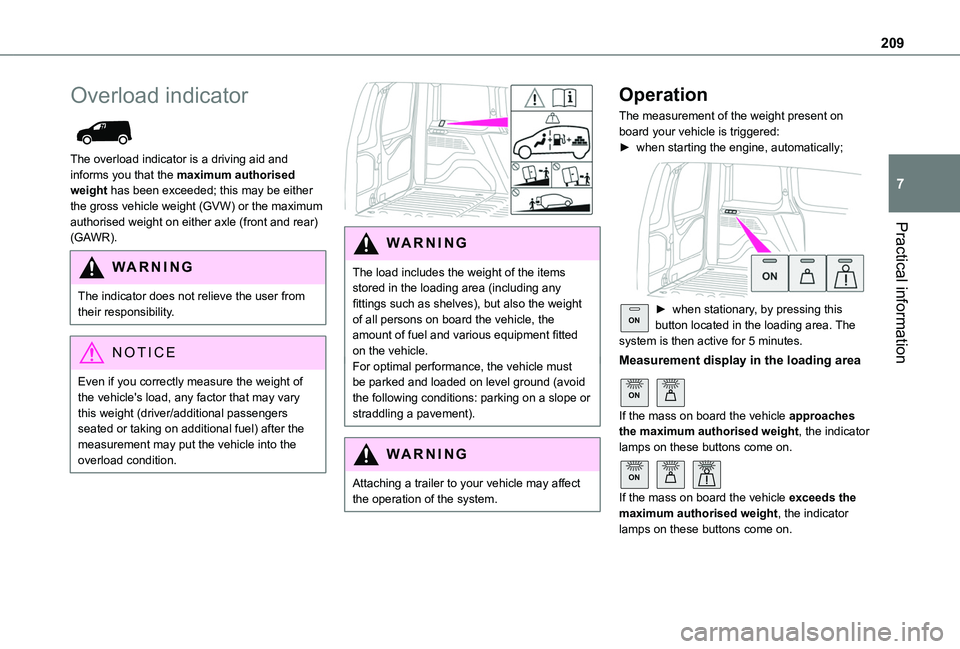
The measurement of the weight present on board your vehicle is triggered:► when starting the engine, automatically;
ON► when stationary, by pressing this button located in the loading area. The system is then active for 5 minutes.
Measurement display in the loading area
ON
If the mass on board the vehicle approaches the maximum authorised weight, the indicator lamps on these buttons come on.
ON
If the mass on board the vehicle exceeds the maximum authorised weight, the indicator lamps on these buttons come on.
Page 210 of 320
210
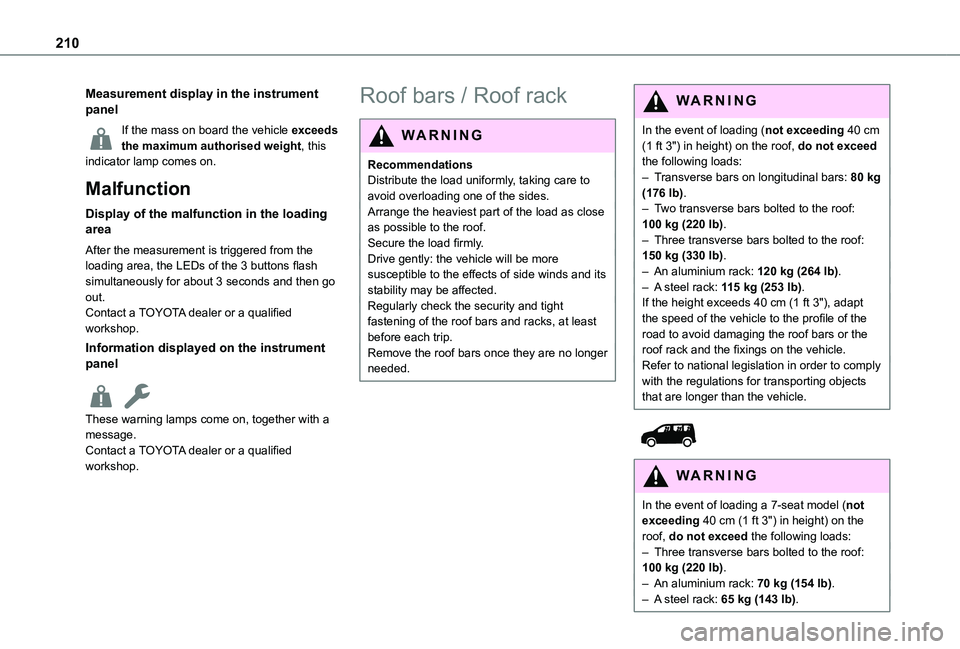
Measurement display in the instrument panel
If the mass on board the vehicle exceeds the maximum authorised weight, this indicator lamp comes on.
Malfunction
Display of the malfunction in the loading area
After the measurement is triggered from the loading area, the LEDs of the 3 buttons flash simultaneously for about 3 seconds and then go out.Contact a TOYOTA dealer or a qualified workshop.
Information displayed on the instrument panel
These warning lamps come on, together with a message.
Contact a TOYOTA dealer or a qualified workshop.
Roof bars / Roof rack
WARNI NG
RecommendationsDistribute the load uniformly, taking care to avoid overloading one of the sides.Arrange the heaviest part of the load as close as possible to the roof.Secure the load firmly.Drive gently: the vehicle will be more susceptible to the effects of side winds and its stability may be affected.Regularly check the security and tight fastening of the roof bars and racks, at least before each trip.Remove the roof bars once they are no longer needed.
WARNI NG
In the event of loading (not exceeding 40 cm (1 ft 3") in height) on the roof, do not exceed the following loads:– Transverse bars on longitudinal bars: 80 kg (176 lb).– Two transverse bars bolted to the roof: 100 kg (220 lb).– Three transverse bars bolted to the roof: 150 kg (330 lb).– An aluminium rack: 120 kg (264 lb).– A steel rack: 115 kg (253 lb).If the height exceeds 40 cm (1 ft 3"), adapt the speed of the vehicle to the profile of the road to avoid damaging the roof bars or the roof rack and the fixings on the vehicle.Refer to national legislation in order to comply with the regulations for transporting objects that are longer than the vehicle.
W ARNI NG
In the event of loading a 7-seat model (not exceeding 40 cm (1 ft 3") in height) on the roof, do not exceed the following loads:– Three transverse bars bolted to the roof: 100 kg (220 lb).– An aluminium rack: 70 kg (154 lb).– A steel rack: 65 kg (143 lb).
Page 256 of 320
256
Steering mounted controls
Steering mounted controls -
Type 1
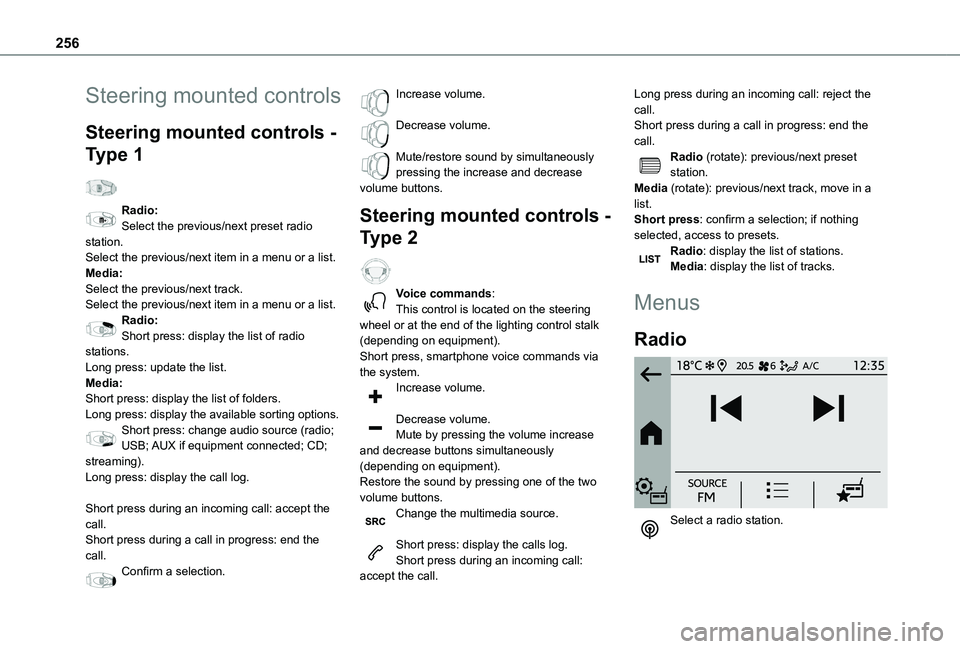
Radio:Select the previous/next preset radio station.Select the previous/next item in a menu or a list.Media:Select the previous/next track.Select the previous/next item in a menu or a list.Radio:Short press: display the list of radio stations.Long press: update the list.Media:Short press: display the list of folders.Long press: display the available sorting options.Short press: change audio source (radio;
USB; AUX if equipment connected; CD; streaming).Long press: display the call log.
Short press during an incoming call: accept the call.Short press during a call in progress: end the call.Confirm a selection.
Increase volume.
Decrease volume.
Mute/restore sound by simultaneously pressing the increase and decrease volume buttons.
Steering mounted controls -
Type 2
Voice commands:This control is located on the steering wheel or at the end of the lighting control stalk (depending on equipment).Short press, smartphone voice commands via the system.Increase volume.
Decrease volume.Mute by pressing the volume increase
and decrease buttons simultaneously (depending on equipment).Restore the sound by pressing one of the two volume buttons.Change the multimedia source.
Short press: display the calls log.Short press during an incoming call: accept the call.
Long press during an incoming call: reject the call.Short press during a call in progress: end the call.Radio (rotate): previous/next preset station.Media (rotate): previous/next track, move in a list.Short press: confirm a selection; if nothing selected, access to presets.Radio: display the list of stations.Media: display the list of tracks.
Menus
Radio
Select a radio station.
Page 258 of 320
258
Radio
Choose the band
Press the "Radio" menu.
Press the "SOURCE" button.Choose the band: FM, AM or DAB, depending on equipment.
Selecting a station
Press one of the buttons for an automatic search for radio stations.OrPress on the displayed frequency.
Enter the FM and AM waveband values using the virtual keypad.OrPress this button to display the list of stations received and available on the waveband.
WARNI NG
Radio reception may be affected by the use of electrical equipment not approved by the Brand, such as a USB charger connected to the 12 V socket.The exterior environment (hills, buildings, tunnels, basement car parks, etc.) may block reception, including in RDS mode. This behaviour is normal in propagation of radio
waves and does not indicate any failure of the audio system.
Presetting a station
Select a radio station or frequency.Press the "Presets" button.
Make a long press on an empty line to preset the station. An audible signal confirms the presetting of the station.It is possible to preset up to 16 stations.
NOTIC E
To replace a preset station by the currently playing station, make a long press on the preset station.
Activating/Deactivating RDS
RDS, if activated, allows you to continue listening to the same station by automatically retuning to alternative frequencies.
NOTIC E
In certain conditions, tracking may not be assured throughout the entire country as
radio stations do not cover 100% of the territory. This explains the loss of reception of the station during a journey.
Press the "Radio Settings" button.
Activate/Deactivate "RDS options".
Playing TA messages
The TA (Traffic Announcement) function gives priority to TA alert messages.To operate, this function needs good reception of a radio station that transmits this type of message. While traffic information is being broadcast, the current media is automatically interrupted so that the TA message can be heard. Normal play of the media previously playing is resumed at the end of the message.Press the "Radio Settings" button.
Activate/Deactivate "Traffic announcement (TA)".
Audio settings
Press the "Radio Settings" button.
In the list, select "Audio Settings".Activate/deactivate and configure the available options (sound balance, ambiances, etc.).
NOTIC E
The sound balance/distribution is audio processing that allows the quality of the sound to be adapted according to where the passengers are sitting in the vehicle.
Page 260 of 320
260
Bluetooth®streaming
Streaming allows you to listen to music from your smartphone.The Bluetooth profile must be activated, first adjust the volume on the portable device (to a high level).Then adjust the volume of the system.If play does not start automatically, it may be necessary to start the audio playback from the smartphone.Control is from the portable device or by using the system's touch buttons.
WARNI NG
Once connected in Streaming mode, the smartphone is considered to be a media source.
Connecting Apple® players
Connect the Apple® player to the USB socket using a suitable cable (not supplied).Play starts automatically.Control is via the audio system.
NOTIC E
The classifications available are those of the portable device connected (artists/albums/
genres/playlists/audio books/podcasts). It is
also possible to use a classification structured in the form of a library.The default classification used is by artist. To modify the classification used, return to the first level of the menu then select the desired classification (playlists for example) and confirm to go down through the menu to the desired track.
The version of software in the audio system may not be compatible with the generation of the Apple® player.
Media settings
Press the "Media Settings" button.
Activate/deactivate track playback options and access the audio settings.
NOTIC E
The audio settings are the same as the audio settings for the radio. For more information on the "Audio settings", refer to the corresponding section.
Information and advice
The system supports USB mass storage devices, BlackBerry® devices or Apple® players via the USB ports. The adapter cable is not supplied.
Devices are managed using the audio system controls.Other devices, not recognised on connection, must be connected to the auxiliary socket using a jack cable (not supplied) or via Bluetooth streaming, if compatible.
WARNI NG
To protect the system, do not use a USB hub.
The audio system will only play audio files with ".wav", ".wma", ".aac", ".mp3", ".mp4", ".m4a", ".flac", ".ogg" file extensions and with a bit rate of between 32 Kbps and 320 Kbps (300 Kbps maximum for ".flac" files).It also supports VBR (Variable Bit Rate) mode.All ".wma" files must be standard WMA 9 files.The supported sampling rates are 11, 22, 44 and 48 KHz.To avoid reading and display problems, we recommend choosing file names less than 20 characters long that do not contain any special characters (e.g. “ ? . ; ù).Use only USB memory sticks in FAT or FAT32 format (File Allocation Table).
NOTIC E
We recommend using the original USB cable for the portable device.
Page 262 of 320
262
Deleting a telephone
Press the "Bluetooth" button.
Press "Manage connections".In the displayed window select "Delete".The list of paired devices is displayed.Press on the name of the telephone to delete.
Receiving a call
An incoming call is announced by a ring and a superimposed display in the screen.To accept the call:Make a short press on the steering mounted TEL button.To reject the call:Make a long press
on the steering mounted TEL button.
OrPress "End call" on the touch screen.
Making a call
WARNI NG
Using the telephone is not recommended while driving.Parking the vehicle.Make the call using the steering mounted controls.
Calling a new number
Press "Telephone".
Press the "Keypad" button.
Enter the phone number using the digital keypad.Press "OK" to start the call.
Calling a contact
Press the "Telephone" menu.
Or make a long press
on the steering mounted TEL button.
Press "Contacts".Select the desired contact from the list offered.
Calling a recently used number
Press "Telephone".
Press "Calls".OrMake a long press
on the steering mounted TEL button.
Select the desired contact from the list offered.
NOTIC E
A call in progress remains active in the vehicle for 10 minutes after switching off the ignition. After that, the system switches off and the call automatically redirects to the telephone.
NOTIC E
It is always possible to make a call directly from the telephone; as a safety measure, first park the vehicle.
Settings
Adjusting the brightness
Press "Settings".
Select "Display".Press the buttons to adjust the brightness of the screen and/or of the instrument panel (depending on version).
Modifying system settings
Press "Settings".
Press "System".Press "Privacy" to access the privacy settings.