2022 TOYOTA PROACE CITY VERSO steering wheel
[x] Cancel search: steering wheelPage 2 of 320
2
■Overview
Overview 4Labels 6
■Eco-driving
1Instruments
Instrument panels 10Warning and indicator lamps 14Indicators 20Trip computer 28Touch screen BLUETOOTH audio system 29Touch screen 30Setting the date and time 32
2Access
Electronic key with remote control function and built-in key, 33Back-up procedures 41Central locking / unlocking 44Doors 46General recommendations for the sliding side doors 47Rear roof flap 48Alarm 49Electric windows 52Tilting rear door windows 53
3Ease of use and comfort
General recommendations for the seats 54Front seats 54Steering wheel adjustment 57Mirrors 582-seat front bench seat 59Rear bench seat (row 2) 61
Rear seats (row 2) 62Rear seats (row 3) 63Interior fittings 65Two-position luggage cover shelf (removable) 71Luggage cover (7-seat) 71Warning triangle 73Extenso cabin 75Crew cab 76Heating and Ventilation 80Heating 81Manual air conditioning 81Dual-zone automatic air conditioning 83Front demisting - defrosting 85Heated windscreen 86Rear screen and/or door mirror demisting/de-icing 86Rear heating and air conditioning 87Additional heating/ventilation system 87A/C preconditioning (Electric) 89
4Lighting and visibility
Lighting control lever 92Direction indicators 93Parking lamps 93Automatic illumination of headlamps 94Daytime running lamps / Sidelamps 94Guide-me-home and welcome lighting 95Automatic lighting systems - General recommendations 95Automatic headlamp dipping 96Headlamp beam height adjustment 97Wiper control lever 97Changing a wiper blade 99Automatic wipers 100
5Safety
General safety recommendations 101Emergency or assistance call 102Hazard warning lamps 104Horn 104Pedestrian horn (Electric) 104Vehicle stability control (VSC) 105Toyota Traction Select 107Hill Assist Descent Control 108Seat belts 11 0Airbags 11 4Child seats 11 7Deactivating the front passenger airbag 11 9ISOFIX child seats 124i-Size child seats 127Manual child lock 128Electric child lock 128
6Driving
Driving recommendations 129Starting/switching off the engine 131Manual parking brake 136Electric parking brake 136Hill start assist 1395-speed manual gearbox 1406-speed manual gearbox 140Automatic gearboxes 141Drive selector (Electric) 147Driving modes 148Gear efficiency indicator 149Stop & Start (Petrol or Diesel) 149Under-inflation detection 151Head-up display 153Driving and manoeuvring aids - General recommendations 154
Page 3 of 320
3
Contents
Speed Limit Recognition and Recommendation 156Speed limiter 159Fixed speed limiter 161Cruise control - particular recommendations 162Programmable cruise control 162Adaptive Cruise Control 165Memorising speeds 169Active Safety Brake with Collision Risk Alert and Intelligent emergency braking assistance 169Active Lane Departure Warning System 173Blind Spot Monitoring System 176Distraction detection 178Parking sensors 179Reversing Camera 182Surround Rear Vision 183Top Rear Vision 186Park Assist 188
7Practical information
Compatibility of fuels 192Refuelling 192Misfuel prevention (Diesel) 194Charging system (Electric) 195Charging the traction battery (Electric) 202Energy economy mode 206Snow chains 206Very cold climate screen 207Towing device 208Overload indicator 209Roof bars / Roof rack 210Bonnet 2 11Engine compartment 212Checking levels 213Speed checks 215
AdBlue® (Diesel engines) 217Free-wheeling 220Advice on care and maintenance 221
8In the event of a breakdown
Running out of fuel (Diesel) 223Tool kit 223Temporary puncture repair kit 225Spare wheel 227Changing a bulb 230Fuses 23612 V battery / Accessory battery 237Towing 241
9Technical data
Dimensions 243Engine technical data and towed loads 248Petrol motors 249Diesel motors 251Electric motor 253Identification markings 254
10 Touch screen BLUETOOTH audio system
First steps 255Steering mounted controls 256Menus 256Radio 258DAB (Digital Audio Broadcasting) radio 259Media 259Telephone 261Settings 262Frequently asked questions 263
11TOYOTA Connect Radio
First steps 265Steering mounted controls 266Menus 267Applications 268Radio 268DAB (Digital Audio Broadcasting) radio 270Media 271Telephone 272Settings 275Frequently asked questions 277
12TOYOTA Connect Nav
First steps 279Steering mounted controls 280Menus 280Voice commands 282Navigation 286Connected navigation 288Applications 291Radio 294DAB (Digital Audio Broadcasting) radio 295Media 296Telephone 297Settings 300Frequently asked questions 303
■Alphabetical index
Page 4 of 320
4
Presentation
Presentation
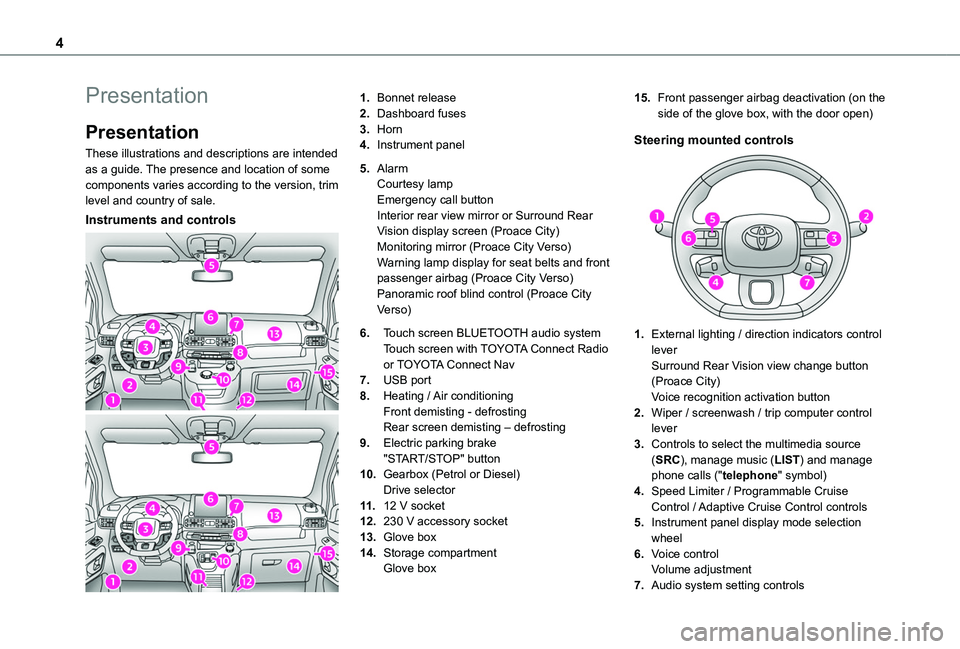
These illustrations and descriptions are intended as a guide. The presence and location of some components varies according to the version, trim level and country of sale.
Instruments and controls
1.Bonnet release
2.Dashboard fuses
3.Horn
4.Instrument panel
5.AlarmCourtesy lampEmergency call buttonInterior rear view mirror or Surround Rear Vision display screen (Proace City)Monitoring mirror (Proace City Verso)Warning lamp display for seat belts and front passenger airbag (Proace City Verso)Panoramic roof blind control (Proace City Verso)
6.Touch screen BLUETOOTH audio systemTouch screen with TOYOTA Connect Radio or TOYOTA Connect Nav
7.USB port
8.Heating / Air conditioningFront demisting - defrostingRear screen demisting – defrosting
9.Electric parking brake"START/STOP" button
10.Gearbox (Petrol or Diesel)Drive selector
11 .12 V socket
12.230 V accessory socket
13.Glove box
14.Storage compartmentGlove box
15.Front passenger airbag deactivation (on the side of the glove box, with the door open)
Steering mounted controls
1.External lighting / direction indicators control leverSurround Rear Vision view change button (Proace City)Voice recognition activation button
2.Wiper / screenwash / trip computer control lever
3.Controls to select the multimedia source
(SRC), manage music (LIST) and manage phone calls ("telephone" symbol)
4.Speed Limiter / Programmable Cruise Control / Adaptive Cruise Control controls
5.Instrument panel display mode selection wheel
6.Voice controlVolume adjustment
7.Audio system setting controls
Page 13 of 320
13
Instruments
1
NOTIC E
Display language and unitsThese depend on the touch screen settings.When travelling abroad, the speed must be shown in the official units of the country you are driving in (mph, miles or km/h, km).
WARNI NG
As a safety measure, these adjustments must be carried out with the vehicle stationary.
Choice of display colour (Petrol or Diesel)
Depending on version, the instrument panel display colour depends on the colour scheme chosen in the touch screen.The settings are changed via the Settings touch screen menu.
Choosing the display mode
In each mode, specific types of information are displayed on the instrument panel.
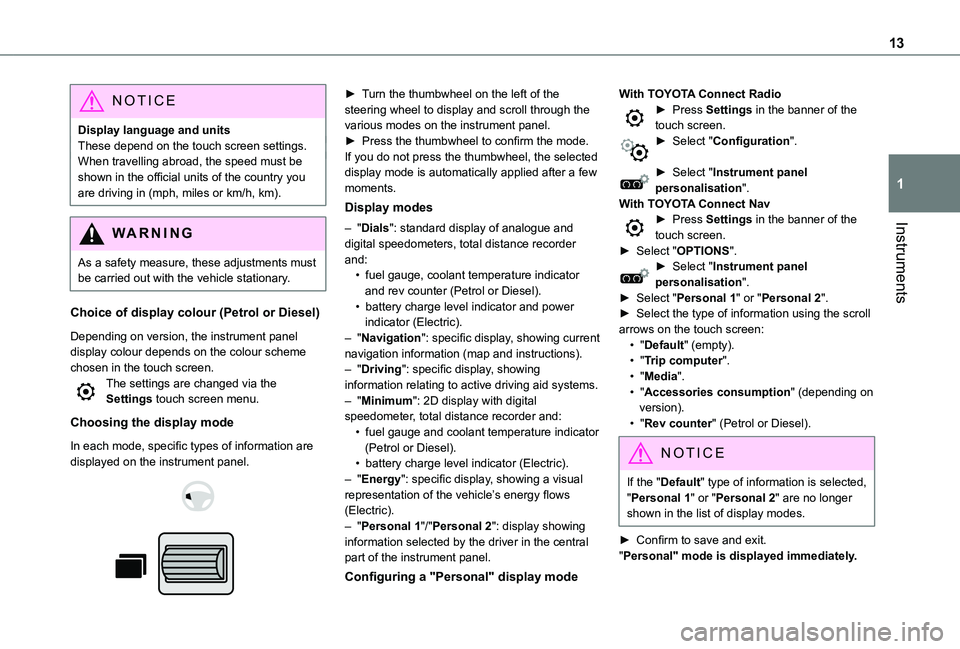
► Turn the thumbwheel on the left of the steering wheel to display and scroll through the various modes on the instrument panel.► Press the thumbwheel to confirm the mode.If you do not press the thumbwheel, the selected display mode is automatically applied after a few moments.
Display modes
– "Dials": standard display of analogue and digital speedometers, total distance recorder and:• fuel gauge, coolant temperature indicator and rev counter (Petrol or Diesel).• battery charge level indicator and power indicator (Electric).– "Navigation": specific display, showing current navigation information (map and instructions).– "Driving": specific display, showing information relating to active driving aid systems.– "Minimum": 2D display with digital speedometer, total distance recorder and:• fuel gauge and coolant temperature indicator
(Petrol or Diesel).• battery charge level indicator (Electric).– "Energy": specific display, showing a visual representation of the vehicle’s energy flows (Electric).– "Personal 1"/"Personal 2": display showing information selected by the driver in the central part of the instrument panel.
Configuring a "Personal" display mode
With TOYOTA Connect Radio► Press Settings in the banner of the touch screen.► Select "Configuration".
► Select "Instrument panel personalisation".With TOYOTA Connect Nav► Press Settings in the banner of the touch screen.► Select "OPTIONS".► Select "Instrument panel personalisation".► Select "Personal 1" or "Personal 2".► Select the type of information using the scroll arrows on the touch screen:• "Default" (empty).• "Trip computer".• "Media".• "Accessories consumption" (depending on version).• "Rev counter" (Petrol or Diesel).
NOTIC E
If the "Default" type of information is selected, "Personal 1" or "Personal 2" are no longer shown in the list of display modes.
► Confirm to save and exit."Personal" mode is displayed immediately.
Page 21 of 320
21
Instruments
1
Service spannerLights up temporarily when the ignition is switched on.Between 3,000 km (1,800 miles) and 1,000 km (600 miles) remain before the next service is due.Fixed, when the ignition is switched on.The service is due in less than 1,000 km (600 miles).Have your vehicle serviced very soon.
Service spanner flashingFlashing then fixed, when the ignition is switched on.(With Diesel engines, combined with the Service warning lamp.)The servicing interval has been exceeded.Have your vehicle serviced as soon as possible.
Resetting the service indicator
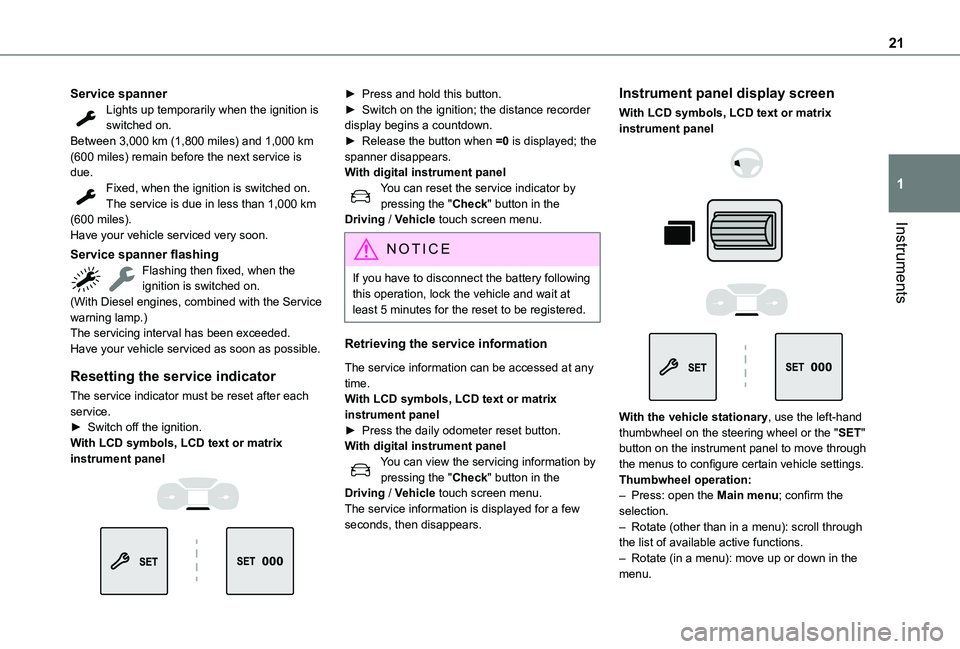
The service indicator must be reset after each service.► Switch off the ignition.With LCD symbols, LCD text or matrix
instrument panel
► Press and hold this button.► Switch on the ignition; the distance recorder display begins a countdown.► Release the button when =0 is displayed; the spanner disappears.With digital instrument panelYou can reset the service indicator by pressing the "Check" button in the Driving / Vehicle touch screen menu.
NOTIC E
If you have to disconnect the battery following this operation, lock the vehicle and wait at least 5 minutes for the reset to be registered.
Retrieving the service information
The service information can be accessed at any time.With LCD symbols, LCD text or matrix instrument panel► Press the daily odometer reset button.With digital instrument panelYou can view the servicing information by pressing the "Check" button in the Driving / Vehicle touch screen menu.The service information is displayed for a few seconds, then disappears.
Instrument panel display screen
With LCD symbols, LCD text or matrix instrument panel
With the vehicle stationary, use the left-hand thumbwheel on the steering wheel or the "SET" button on the instrument panel to move through the menus to configure certain vehicle settings.
Thumbwheel operation:– Press: open the Main menu; confirm the selection.– Rotate (other than in a menu): scroll through the list of available active functions.– Rotate (in a menu): move up or down in the menu.
Page 28 of 320
28
Trip computer
Information displayed about the current journey (range, fuel consumption, average speed, etc.).
Information display
Details are displayed successively.– Trip mileage.– Range.– Current fuel consumption.– Average speed.– Stop & Start time counter.– Information from the speed limit recognition system.
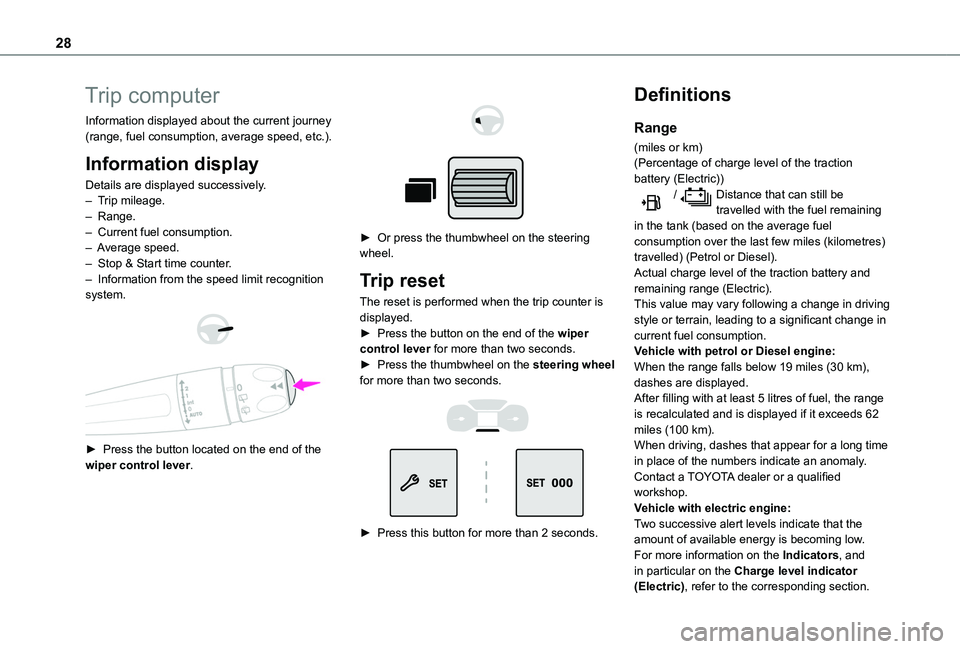
► Press the button located on the end of the wiper control lever.
► Or press the thumbwheel on the steering wheel.
Trip reset
The reset is performed when the trip counter is displayed.► Press the button on the end of the wiper control lever for more than two seconds.► Press the thumbwheel on the steering wheel for more than two seconds.
► Press this button for more than 2 seconds.
Definitions
Range
(miles or km)(Percentage of charge level of the traction battery (Electric)) / Distance that can still be travelled with the fuel remaining in the tank (based on the average fuel consumption over the last few miles (kilometres) travelled) (Petrol or Diesel).Actual charge level of the traction battery and remaining range (Electric).This value may vary following a change in driving style or terrain, leading to a significant change in current fuel consumption.Vehicle with petrol or Diesel engine:When the range falls below 19 miles (30 km), dashes are displayed.After filling with at least 5 litres of fuel, the range is recalculated and is displayed if it exceeds 62 miles (100 km).
When driving, dashes that appear for a long time in place of the numbers indicate an anomaly.Contact a TOYOTA dealer or a qualified workshop.Vehicle with electric engine:Two successive alert levels indicate that the amount of available energy is becoming low.For more information on the Indicators, and in particular on the Charge level indicator (Electric), refer to the corresponding section.
Page 35 of 320
35
Access
2
Advice
WARNI NG
Remote controlThe remote control is a sensitive, high-frequency device; avoid handling it in your pocket, due to the risk of unintentionally unlocking the vehicle.Avoid pressing the remote control buttons
while out of range of the vehicle, due to the risk of rendering the remote control inoperative. It would then be necessary to reset it.The remote control does not work when the key is in the ignition switch, even when the ignition is switched off.
WARNI NG
Anti-theft protectionDo not modify the electronic vehicle immobiliser, as this might result in malfunctions.For vehicles with a key ignition switch, remember to remove the key and turn the steering wheel to engage the steering lock.
WARNI NG
Locking the vehicleDriving with the doors locked could make it more difficult for the emergency services to enter the vehicle in an emergency.As a safety precaution, remove the key from the ignition or take the electronic key with you when leaving the vehicle, even for a short time.
NOTIC E
Purchasing a second-hand vehicleHave the key codes memorised by a TOYOTA dealer, to ensure that the keys in your possession are the only ones able to start the vehicle.
WARNI NG
Accumulations (water, dust, grime, salt, etc.) on the inner surface of the door handle may affect detection.If cleaning the inner surface of the door handle using a cloth does not restore detection, contact a TOYOTA dealer or a qualified workshop.A sudden splash of water (stream of water, high pressure jet washer, etc.) may be identified by the system as the desire to open the vehicle.
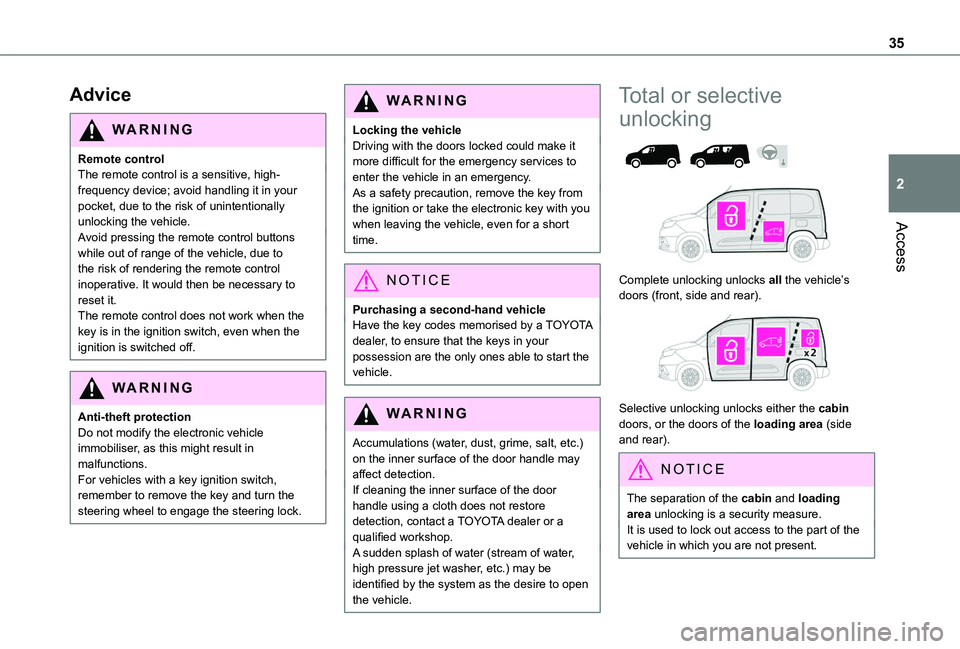
Total or selective
unlocking
Complete unlocking unlocks all the vehicle’s doors (front, side and rear).
Selective unlocking unlocks either the cabin doors, or the doors of the loading area (side and rear).
NOTIC E
The separation of the cabin and loading area unlocking is a security measure.It is used to lock out access to the part of the vehicle in which you are not present.
Page 54 of 320
54
General
recommendations for the
seats
WARNI NG
For safety reasons, seat adjustments must only be made when the vehicle is stationary.
WARNI NG
Folding or unfolding the seat backrests must only be done with the vehicle stationary.
WARNI NG
Before moving the seat backwards, ensure that there is no person or object that might prevent the full travel of the seat.There is a risk of trapping or pinching
passengers if present in the rear seats or of jamming the seat if large objects are placed on the floor behind the seat.
WARNI NG
Do not place hard or heavy objects on the backrests forming a table. They could become
dangerous projectiles in the event of sudden braking or a collision.– Do not remove a head restraint without stowing it; secure it to a support inside the vehicle.– Check that the seat belts remain accessible to the passenger and easy to fasten.– Passengers must never take their seat without adjusting and fastening their seat belt.– In row 3, be careful not to leave your feet under the row 2 seat while it is being tilted.– When a row 3 seat is in the fully folded position, ensure that the strap is correctly hooked to the Top Tether fixing of the row 2 backrest: risk of unexpected tipping of the seat.
WARNI NG
Before carrying out the manoeuvres, check that nothing and no one is obstructing the moving elements and their locking.
To avoid sudden folding, take care to hold the backrest and support it until it is horizontal.Never put your hand underneath the seat cushion to guide the seat downwards or upwards, you could get your fingers trapped. Place your hand on the grip/strap (depending on equipment) at the top of the seat cushion.
WARNI NG
Please note: an incorrectly latched backrest compromises the safety of passengers in the event of sudden braking or an impact.The contents of the boot may be thrown forward - risk of severe injury!
Front seats
Correct driving position
Before taking to the road and to make the most of the ergonomic layout of the instruments and controls, carry out these adjustments in the following order:– head restraint height.– seat backrest angle.– seat cushion height.– longitudinal seat position.– steering wheel height and reach.– rear view mirror and door mirrors.