2022 TOYOTA PROACE CITY check engine
[x] Cancel search: check enginePage 140 of 320
140
Malfunction
If the event of a malfunction, these warning lamps light up on the instrument panel, accompanied by the display of a message.Have it checked by any authorized Toyota retailer or Toyota authorized repairer, or any reliable repairer.
5-speed manual gearbox
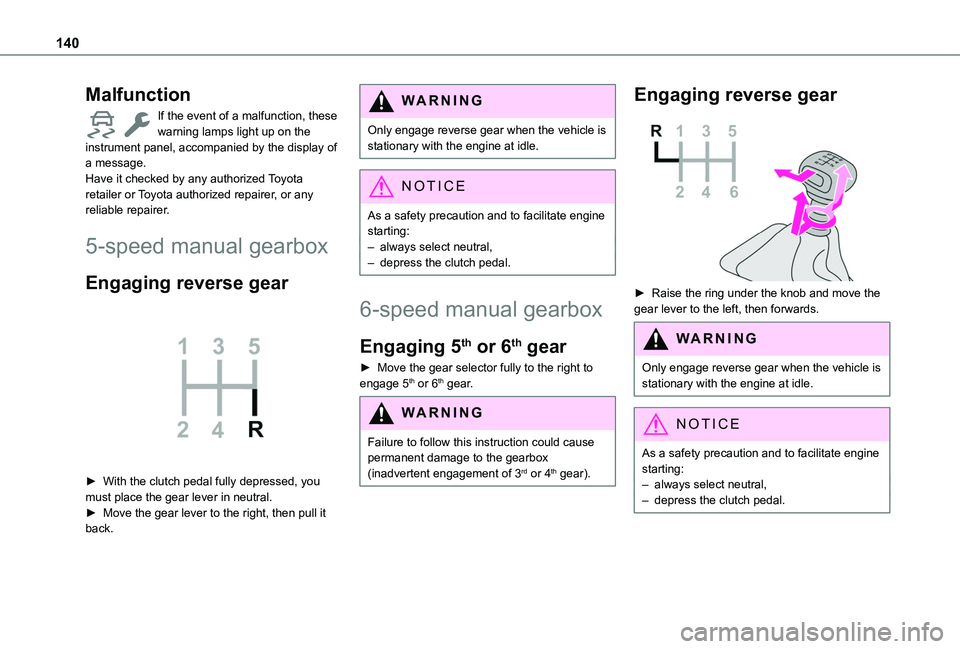
Engaging reverse gear
► With the clutch pedal fully depressed, you must place the gear lever in neutral.► Move the gear lever to the right, then pull it back.
WARNI NG
Only engage reverse gear when the vehicle is stationary with the engine at idle.
NOTIC E
As a safety precaution and to facilitate engine starting:
– always select neutral,– depress the clutch pedal.
6-speed manual gearbox
Engaging 5th or 6th gear
► Move the gear selector fully to the right to engage 5th or 6th gear.
WARNI NG
Failure to follow this instruction could cause permanent damage to the gearbox (inadvertent engagement of 3rd or 4th gear).
Engaging reverse gear
► Raise the ring under the knob and move the gear lever to the left, then forwards.
WARNI NG
Only engage reverse gear when the vehicle is stationary with the engine at idle.
NOTIC E
As a safety precaution and to facilitate engine starting:– always select neutral,– depress the clutch pedal.
Page 144 of 320
144
Invalid value during manual
operation
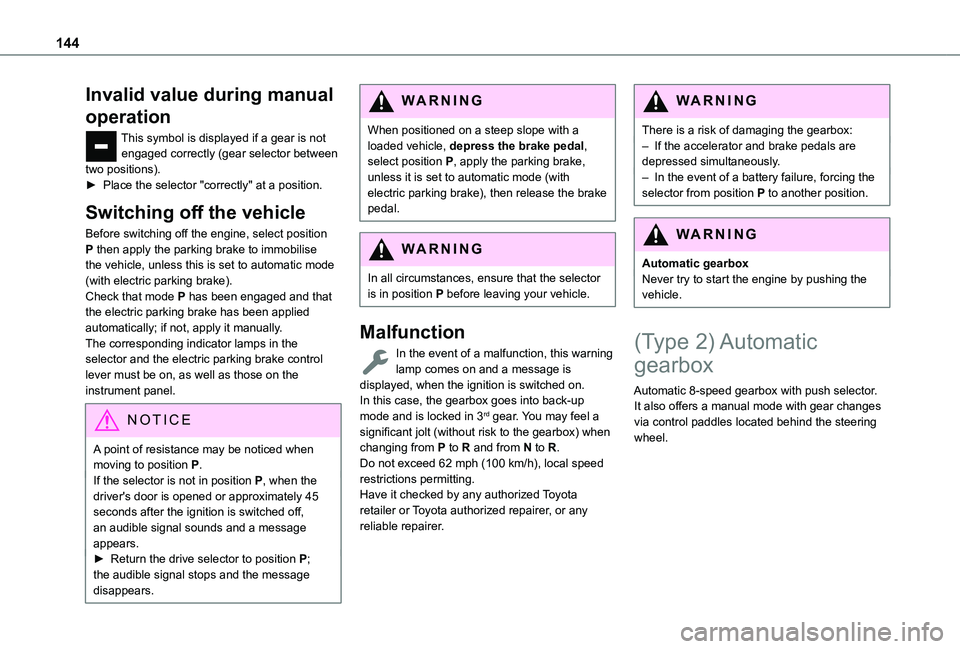
This symbol is displayed if a gear is not engaged correctly (gear selector between two positions).► Place the selector "correctly" at a position.
Switching off the vehicle
Before switching off the engine, select position P then apply the parking brake to immobilise the vehicle, unless this is set to automatic mode (with electric parking brake).Check that mode P has been engaged and that the electric parking brake has been applied automatically; if not, apply it manually.The corresponding indicator lamps in the selector and the electric parking brake control lever must be on, as well as those on the instrument panel.
NOTIC E
A point of resistance may be noticed when moving to position P.If the selector is not in position P, when the driver's door is opened or approximately 45 seconds after the ignition is switched off, an audible signal sounds and a message appears.► Return the drive selector to position P; the audible signal stops and the message disappears.
WARNI NG
When positioned on a steep slope with a loaded vehicle, depress the brake pedal, select position P, apply the parking brake, unless it is set to automatic mode (with electric parking brake), then release the brake pedal.
WARNI NG
In all circumstances, ensure that the selector is in position P before leaving your vehicle.
Malfunction
In the event of a malfunction, this warning lamp comes on and a message is displayed, when the ignition is switched on.In this case, the gearbox goes into back-up mode and is locked in 3rd gear. You may feel a significant jolt (without risk to the gearbox) when changing from P to R and from N to R.Do not exceed 62 mph (100 km/h), local speed restrictions permitting.Have it checked by any authorized Toyota retailer or Toyota authorized repairer, or any reliable repairer.
WARNI NG
There is a risk of damaging the gearbox:– If the accelerator and brake pedals are depressed simultaneously.– In the event of a battery failure, forcing the selector from position P to another position.
WARNI NG
Automatic gearboxNever try to start the engine by pushing the vehicle.
(Type 2) Automatic
gearbox
Automatic 8-speed gearbox with push selector. It also offers a manual mode with gear changes via control paddles located behind the steering wheel.
Page 146 of 320
146
NOTIC E
If you open the driver's door while mode N is engaged, an audible signal will sound and mode P will be engaged. The audible signal stops when the driver's door is closed.
WARNI NG
At speeds below 3 mph (5 km/h), opening the driver’s door will engage mode P - risk of sudden braking!
WARNI NG
In the event of battery failure, it is essential to place the chock(s) supplied with the tool kit against one of the wheels to immobilise the vehicle.
Special aspects of automatic mode
The gearbox selects the gear that provides optimal performance based on ambient temperature, road profile, vehicle loading and driving style.For maximum acceleration, press the accelerator fully down (kick-down). The gearbox changes
down automatically or holds the selected gear until the maximum engine speed is reached.
Steering mounted controls allow the driver to temporarily select a gear, if the vehicle speed and engine speed conditions permit.
Special aspects of manual mode
The gearbox only changes from one gear to another if the vehicle speed and engine speed conditions permit.
Starting the vehicle
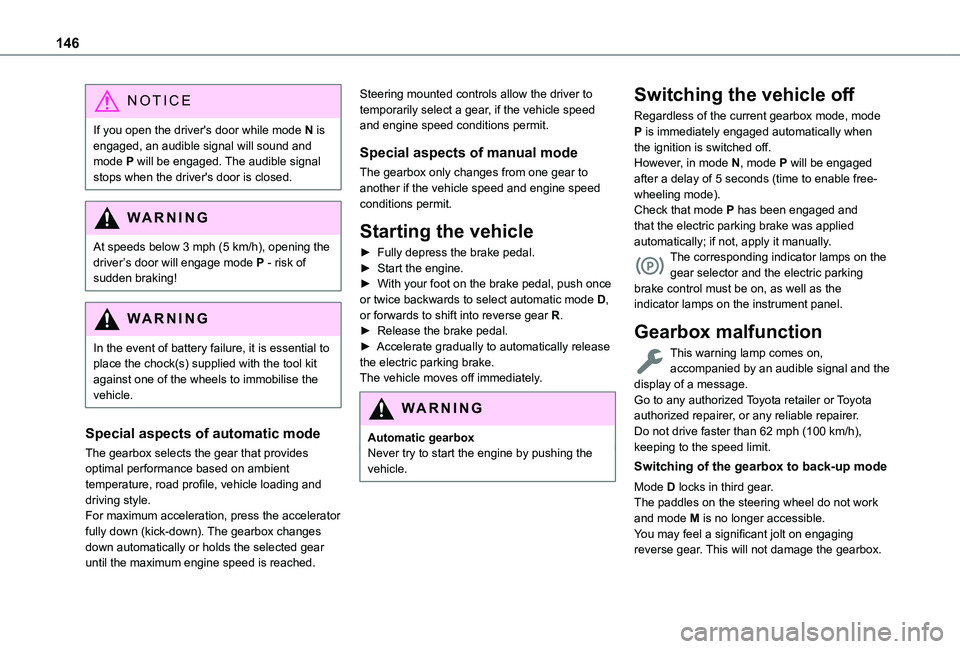
► Fully depress the brake pedal.► Start the engine.► With your foot on the brake pedal, push once or twice backwards to select automatic mode D, or forwards to shift into reverse gear R.► Release the brake pedal.► Accelerate gradually to automatically release the electric parking brake.The vehicle moves off immediately.
WARNI NG
Automatic gearbox
Never try to start the engine by pushing the vehicle.
Switching the vehicle off
Regardless of the current gearbox mode, mode P is immediately engaged automatically when the ignition is switched off.However, in mode N, mode P will be engaged after a delay of 5 seconds (time to enable free-wheeling mode).Check that mode P has been engaged and that the electric parking brake was applied automatically; if not, apply it manually.The corresponding indicator lamps on the gear selector and the electric parking brake control must be on, as well as the indicator lamps on the instrument panel.
Gearbox malfunction
This warning lamp comes on, accompanied by an audible signal and the display of a message.Go to any authorized Toyota retailer or Toyota authorized repairer, or any reliable repairer.Do not drive faster than 62 mph (100 km/h),
keeping to the speed limit.
Switching of the gearbox to back-up mode
Mode D locks in third gear.The paddles on the steering wheel do not work and mode M is no longer accessible.You may feel a significant jolt on engaging reverse gear. This will not damage the gearbox.
Page 151 of 320
151
Driving
6
Restarting the engine (START mode)
The engine automatically restarts as soon as the driver indicates the intention of moving off again.– With a manual gearbox: with the clutch pedal fully depressed.– With an automatic gearbox:• With the selector in position D or M: with the brake pedal released.• With the selector in position N and the brake pedal released: with the selector at D or M.• With the selector in position P and the brake pedal depressed: with the selector at R, N, D or M.
Special cases
The engine will restart automatically if all conditions for operation are met again and in the following case.– Speed of the vehicle exceeds 3 km/h (2 mph) (depending on the engine).In this case, this indicator lamp flashes for a few seconds, then goes off.
Malfunctions
Depending on the vehicle’s equipment:In the event of a system malfunction, this warning lamp flashes on the instrument panel.The warning lamp in this button flashes and a message appears, accompanied by an audible signal.Have the vehicle checked by a TOYOTA dealer or a qualified workshop.
The vehicle stalls in STOP mode
All of the instrument panel warning lamps come on if there is a fault.Depending on version, a warning message may also be displayed, prompting you to place the gear selector in position N and depress the brake pedal.► Switch off the ignition then start the engine again with the key or the "START/STOP" button.
WARNI NG
12 V batteryThe Stop & Start system requires a 12 V battery of specific technology and specification.All work must be carried out only by any authorized Toyota retailer or Toyota authorized repairer, or any reliable repairer.
Under-inflation detection
This system alerts the driver if one or more tyres suffer a drop in pressure.The alert is raised when the vehicle is moving, not when stationary.It compares the information given by the wheel speed sensors with reference values, which must be reinitialised every time the tyre pressures are adjusted or a wheel changed.It takes into account the last values stored during the reinitialisation request. It is therefore essential that the tyre pressure is correct during the operation. This operation is the driver's responsibility.
WARNI NG
The tyre under-inflation detection cannot, in any circumstances, replace the need for vigilance on the part of the driver.This system does not avoid the need to regularly check the tyre pressures (including the spare wheel), especially before a long journey.Driving with under-inflated tyres, particularly in adverse conditions (heavy load, high speed, long journey):– worsens road-holding.– lengthens braking distances.– causes premature wear of the tyres.– increases energy consumption.
Page 154 of 320
154
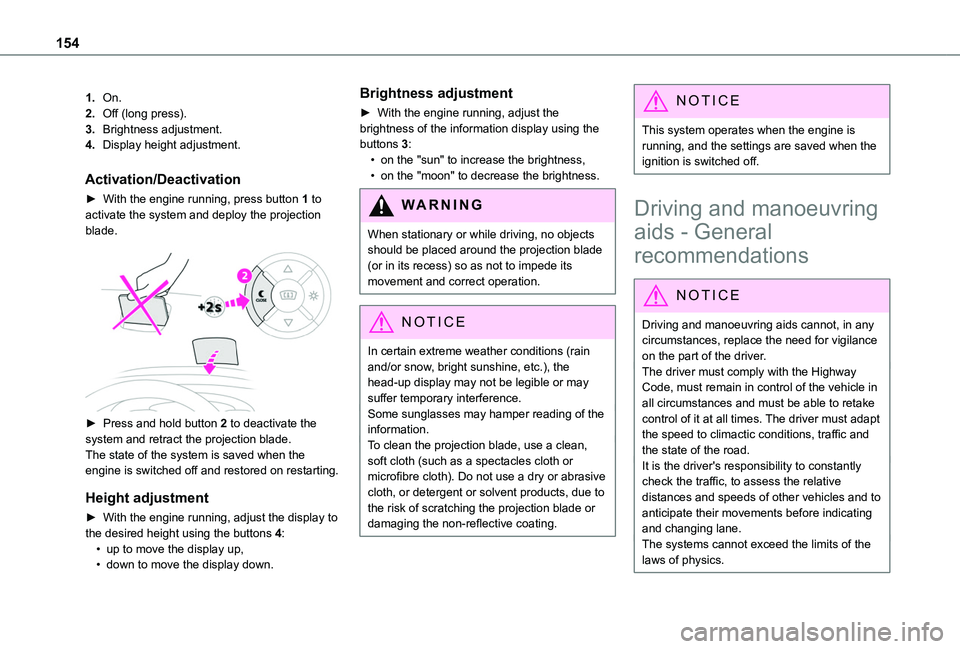
1.On.
2.Off (long press).
3.Brightness adjustment.
4.Display height adjustment.
Activation/Deactivation
► With the engine running, press button 1 to activate the system and deploy the projection blade.
► Press and hold button 2 to deactivate the system and retract the projection blade.
The state of the system is saved when the engine is switched off and restored on restarting.
Height adjustment
► With the engine running, adjust the display to the desired height using the buttons 4:• up to move the display up,• down to move the display down.
Brightness adjustment
► With the engine running, adjust the brightness of the information display using the buttons 3:• on the "sun" to increase the brightness,• on the "moon" to decrease the brightness.
W ARNI NG
When stationary or while driving, no objects
should be placed around the projection blade (or in its recess) so as not to impede its movement and correct operation.
NOTIC E
In certain extreme weather conditions (rain and/or snow, bright sunshine, etc.), the head-up display may not be legible or may suffer temporary interference.Some sunglasses may hamper reading of the information.To clean the projection blade, use a clean, soft cloth (such as a spectacles cloth or microfibre cloth). Do not use a dry or abrasive cloth, or detergent or solvent products, due to the risk of scratching the projection blade or damaging the non-reflective coating.
NOTIC E
This system operates when the engine is running, and the settings are saved when the ignition is switched off.
Driving and manoeuvring
aids - General
recommendations
NOTIC E
Driving and manoeuvring aids cannot, in any circumstances, replace the need for vigilance on the part of the driver.The driver must comply with the Highway Code, must remain in control of the vehicle in all circumstances and must be able to retake control of it at all times. The driver must adapt the speed to climactic conditions, traffic and
the state of the road.It is the driver's responsibility to constantly check the traffic, to assess the relative distances and speeds of other vehicles and to anticipate their movements before indicating and changing lane.The systems cannot exceed the limits of the laws of physics.
Page 172 of 320
172
NOTIC E
The speed will be reduced by a maximum of 16 mph (25 km/h) for versions with camera only, or by a maximum of 31 mph (50 km/h) for versions with camera and radar.
Operation
The system operates subject to the following conditions:– At reduced speed in an urban environment, when a pedestrian is detected.– At reduced speed in an urban environment, when a stationary vehicle is detected.– The vehicle's speed is between 10 km/h and 85 km/h (6 mph and 53 mph) when a moving vehicle is detected.This warning lamp flashes (for approximately 10 seconds) as soon as the function applies the vehicle’s brakes.With an automatic gearbox, in the event of automatic emergency braking bringing the
vehicle to a complete stop, keep the brake pedal depressed to prevent the vehicle from moving off again.With a manual gearbox, in the event of automatic emergency braking bringing the vehicle to a complete stop, the engine may stall.
NOTIC E
The driver can maintain control of the vehicle at any time by firmly turning the steering wheel and/or firmly depressing the accelerator pedal.
NOTIC E
The brake pedal may vibrate slightly while the function is operating.If the vehicle comes to a complete stop, automatic braking is maintained for 1 to 2 seconds.
Deactivation/Activation
By default, the system is automatically activated at every engine start.The settings are changed via the Driving / Vehicle touch screen menu.Deactivation of the system is signalled by the illumination of this warning lamp, accompanied by the display of a message.
Malfunction
In the event of a malfunction, this warning lamp comes on on the instrument panel, accompanied by the display of a message and an audible signal.Have it checked by any authorized Toyota retailer or Toyota authorized repairer, or any reliable repairer.If these warning lamps come on after the engine has been switched off and then restarted, contact any authorized Toyota retailer or Toyota authorized repairer, or any reliable repairer to have the system checked.These warning lamps light up on the instrument panel to indicate that the driver's and/or front passenger's seat belt is not fastened (depending on version). The automatic braking system is deactivated until the seat belts are fastened.
Page 178 of 320

178
– In the presence of non-moving objects (parked vehicles, barriers, street lamps, road signs, etc.).– Oncoming traffic.– Driving on a winding road or a sharp corner.– When overtaking or being overtaken by a very long vehicle (lorry, bus, etc.) that is detected in the rear blind spot but is also present in the driver’s front field of vision.– When overtaking quickly.– In very heavy traffic: vehicles detected in front and behind are confused with a lorry or a stationary object.
Malfunction
If the event of malfunction, this warning lamp comes on in the instrument panel, accompanied by the display of a message.Contact a TOYOTA dealer or a qualified workshop to have the system checked.
NOTIC E
The system may suffer temporary interference in certain weather conditions (rain, hail, etc.).In particular, driving on a wet surface or moving from a dry area to a wet area can cause false alerts (for example, the presence of a fog of water droplets in the blind spot angle is interpreted as a vehicle).
In bad or wintry weather, ensure that the sensors are not covered by mud, ice or snow.Take care not to cover the warning zone in the door mirrors or the detection zones on the front and rear bumpers with adhesive labels or other objects; they may hamper correct operation of the system.
Distraction detection
WARNI NG
Refer to the General recommendations on the use of driving and manoeuvring aids.
Depending on version, the function consists of either the "Coffee Break Alert" system alone or combined with the "Driver Attention Alert" system.
WARNI NG
These systems are in no way designed to keep the driver awake or to prevent the driver from falling asleep at the wheel. It is the driver’s responsibility to stop if feeling tired.Take a break if you are feeling tired or at least
every 2 hours.
Activation/Deactivation
The settings are changed via the Driving / Vehicle touch screen menu.The state of the system is memorised when the ignition is switched off.
Coffee Break Alert
The system triggers an alert as soon as it detects that the driver has not taken a break after two hours of driving at a speed above 43 mph (70 km/h).This alert is issued via the display of a message encouraging the driver to take a break, accompanied by an audible signal.If the driver does not follow this advice, the alert is repeated hourly until the vehicle is stopped.The system resets itself if one of the following conditions is met:– With the engine running, the vehicle has been stationary for more than 15 minutes.– The ignition has been switched off for a few
minutes.– The driver's seat belt is unfastened and their door is opened.
NOTIC E
As soon as the speed of the vehicle drops below 43 mph (70 km/h), the system goes into standby.The driving time is counted again once the speed is above 43 mph (70 km/h).
Page 190 of 320
190
WARNI NG
During manoeuvring phases, the steering wheel performs rapid turns: do not hold the steering wheel or put your hands between the spokes of the steering wheel. Watch out for any objects that could interfere with the manoeuvre (loose clothing, scarf, tie, etc.). Risk of injury!It is the driver's responsibility to constantly monitor the traffic, especially vehicles coming towards you.The driver should check that no objects or people are obstructing the vehicle’s path.
NOTIC E
The images from the camera(s) displayed on the touch screen may be distorted by the terrain.In shady areas, or in inadequate sunlight or lighting conditions, the image may be darkened and with lower contrast
The manoeuvre can be permanently interrupted at any time, either by the driver or automatically by the system.Interruption by the driver:– taking over control of the steering.
– activating the direction indicator lamps on the opposite side to that of the manoeuvre.– unfastening the driver's seat belt.– switching off the ignition.Interruption by the system:– vehicle exceeding the speed limit of 7 km/h (5 mph) during parking space entry manoeuvres, or 5 km/h (3 mph) during parking space exit manoeuvres.– activation of anti-slip regulation on a slippery road.– opening of a door or the boot.– engine stall.– system malfunction.– after 10 manoeuvres to enter or exit a parallel parking space and after 7 manoeuvres to enter a parking bay.Interrupting the manoeuvre automatically deactivates the function.The manoeuvre symbol is displayed in red, accompanied by the "Manoeuvre cancelled" message on the touch screen.A message prompts the driver to take back
control of the vehicle.The function is deactivated after a few seconds; this warning lamp goes off and the function returns to the initial display.
End of the parking space entry or exit
manoeuvre
The vehicle stops as soon as the manoeuvre is completed.The manoeuvre symbol is displayed in red, accompanied by the message “Manoeuvre completed” on the touch screen.When the function is deactivated, this indicator lamp goes off, accompanied by an audible signal.When entering a parking space, the driver may be required to complete the manoeuvre.