2022 TOYOTA PROACE CITY height
[x] Cancel search: heightPage 97 of 320
97
Lighting and visibility
4
– If the "AUTO" and "Dipped beam" indicator lamps were on, the system changes to main beam.– If the "AUTO" and "Main beam" indicator lamps were on, the system changes to dipped beam.► To reactivate the function, once again switch the headlamps manually between dipped and main beam.
NOTIC E
The system may be disrupted or not work correctly:– When visibility conditions are poor (snowfall, heavy rain, etc.).– If the windscreen in front of the camera is dirty, misted or obscured (for example, by a sticker).– If the vehicle is facing highly reflective signs.When the system detects thick fog, it temporarily deactivates the function.
The system is not able to detect:– Road users that do not have their own lighting, such as pedestrians.– Vehicles whose lighting is obscured (for example, vehicles driving behind a safety barrier on a motorway).– Vehicles at the top or bottom of a steep slope, on winding roads, on crossroads.
WARNI NG
Clean the windscreen regularly, particularly the area in front of the camera.The internal surface of the windscreen can also become misted around the camera. In humid and cold weather, demist the windscreen regularly.Do not allow snow to accumulate on the bonnet or roof of the vehicle as this could obstruct the detection camera.
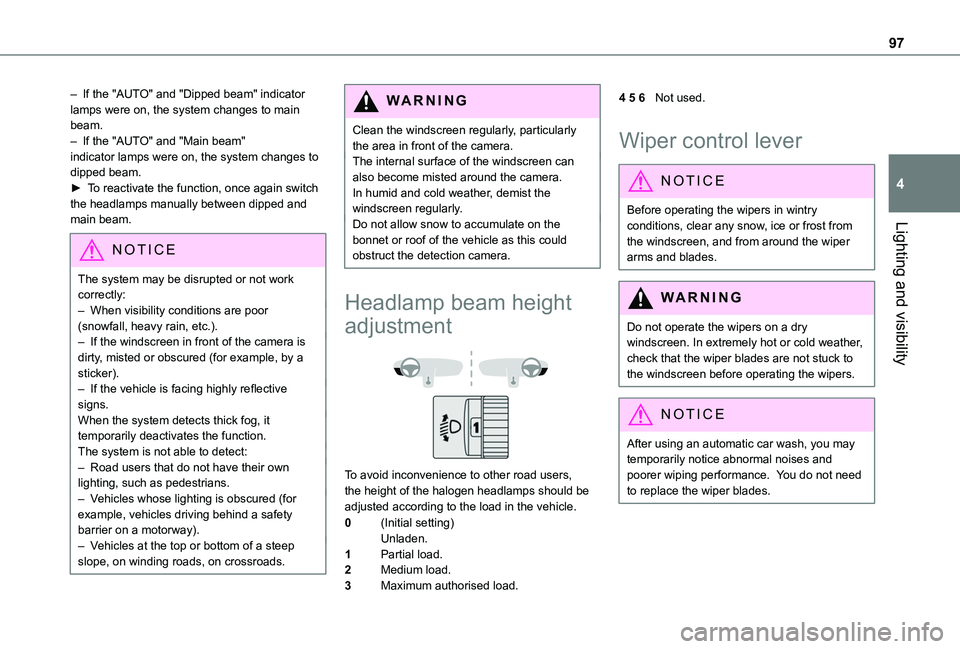
Headlamp beam height
adjustment
To avoid inconvenience to other road users, the height of the halogen headlamps should be adjusted according to the load in the vehicle.
0(Initial setting)Unladen.
1Partial load.
2Medium load.
3Maximum authorised load.
4 5 6Not used.
Wiper control lever
NOTIC E
Before operating the wipers in wintry conditions, clear any snow, ice or frost from the windscreen, and from around the wiper arms and blades.
WARNI NG
Do not operate the wipers on a dry windscreen. In extremely hot or cold weather, check that the wiper blades are not stuck to the windscreen before operating the wipers.
NOTIC E
After using an automatic car wash, you may temporarily notice abnormal noises and poorer wiping performance. You do not need to replace the wiper blades.
Page 113 of 320
11 3
Safety
5
Unfastened
After the ignition is switched on, warning lamp 1 (depending on version) and the corresponding indicator lamps light up if the driver and/or one or more passengers unfasten their seat belts.At a speed greater than 12 mph (20 km/h), these warning lamps flash, accompanied by an audible signal for approximately two minutes. After this time, these warning lamps remain on as long as the seatbelts are not refastened.
Advice
WARNI NG
The driver must ensure that passengers use the seat belts correctly and that they are all fastened before setting off.Wherever seated in the vehicle, you must always fasten the seat belt, even for short journeys.Do not invert the seat belt buckles, as they will not fulfil their role properly.To ensure the proper functioning of the belt buckles, make sure that there are no foreign bodies present (e.g. a coin) before fastening.Before and after use, ensure that the seat belt is reeled in correctly.After folding or moving a seat or rear bench seat, ensure that the seat belt is positioned and reeled in correctly.
WARNI NG
InstallationThe lower part of the strap must be positioned as low as possible over the pelvis.The upper part must be positioned in the hollow of the shoulder.At the front, adjusting the position of the seat belt may require the seat height to be adjusted.In order to be effective, a seat belt must:– be tightened as close to the body as possible.– be pulled in front of you with a smooth movement, ensuring that it is not twisted.– must only be used to secure one person.– not show signs of tearing or fraying.– not be changed or modified, in order to avoid affecting its performance.
WARNI NG
Recommendations for childrenUse a suitable child seat if the passenger is less than 12 years old or shorter than 1.5 metres (4 ft 11").Never use the same seat belt to secure more than one child.Never carry a child on your lap.For more information on Child seats, refer to the corresponding section.
WARNI NG
MaintenanceIn accordance with current safety regulations, for all work on your vehicle's seat belts, contact a qualified workshop with the skills and equipment needed, which any authorized Toyota retailer or Toyota authorized repairer, or any reliable repairer is able to provide.Have the seat belts checked regularly by any authorized Toyota retailer or Toyota authorized repairer, or any reliable repairer, particularly if the straps show signs of damage.Clean the seat belt straps with soapy water or a textile cleaning product, sold by any authorized Toyota retailer or Toyota authorized repairer, or any reliable repairer.
WARNI NG
In the event of an impact
Depending on the nature and seriousness of impacts, the pyrotechnic pretensioner device may trigger before and independently of airbag deployment. Deployment of the pretensioners is accompanied by a slight discharge of harmless smoke and a noise, due to the activation of the pyrotechnic cartridge incorporated in the system.
Page 125 of 320
125
Safety
5
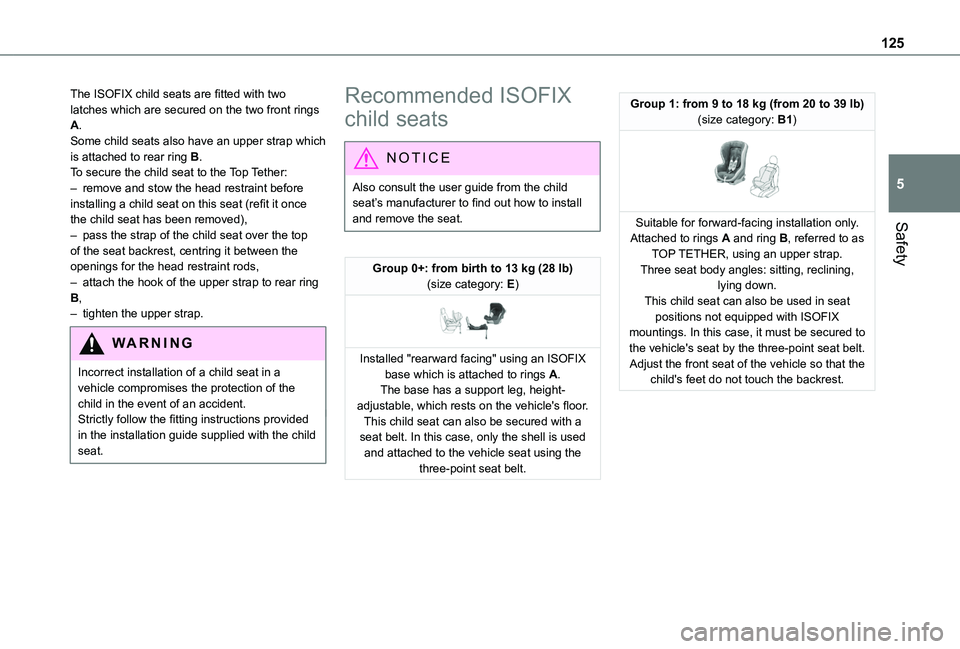
The ISOFIX child seats are fitted with two latches which are secured on the two front rings A.Some child seats also have an upper strap which is attached to rear ring B.To secure the child seat to the Top Tether:– remove and stow the head restraint before installing a child seat on this seat (refit it once the child seat has been removed),– pass the strap of the child seat over the top of the seat backrest, centring it between the openings for the head restraint rods,– attach the hook of the upper strap to rear ring B,– tighten the upper strap.
WARNI NG
Incorrect installation of a child seat in a vehicle compromises the protection of the child in the event of an accident.Strictly follow the fitting instructions provided in the installation guide supplied with the child seat.
Recommended ISOFIX
child seats
NOTIC E
Also consult the user guide from the child seat’s manufacturer to find out how to install and remove the seat.
Group 0+: from birth to 13 kg (28 lb)(size category: E)
Installed "rearward facing" using an ISOFIX base which is attached to rings A.The base has a support leg, height-adjustable, which rests on the vehicle's floor.This child seat can also be secured with a seat belt. In this case, only the shell is used and attached to the vehicle seat using the three-point seat belt.
Group 1: from 9 to 18 kg (from 20 to 39 lb)(size category: B1)
Suitable for forward-facing installation only.Attached to rings A and ring B, referred to as TOP TETHER, using an upper strap.Three seat body angles: sitting, reclining, lying down.This child seat can also be used in seat positions not equipped with ISOFIX mountings. In this case, it must be secured to the vehicle's seat by the three-point seat belt. Adjust the front seat of the vehicle so that the child's feet do not touch the backrest.
Page 126 of 320
126
Locations for ISOFIX child seats
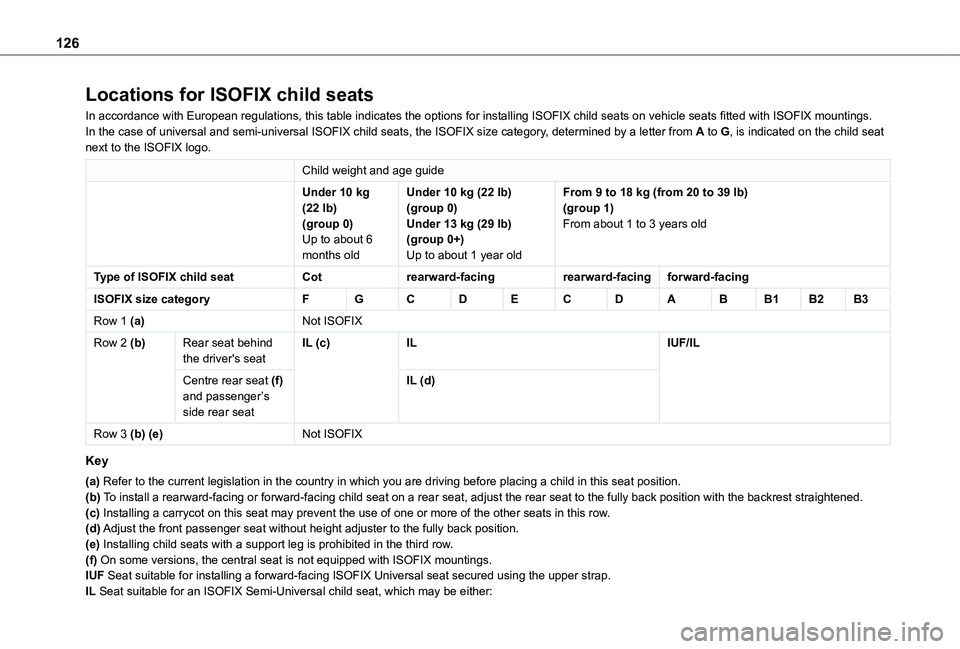
In accordance with European regulations, this table indicates the options for installing ISOFIX child seats on vehicle seats fitted with ISOFIX mountings.In the case of universal and semi-universal ISOFIX child seats, the ISOF\
IX size category, determined by a letter from A to G, is indicated on the child seat next to the ISOFIX logo.
Child weight and age guide
Under 10 kg (22 lb)(group 0)Up to about 6
months old
Under 10 kg (22 lb)(group 0)Under 13 kg (29 lb)(group 0+)
Up to about 1 year old
From 9 to 18 kg (from 20 to 39 lb)(group 1)From about 1 to 3 years old
Type of ISOFIX child seatCotrearward-facingrearward-facingforward-facing
ISOFIX size categoryFGCDECDABB1B2B3
Row 1 (a)Not ISOFIX
Row 2 (b)Rear seat behind the driver's seatIL (c)ILIUF/IL
Centre rear seat (f) and passenger’s side rear seat
IL (d)
Row 3 (b) (e)Not ISOFIX
Key
(a) Refer to the current legislation in the country in which you are driving before placi\
ng a child in this seat position.(b) To install a rearward-facing or forward-facing child seat on a rear seat,\
adjust the rear seat to the fully back position with the backrest strai\
ghtened.(c) Installing a carrycot on this seat may prevent the use of one or more o\
f the other seats in this row.(d) Adjust the front passenger seat without height adjuster to the fully bac\
k position.(e) Installing child seats with a support leg is prohibited in the third ro\
w.(f) On some versions, the central seat is not equipped with ISOFIX mounting\
s.IUF Seat suitable for installing a forward-facing ISOFIX Universal seat sec\
ured using the upper strap.IL Seat suitable for an ISOFIX Semi-Universal child seat, which may be eit\
her:
Page 127 of 320
127
Safety
5
– rearward-facing, fitted with an upper strap or a support leg.– forward-facing, fitted with a support leg.– a carrycot fitted with an upper strap or a support leg.For more information on ISOFIX child seats and in particular on securing the upper strap, refer to the correspondi\
ng section.
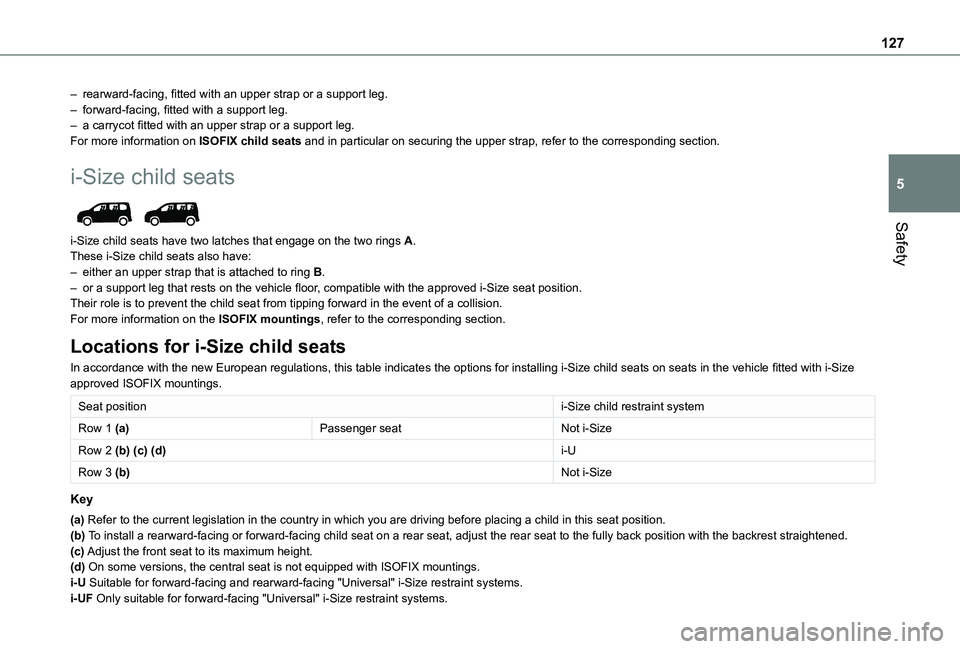
i-Size child seats
i-Size child seats have two latches that engage on the two rings A.These i-Size child seats also have:– either an upper strap that is attached to ring B.– or a support leg that rests on the vehicle floor, compatible with the approved i-Size seat position.Their role is to prevent the child seat from tipping forward in the even\
t of a collision.For more information on the ISOFIX mountings, refer to the corresponding section.
Locations for i-Size child seats
In accordance with the new European regulations, this table indicates the options for installing i-Size child seats on seats in the vehicle fitted with i-Size approved ISOFIX mountings.
Seat positioni-Size child restraint system
Row 1 (a)Passenger seatNot i-Size
Row 2 (b) (c) (d)i-U
Row 3 (b)Not i-Size
Key
(a) Refer to the current legislation in the country in which you are drivin\
g before placing a child in this seat position.(b) To install a rearward-facing or forward-facing child seat on a rear seat,\
adjust the rear seat to the fully back position with the backrest strai\
ghtened.(c) Adjust the front seat to its maximum height.(d) On some versions, the central seat is not equipped with ISOFIX mounting\
s.i-U Suitable for forward-facing and rearward-facing "Universal" i-Size rest\
raint systems.
i-UF Only suitable for forward-facing "Universal" i-Size restraint systems.
Page 130 of 320

130
► Check that the depth of the water does not exceed 15 cm, taking account of waves that might be generated by other users.► Deactivate the Stop & Start function.► Drive as slowly as possible without stalling. In all cases, do not exceed 6 mph (10 km/h).► Do not stop and do not switch off the motor.On leaving the flooded road, as soon as safety conditions allow, make several light brake applications to dry the brake discs and pads.If in doubt about the state of your vehicle, contact any authorized Toyota retailer or Toyota authorized repairer, or any reliable repairer.
Noise (Electric)
On the outside
Due to the vehicle’s quiet operation when driving, the driver must pay particular attention.When manoeuvring, the driver must always check the vehicle's immediate surroundings.At speeds of up to 19 mph (30 km/h), the pedestrian horn warns other road users of the
vehicle’s presence.
NOTIC E
Cooling the traction batteryThe cooling fan comes on during charging to cool the on-board charger and the traction battery.
On the inside
During use, you may hear certain perfectly normal noises specific to electric vehicles, such as:– Traction battery relay when starting.– Vacuum pump when braking.– Vehicle tyres or aerodynamics when driving.– Jolting and knocking noise during hill starts.
In case of towing
WARNI NG
Driving with a trailer places greater demands on the towing vehicle and requires extra care from the driver.
NOTIC E
Respect the maximum towable weights.At altitude: reduce the maximum load by 10% per 1,000 metres (3,280 ft) of altitude; the density of the air decreases with altitude and the performance of the engine reduces.
WARNI NG
New vehicle: do not pull a trailer before having driven at least 1,000 kilometres (620 miles).
NOTIC E
If the outside temperature is high, let the engine idle for 1 to 2 minutes after the vehicle comes to a stop, to help it to cool.
Before setting off
Nose weight
► Distribute the load in the trailer so that the heaviest items are as close as possible to the axle and the nose weight (at the point where it joins your vehicle) approaches the maximum permitted without exceeding it.
Tyres
► Check the tyre pressures of the towing vehicle and of the trailer, observing the recommended pressures.
Lighting
► Check the electrical signalling on the trailer and the headlamp beam height of your vehicle.
NOTIC E
If a genuine TOYOTA towing device is used, the rear parking sensors will be deactivated automatically to avoid the audible signal.
Page 154 of 320
154
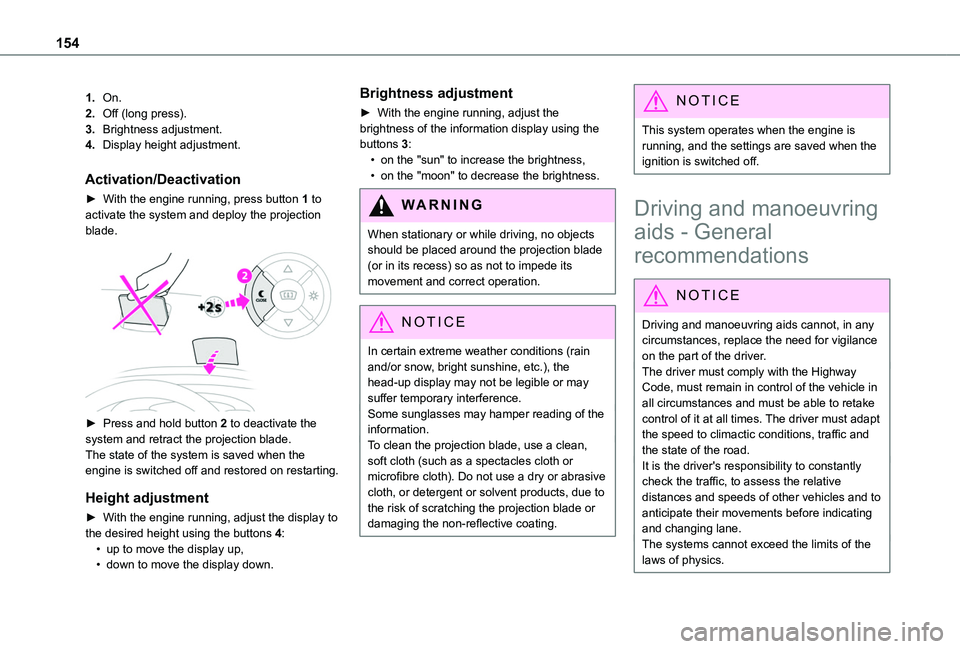
1.On.
2.Off (long press).
3.Brightness adjustment.
4.Display height adjustment.
Activation/Deactivation
► With the engine running, press button 1 to activate the system and deploy the projection blade.
► Press and hold button 2 to deactivate the system and retract the projection blade.
The state of the system is saved when the engine is switched off and restored on restarting.
Height adjustment
► With the engine running, adjust the display to the desired height using the buttons 4:• up to move the display up,• down to move the display down.
Brightness adjustment
► With the engine running, adjust the brightness of the information display using the buttons 3:• on the "sun" to increase the brightness,• on the "moon" to decrease the brightness.
W ARNI NG
When stationary or while driving, no objects
should be placed around the projection blade (or in its recess) so as not to impede its movement and correct operation.
NOTIC E
In certain extreme weather conditions (rain and/or snow, bright sunshine, etc.), the head-up display may not be legible or may suffer temporary interference.Some sunglasses may hamper reading of the information.To clean the projection blade, use a clean, soft cloth (such as a spectacles cloth or microfibre cloth). Do not use a dry or abrasive cloth, or detergent or solvent products, due to the risk of scratching the projection blade or damaging the non-reflective coating.
NOTIC E
This system operates when the engine is running, and the settings are saved when the ignition is switched off.
Driving and manoeuvring
aids - General
recommendations
NOTIC E
Driving and manoeuvring aids cannot, in any circumstances, replace the need for vigilance on the part of the driver.The driver must comply with the Highway Code, must remain in control of the vehicle in all circumstances and must be able to retake control of it at all times. The driver must adapt the speed to climactic conditions, traffic and
the state of the road.It is the driver's responsibility to constantly check the traffic, to assess the relative distances and speeds of other vehicles and to anticipate their movements before indicating and changing lane.The systems cannot exceed the limits of the laws of physics.
Page 170 of 320
170
WARNI NG
The system also takes motorcyclists and animals into account; however, animals below 0.5 m (1 ft 6") tall and objects on the road are not necessarily detected.
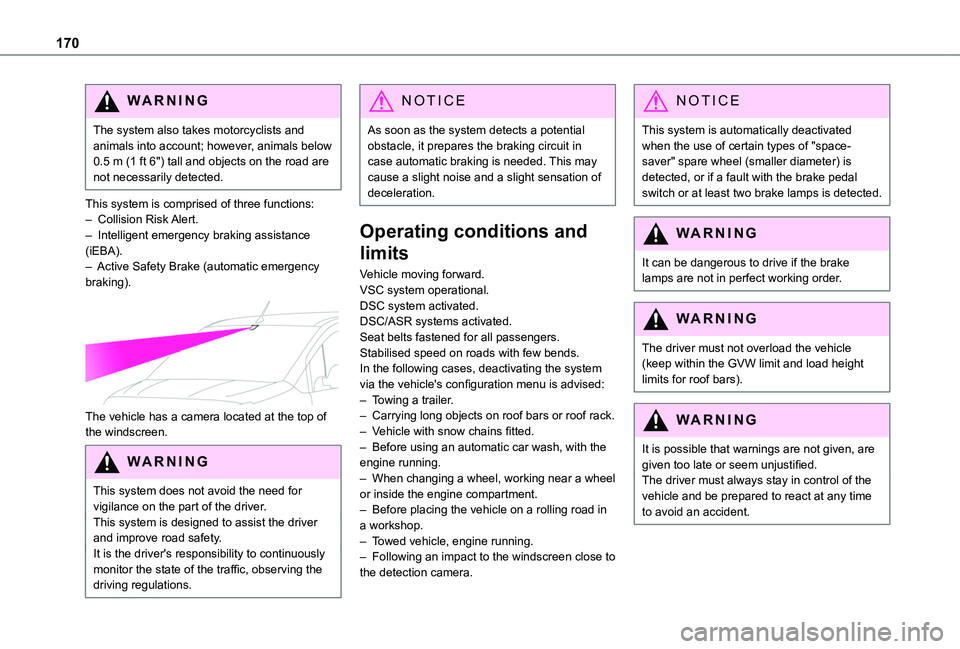
This system is comprised of three functions:– Collision Risk Alert.– Intelligent emergency braking assistance (iEBA).– Active Safety Brake (automatic emergency braking).
The vehicle has a camera located at the top of the windscreen.
W ARNI NG
This system does not avoid the need for vigilance on the part of the driver.This system is designed to assist the driver and improve road safety.It is the driver's responsibility to continuously monitor the state of the traffic, observing the driving regulations.
NOTIC E
As soon as the system detects a potential obstacle, it prepares the braking circuit in case automatic braking is needed. This may cause a slight noise and a slight sensation of deceleration.
Operating conditions and
limits
Vehicle moving forward.VSC system operational.DSC system activated.DSC/ASR systems activated.Seat belts fastened for all passengers.Stabilised speed on roads with few bends.In the following cases, deactivating the system via the vehicle's configuration menu is advised:– Towing a trailer.– Carrying long objects on roof bars or roof rack.– Vehicle with snow chains fitted.
– Before using an automatic car wash, with the engine running.– When changing a wheel, working near a wheel or inside the engine compartment.– Before placing the vehicle on a rolling road in a workshop.– Towed vehicle, engine running.– Following an impact to the windscreen close to the detection camera.
NOTIC E
This system is automatically deactivated when the use of certain types of "space-saver" spare wheel (smaller diameter) is detected, or if a fault with the brake pedal switch or at least two brake lamps is detected.
WARNI NG
It can be dangerous to drive if the brake lamps are not in perfect working order.
WARNI NG
The driver must not overload the vehicle (keep within the GVW limit and load height limits for roof bars).
WARNI NG
It is possible that warnings are not given, are given too late or seem unjustified.The driver must always stay in control of the vehicle and be prepared to react at any time to avoid an accident.