2022 TOYOTA PROACE CITY EV gearbox
[x] Cancel search: gearboxPage 216 of 320

216
Air filter
Depending on the environment and the use of the vehicle (e.g. dusty atmosphere, city driving), change it twice as often, if necessary.
Oil filter
Change the oil filter each time the engine oil is changed.
Particle filter (Diesel)
The start of clogging of the particle filter is indicated by the temporary lighting of this warning lamp, accompanied by an alert message.As soon as the traffic conditions permit, regenerate the filter by driving at a speed of at least 37 mph (60 km/h), with an engine speed above 2,500 rpm, for about 15 minutes (until the warning lamp goes off).If it is not possible to reach 37 mph (60 km/h), leave the engine running at idle for about
15 minutes, then drive with an engine speed above 2,500 rpm for 15 minutes.
NOTIC E
Do not switch off the engine until the filter is fully regenerated; repeated intervals can degrade the engine oil prematurely.Regenerating the filter while the vehicle is stationary is not recommended.
NOTIC E
If the warning lamp stays on, this indicates a low Diesel additive level.For more information on Checking levels, refer to the corresponding section.
NOTIC E
Following prolonged operation of the vehicle at very low speed or at idle, you may, in exceptional circumstances, notice water vapour coming from the exhaust while accelerating. These emissions have no impact on the vehicle’s behaviour and the environment.
NOTIC E
New vehicleDuring the first few particle filter regeneration operations, you may notice a "burning" smell. This is perfectly normal.
Manual gearbox
The gearbox does not require any maintenance (no oil change).
Automatic gearbox
The gearbox does not require any maintenance (no oil change).
Drive selector
The drive selector does not require any maintenance.
Brake pads
Brake wear depends on the style of driving, particularly in the case of vehicles used in town, over short distances. It may be necessary to have the condition of the brakes checked, even between vehicle services.Unless there is a leak in the circuit, a drop in the brake fluid level indicates that the brake pads are worn.
NOTIC E
After washing the vehicle, moisture, or in wintry conditions, ice can form on the brake discs and pads: braking efficiency may be reduced. Gently dab the brakes to dry and defrost them.
Page 220 of 320

220
► With an AdBlue® pump: insert the nozzle and fill the tank until the nozzle automatically cuts out.
WARNI NG
In order not to overfill the AdBlue® tank:– Add between 10 and 13 litres using AdBlue® containers.– Stop after the nozzle’s first automatic cut-
out, if you are refilling at a service station.The system only registers AdBlue® top-ups of 5 litres or more.
WARNI NG
If the AdBlue® tank is completely empty – which is confirmed by the message "Top up AdBlue: Starting impossible" – it is essential to add at least 5 litres.
After refilling
► Refit the blue cap to the tank filler and turn it clockwise, as far as it will go.► Close the fuel filler flap.
Do not dispose of AdBlue® bottles or containers in the household waste.Place them in a container reserved for this purpose or take them back to where you purchased them.
Free-wheeling
In certain situations, you must allow the vehicle to free-wheel (while being towed, on a rolling road, in an automatic car wash, or being transported by rail or sea freight, etc.).The procedure varies according to the type of gearbox and parking brake.
WARNI NG
Do not leave the vehicle unattended while coasting.
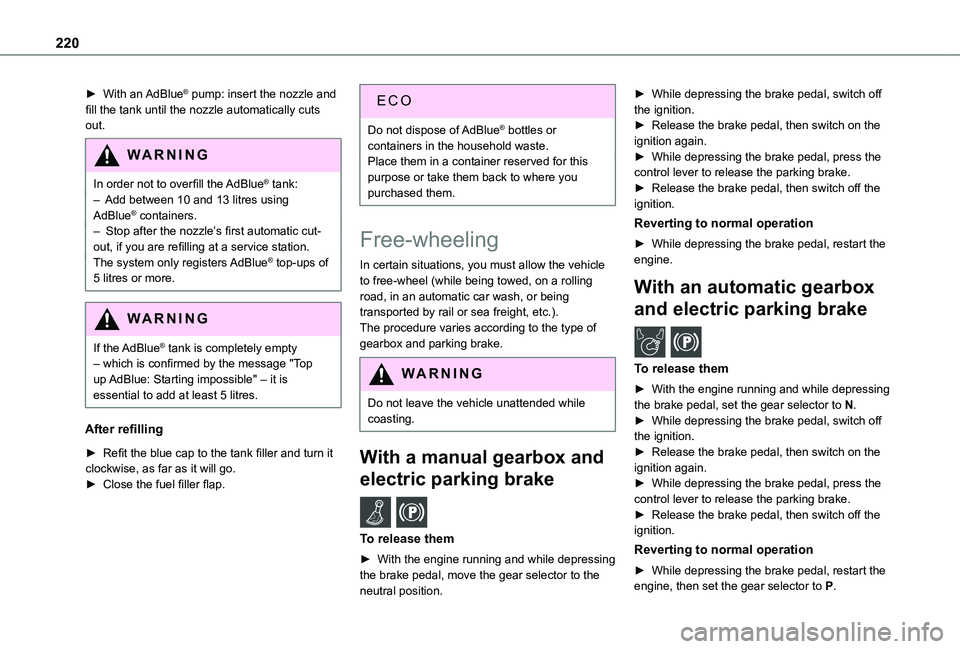
With a manual gearbox and
electric parking brake /
To release them
► With the engine running and while depressing the brake pedal, move the gear selector to the neutral position.
► While depressing the brake pedal, switch off the ignition.► Release the brake pedal, then switch on the ignition again.► While depressing the brake pedal, press the control lever to release the parking brake.► Release the brake pedal, then switch off the ignition.
Reverting to normal operation
► While depressing the brake pedal, restart the engine.
With an automatic gearbox
and electric parking brake /
To release them
► With the engine running and while depressing the brake pedal, set the gear selector to N.► While depressing the brake pedal, switch off the ignition.
► Release the brake pedal, then switch on the ignition again.► While depressing the brake pedal, press the control lever to release the parking brake.► Release the brake pedal, then switch off the ignition.
Reverting to normal operation
► While depressing the brake pedal, restart the engine, then set the gear selector to P.
Page 228 of 320

228
Removing a wheel
WARNI NG
Parking the vehicleImmobilise the vehicle where it does not obstruct traffic: the ground must be level, stable and non-slippery.With a manual gearbox, engage first gear to lock the wheels, apply the parking brake, unless it is programmed to be in automatic mode, and switch off the ignition.With an automatic gearbox, select mode P to lock the wheels, apply the parking brake, unless it is programmed to be in automatic mode, and switch off the ignition.Check for the fixed illumination of the parking brake warning lamps in the instrument panel.The occupants must get out of the vehicle and wait where they are safe.If necessary, place a chock under the wheel diagonally opposite the wheel to be changed.Never go underneath a vehicle raised using a
jack; use an axle stand.
NOTIC E
Wheel with wheel trimWhen removing the wheel, first remove the wheel trim by pulling at the valve aperture using the wheelbrace.When refitting the wheel, refit the wheel trim, starting by placing its aperture in line with the valve and then pushing it into place all round its edge with the palm of your hand.
► With a steel wheel, remove the wheel trim using tool 7.► With an alloy wheel, remove the cap from each of the bolts using tool 7.
► If the vehicle is so equipped, fit security bolt socket 8 to wheelbrace 5 to slacken the security bolt.
► Slacken (without removing) the other wheel bolts using just wheelbrace 5.
NOTIC E
Wheel with wheel trimWhen removing the wheel, first remove the wheel trim by pulling at the valve aperture using the wheelbrace.
► Place the foot of the jack on the ground and ensure that it is directly below the A or B jacking point provided on the underbody, whichever is closest to the wheel to be changed.
Page 238 of 320

238
Starting using another
battery
If the vehicle's battery is flat, the engine can be started using a backup battery (either external or from another vehicle) and jump leads or using a battery booster.
WARNI NG
Never start the engine by connecting a battery charger.Never use a 24 V or higher battery booster.Check beforehand that the backup battery has a nominal voltage of 12 V and a capacity at least equal to that of the discharged battery.The two vehicles must not be in contact with each other.Switch off all electricity-consuming equipment on both vehicles (audio system, wipers, lighting, etc.).Make sure that the jump leads are well away from the engine’s moving parts (fan, belt, etc.).Do not disconnect the (+) terminal while the engine is running.
► Connect the red cable to the (+) terminal of flat battery A (at the metal elbow), then to the (+) terminal of the backup battery B or of the booster.► Connect one end of the green or black cable to the (-) terminal of the backup battery B or of the booster (or to an earth point on the assisting vehicle).► Connect the other end of the green or black cable to the earth point C.► Start the engine on the assisting vehicle and leave it running for a few minutes.► Operate the starter on the broken down vehicle and let the engine run.If the engine does not start immediately, switch off the ignition and wait a few moments before trying again.► Wait for it to return to idle.► Disconnect the jump leads in reverse order.► Allow the engine to run for at least 30 minutes, with the vehicle stationary, so that the battery reaches an adequate state of charge.
WARNI NG
Driving immediately without having reached a sufficient level of charge may affect some of the vehicle's functionalities (e.g. Stop & Start).
WARNI NG
To disconnect, proceed in reverse order.
WARNI NG
Automatic gearboxNever try to start the engine by pushing the vehicle.
NOTIC E
Some functions, including Stop & Start, are not available if the battery is not sufficiently charged.
Page 241 of 320

241
In the event of a breakdown
8
Towing
Procedure for having your vehicle towed or for towing another vehicle using the towing eye.
NOTIC E
General recommendationsObserve the legislation in force in the country where you are driving.Ensure that the weight of the towing vehicle is higher than that of the towed vehicle.The driver must remain at the wheel of the towed vehicle and must have a valid driving licence.When towing a vehicle with all four wheels on the ground, always use an approved towbar; ropes and straps are prohibited.
The towing vehicle must move off gently.When the vehicle is towed with its engine off, there is no longer braking and steering assistance.
WARNI NG
A professional recovery service must be called if:– broken down on a motorway or main road;
– not possible to put the gearbox into neutral, unlock the steering, or release the parking brake;– not possible to tow a vehicle with an automatic gearbox, with the engine running;– towing with only two wheels on the ground;– four-wheel drive vehicle;– no approved towbar available.
WARNI NG
Before towing the vehicle, it is essential to put the vehicle in free-wheeling mode.For more information on Free-wheeling, refer to the corresponding section.
NOTIC E
Electric motorAn electric vehicle cannot under any circumstances be used to tow another vehicle.However, it may be used, for example, to exit a rut.
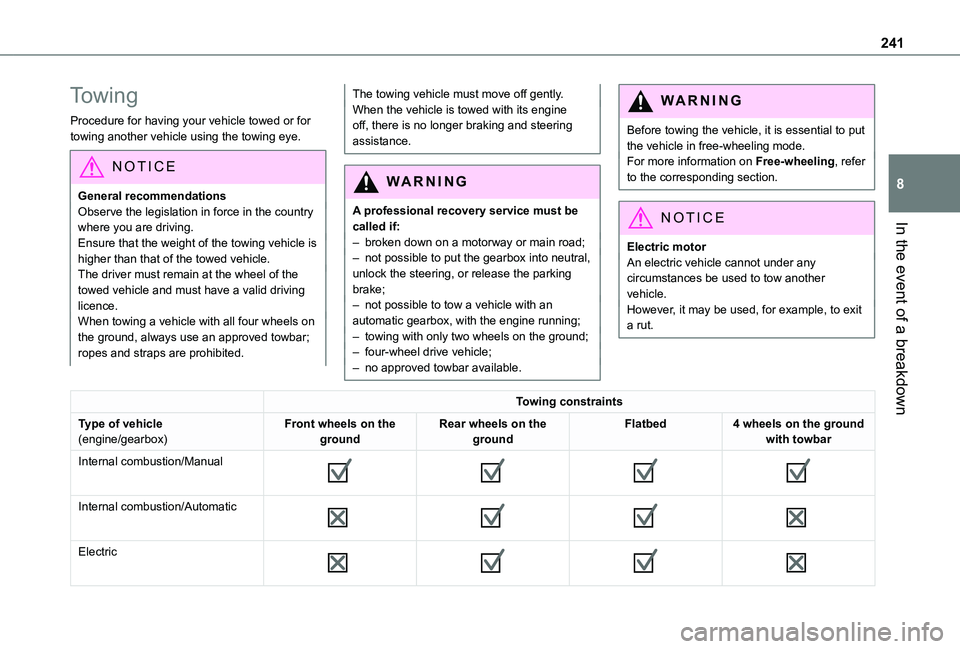
Towing constraints
Type of vehicle(engine/gearbox)Front wheels on the groundRear wheels on the groundFlatbed4 wheels on the ground with towbar
Internal combustion/Manual
Internal combustion/Automatic
Electric
Page 242 of 320

242
NOTIC E
In case of battery or electric parking brake failure, it is essential to call a professional using flatbed recovery vehicles (excluding manual gearbox).
Accessing the eye
NOTIC E
For more information on the Tool kit, refer to the corresponding section.
WARNI NG
With a manual gearbox, move the gear lever into neutral.With an automatic gearbox, place the gear selector into position N.Failure to adhere to this instruction may lead to damage to braking system components and the lack of braking assistance on restarting the engine.
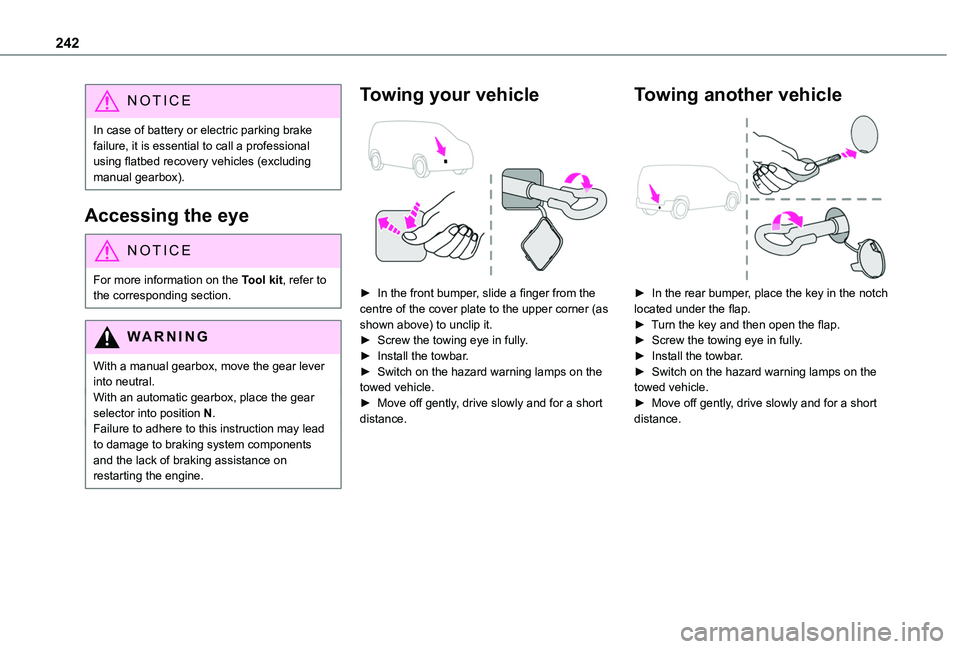
Towing your vehicle
► In the front bumper, slide a finger from the centre of the cover plate to the upper corner (as shown above) to unclip it.► Screw the towing eye in fully.► Install the towbar.► Switch on the hazard warning lamps on the towed vehicle.► Move off gently, drive slowly and for a short distance.
Towing another vehicle
► In the rear bumper, place the key in the notch located under the flap.► Turn the key and then open the flap.► Screw the towing eye in fully.► Install the towbar.► Switch on the hazard warning lamps on the towed vehicle.► Move off gently, drive slowly and for a short distance.
Page 249 of 320

249
Technical data
9
Engines and towed loads - PETROL EURO 6.3
Engine1.2Turbo 110HP1.2Turbo 130HP
GearboxManual 6-speedAutomatic 8-speed
CodeEB2ADT STTd BVM6EB2ADTS STTd EAT8
Model CodeEUHNP2-LEUHNS3-L
Cubic capacity (cc)1,1991,199
Max. power: EC standard (kW)8196
FuelUnleadedUnleaded
Braked trailer (within the GTW limit) on a 12% slope900 kg (1,984 lb)950 kg (2,094 lb)
Unbraked trailer750 kg (1,653 lb)750 kg (1,653 lb)
Maximum authorised nose/towball weight74 kg (163 lb)74 kg (163 lb)
Page 250 of 320

250
Engine1.2Turbo 110HP1.2Turbo 130HP
GearboxManual 6-speedAutomatic 8-speed
CodeEB2ADT MB6 STTDEB2ADTS ATN8 STTD
LengthL1L2L1L2
Model Code5 seats
ERHNP2-AERHNP2-CERHNS3-AERHNS3-C
7 seats
ERHNP2-BERHNP2-DERHNS3-BERHNS3-D
Cubic capacity (cc)1,1991,199
Max. power: EC standard (kW)8196
FuelUnleadedUnleaded
Braked trailer (within the GTW limit) on a 12% slope
5 seats1,150 kg (2,535 lb)1,100 kg (2,425 lb)1,200 kg (2,645 lb)1,150 kg (2,535 lb)
7 seats1,000 kg (2,204 lb)900 kg (1,984 lb) / 950 kg
(2,094 lb)
1,050 kg (2,314 lb)1 000 kg (2,204 lb) / 950
kg (2,094 lb)
Unbraked trailer5 seats720 kg (1,587 lb) / 730 kg (1,609 lb)
750 kg (1,653 lb)740 kg (1,631 lb) / 750 kg (1,653 lb)
750 kg (1,653 lb)
7 seats750 kg (1,653 lb)750 kg (1,653 lb)
Maximum authorised nose/towball weight5 seats74 kg (163 lb)74 kg (163 lb)74 kg (163 lb)74 kg (163 lb)
7 seats50 kg (110 lb) /
70 kg (154 lb)
50 kg (110 lb)70 kg (154 lb) /
50 kg (110 lb)
50 kg (110 lb)