2022 TOYOTA 4RUNNER change time
[x] Cancel search: change timePage 8 of 616

8
4RUNNER (U)Please note that this manual applies to all models and explains
all equipment,
including options. Therefore, you may find explanations for equ ipment not
installed on your vehicle and the illustrations used may differ from your vehi-
cle.
All specifications provided in this manual are current at the t ime of printing.
Over time, your vehicle may receive updates that modify the veh icle and
make material in this manual incomplete and/or inaccurate. Beca use of Toy-
ota's interest in continual product improvement, Toyota reserves the right to
make changes to this manual at any time without notice.
If Toyota chooses to update the manual, updated versions can be viewed by
selecting your vehicle by model and year at the following URL o r on your
mobile device if you have access to the Toyota app.
www.toyota.com/owners
Approximately five hours after the engine is turned off, you ma y hear sound
coming from under the vehicle for several minutes. This is the sound of a fuel
evaporation leakage check and, it does not indicate a malfunction.
A wide variety of non-genuine spare parts and accessories for T oyota vehi-
cles are currently available in the market. You should know tha t Toyota does
not warrant these products and is not responsible for their per formance,
repair, or replacement, or for any damage they may cause to, or adverse
effect they may have on, your Toyota vehicle.
This vehicle should not be modified with non-genuine Toyota pro ducts. Modi-
fication with non-genuine Toyota products could affect its perf ormance, safety
or durability, and may even violate governmental regulations. In addition,
damage or performance problems resulting from the modification may not be
covered under warranty.
Also, remodeling like this will have an effect on advanced safe ty equipment
such as Toyota Safety Sense P and there is a danger that it wil l not work
properly or the danger that it may work in situations where it should not be
working.
For your infor mation
Main Owner’s Manual
Noise from under vehicle afte r turning off the engine
Accessories, spare parts and m odification of your Toyota
Page 97 of 616

972. Instrument cluster
2
Instrument cluster
4RUNNER (U)
Items displayed can be switched by pressing or up and down.
■Steering angle
Displays the direction of the front tires.
The tire direction is displayed in 3 stages for both left and right, in accor-
dance with the angle of the tire.
If a battery terminal is disconnected and reconnected, the disp lay may
be disabled temporarily. After driving the vehicle for a while, the display
will be enabled.
■
Tire inflation pressure
Displays inflation pressure of each tire.
The inflation pressure of the spare tire will be displayed. (if equipped)
The settings of some features can be changed by using the meter
control switches.
■Setting procedure
On the setting screen, choose the desired item using or ,
and then press .
• For functions that can be enabled or disabled, the function switches between on and off each time is pressed.
• For functions that allow to select operation contents, display con- tents, etc., the setting screen is displayed.
Select the desired setting by operating or , and then
press .
To stop the selection, press to return to the previous screen.
Vehicle information
Settings display
1
2
Page 117 of 616

1173-1. Key information
3
Operation of each component
4RUNNER (U)
■Switching the door unlock func tion (vehicles with a smart key system)
It is possible to set which doors the entry function unlocks using the wireless
remote control.
Turn the power switch off.
When the indicator light on the key surface is not on, press an d hold
or for about 5 seconds while pressing and holding .
The setting changes each time an operation is performed, as sho wn below.
(When changing the setting continuously, release the buttons, w ait for at least
5 seconds, and repeat step 2.)
■ Rear seat reminder function
In order to remind you not to forget luggage, etc. in the rear seat, when the
engine switch is turned off after any of the following conditio ns are met, a
buzzer will sound and a message will be displayed on the multi- information
display for approximately 6 seconds.
● The engine is started within 10 minutes after opening and closi ng a rear
door.
● A rear door has been opened and closed after the engine was sta rted.
However, if a rear door is opened and then closed within approx imately 2 sec-
onds, the rear seat reminder function may not operate.
The rear seat reminder function determines that luggage, etc. h as been
placed in a rear seat based on opening and closing of a rear do or. Therefore,
depending on the situation, the rear seat reminder function may not operate
and you may still forget luggage, etc. in the rear seat, or it may operate
unnecessarily.
The rear seat reminder function can be enabled/disabled. ( P. 567)
■ Customization
Settings (e.g. unlocking function using a key) can be changed.
(Customizable features: P. 557)
1
2
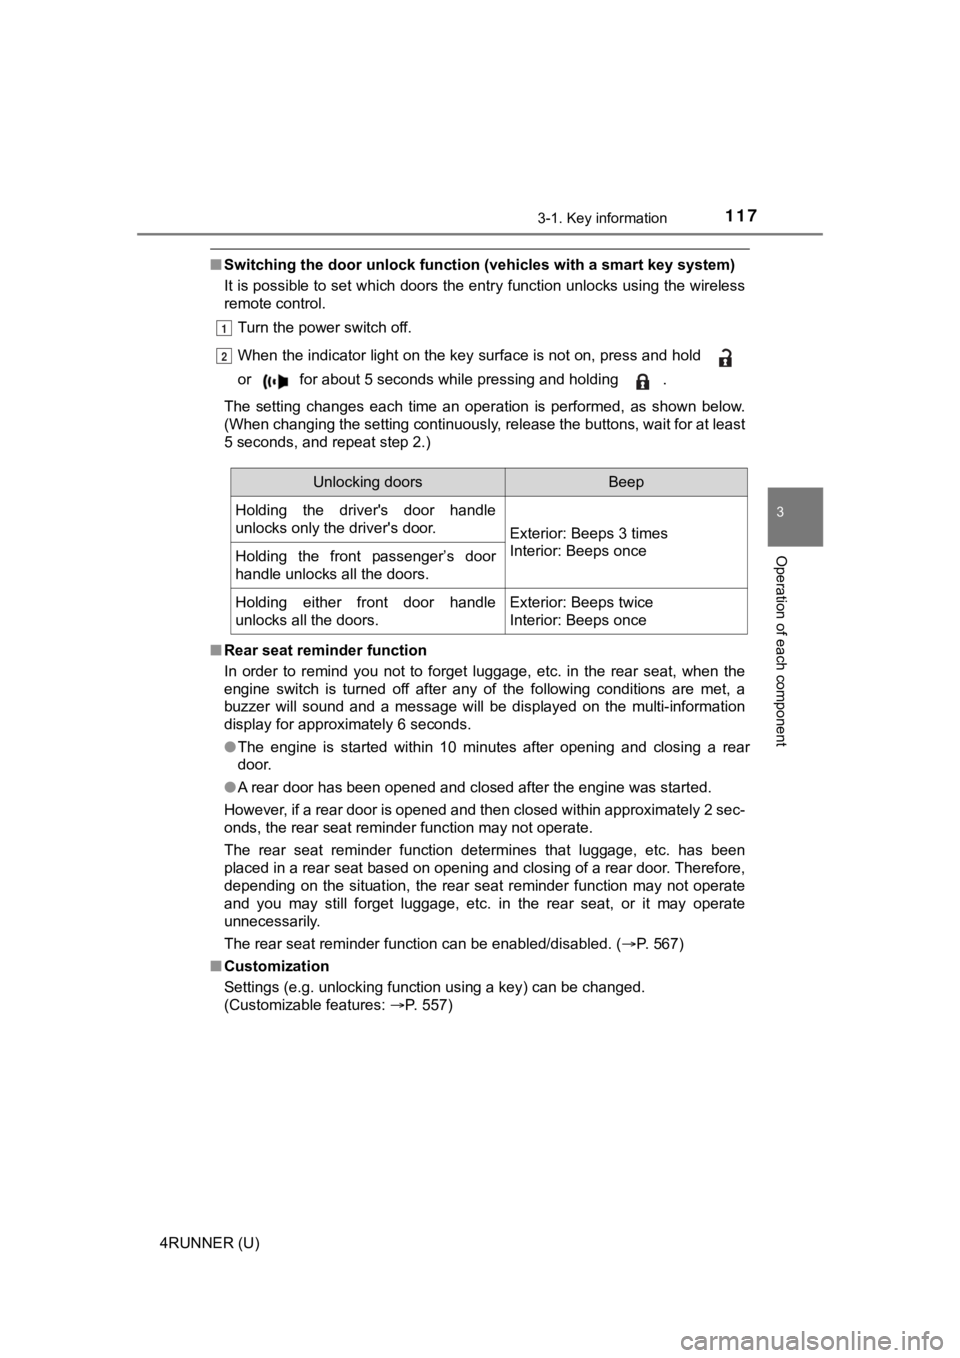
Unlocking doorsBeep
Holding the driver's door handle
unlocks only the driver's door.
Exterior: Beeps 3 times
Interior: Beeps once
Holding the front passenger’s door
handle unlocks all the doors.
Holding either front door handle
unlocks all the doors.Exterior: Beeps twice
Interior: Beeps once
Page 211 of 616

2114-2. Driving procedures
4
Driving
4RUNNER (U)
Stop the vehicle.
Set the parking brake (
P. 222), and shift the shift lever to P.
Press the engine switch.
Release the brake pedal and check that “ACCESSORY” or “IGNI-
TION ON” is not shown on the meter.
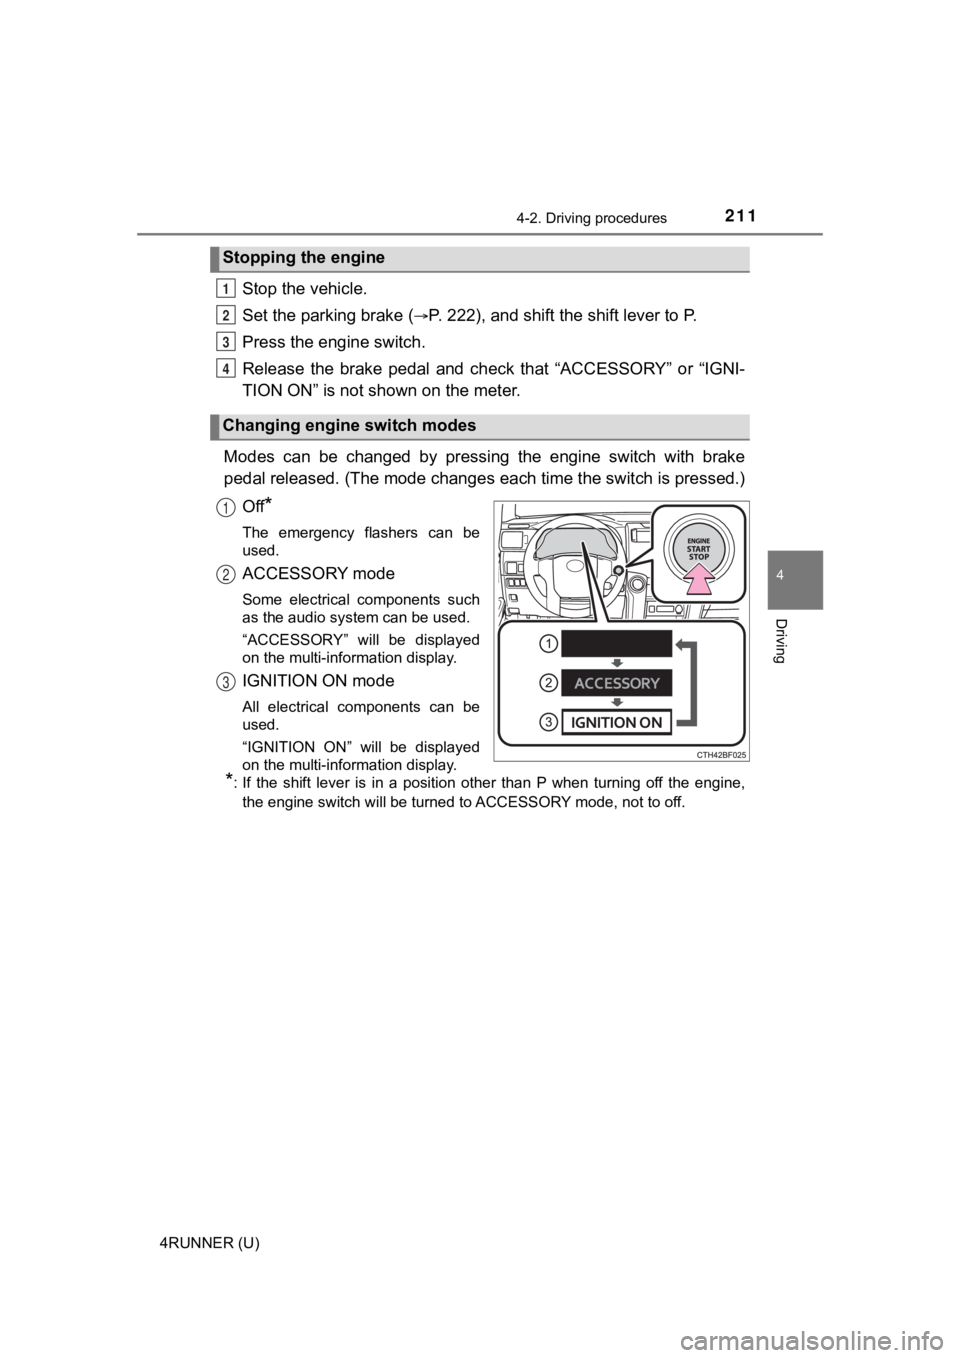
Modes can be changed by pressing the engine switch with brake
pedal released. (The mode changes each time the switch is pressed.)
Off
*
The emergency flashers can be
used.
ACCESSORY mode
Some electrical components such
as the audio system can be used.
“ACCESSORY” will be displayed
on the multi-information display.
IGNITION ON mode
All electrical components can be
used.
“IGNITION ON” will be displayed
on the multi-information display.
*: If the shift lever is in a position other than P when turning off the engine, the engine switch will be turned to ACCESSORY mode, not to off.
Stopping the engine
Changing engine switch modes
1
2
3
4
1
2
3
Page 230 of 616

2304-3. Operating the lights and wipers
4RUNNER (U)
■Conditions to turn the high beams on/off automatically
●When all of the following conditions are met, the high beams will be turned
on automatically (after approximately 1 second):
• The vehicle speed is approximately 21 mph (34 km/h) or more.
• The area ahead of the vehicle is dark.
• There are no vehicles ahead with headlights or tail lights turned on.
• There are few streetlights on the road ahead.
● If any of the following conditions is met, the high beams will turn off automat-
ically:
• The vehicle speed is below approximately 17 mph (27 km/h).
• The area ahead of the vehicle is not dark.
• Vehicles ahead have their headlights or tail lights turned on.
• There are many streetlights on the road ahead.
■ Camera sensor detection information
●The high beams may not be automatically turned off in the follo wing situa-
tions:
• When a vehicle suddenly appears from around a curve
• When the vehicle is cut in front of by another vehicle
• When vehicles ahead cannot be detected due to repeated curves, road dividers or roadside trees
• When vehicles ahead appear in a faraway lane on a wide road
• When the lights of vehicles ahead are not on
● The high beams may be turned off if a vehicle ahead that is usi ng fog lights
without its headlights turned on is detected.
● House lights, street lights, traffic signals, and illuminated billboards or signs
and other reflective objects may cause the high beams to change to the low
beams, or the low beams to remain on.
● The following factors may affect the amount of time taken for t he high
beams to turn on or off:
• The brightness of the headlights, fog lights, and tail lights of vehicles
ahead
• The movement and direction of vehicles ahead
• When a vehicle ahead only has operational lights on one side
• When a vehicle ahead is a two-wheeled vehicle
• The condition of the road (gradient, curve, condition of the r oad surface,
etc.)
• The number of passengers and amount of luggage in the vehicle
● The high beams may turn on or off unexpectedly.
● Bicycles or similar vehicles may not be detected.
● In the following situations the system may not be able to correctly detect the
surrounding brightness level. This may cause the low beams to r emain on
or the high beams to flash or dazzle pedestrians or vehicles ah ead. In such
a case, it is necessary to manually switch between the high and low beams.
Page 231 of 616

2314-3. Operating the lights and wipers
4
Driving
4RUNNER (U)• When driving in inclement weather (heavy rain, snow, fog, sand
storms,
etc.)
• When the windshield is obscured by fog, mist, ice, dirt, etc.
• When the windshield is cracked or damaged
• When the camera sensor is deformed or dirty
• When the temperature of the camera sensor is extremely high
• When the surrounding brightness level is equal to that of head lights, tail
lights or fog lights
• When headlights or tail lights of vehicles ahead are turned off, dirty, changing color, or not aimed properly
• When the vehicle is hit by water, snow, dust, etc. from a prec eding vehi-
cle
• When driving through an area of intermittently changing brightness and
darkness
• When frequently and repeatedly driving ascending/descending roads, or roads with rough, bumpy or uneven surfaces (such as stone-paved
roads, gravel roads, etc.)
• When frequently and repeatedly taking curves or driving on a w inding
road
• When there is a highly reflective object ahead of the vehicle, such as a sign or mirror
• When the back of a preceding vehicle is highly reflective, suc h as a con-
tainer on a truck
• When the vehicle's headlights are damaged or dirty, or are not aimed
properly
• When the vehicle is listing or titling due to a flat tire, a trailer being towed, etc.
• When the headlights are changed between the high beams and low beams repeatedly in an abnormal manner
• When the driver believes that the high beams may be flashing or dazzling
pedestrians or other drivers
■ Temporarily lowering sensor sensitivity
The sensitivity of the sensor can be temporarily lowered.
Turn the engine switch off while the following conditions are m et.
• The headlight switch is in or .
• The headlight switch lever is in the high beam position.
• Automatic High Beam switch is on.
Turn the engine switch to the “ON” position (vehicles without a smart key
system) or IGNITION ON mode (vehicles with a smart key system).
Within 60 seconds after , repeat pulling the headlight switch l ever to the
original position then pushing it to the high beam position qui ckly 10 times,
then leave the lever in the high beam position.
If the sensitivity is changed, the Automatic High Beam indicato r will turn on
and off 3 times.
Automatic High Beam (headlights) may turn on even when the vehicle is
stopped.
1
2
32
4
Page 249 of 616

2494-5. Using the driving support systems
4
Driving
4RUNNER (U)●
In the following situations, if the situation has changed (or the vehicle has
been driven for some time) and the normal operating conditions are
detected, the message will disappear and the system will become opera-
tional.
If the message does not disappear, contact your Toyota dealer.
• When the temperature around the radar sensor is outside of the opera- tional range, such as when the vehicle is in the sun or in an e xtremely
cold environment
• When the front camera cannot detect objects in front of the ve hicle, such
as when driving in the dark, snow, or fog, or when bright lights are shining
into the front camera
• Depending on the conditions in the vicinity of the vehicle, th e radar may
judge the surrounding environment can not be properly recognize d. In
that case, “Pre-Collision Syst em Unavailable” is displayed.
Page 253 of 616

2534-5. Using the driving support systems
4
Driving
4RUNNER (U)■
Enabling/disabling th
e pre-collision system
The pre-collision sy stem can be enabled/disabled on ( P. 9 8 )
of the multi-information display.
The system is automatically enabled each time the engine switch is
turned to the “ON” position (vehicles without a smart key syste m) or the
engine switch is turned to IGNITION ON mode (vehicles with a sm art
key system).
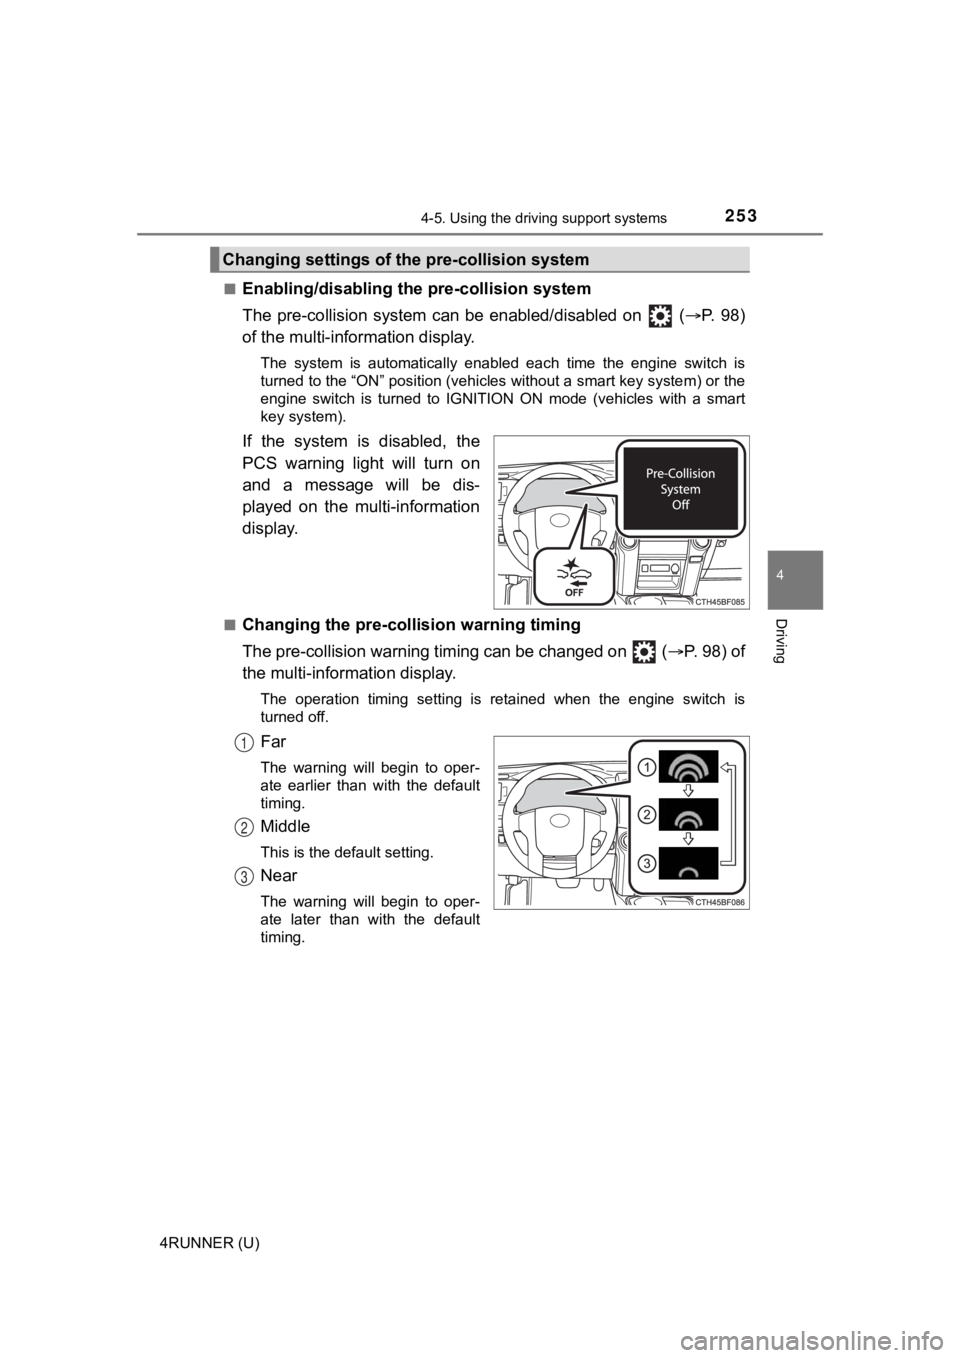
If the system is disabled, the
PCS warning light will turn on
and a message will be dis-
played on the multi-information
display.
■Changing the pre-colli sion warning timing
The pre-collision warning timing can be changed on ( P. 98) of
the multi-inform ation display.
The operation timing setting is retained when the engine switch is
turned off.
Far
The warning will begin to oper-
ate earlier than with the default
timing.
Middle
This is the default setting.
Near
The warning will begin to oper-
ate later than with the default
timing.
Changing settings of the pre-collision system
1
2
3