2022 TESLA MODEL Y light
[x] Cancel search: lightPage 68 of 250

When Model Y is stopped, Vehicle Hold can continue to
apply the brakes even after you remove your foot from
the brake pedal. When driving on a hill or on a
flat
surface, brake as you normally would. After coming to a
complete stop, simply press the brake pedal again (until
the
touchscreen displays the Vehicle Hold indicator
light) to enable Vehicle Hold. You can then release the
brake pedal and remain stopped, even on a hill.
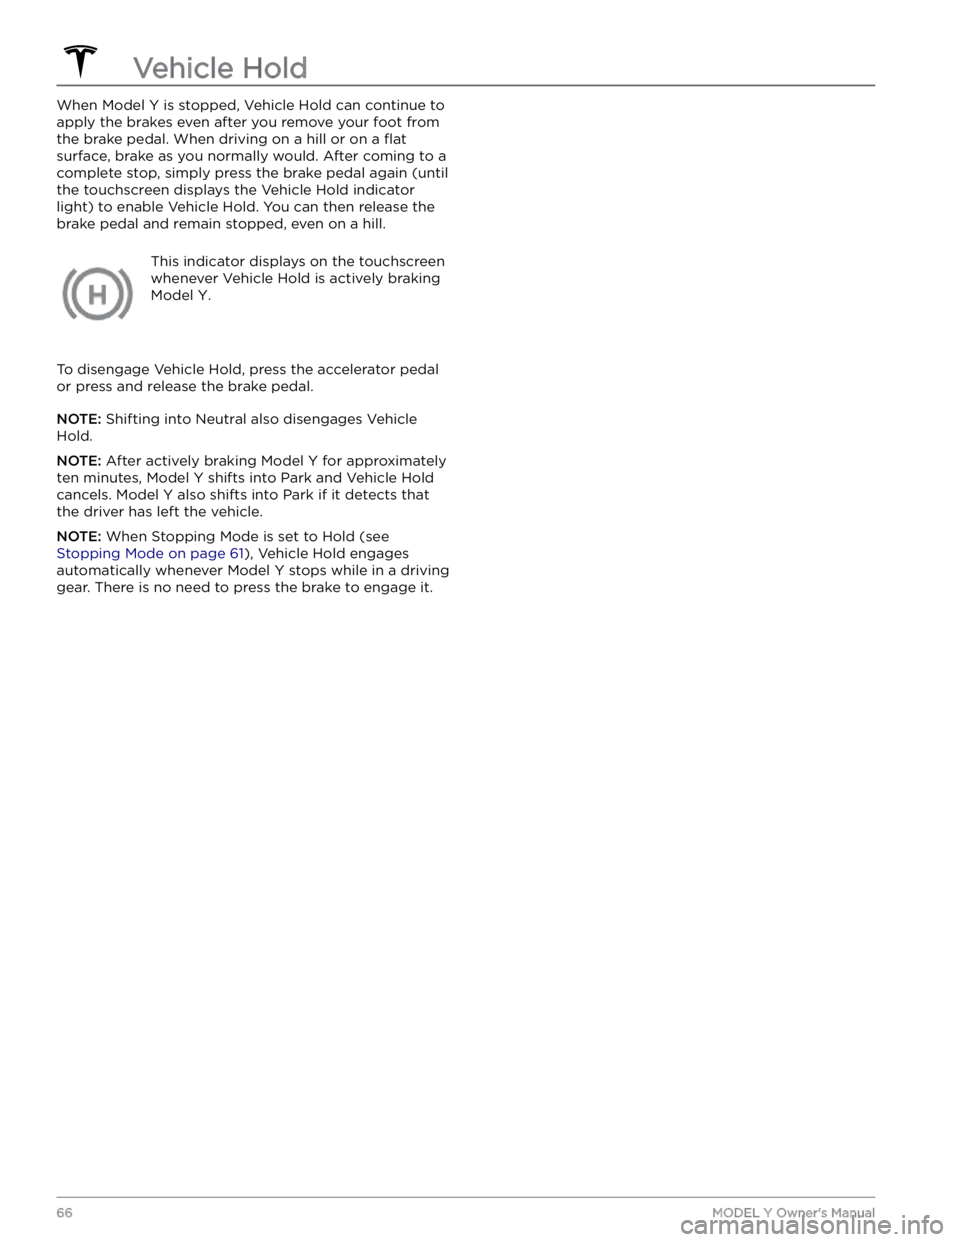
This indicator displays on the touchscreen
whenever Vehicle Hold is actively braking
Model Y.
To disengage Vehicle Hold, press the accelerator pedal or press and release the brake pedal.
NOTE: Shifting into Neutral also disengages Vehicle
Hold.
NOTE: After actively braking Model Y for approximately
ten minutes,
Model Y shifts into Park and Vehicle Hold
cancels.
Model Y also shifts into Park if it detects that
the driver has left the vehicle.
NOTE: When Stopping Mode is set to Hold (see
Stopping Mode on page 61), Vehicle Hold engages
automatically whenever
Model Y stops while in a driving
gear. There is no need to press the brake to engage it.
Vehicle Hold
66MODEL Y Owner
Page 76 of 250

The towing package includes a 2" x 2" (5 cm x 5 cm)
hitch receiver that can support an accessory carrier (for bicycles, skis, snowboards, etc.) or tow a trailer.
Installing and Using a Carrier
When using the tow package to carry accessories, the 2"
x 2" (5 cm x 5 cm) square hitch receiver is designed to
support vertical loads of up to
160 lbs (72 kg). Ball
mounts that are compatible with the square receiver
must be purchased separately.
To install and use an accessory carrier, you must first
attach the ball mount to the hitch receiver (see
Attaching and Removing the Ball Mount on page 78).
Then, follow the instructions provided by your accessory
carrier. Observe all regulations and legal requirements in your state or region that apply to carrying accessories.
The Model Y towing package includes the wiring
necessary for using an accessory carrier equipped with
lights (see
Electrical Connections on page 78). The
package also includes Trailer Mode software compatibility (see
Trailer Mode on page 76).
NOTE: Go to http://www.tesla.com to purchase
accessories for your vehicle. Although third-party products are available, Tesla recommends and supports
only Tesla-approved products (see
Parts and
Accessories on page 179). The accessory products
available for your vehicle may vary based on market
region. Before attempting to install a non Tesla-
approved carrier, review the product information to ensure compatibility.
NOTE: When not in use, the ball mount should be
removed and stored in a dry location to prevent dust and corrosion. Keep the dust cover over the hitch housing to prevent dirt and debris from entering (see
Attaching and Removing the Ball Mount on page 78).
NOTE: Tesla assumes no responsibility for damage or
injuries resulting from installing and using an accessory carrier, for any omissions in the instructions
accompanying an accessory carrier, or for your failure to follow the instructions. Damage caused by using an
accessory carrier is not covered by the warranty.
Carrying Accessories
The hitch receiver is designed to support vertical loads
up to
160 lbs (72 kg). When carrying bicycles, skis, or
other items on the
Model Y hitch, always check to
ensure that the maximum weight is not exceeded. When calculating weight, remember to include the weight of
the accessory carrier.
For example, assuming the carrier
weighs 40 lbs (18 kg), the weight threshold is sufficient
for carrying two bicycles weighing approximately 60 lbs
(27 kg) each, or four items weighing approximately 30
lbs (14 kg) each.
NOTE: Consult the product details of your accessory
carrier for more information, such as additional weight or load limits. Damage caused by non Tesla-approved
accessories is not covered by the warranty.CAUTION: Exceeding the maximum weight the
Model Y hitch is designed to support (as
previously described) can cause significant
damage.
CAUTION: Do not attempt to install an accessory
carrier on Model Y that is not equipped with the
tow package. Doing so can cause significant
damage.
Trailer Towing
The maximum trailer weight (including all cargo and
additional equipment), and the trailer tongue weight
depend on the number of occupants in your vehicle and the tires being used. The maximum towing capacity and
trailer tongue weight must never exceed the following:
Tire
Size# of
PassengersMaximum
Towing
CapacityMaximum
Tongue
Weight19",
20"
and
21"up to 33,500 lbs
(1,588 kg)350 lbs (159
kg)19"
and
21"4 - 53,500 lbs
(1,588 kg)350 lbs (159
kg)20"4 - 52,300 lbs
(1,043 kg)**230 lbs (104
kg)**19"6 - 7*2000 lbs (907
kg)**200 lbs (91
kg)**20"6 - 7*Towing not
permitted-21"6 - 7*1200 lbs (544
kg)**120 lbs (54
kg)**
*Applicable only to vehicles with seven seating
positions.
** You must operate within the speed limitations of your trailer and tires, and only drive at speeds appropriate for
the load you are towing, the weather, road and
traffic
conditions, and your level of towing experience. Always
obey posted speed limits and local regulations regarding
speed.
NOTE: In Canada, towing is limited to 55 mph (89 km/h).
Towing and Accessories
74MODEL Y Owner
Page 80 of 250

NOTE: When testing chocks, ensure that Vehicle Hold
(see
Vehicle Hold on page 66) is not engaged. If
Vehicle Hold is braking
Model Y, the Vehicle Hold
indicator light displays on the touchscreen. To
disengage Vehicle Hold, press and release the brake
pedal.
4.
Place the vehicle in Park.
WARNING: If parking on a grade is necessary,
always ensure that all trailer wheels have been
securely chocked. Failure to do so can result in
serious damage or injury.
Trailer Sway Mitigation
When trailer sway is detected, the electronic stability control system attempts to apply the appropriate amount of braking to minimize trailer sway. The touchscreen
briefly displays the traction control system
indicator. Pressing the brake pedal when the system is actively braking to mitigate trailer sway does not cancel this automatic braking.
Attaching and Removing the Ball
Mount
The Model Y towing package does not include a ball
mount. You must purchase a ball mount suitable for the type of trailer you are towing. The
Model Y hitch receiver
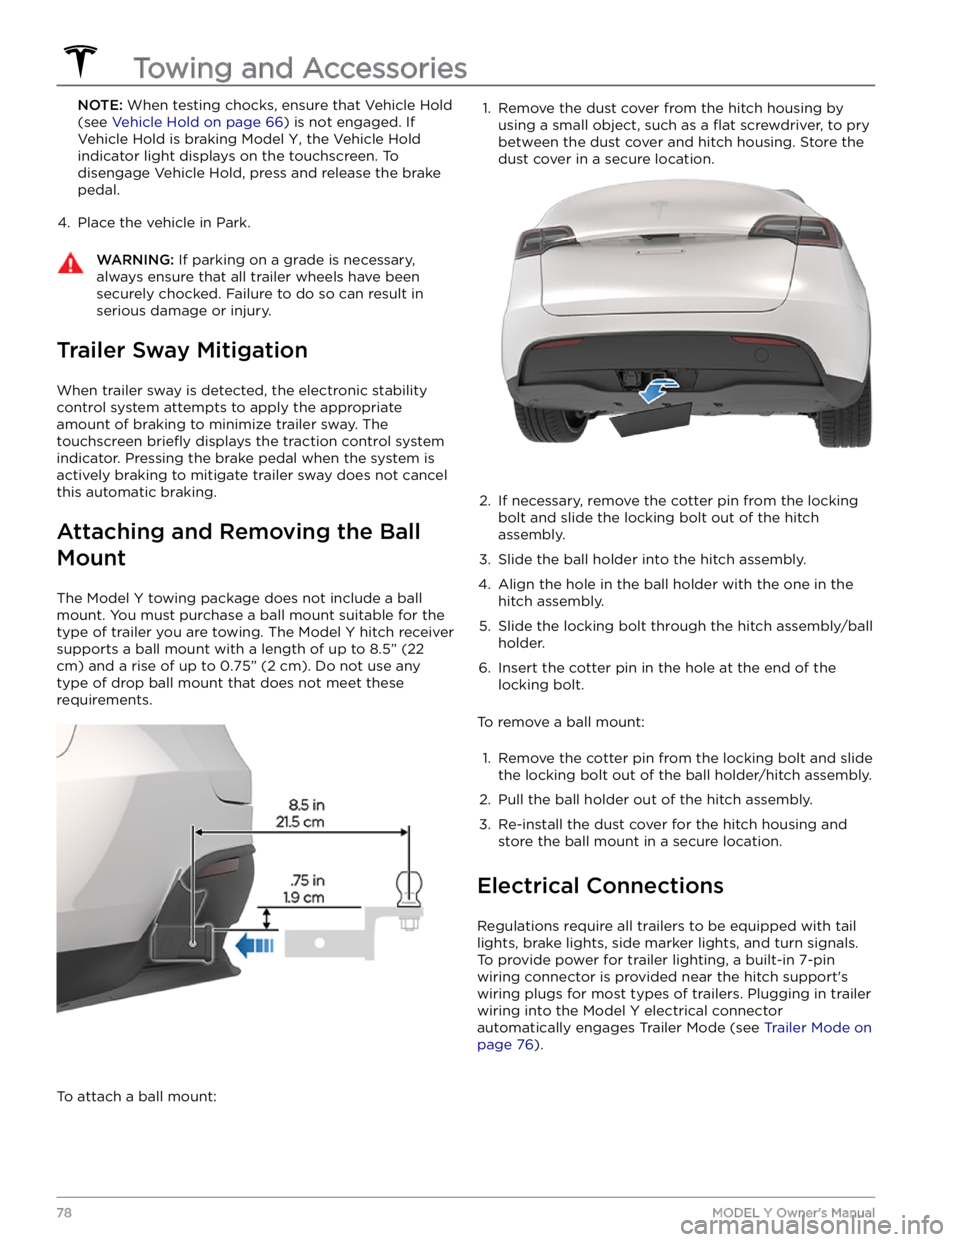
supports a ball mount with a length of up to
8.5” (22
cm) and a rise of up to 0.75” (2 cm). Do not use any
type of drop ball mount that does not meet these requirements.
To attach a ball mount:
1. Remove the dust cover from the hitch housing by
using a small object, such as a
flat screwdriver, to pry
between the dust cover and hitch housing. Store the dust cover in a secure location.
2.
If necessary, remove the cotter pin from the locking
bolt and slide the locking bolt out of the hitch assembly.
3.
Slide the ball holder into the hitch assembly.
4.
Align the hole in the ball holder with the one in the hitch assembly.
5.
Slide the locking bolt through the hitch assembly/ball holder.
6.
Insert the cotter pin in the hole at the end of the
locking bolt.
To remove a ball mount:
1.
Remove the cotter pin from the locking bolt and slide
the locking bolt out of the ball holder/hitch assembly.
2.
Pull the ball holder out of the hitch assembly.
3.
Re-install the dust cover for the hitch housing and store the ball mount in a secure location.
Electrical Connections
Regulations require all trailers to be equipped with tail lights, brake lights, side marker lights, and turn signals.
To provide power for trailer lighting, a built-in 7-pin wiring connector is provided near the hitch support
Page 81 of 250

1.
Reverse Lights
2.
Brake Controller Output
3.
Right Turn Signal and Brake Light
4.
12V Power
5.
Ground
6.
Left Turn Signal and Brake Light
7.
Tail Lamps
NOTE: It is the driver
Page 93 of 250

NOTE: Depending on market region, vehicle
configuration, options purchased, and software version,
your vehicle may not be equipped with Autosteer, or the
feature may not operate exactly as described.
NOTE: Autosteer is a BETA feature.
Autosteer builds upon Traffic-Aware Cruise Control (see
Traffic-Aware Cruise Control on page 86), intelligently
keeping
Model Y in its driving lane when cruising at a set
speed.
Autosteer also allows you to use the turn signals
to move Model Y into an adjacent lane (see Auto Lane
Change on page 93). Autosteer detects lane markings
and the presence of vehicles and objects to
steer Model
Y.
NOTE: To display more details about the roadway and its
surroundings, such as road markings, stop lights, objects (such as trash cans and poles), etc., touch
Controls >
Autopilot > Full Self-Driving Visualization Preview (if
equipped).
CAUTION: Ensure all cameras and sensors are
clean. Dirty cameras and sensors, as well as
environmental conditions such as rain and faded
lane markings, affect performance.
WARNING: Autosteer is a hands-on feature. You
must keep your hands on the steering wheel at all
times.
WARNING: Autosteer is intended for use on
highways and limited-access roads with a fully
attentive driver. When using Autosteer, hold the
steering wheel and be mindful of road conditions
and surrounding traffic. Do not use Autosteer on
city streets, in construction zones, or in areas
where bicyclists or pedestrians may be present.
Never depend on Autosteer to determine an
appropriate driving path. Always be prepared to
take immediate action. Failure to follow these
instructions could cause damage, serious injury or
death.
Operating Autosteer
Before you can operate Autosteer, you must enable it by touching
Controls > Autopilot > Autosteer (Beta).
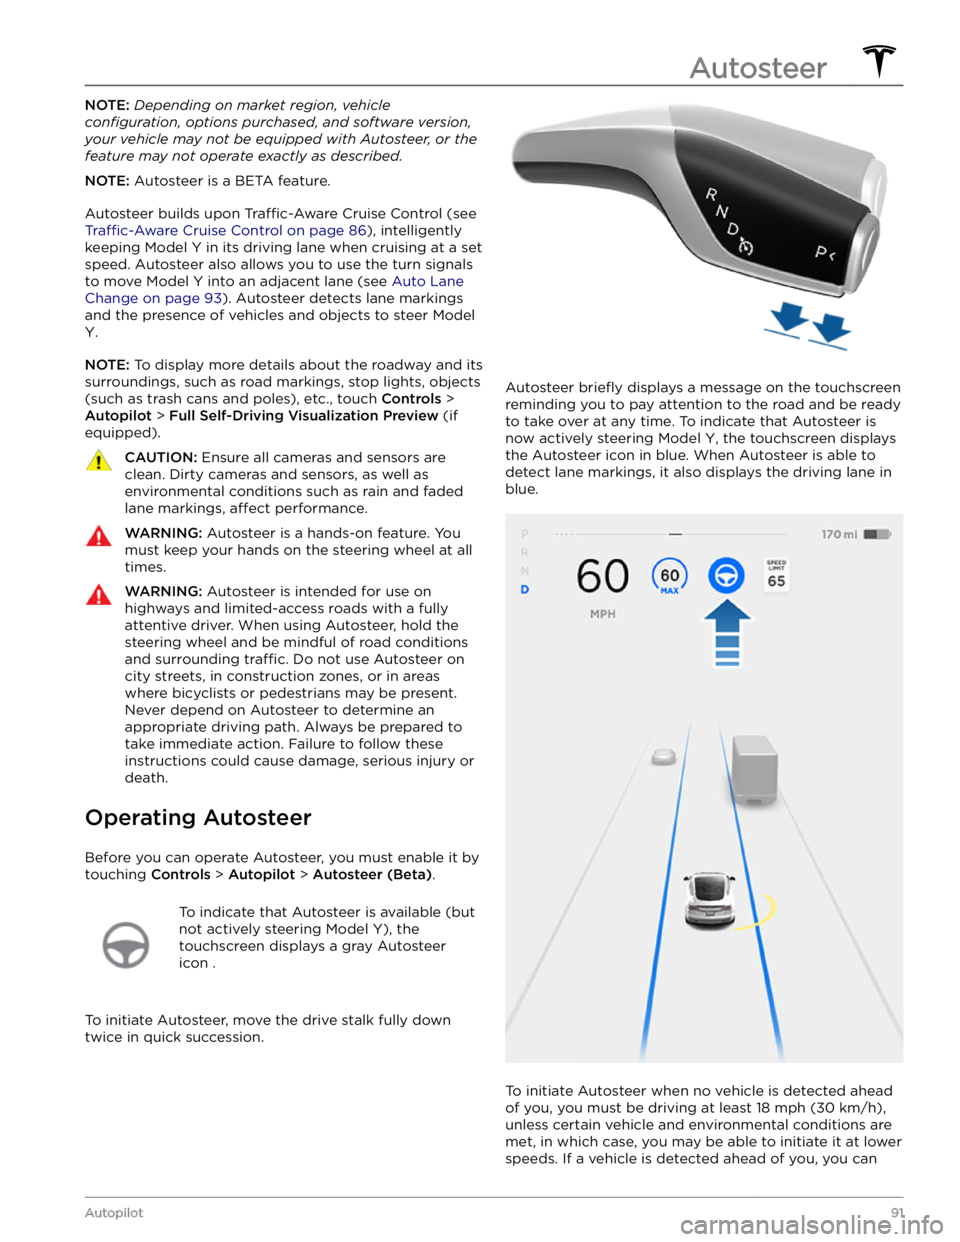
To indicate that Autosteer is available (but
not actively steering
Model Y), the
touchscreen displays a gray Autosteer
icon .
To initiate Autosteer, move the drive stalk fully down
twice in quick succession.
Autosteer briefly displays a message on the touchscreen
reminding you to pay attention to the road and be ready
to take over at any time. To indicate that Autosteer is
now actively steering
Model Y, the touchscreen displays
the Autosteer icon in blue. When Autosteer is able to detect lane markings, it also displays the driving lane in blue.
To initiate Autosteer when no vehicle is detected ahead
of you, you must be driving at least
18 mph (30 km/h),
unless certain vehicle and environmental conditions are met, in which case, you may be able to initiate it at lower speeds. If a vehicle is detected ahead of you, you can
Autosteer
91Autopilot
Page 96 of 250

When using Auto Lane Change, it is important to monitor its performance by watching the driving path in front of you and the surrounding area. Stay prepared to take over steering at any time. As you are crossing over into the adjacent lane, the
touchscreen displays the
location in the lane that
Model Y is moving into.
In situations where Auto Lane Change is unable to operate at optimal performance, or cannot operate due to inadequate data, the
touchscreen displays a series of
warnings. Therefore, when using Auto Lane Change,
always pay attention to the
touchscreen and be
prepared to manually steer
Model Y.
Stop Light and Stop Sign Warning
NOTE: Depending on market region, vehicle
configuration, options purchased, and software version,
your vehicle may not be equipped with Stop Light and
Stop Sign Warning, or the feature may not operate
exactly as described.
While Autosteer is in use, Model Y displays a warning on
the
touchscreen and sounds a chime if it detects that
you are likely to run through a red stop light or stop sign. If this happens,
TAKE IMMEDIATE CORRECTIVE
ACTION!
The visual and audible warnings cancel after a few seconds, or when you press the brake pedal, whichever
comes
first.
Stop Light and Stop Sign Warning provides warnings
only. It makes no attempt to slow down or stop
Model Y
at red traffic lights, stop signs, road markings, etc. If your
vehicle is equipped with Traffic Light and Stop Sign
Control, you can enable this feature to automatically
stop Model Y at traffic lights and stop signs (see Traffic
Light and Stop Sign Control on page 99).
NOTE: Touch Controls > Autopilot > Full Self-Driving
Visualization Preview (if equipped) to display more
details about the roadway and its surroundings, such as road markings, stop lights, objects (such as trash cans
and poles), etc.
CAUTION: Stop Light and Stop Sign Warning
requires the vehicle
Page 101 of 250

NOTE: Depending on market region, vehicle
configuration, options purchased, and software version,
your vehicle may not be equipped with Traffic Light and
Stop Sign Control, or the feature may not operate
exactly as described.
NOTE: Traffic Light and Stop Sign Control is a BETA
feature and works best on roads that are frequently
driven by Tesla vehicles. Traffic Light and Stop Sign
Control attempts to stop at all traffic lights and may also
stop at green lights.
Traffic Light and Stop Sign Control is designed to
recognize and respond to
traffic lights and stop signs,
slowing
Model Y to a stop when using Traffic-Aware
cruise control or Autosteer. This feature uses the
vehicle
Page 104 of 250

Type of Traffic LightVehicle Intended ResponseModel Y slows down. To proceed, you must press down on the drive stalk or briefly
press the accelerator pedal. If you don