Page 21 of 248

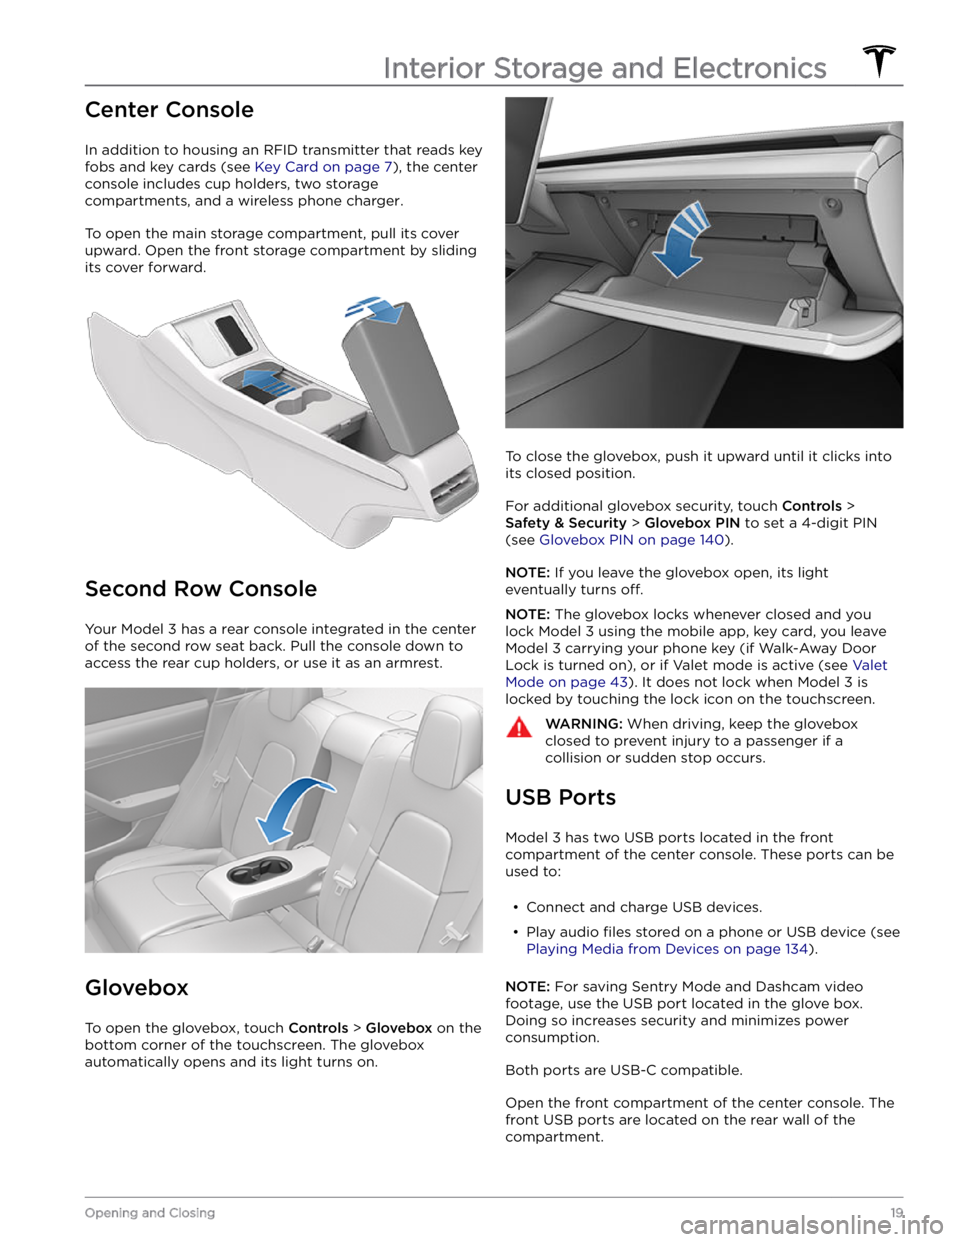
Center Console
In addition to housing an RFID transmitter that reads key fobs and key cards (see
Key Card on page 7), the center
console includes cup holders, two storage
compartments, and
a wireless phone charger.
To open the main storage compartment, pull its cover upward. Open the front storage compartment by sliding its cover forward.
Second Row Console
Your Model 3 has a rear console integrated in the center
of the second row seat back. Pull the console down to
access the rear cup holders, or use it as an armrest.
Glovebox
To open the glovebox, touch Controls > Glovebox on the
bottom corner of the touchscreen. The glovebox automatically opens and its light turns on.
To close the glovebox, push it upward until it clicks into its closed position.
For additional glovebox security, touch Controls >
Safety & Security > Glovebox PIN to set a 4-digit PIN
(see
Glovebox PIN on page 140).
NOTE: If you leave the glovebox open, its light
eventually turns
off.
NOTE: The glovebox locks whenever closed and you
lock
Model 3 using the mobile app, key card, you leave
Model 3 carrying your phone key (if Walk-Away Door
Lock is turned on), or if Valet mode is active (see
Valet
Mode on page 43). It does not lock when Model 3 is
locked by touching the lock icon on the touchscreen.
WARNING: When driving, keep the glovebox
closed to prevent injury to a passenger if a
collision or sudden stop occurs.
USB Ports
Model 3 has two USB ports located in the front
compartment of the center console. These ports can be used to:
Page 50 of 248

Starting
When you open a door to enter Model 3, the
touchscreen powers on and you can operate all controls.
To drive
Model 3:
1.
PRESS THE BRAKE PEDAL - Model 3 powers on and
is ready to drive.
2.
SELECT A GEAR - move the gear stalk down for
Drive or up for Reverse (see
Gears on page 50).
NOTE: If the PIN to Drive feature is enabled (see PIN to
Drive on page 140), you must also enter a valid PIN on
the touchscreen before you can drive
Model 3.
Everything you need to know when driving Model 3
displays on the touchscreen.
Drive Disabled - Requires Authentication
If Model 3 does not detect a key when you press the
brake (a key fob or phone key is not detected or two
minutes have passed since you used the key card), the touchscreen displays a message telling you that driving requires authentication.
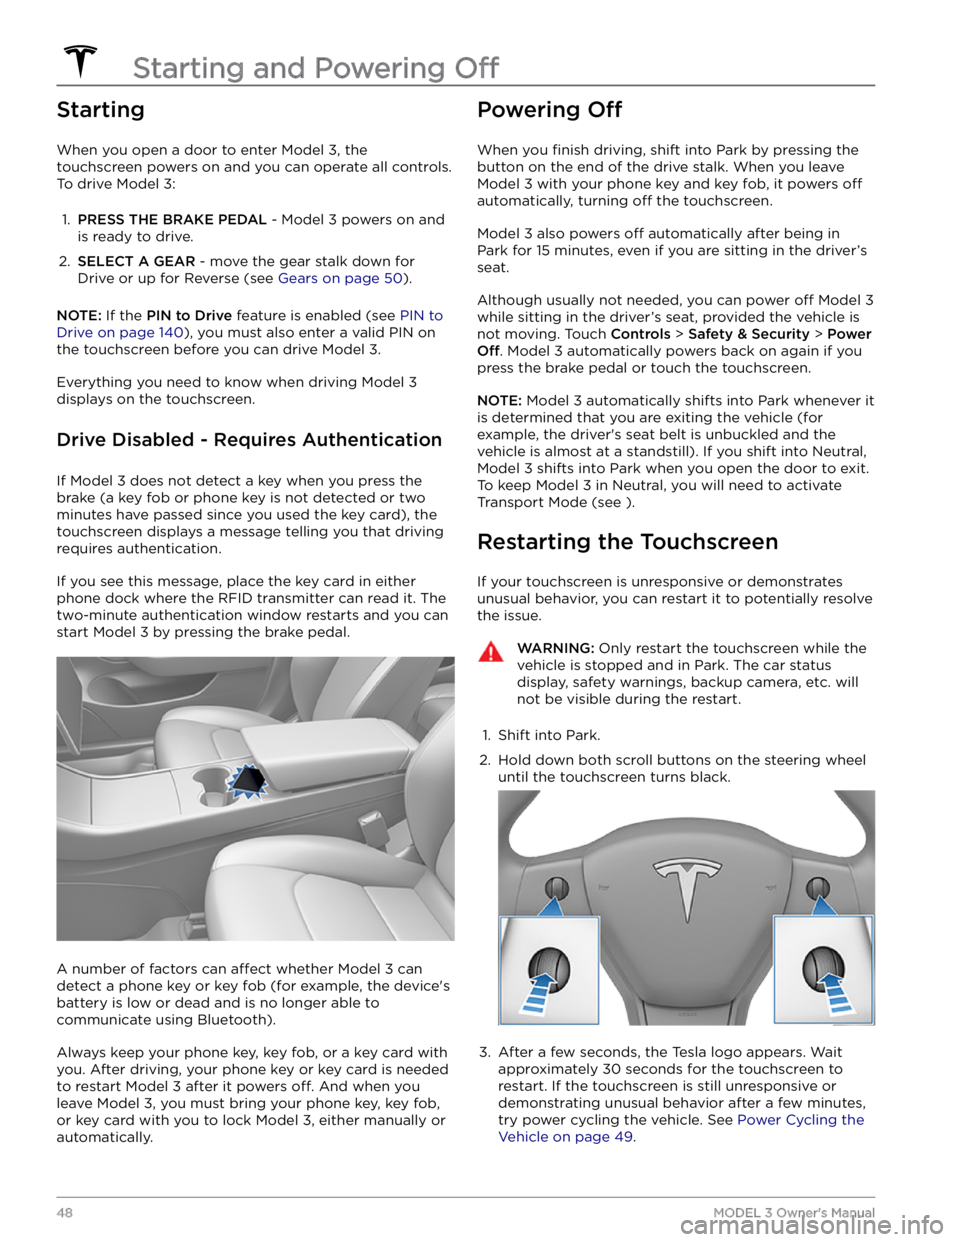
If you see this message, place the key card in either
phone dock where the RFID transmitter can read it. The
two-minute authentication window restarts and you can
start
Model 3 by pressing the brake pedal.
A number of factors can affect whether Model 3 can
detect a phone key or key fob (for example, the device
Page 55 of 248

WARNING: Proceed with caution when adjusting
headlights. Tesla has carefully calibrated the
position of the headlights to be in an optimum
position for most driving scenarios. Tesla
recommends that you do not adjust headlights
unless you are familiar with how headlights should
be adjusted. Once adjusted, you will be unable to
automatically restore them to their originally
calibrated position. Contact Tesla for assistance
when adjusting headlights.
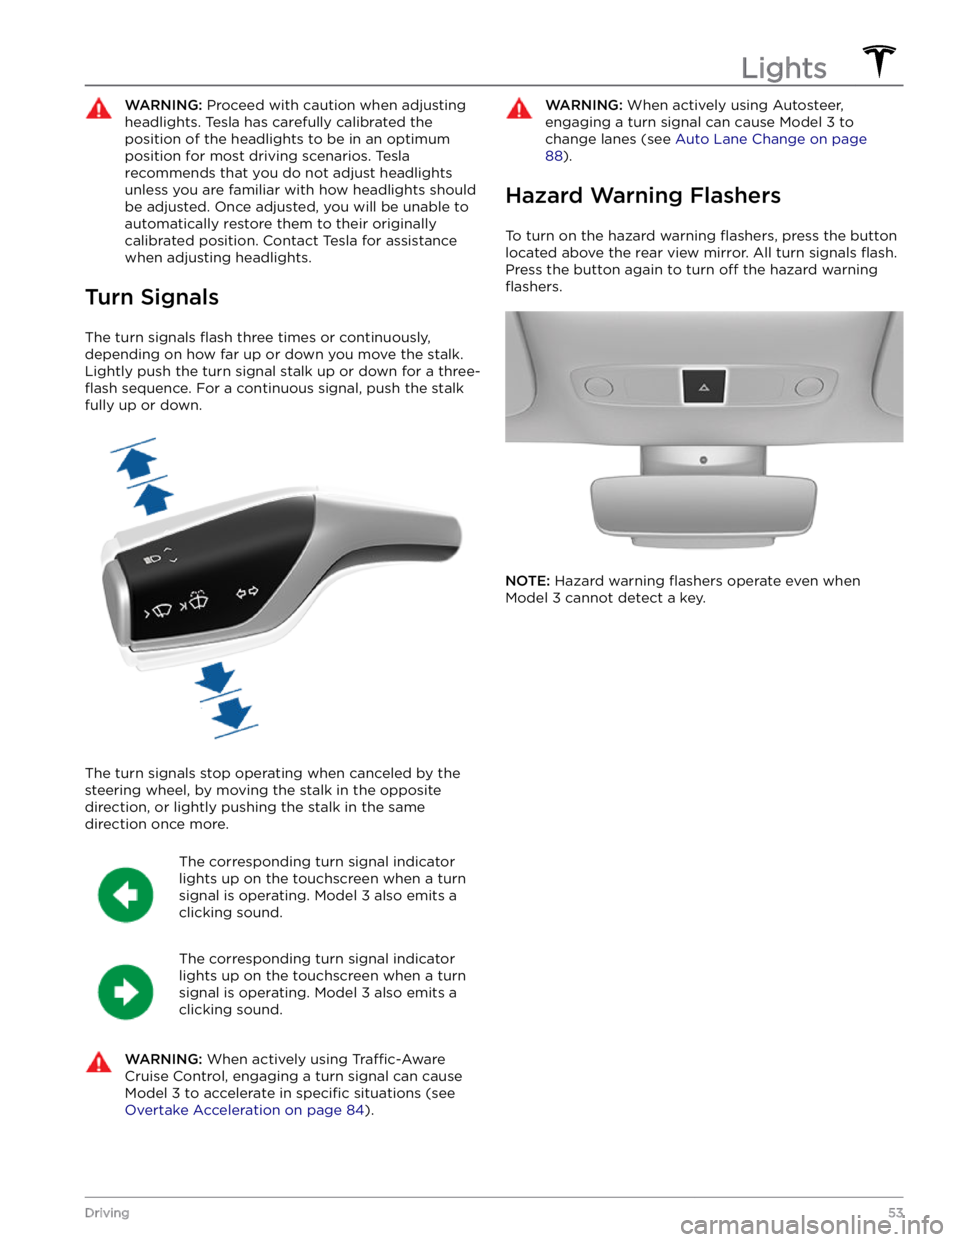
Turn Signals
The turn signals flash three times or continuously,
depending on how far up or down you move the stalk.
Lightly push the turn signal stalk up or down for a
three-
flash sequence. For a continuous signal, push the stalk
fully up or down.
The turn signals stop operating when canceled by the steering wheel, by moving the stalk in the opposite direction, or lightly pushing the stalk in the same
direction once more.
The corresponding turn signal indicator
lights up on the touchscreen when a turn
signal is operating.
Model 3 also emits a
clicking sound.
The corresponding turn signal indicator
lights up on the touchscreen when a turn
signal is operating.
Model 3 also emits a
clicking sound.
WARNING: When actively using Traffic-Aware
Cruise Control, engaging a turn signal can cause
Model 3 to accelerate in specific situations (see
Overtake Acceleration on page 84).
WARNING: When actively using Autosteer,
engaging a turn signal can cause Model 3 to
change lanes (see Auto Lane Change on page
88).
Hazard Warning Flashers
To turn on the hazard warning flashers, press the button
located above the rear view mirror. All turn signals
flash.
Press the button again to turn off the hazard warning
flashers.
NOTE: Hazard warning flashers operate even when
Model 3 cannot detect a key.
Lights
53Driving
Page 107 of 248
NOTE: To cancel the parking maneuver before exiting,
touch
Cancel on the popup window.
NOTE: If you do not choose a direction of travel on the
touchscreen, Summon does not start a parking
maneuver when you exit.
Stopping or Canceling Summon
You can stop Model 3 at any time while Summon is
active by using the mobile app or by pressing any
button on the key fob
accessory. Summon also cancels
when:
Page 139 of 248

NOTE: Unpairing the phone has no effect on using the
phone as a key. To forget an authenticated phone, see
Keys on page 6.
Connecting to a Paired Phone
Model 3 automatically connects to a phone that you
designated as
Priority Device on the Bluetooth settings
screen. If you have not set a phone as a priority,
Model 3
connects to the last phone to which is was connected, provided it is within operating range and has Bluetooth
turned on. If the last phone is not within range, it attempts to connect with the next phone that it has
been paired with.
To connect to a different phone, touch the Bluetooth
icon on the top of the touchscreen. The Bluetooth window displays a list of paired phones. Choose the phone you want to connect to, then touch
Connect. If
the phone you want to connect to is not listed, you must
pair the phone. See
Pairing a Bluetooth Phone on page
136.
When connected, the Model 3 touchscreen displays the
Bluetooth symbol next to the phone name to show that the connection is active.
Using the Phone App
When your phone is connected to Model 3 using
Bluetooth, and you have allowed access to your phone
Page 142 of 248
About the Security System
If Model 3 does not detect an authenticated phone, key
fob, or key card and a locked door or trunk is opened, an
alarm sounds and the headlights and turn signals
flash.
To deactivate the alarm, press any button on the mobile
app or tap your key card or key fob against the card reader located
just below the Autopilot camera on the
driver
Page 152 of 248
NOTE: Keyless Driving can be used when you do not
have your key or to bypass PIN to Drive in cases where you forgot your PIN or your touchscreen is unresponsive (see
PIN to Drive on page 140).
Page 205 of 248
FCC and IC CertificationComponentManufacturerModel
Operating Frequency
(MHz)
FCC IDIC IDB-Pillar Endpoint
Tesla
1089773E13.56
2400-2483.5
2AEIM-1089773E20098-1089773E
Center ConsoleTesla1089774
13.56
2400-2483.5
2AEIM-1089774
20098-1089774
Rear Endpoint
Tesla
1089775
2400-2483.5
2AEIM-108977520098-1089775
Key fobTesla11331482400-2483.52AEIM-113314820098-1133148TPMS
Tesla14725472400-2483.52AEIM-147254720098-1472547
Radar (if equipped)ContinentalARS 4-B76000-77000OAYARS4B4135A-ARS4BHomelinkGentexADHL5C286-440MHzNZLADHL5C4112A-ADHL5CCarPCTesla
1098058
--
YZP-RBHP-B216C
RI7LE940B6NA
RBHP-B216C
5131A-LE940B6NA
Wireless ChargerTesla
WC3127.72KHz2AEIM-WC320098-WC3
The devices listed above comply with Part 15 of the FCC rules and Industry Canada