2022 SUZUKI IGNIS rear seat
[x] Cancel search: rear seatPage 14 of 505

ILLUSTRATED TABLE OF CONTENTS
75RM4-01E
INTERIOR, FRONT1. Electric window controls (if equipped) (P.2-20)/
Electric mirror control switch
(if equipped) (P.2-24)/
Outside rearview mirror folding switch
(if equipped) (P.2-24)
2. Front passenger’s front air bag
(P.2-55)
3. Glove box (P.5-7)
4. Front seats (P.2-27)/
Side air bags (if equipped) (P.2-60)
5. Parking brake lever (P.3-10)
6. Front seat heater switch (if equipped)
(P.2-28)
75RM343
B
C
A
3
2
45 66
1
EXAMPLE
Page 18 of 505

ILLUSTRATED TABLE OF CONTENTS
75RM4-01E
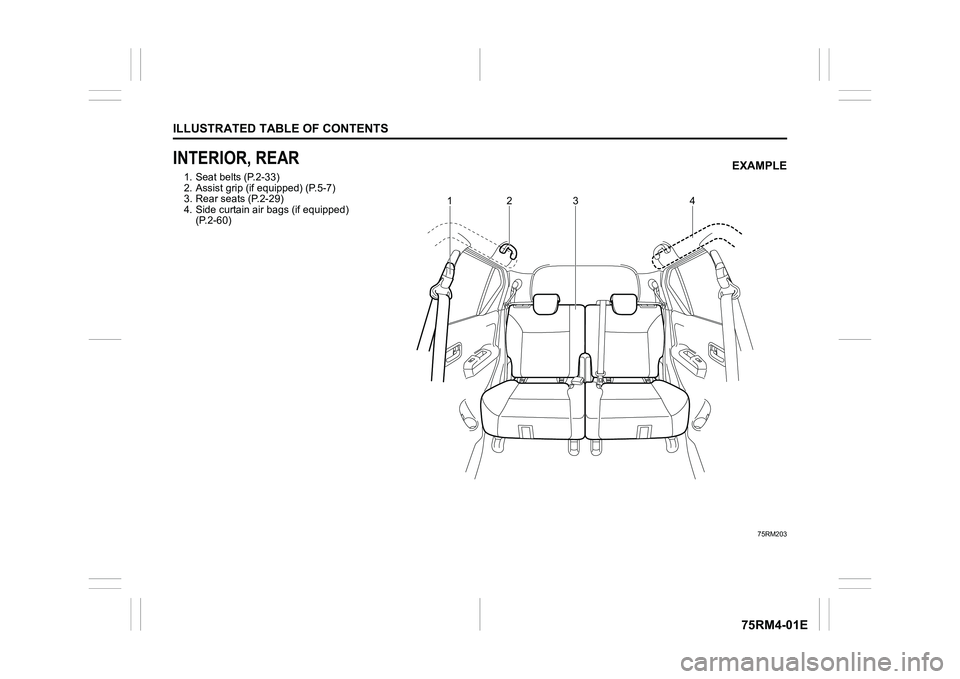
INTERIOR, REAR1. Seat belts (P.2-33)
2. Assist grip (if equipped) (P.5-7)
3. Rear seats (P.2-29)
4. Side curtain air bags (if equipped) (P.2-60)
75RM203
12
34
EXAMPLE
Page 23 of 505

BEFORE DRIVING
2
75RM4-01E
60G404
Keys ......................................................................................2-1
Door locks .................................................... ........................2-2
Keyless push start system remote controller /
Keyless entry system transmitte r (if equipped) ................2-7
Theft deterrent alarm system (if equipped) .................... ...2-16
Theft deterrent light (if equipped) ........................... ...........2-19
Windows ....................................................... ........................2-20
Mirrors ....................................................... ...........................2-23
Front seats ................................................... ........................2-27
Rear seats .................................................... .........................2-29
BEFORE DRIVINGSeat belts and child restraint systems ........................ ...... 2-33
Child restraint system f or countries applied for
UN Regulation No.16 ........................................... ................ 2-43
Supplemental restraint system (air bags) ...................... ... 2-54
Instrument cluster ............................................ ................... 2-68
Speedometer ................................................... .................... 2-69
Tachometer (if equipped) ...................................... ............. 2-69
Fuel gauge .................................................... ....................... 2-70
Brightness control ............................................ .................. 2-70
Information display
(instrument clus ter with tachometer) .......................... ...... 2-72
Information display
(instrument clus ter without tachometer) ....................... ... 2-93
Warning and indicator lights .................................. .......... 2-101
Lighting control lever ........................................ ............... 2-116
Headlight leveling switch (if equipped) ....................... .... 2-123
Turn signal control lever ..................................... ............. 2-123
Hazard warning switch ......................................... ............ 2-125
Windshield wiper and washer lever ............................. ... 2-125
Tilt steering lock lever ... ................................................... 2-128
Horn .......................................................... .......................... 2-128
Heated rear window switch /
heated outside rearview mirror switch (if equipped) ..... 2-129
Page 28 of 505

2-5BEFORE DRIVING
75RM4-01E
To activate this system:
Insert the key in the driver’s door lock and
turn the top of the key toward the front of
the vehicle twice within 3 seconds.
You cannot use the lock knobs to unlock
the side doors when this system is acti-
vated.
54P000259
To release this system:
To unlock the driver’s door, insert the key
in the driver’s door lock and turn the top of
the key toward the rear of the vehicle once.
NOTE:
You can switch the function that unlocks all
doors from requiring two turns to requiring
one turn, and vice versa, via the informa-
tion display setting mode. For details on
how to use the informati on display, refer to
“Information display” in this section.
Child-proof locks (rear door)
75RM037
(1) LOCK
(2) UNLOCK
Each of the rear doors is equipped with a
child-proof lock which can be used to help
prevent unwanted opening of the door
from inside the vehicle. When the lock
lever is in LOCK position (1), the rear door
can only be opened from outside. When
the lock lever is in UNLOCK position (2),
the rear door can be opened from inside or
outside.
Ta i l g a t e
75RM153
You can lock and unlock the tailgate by
using the key in the driver’s door lock.
To open the tailgate, pull up the tailgate
handle (1) and lift the tailgate.
Front Rear
WA R N I N G
Place the child-proof lock in LOCK
position whenever children are
seated in the rear.
(1)
(2)
�(�Ο�Ν�0�3�/�(
�:�Ν �5 �1 �, �1 �*
�Ν�O�Z�D�ś�Κ�а �F�K�H�F�N�а �W�K�D�W�а �W�K�H�а �W�D�L�O�Ι�D�W�H�а �L�Κ
�F�O�R�Κ�H�G�а �D�Φ�G�а �O�D�W�F�K�H�G�а �Κ�H�F�Χ�U�H�O�ś�ъ�а �Α�R�P�в
�S�O�H�W�H�O�ś�а �F�O�R�Κ�L�Φ�Ι�а �W�K�H�а �W�D�L�O�Ι�D�W�H�а �K�H�O�S�Κ�а �S�U�H�в
�Y�H�Φ�W�а �R�F�F�Χ�S�D�Φ�W�Κ�а �I�U�R�P�а �E�H�L�Φ�Ι�а �W�K�U�R�Z�Φ
�I�U�R�P�а �W�K�H�а �Y�H�K�L�F�O�H�а �L�Φ�а �W�K�H�а �H�Y�H�Φ�W�а �R�I�а �D�Φ
�D�F�F�L�G�H�Φ�W�ъ�а �Α�R�P�S�O�H�W�H�O�ś�а �F�O�R�Κ�L�Φ�Ι�а �L�W�а �D�O�Κ�R
�K�H�O�S�Κ�а�N�H�H�S�а�H�Ξ�K�D�Χ�Κ�W�а�Ι�D�Κ�H�Κ�а�I�U�R�P�а�H�Φ�W�H�U�в
�L�Φ�Ι�а�W�K�H�а�Y�H�K�L�F�O�H�ъ
(1)
�(�Ο�Ν�0�3�/�(
Page 29 of 505

2-6
BEFORE DRIVING
75RM4-01E
If you cannot unlock the tailgate by using
the key in the driver’s door lock due to a
discharged lead-acid battery or malfunc-
tion, follow the procedure below to unlatch
the tailgate from inside the vehicle.
1) Remove the luggage compartmentcover (if equipped) and fold the rear
seat forward for easier access. Refer to
“Folding rear seats” section for details
on how to fold the rear seat forward.
62R0366
2) Open the cover (2) in the lock mecha-nism of the tailgate.
NOTE:
Be careful not to lose the cover (2)
because it is small and detachable.
65P30080
3) Move the lever (3) in arrow direction by using a flat blade screwdriver to unlock
the tailgate.
75RM154
4) From outside the vehicle, pull up thetailgate handle (4) and lift the tailgate.
If the tailgate cannot be unlocked, have the
vehicle inspected by your SUZUKI dealer.
(2)
EXAMPLE
(3)
(3)
EXAMPLE
(4)
EXAMPLE
Page 48 of 505

2-25BEFORE DRIVING
75RM4-01E
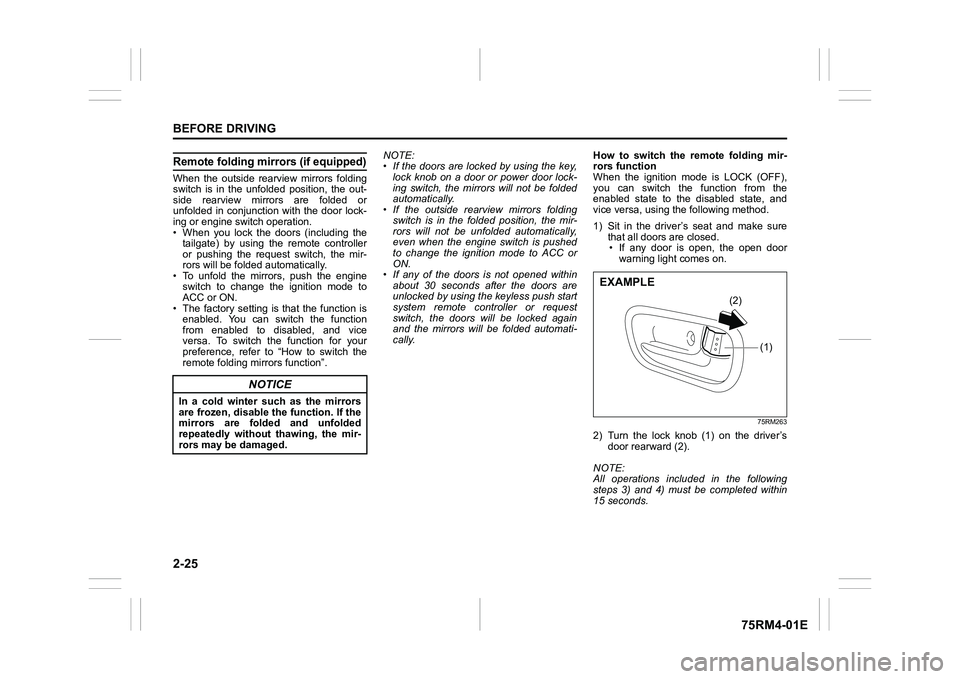
Remote folding mirrors (if equipped)When the outside rearview mirrors folding
switch is in the unfolded position, the out-
side rearview mirrors are folded or
unfolded in conjunction with the door lock-
ing or engine switch operation.
• When you lock the doors (including the tailgate) by using the remote controller
or pushing the request switch, the mir-
rors will be folded automatically.
• To unfold the mirrors, push the engine switch to change the ignition mode to
ACC or ON.
• The factory setting is that the function is enabled. You can switch the function
from enabled to disabled, and vice
versa. To switch the function for your
preference, refer to “How to switch the
remote folding mi rrors function”. NOTE:
• If the doors are locked by using the key,
lock knob on a door or power door lock-
ing switch, the mirrors will not be folded
automatically.
• If the outside rearview mirrors folding
switch is in the folded position, the mir-
rors will not be unfolded automatically,
even when the engine switch is pushed
to change the ignition mode to ACC or
ON.
• If any of the doors is not opened within
about 30 seconds after the doors are
unlocked by using the keyless push start
system remote controller or request
switch, the doors will be locked again
and the mirrors will be folded automati-
cally. How to switch the remote folding mir-
rors function
When the ignition mode is LOCK (OFF),
you can switch the function from the
enabled state to the disabled state, and
vice versa, using the following method.
1) Sit in the driver’s seat and make sure
that all doors are closed.
• If any door is open, the open door warning light comes on.
75RM263
2) Turn the lock knob (1) on the driver’s door rearward (2).
NOTE:
All operations included in the following
steps 3) and 4) must be completed within
15 seconds.
NOTICE
In a cold winter such as the mirrors
are frozen, disable the function. If the
mirrors are folded and unfolded
repeatedly without thawing, the mir-
rors may be damaged.
(1)
(2)
EXAMPLE
Page 52 of 505

2-29BEFORE DRIVING
75RM4-01E
86G064
Rear seatsSeat adjustment (if equipped)
WA R N I N G
Improperly using the seat heater can
be hazardous. An occupant can suf-
fer burns even if the heating tempera-
ture is fairly low, if the occupant
wears thin pants, a thin skirt or
shorts and leaves the heater on for
long periods.
Avoid using the seat heater for these
occupants:
• People who have reduced feeling intheir legs, including the elderly or
those with certain disabilities.
• Small children or anyone with sen-
sitive skin.
• People who are asleep or under the influence of alcohol or other drugs
which make them tired.
NOTICE
To avoid damaging the heater ele-
ment:
• Do not subject the front seats toheavy impacts, such as children
jumping on them.
• Do not cover the seat with any insulating materials such as blan-
kets or cushions.
WA R N I N G
To avoid excessive seat belt slack,
which reduces the effectiveness of
the seat belts as a safety device,
check that the seats are adjusted
before the seat belts are fastened.
WA R N I N G
All seatbacks should always be in an
upright position when driving, or seat
belt effectiveness may be reduced.
Seat belts are designed to offer maxi-
mum protection when seatbacks are
in the upright position.
WA R N I N G
Do not place any object under the
rear seat equipped with the seat posi-
tion adjustment lever. If an object
becomes caught under the rear seat,
the seat will not be latched.
Page 53 of 505

2-30
BEFORE DRIVING
75RM4-01E
75RM192
Seat position adjustment lever (1)
(if equipped)
Pull the lever up and slide the seat.
Seatback angle adju stment lever (2)
(if equipped)
Pull the lever up and move the seatback.
After adjustment, move the seat and seat-
back forward and backward to check that it
is securely latched.
Head restraintsHead restraints are designed to help
reduce the risk of neck injuries in the case
of an accident.
NOTE:
It may be necessary to fold forward the
seatback to provide enough overhead
clearance to remove the head restraint.
Adjust the head restraint to the position
which places the center of the head
restraint closest to the top of your ears. If
this is not possible for very tall passengers,
adjust the head restraint as high as possi-
ble. Rear
75RM006
To raise the rear head restraint, pull
upward the head restraint until it clicks. To
lower the head restraint, push down the
head restraint while holding in the lock
lever. If a head restraint must be removed
(for cleaning, replacement, etc.), push in
the lock lever and pull the head restraint all
the way out.
When installing a chil
d restraint system,
adjust the height of the head restraint or
remove it for fitting the child restraint, as
necessary.
(1)
(2)
(1)
EXAMPLE
WA R N I N G
• Never drive the vehicle with the
head restraints removed.
• Do not attempt to adjust the head restraint while driving.
EXAMPLE