Page 140 of 172

Connecting an Android Phone
Your Subaru comes equipped with Android Auto™, and allows you
to safely utilize certain Android features with your vehicle. You can
learn more about connecting your phone and using Android Auto™
from the how-to video linked in the QR code and the steps listed
below.
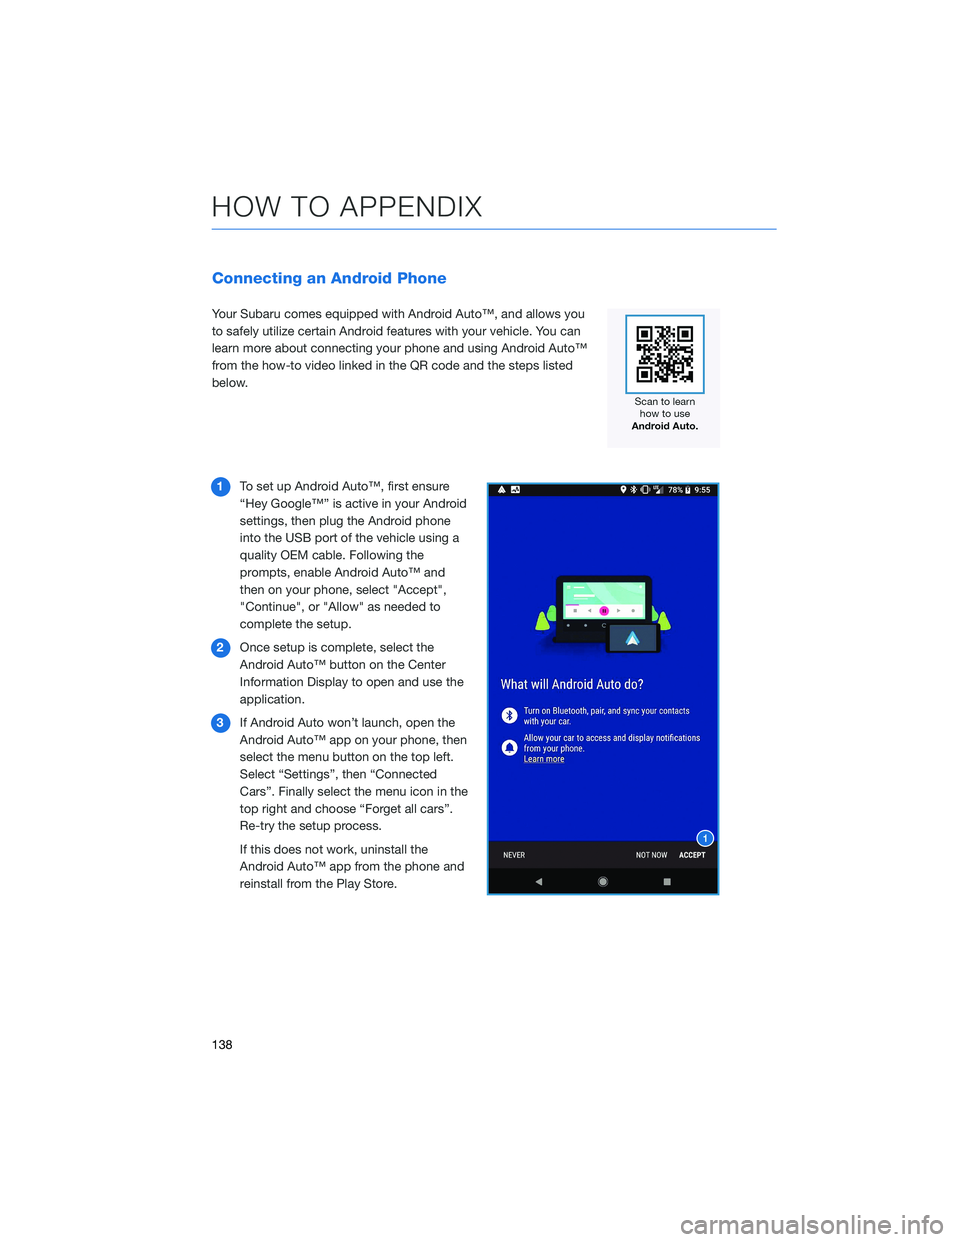
1To set up Android Auto™, first ensure
“Hey Google™” is active in your Android
settings, then plug the Android phone
into the USB port of the vehicle using a
quality OEM cable. Following the
prompts, enable Android Auto™ and
then on your phone, select "Accept",
"Continue", or "Allow" as needed to
complete the setup.
2Once setup is complete, select the
Android Auto™ button on the Center
Information Display to open and use the
application.
3If Android Auto won’t launch, open the
Android Auto™ app on your phone, then
select the menu button on the top left.
Select “Settings”, then “Connected
Cars”. Finally select the menu icon in the
top right and choose “Forget all cars”.
Re-try the setup process.
If this does not work, uninstall the
Android Auto™ app from the phone and
reinstall from the Play Store.
HOW TO APPENDIX
138
Page 142 of 172
Connecting an iPhone
Your Subaru comes equipped with Apple CarPlay®, and allows you
to safely utilize certain iPhone features with your vehicle. You can
learn more about connecting your phone and using Apple CarPlay
®
from the how-to video linked in the QR code and the steps listed
below.
1. To set up Apple CarPlay
®, make sure Siri is
turned on then plug the iOS/Apple phone
into the USB port of the vehicle. Make sure
to use an MFi certified cable.
2. Enable Apple CarPlay
®on the Center
Information Display, then select “Allow” on
the iOS/Apple phone when prompted.
3. Select Apple CarPlay
®on the vehicle screen.
This will bring you to the home page of your
phone in Apple CarPlay
®.
Ensure the iOS/Apple phone is fully up to
date. Also ensure all apps that work on
Apple CarPlay
®are up to date. Apple
CarPlay®might not function correctly if one
of the apps is outdated or having an issue.
Apps can be updated in the App Store.
HOW TO APPENDIX
140
Page 148 of 172
5Select “Search”.
6Type in the address. As you type,
suggestions will display. Once your
address is displayed, select your
address.
HOW TO APPENDIX
146
Page 150 of 172
Finding a Destination By Address
To search by address:
1Start by pushing the “Map” button to
display the map screen.
2Select “Menu”.
HOW TO APPENDIX
148
Page 151 of 172
3Next, select “Search”.
4Select “Addresses” if it is not already
selected and type the address.
a. Selecting this icon will display the
current vehicle location.
b. Selecting this icon allows you to set the
search radius filter. Once the filter is set,
the search will only be performed for
items within the chosen option: Whole
Map, Near Me, In Town or City, Along
Route, Near Destination, or
Latitude/Longitude. You may need to
change the setting if your destination is
beyond the scope of the search radius
filter.
NOTE: You can toggle between “Address” and “Point Of Interest” search by
selecting the one you want.
5When the address appears on the screen select it.
HOW TO APPENDIX
149
Page 153 of 172
Finding a Destination By POI
You can search by Points Of Interest (POI) using the search function or with the Points Of
Interest button. To search by Points Of Interest (POI):
1Push the “Map” button to display the
map screen.
2Then select “Menu”.
HOW TO APPENDIX
151
Page 163 of 172

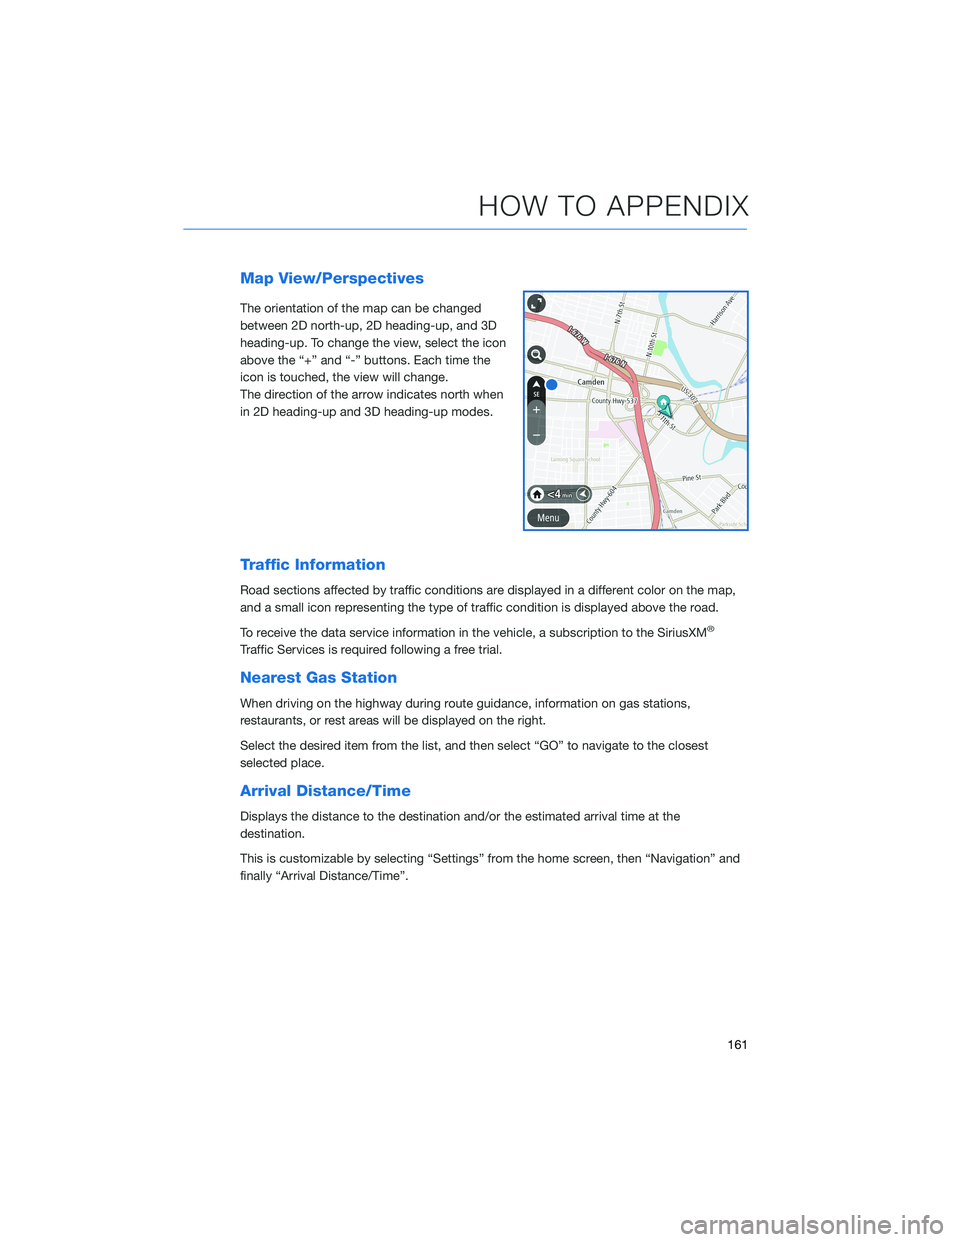
Map View/Perspectives
The orientation of the map can be changed
between 2D north-up, 2D heading-up, and 3D
heading-up. To change the view, select the icon
above the “+” and “-” buttons. Each time the
icon is touched, the view will change.
The direction of the arrow indicates north when
in 2D heading-up and 3D heading-up modes.
Traffic Information
Road sections affected by traffic conditions are displayed in a different color on the map,
and a small icon representing the type of traffic condition is displayed above the road.
To receive the data service information in the vehicle, a subscription to the SiriusXM
®
Traffic Services is required following a free trial.
Nearest Gas Station
When driving on the highway during route guidance, information on gas stations,
restaurants, or rest areas will be displayed on the right.
Select the desired item from the list, and then select “GO” to navigate to the closest
selected place.
Arrival Distance/Time
Displays the distance to the destination and/or the estimated arrival time at the
destination.
This is customizable by selecting “Settings” from the home screen, then “Navigation” and
finally “Arrival Distance/Time”.
HOW TO APPENDIX
161
Page 166 of 172

FIRMWARE AND SOFTWARE UPDATES
Software updates provide enhancements to the system, such as new features, added
security, and upgraded functions. You can ask your preferred Subaru retailer to check for
and perform a full update to the system software. Please ask your preferred Subaru retailer
for specific details on update content.
For the 11.6-inch Multimedia Plus and the 11.6-inch Multimedia Navigation systems, some
system software can be updated via a Wi-Fi network. The update process involves
downloading and installing the software update.
NOTE: System functionality will be restricted during installation, and you may need to
reset radio station presets and volume settings after the update process. Set your clock to
“Auto” (see page 126) before updating the software.
To update the software via Wi-Fi:
1. Connect to a Wi-Fi network (see page 141).
2. Display the general setting screen by pressing the “Home” button, then select
“Settings”, and finally “General”.
3. Select “Software Update”, select “Update”, and then select “Check for Updates”
• If “Automatically Check for Updates” is enabled, an update check will be performed
automatically before proceeding to the next step.
• If “Automatically Download Updates” is enabled, available software updates will be
downloaded automatically.
4. Select “Download Now” to begin the download. The download status progress is
displayed in the upper right of the screen. If you need to stop the download and restart
at a later time, select “Cancel” to stop the process.
5. Select “Install Now” to start the installation process. The installation process will take
several minutes to complete.
6. When the installation is complete, select “OK” on the confirmation message to
complete the update process.
7. Turn the ignition to the “OFF” position and open and close the driver’s door. After about
5 minutes, restart the engine, and the software installation will be applied.
HOW TO APPENDIX
164