2022 SUBARU LEGACY parking brake
[x] Cancel search: parking brakePage 3 of 164

PURPOSE OF THIS GUIDE
WELCOME................. 4
IMPORTANT SAFETY
INFORMATION.............. 4
OWNER’S RESOURCES....... 4
IN CASE OF EMERGENCY..... 5
TOWING YOUR ALL-WHEEL
DRIVE SUBARU............. 6
ENTRY AND EXIT
KEYLESS ENTRY............ 7
KEYLESS ACCESS WITH PUSH
BUTTON START............. 8
INSTRUMENT PANEL........10
GETTING COMFORTABLE
SEATING...................12
TILT AND TELESCOPIC STEERING
COLUMN...................15
POWER EXTERIOR MIRRORS . . 16
REAR VIEW MIRROR.........18
POWER WINDOWS..........19
CENTER CONSOLE STORAGE . 19
POWER MOONROOF........20
CLIMATE CONTROL..........21
ACCESSORY CONNECTIONS . . 29
CONTROLS
INSTRUMENT PANEL SWITCHES
(LOWER LEFT)..............30
AUDIO CONTROLS...........30ADVANCED ADAPTIVE CRUISE
CONTROL..................31
I SWITCH...................31
LIGHT CONTROLS...........32
TURN SIGNALS.............33
WINDSHIELD WIPERS........33
OVERHEAD CONSOLE........34
GAUGES AND WARNING
LIGHTS
COMBINATION METER.......35
WARNING AND INDICATOR
LIGHTS....................36
OPERATING THE VEHICLE
IGNITION SWITCH...........37
PUSH-BUTTON IGNITION
SWITCH...................37
STARTING THE VEHICLE......37
DRIVING THE VEHICLE.......38
AUTO START–STOP..........39
ELECTRONIC PARKING BRAKE
(EPB).....................42
TURNING OFF THE VEHICLE...44
REFUELING
FUEL FILLER LID............45
FUEL SPECIFICATIONS AND
CAPACITY..................45
PASSENGER/CARGO AREAS
FOLDING THE REAR SEATS...46
TABLE OF CONTENTS
Page 35 of 164

Daytime Running Lights
The daytime running lights automatically turn on when the engine is running, the parking
brake is fully released, the select lever is out of the “P” position, and the light switch is set
to Off, “AUTO”, or “
”. Always turn on the headlights when it’s dark outside by rotating
the dial to the “
” or “AUTO” position.
TURN SIGNALS
Push fully up for the right turn signal and fully
down for left turn signal. Your Subaru also has
a one-touch lane changer feature: push slightly
up and release to signal a right lane change or
push slightly down and release to signal a left
lane change.
WINDSHIELD WIPERS
1Intermittent:Push the wiper control lever
down one position for intermittent
operation. When the lever is in the
intermittent position, you can rotate the
dial to adjust the operating interval of the
wipers.
2Low Speed:Push the wiper control lever
down two positions for low speed wiper
operation.
3High Speed:Push the wiper control lever
down three positions for high speed wiper operation.
4Mist:Push the wiper up from the OFF position for a single wipe.
5Windshield Washer:Pull the lever toward you to wash the windshield. The washer
will spray and the wipers will operate while you pull the lever.
CONTROLS
33
Page 42 of 164

Auto Start-Stop System ON/OFF
The Auto Start-Stop system can be turned on
and off in the Center Information Display (CID)
by using the Auto Start-Stop button on the
Home screen.
NOTE: The system will default to ON after the
vehicle has been shut off.
When the Auto Start-Stop system is turned OFF, the Auto Start-Stop OFF
indicator light in the combination meter display will illuminate. This is a solid
yellow indicator.
System Operation
So that it can be used safely and comfortably, in addition to driver operations, the Auto
Start-Stop system is designed to constantly monitor the vehicle conditions as well as the
environment inside and outside the vehicle, in order to control stopping and restarting of
the engine.
After the vehicle has been completely stopped by depressing the brake pedal with the
select lever in the “D” position, the engine will be automatically stopped. When you release
the brake pedal with the select lever kept in the “D” position, the engine will be
automatically restarted.
If the engine is temporarily stopped by the system, the Auto Start-Stop
indicator light on the combination meter will illuminate in green. This indicator
light will turn off when the system restarts the engine.
Auto Vehicle Hold (AVH) also integrates seamlessly with Auto Start-Stop
functions. With AVH, the parking brake automatically applies, so you can sit without your
foot on the brake pedal. To restart the engine, just gently press down on the accelerator
pedal.
There are several operating conditions for this system to operate as intended. Please refer
to “Starting and Operating” in your Owner’s Manual for further information.
OPERATING THE VEHICLE
40
Page 44 of 164

ELECTRONIC PARKING BRAKE (EPB)
To apply the parking brake,
depress the brake pedal and pull
the parking brake switch up. The
indicator light on the parking
brake switch will illuminate and
“PARK” will appear in the
Combination Meter.
To release the parking brake
manually, depress the brake pedal
and push the parking brake
switch down with the ignition in
the “ON” position. To
automatically release the parking
brake, gently press the accelerator pedal with the select lever in the “D” or “R” position.
NOTE: Automatic parking brake release will not work unless all the doors are closed and
your seatbelt is fastened.
OPERATING THE VEHICLE
42
Page 95 of 164

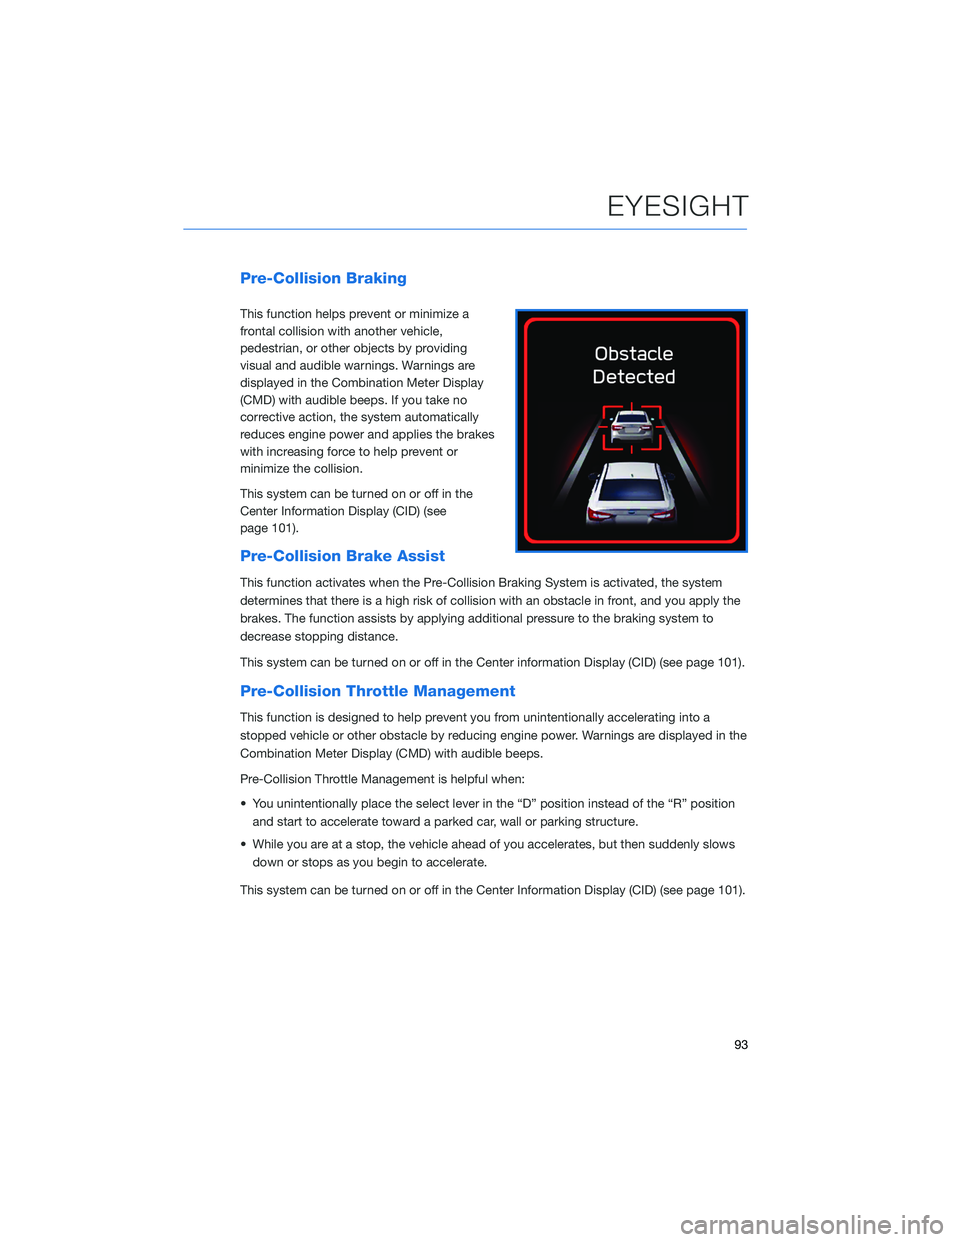
Pre-Collision Braking
This function helps prevent or minimize a
frontal collision with another vehicle,
pedestrian, or other objects by providing
visual and audible warnings. Warnings are
displayed in the Combination Meter Display
(CMD) with audible beeps. If you take no
corrective action, the system automatically
reduces engine power and applies the brakes
with increasing force to help prevent or
minimize the collision.
This system can be turned on or off in the
Center Information Display (CID) (see
page 101).
Pre-Collision Brake Assist
This function activates when the Pre-Collision Braking System is activated, the system
determines that there is a high risk of collision with an obstacle in front, and you apply the
brakes. The function assists by applying additional pressure to the braking system to
decrease stopping distance.
This system can be turned on or off in the Center information Display (CID) (see page 101).
Pre-Collision Throttle Management
This function is designed to help prevent you from unintentionally accelerating into a
stopped vehicle or other obstacle by reducing engine power. Warnings are displayed in the
Combination Meter Display (CMD) with audible beeps.
Pre-Collision Throttle Management is helpful when:
• You unintentionally place the select lever in the “D” position instead of the “R” position
and start to accelerate toward a parked car, wall or parking structure.
• While you are at a stop, the vehicle ahead of you accelerates, but then suddenly slows
down or stops as you begin to accelerate.
This system can be turned on or off in the Center Information Display (CID) (see page 101).
EYESIGHT
93
Page 104 of 164

REAR-VISION CAMERA
This function provides a clear view of the area
behind the vehicle to help avoid obstacles.
Using a wide-angle camera mounted on the
rear of the vehicle, an image is automatically
displayed on the multimedia screen when you
place the select lever in the “R” position. The
displayed image features a centerline
indicator, colored distance markers, and
dynamic guidelines that move as the steering
wheel is turned.
FRONT VIEW MONITOR(if equipped)
The Front View Monitor provides you with
visibility from the front grille shown in the
Center Information Display, improving visibility
when making turns with an obstructed view or
pulling into a narrow parking spot. A guide line
is also displayed to provide distance and width
references.
Press the Front View Monitor
switch on the center console to
display the Front View Monitor
image on the Center Information
Display (CID). You can manually
turn off the Front View Monitor by
pressing the Front View Monitor
switch again or with the Car
Settings icon, Home button, or
Driver Profiles icon. The function
also automatically turns off when
the select lever is shifted to “P”,
the parking brake is applied,
vehicle speed becomes 12.5 mph
or more, or 3 minutes have
passed since the last operation.
Front View Monitor Switch
DRIVER ASSIST TECHNOLOGIES
102
Page 122 of 164

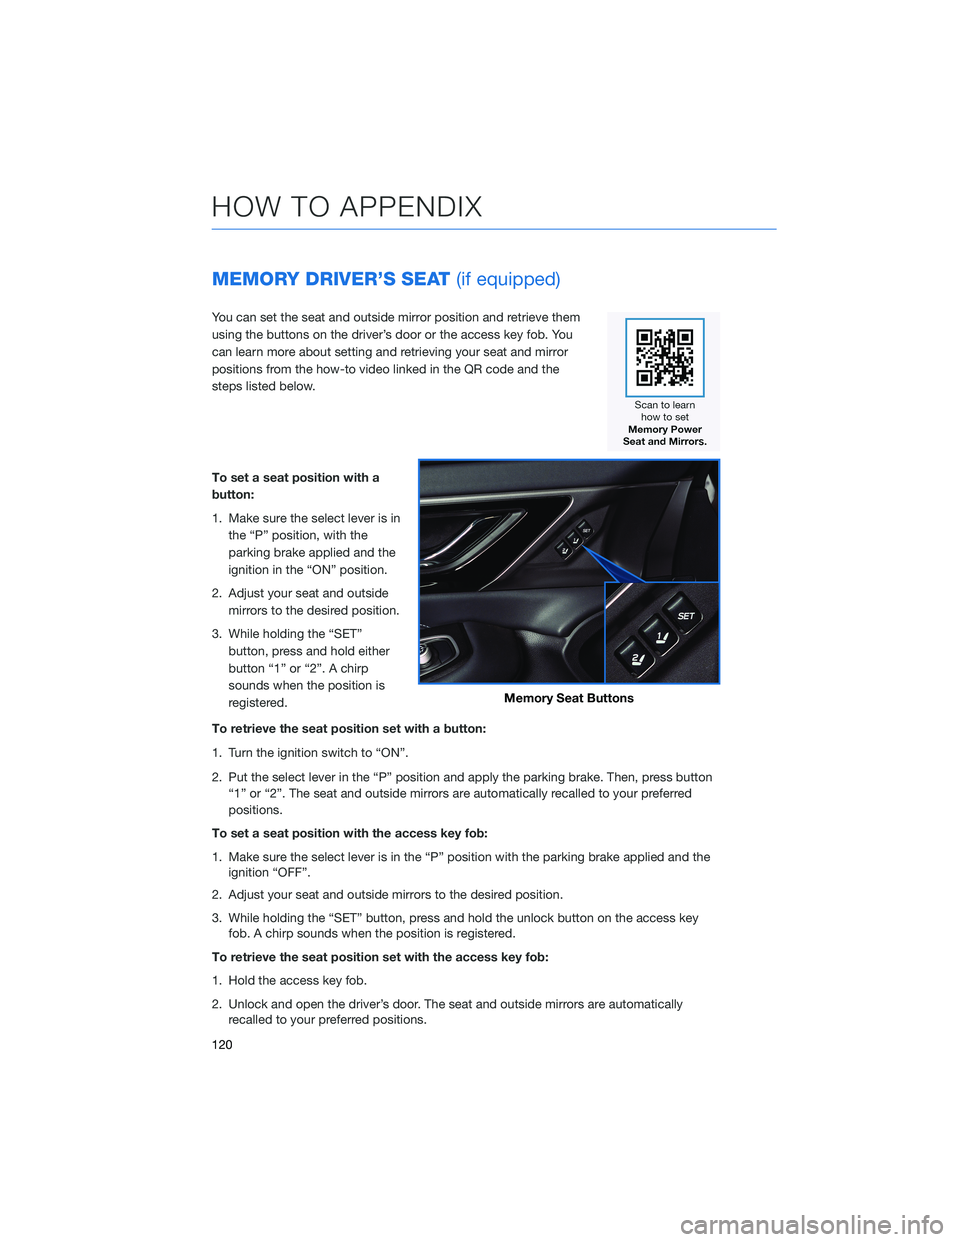
MEMORY DRIVER’S SEAT(if equipped)
You can set the seat and outside mirror position and retrieve them
using the buttons on the driver’s door or the access key fob. You
can learn more about setting and retrieving your seat and mirror
positions from the how-to video linked in the QR code and the
steps listed below.
To set a seat position with a
button:
1. Make sure the select lever is in
the “P” position, with the
parking brake applied and the
ignition in the “ON” position.
2. Adjust your seat and outside
mirrors to the desired position.
3. While holding the “SET”
button, press and hold either
button “1” or “2”. A chirp
sounds when the position is
registered.
To retrieve the seat position set with a button:
1. Turn the ignition switch to “ON”.
2. Put the select lever in the “P” position and apply the parking brake. Then, press button
“1” or “2”. The seat and outside mirrors are automatically recalled to your preferred
positions.
To set a seat position with the access key fob:
1. Make sure the select lever is in the “P” position with the parking brake applied and the
ignition “OFF”.
2. Adjust your seat and outside mirrors to the desired position.
3. While holding the “SET” button, press and hold the unlock button on the access key
fob. A chirp sounds when the position is registered.
To retrieve the seat position set with the access key fob:
1. Hold the access key fob.
2. Unlock and open the driver’s door. The seat and outside mirrors are automatically
recalled to your preferred positions.
Memory Seat Buttons
HOW TO APPENDIX
120
Page 156 of 164

2.4L TURBO ENGINE . . . ........ 52
2.5L ENGINE . . . . . . . . . . . . . . . . 51
A
ACCESSORY CONNECTIONS . . . . . . 29
ADDING SHORTCUTS . ......... 66
ADVANCED ADAPTIVE CRUISE
CONTROL . . . . . . . . ........ 31
ANDROID AUTO™ . . . . . . . . . . . . 127
Cables . . . . . . . . . . . . .....127
Compatible Models . . . . . . . . . . 129
Connecting an Android Phone....128
APPLE CARPLAY
®............ 129
Cables . . . . . . . . . . . . .....129
Compatible Models . . . . . . . . . . 131
Connecting an iPhone . . . . . . . . 130
AUDIO CONTROLS . . . . . . . . . . . . 30
AUTO START–STOP . . . . . . ..... 39
B
BLIND SPOT DETECTION (BSD) / REAR
CROSS TRAFFIC ALERT (RCTA) . . 103
Blind Spot Detection (BSD).....103
Blind Spot Detection / Rear Cross
Traffic Alert OFF . . . . . . . . . . . . 104
Lane Change Assist (LCA) . . . . . . 103
Rear Cross-Traffic Alert (RCTA) . . . 104
BLUETOOTH
®PAIRING . . . ...... 121
Pairing an Android Device......121
Pairing an iOS/Apple Device . . . . . 124
BUTTONS . . . . . . . . . . . . . . . . . 60
Controlling the Volume . ........60
C
CENTER CONSOLE STORAGE ..... 19
CHILD SAFETY LOCKS .......... 46
CLIMATE CONTROL . . . . . . ..... 21
11.6–Inch Automatic Climate
Control . . . . . . . . . .........22Dual 7–Inch Automatic Climate
Control . . . . . . . . . . . . . . . . . . 21
Heated Seats..............27
Heated Steering Wheel . . ......28
Rear Heated Seats . ..........28
Remote Engine Start with Climate
Control . . . . . . . . . . . . . . . . . . 27
Ventilated Seats . ...........28
CLOCK . .................. 90
COMBINATION METER . ......... 35
CREATING A DRIVER PROFILE . . . . . 68
Retrieving a Driver Profile . . . . . . . 71
D
DRIVERFOCUS
®COMPONENTS . . . 107
Camera . ................107
Center Information Display (CID) . . 108
Combination Meter Display (CMD) . 108
DRIVERFOCUS
®OVERVIEW..... 107
DRIVER MONITORING SYSTEM OFF . 111
DRIVER PROFILE/CONVENIENCE
SETTINGS............... 109
Deleting a Driver . . . . . . ......110
Recognizing a Driver . . . . . . . . . 110
Registering a Driver . . . . ......109
DRIVING THE VEHICLE . . . . . . . . . . 38
Automatic Transmission Shift Mode . 38
Paddle Shift Control Switches .....38
SI-DRIVE (if equipped).........39
DROWSY/INATTENTIVE WARNINGS . 109
E
ELECTRONIC PARKING BRAKE (EPB) . 42
Auto Vehicle Hold (AVH)........43
ENGINE OIL................ 53
ENGINE OIL CAPACITY ......... 53
ENROLLMENT............... 84
EYESIGHT
®DISCLAIMER....... 114
EYESIGHT®OVERVIEW . . . . . . . . . 91
EYESIGHT®ASSIST MONITOR
(EAM).................. 100
INDEX
154