Page 44 of 164
ELECTRONIC PARKING BRAKE (EPB)
To apply the parking brake,
depress the brake pedal and pull
the parking brake switch up. The
indicator light on the parking
brake switch will illuminate and
“PARK” will appear in the
Combination Meter.
To release the parking brake
manually, depress the brake pedal
and push the parking brake
switch down with the ignition in
the “ON” position. To
automatically release the parking
brake, gently press the accelerator pedal with the select lever in the “D” or “R” position.
NOTE: Automatic parking brake release will not work unless all the doors are closed and
your seatbelt is fastened.
OPERATING THE VEHICLE
42
Page 46 of 164
TURNING OFF THE VEHICLE
Without Push-button Ignition
To stop the engine:
1. Stop your Subaru completely.
2. Move the select lever to the “P” position.
3. Turn the ignition switch to “OFF”.
NOTE: The front windows will remain active for about 40 seconds and the SUBARU
STARLINK
®Multimedia System will remain on for about three minutes or until a door is
opened, whichever occurs first.
With Push-button Ignition
To stop the engine:
1. Stop your Subaru completely.
2. Move the select lever to the “P” position.
3. Press the ignition switch to stop the engine.
NOTE: The front windows will remain active for about 40 seconds and the SUBARU
STARLINK
®Multimedia System will remain on for about three minutes or until a door is
opened, whichever occurs first.
OPERATING THE VEHICLE
44
Page 47 of 164

FUEL FILLER LID
The fuel filler lid is located toward the rear of the
passenger side. To open the lid:
1. Make sure your Subaru is stopped and the select
lever is placed in PARK. Then turn the ignition to
the "LOCK"/ "OFF" position.
2. The fuel filler lid is automatically unlocked when the
ignition is moved to the ”LOCK”/OFF” position, or
by unlocking using the access key fob/transmitter
or door handles.
3. Push the rear side of the lid.
4. When the lid opens slightly, open it further by hand.
While refueling, place the fuel filler cap on the cap
holder inside the lid.
After refueling, put the cap back on and turn it
clockwise until you hear a clicking noise. Be certain
not to catch the tether under the cap while tightening.
To close the lid, press it until you hear it latch.
NOTE: The Check Engine warning light may illuminate if the fuel filler cap is not tightened
properly.
FUEL SPECIFICATIONS AND CAPACITY
2.5L Engine Fuel Specifications and Capacity
Fuel Octane Rating
87 AKI or higher
Ethanol Content Limit
No more than 10%
Fuel Tank Capacity
18.5 US Gallons
Low Fuel Warning Light
2.6 US Gallons
2.4L Engine Fuel Specifications and Capacity
Fuel Octane Rating
87 AKI or higher
Ethanol Content Limit
No more than 15%
Fuel Tank Capacity
18.5 US Gallons
Low Fuel Warning Light
2.6 US Gallons
Fuel Filler Lid and Cap
REFUELING
45
Page 50 of 164

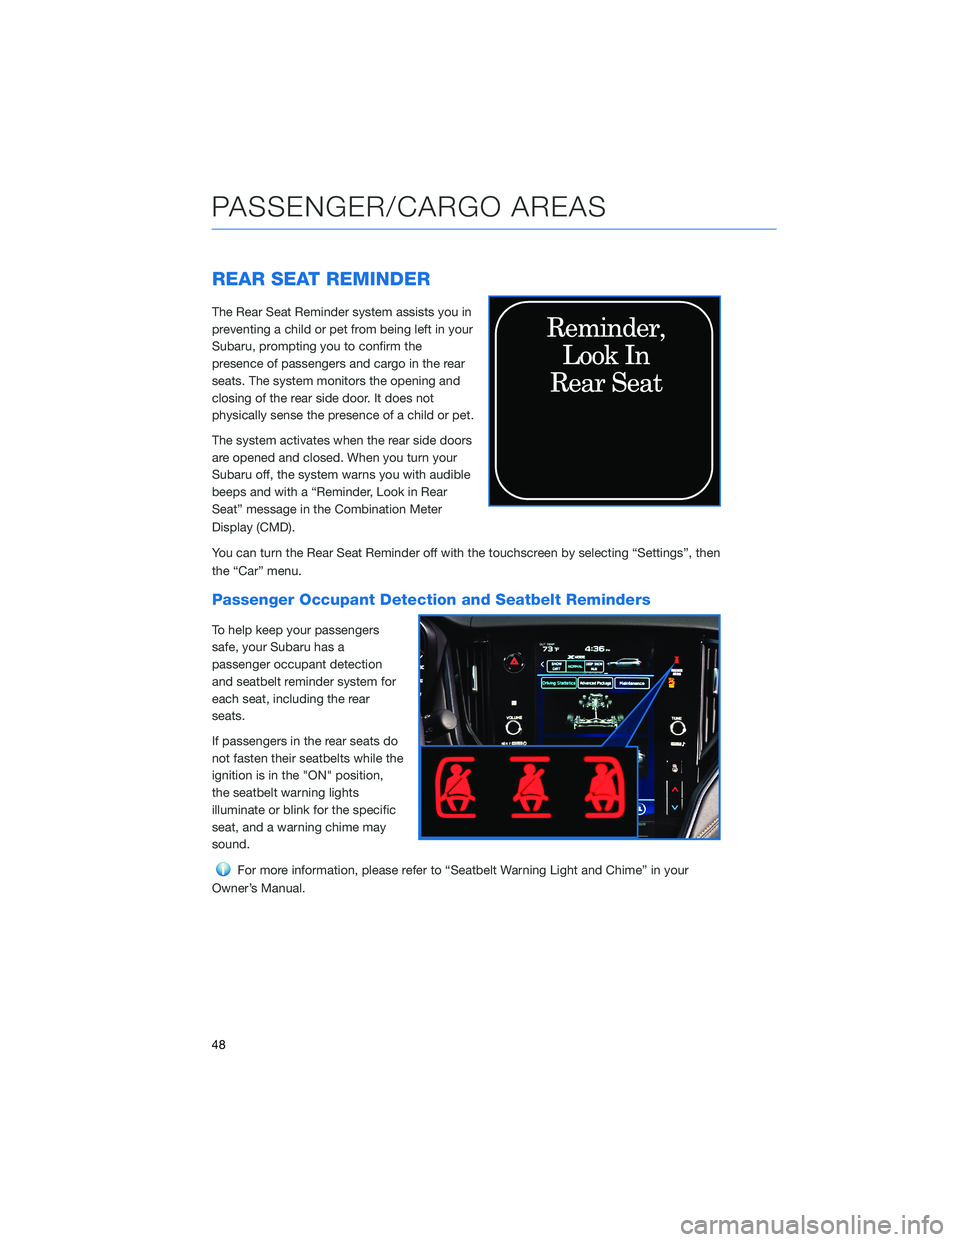
REAR SEAT REMINDER
The Rear Seat Reminder system assists you in
preventing a child or pet from being left in your
Subaru, prompting you to confirm the
presence of passengers and cargo in the rear
seats. The system monitors the opening and
closing of the rear side door. It does not
physically sense the presence of a child or pet.
The system activates when the rear side doors
are opened and closed. When you turn your
Subaru off, the system warns you with audible
beeps and with a “Reminder, Look in Rear
Seat” message in the Combination Meter
Display (CMD).
You can turn the Rear Seat Reminder off with the touchscreen by selecting “Settings”, then
the “Car” menu.
Passenger Occupant Detection and Seatbelt Reminders
To help keep your passengers
safe, your Subaru has a
passenger occupant detection
and seatbelt reminder system for
each seat, including the rear
seats.
If passengers in the rear seats do
not fasten their seatbelts while the
ignition is in the "ON" position,
the seatbelt warning lights
illuminate or blink for the specific
seat, and a warning chime may
sound.
For more information, please refer to “Seatbelt Warning Light and Chime” in your
Owner’s Manual.
PASSENGER/CARGO AREAS
48
Page 62 of 164

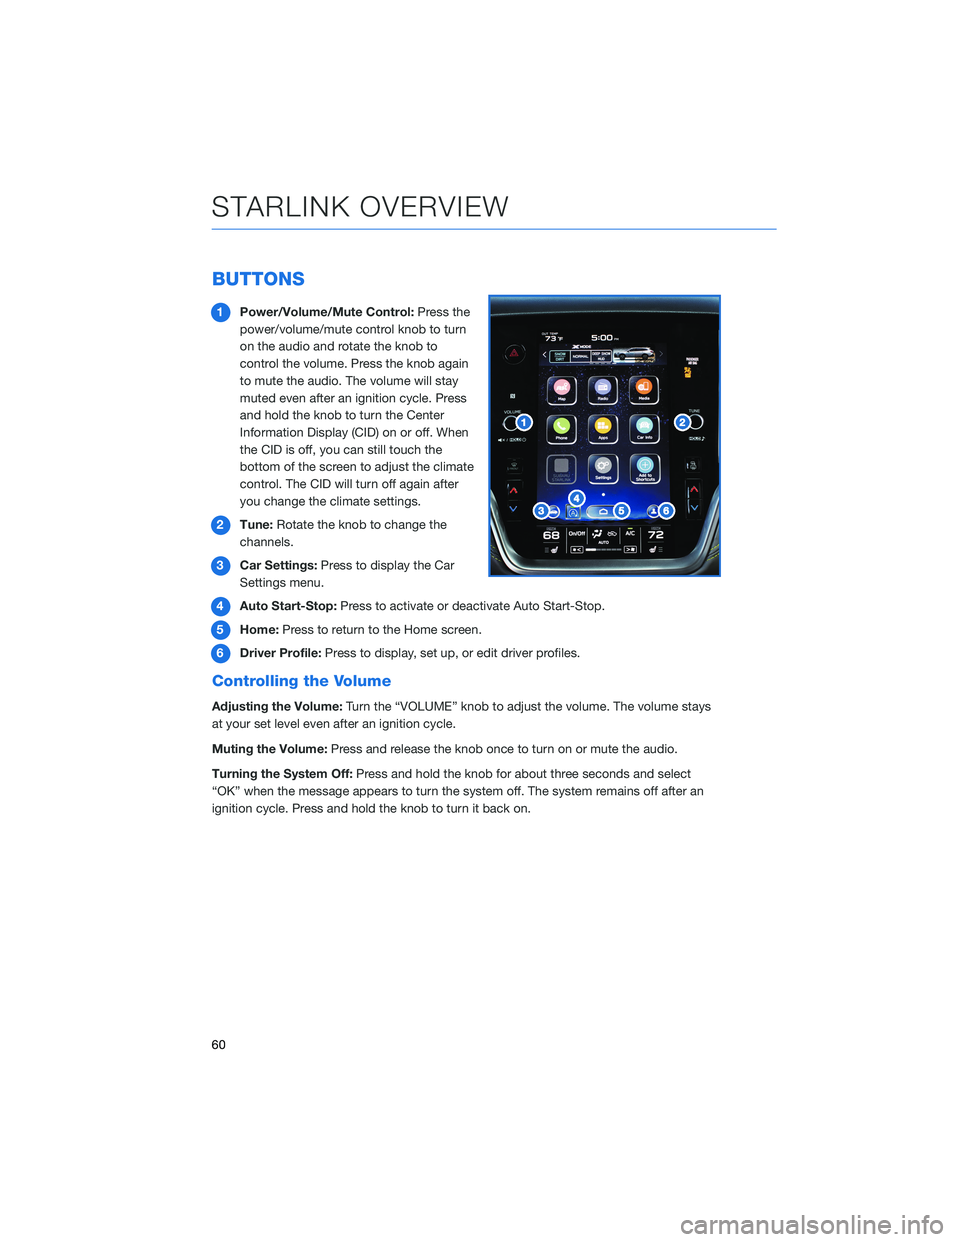
BUTTONS
1Power/Volume/Mute Control:Press the
power/volume/mute control knob to turn
on the audio and rotate the knob to
control the volume. Press the knob again
to mute the audio. The volume will stay
muted even after an ignition cycle. Press
and hold the knob to turn the Center
Information Display (CID) on or off. When
the CID is off, you can still touch the
bottom of the screen to adjust the climate
control. The CID will turn off again after
you change the climate settings.
2Tune:Rotate the knob to change the
channels.
3Car Settings:Press to display the Car
Settings menu.
4Auto Start-Stop:Press to activate or deactivate Auto Start-Stop.
5Home:Press to return to the Home screen.
6Driver Profile:Press to display, set up, or edit driver profiles.
Controlling the Volume
Adjusting the Volume:Turn the “VOLUME” knob to adjust the volume. The volume stays
at your set level even after an ignition cycle.
Muting the Volume:Press and release the knob once to turn on or mute the audio.
Turning the System Off:Press and hold the knob for about three seconds and select
“OK” when the message appears to turn the system off. The system remains off after an
ignition cycle. Press and hold the knob to turn it back on.
STARLINK OVERVIEW
60
Page 92 of 164
CLOCK
Clock settings can be adjusted when the
ignition is in the “ON” position. You can adjust
the clock manually or set the clock to adjust
automatically on the clock setting screen. To
access the clock setting screen with a single
step:
1Select the clock on the status bar at the
top of the Center Information Display.
For more information on clock settings
and full step-by-step instructions on adjusting
the clock both manually and automatically,
please refer to page 115 in this Getting
Started Guide.
1
SETTINGS AND UPDATES
90
Page 111 of 164

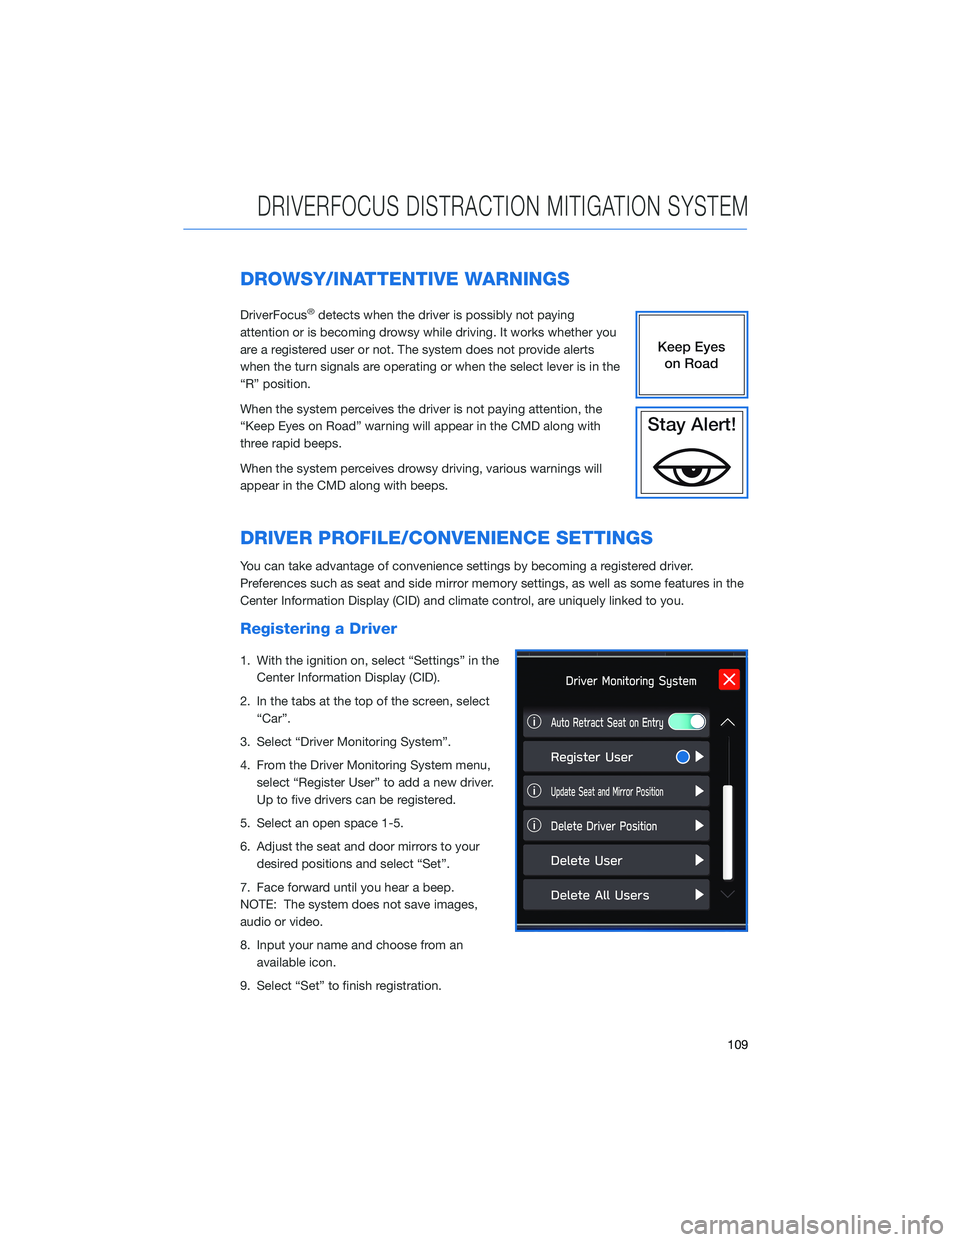
DROWSY/INATTENTIVE WARNINGS
DriverFocus®detects when the driver is possibly not paying
attention or is becoming drowsy while driving. It works whether you
are a registered user or not. The system does not provide alerts
when the turn signals are operating or when the select lever is in the
“R” position.
When the system perceives the driver is not paying attention, the
“Keep Eyes on Road” warning will appear in the CMD along with
three rapid beeps.
When the system perceives drowsy driving, various warnings will
appear in the CMD along with beeps.
DRIVER PROFILE/CONVENIENCE SETTINGS
You can take advantage of convenience settings by becoming a registered driver.
Preferences such as seat and side mirror memory settings, as well as some features in the
Center Information Display (CID) and climate control, are uniquely linked to you.
Registering a Driver
1. With the ignition on, select “Settings” in the
Center Information Display (CID).
2. In the tabs at the top of the screen, select
“Car”.
3. Select “Driver Monitoring System”.
4. From the Driver Monitoring System menu,
select “Register User” to add a new driver.
Up to five drivers can be registered.
5. Select an open space 1-5.
6. Adjust the seat and door mirrors to your
desired positions and select “Set”.
7. Face forward until you hear a beep.
NOTE: The system does not save images,
audio or video.
8. Input your name and choose from an
available icon.
9. Select “Set” to finish registration.
DRIVERFOCUS DISTRACTION MITIGATION SYSTEM
109
Page 112 of 164
Recognizing a Driver
DriverFocus®will scan and recognize you as
soon as you enter the vehicle. The
Combination Meter Display will show a
welcome screen with your user name and
personal icon. The vehicle will also recall your
user settings, such as driver seat and side
mirror positions.
If the system does not automatically recognize
a registered driver, you can repeat the facial
scan by selecting "Settings", then selecting
the "Car" menu. Select "Driver Monitoring
System", then "Repeat Facial Scan".
Deleting a Driver
1. With the ignition on, select “Settings” in the
Center Information Display (CID).
2. In the tabs at the top of the screen, select
“Car”.
3. Select “Driver Monitoring System”.
4. Scroll down and select “Delete User”.
5. Select the driver you want to delete and
select “Yes”.
DRIVERFOCUS DISTRACTION MITIGATION SYSTEM
110