Page 34 of 156

Operation in Manual Mode3 Air Conditioner Button: Press this button to activate or deactivate the air
conditioning.
4 MAX A/C Button: Press this button for quickest cooling.
5 Airflow Mode Selection Dial: Turn the dial to select the desired airflow mode. The
selected mode – ventilation, ventilation 2, bi-level, feet, or feet-defrost – is shown on
the display.
ICON MODE FUNCTION
Ventilation
Instrument panel outlets
Ventilation 2Instrument panel outlets and less foot outlets than
bi-level
Bi-LevelInstrument panel outlets and foot outlets
FeetFoot outlets, both side outlets of the instrument panel
and some through windshield defroster outlets
Feet-Defrost Windshield defroster outlets, foot outlets and both
side outlets of the instrument panel
Defrost Windshield defroster outlets and both side outlets of
the instrument panel
NOTE: The defroster button is used to activate the defrost airflow mode. 6 Fan Speed Control Dial: Turn the fan speed control dial to increase or decrease fan
speed.
GETTING COMFORTABLE
32
Page 37 of 156

If you operate any of the buttons other than “ON/OFF”, rear window defogger, “SYNC”, or
the temperature control dial, the “FULL” indicator light will turn off. The “AUTO” light will
remain illuminated. You can then manually control the system as desired. Press the
“AUTO” button to change back to “FULL AUTO” mode.4 Air Conditioner Button: Press this button to activate or deactivate the air
conditioning.
5 MAX A/C Button: Press this button for quickest cooling.
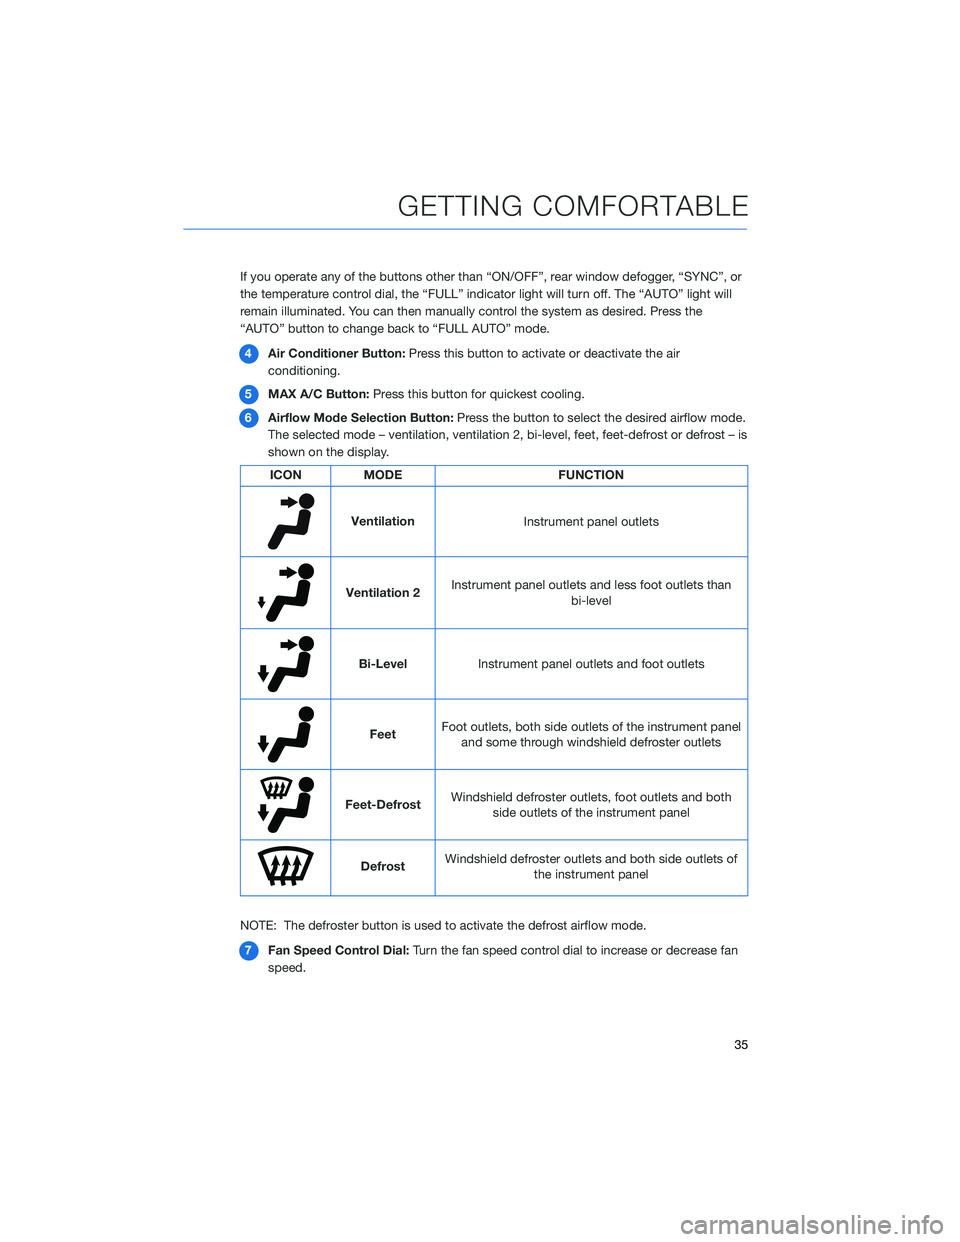
6 Airflow Mode Selection Button: Press the button to select the desired airflow mode.
The selected mode – ventilation, ventilation 2, bi-level, feet, feet-defrost or defrost – is
shown on the display.
ICON MODE FUNCTION
Ventilation
Instrument panel outlets
Ventilation 2Instrument panel outlets and less foot outlets than
bi-level
Bi-LevelInstrument panel outlets and foot outlets
FeetFoot outlets, both side outlets of the instrument panel
and some through windshield defroster outlets
Feet-Defrost Windshield defroster outlets, foot outlets and both
side outlets of the instrument panel
Defrost Windshield defroster outlets and both side outlets of
the instrument panel
NOTE: The defroster button is used to activate the defrost airflow mode. 7 Fan Speed Control Dial: Turn the fan speed control dial to increase or decrease fan
speed.
GETTING COMFORTABLE
35
Page 114 of 156

STEREO CAMERA PRECAUTIONS
Your EyeSight®stereo cameras are precision components that must be kept free from
obstruction and contamination, such as fingerprints or cleaning solutions. When the
system detects that the stereo camera lenses are impaired, a malfunction indicator will be
displayed and EyeSight
®functions will not be available.
When you are in the vicinity of the EyeSight
®stereo cameras, always observe the following
precautions:
• Do not touch or attempt to clean the EyeSight
®camera lenses inside the vehicle. Extra
caution should be used when cleaning the inside of the windshield. Over-spray from
cleaning solutions may impair or even damage the camera lenses. When cleaning the
inside of the windshield around the camera cover, do not spray cleaner directly onto the
windshield. Instead, spray cleaner onto a cloth and then wipe the windshield. Please
inform others who may attempt to clean the windshield, such as car wash staff, of these
precautions.
• If the inside of the windshield in front of the stereo camera is dirty, do not try to clean the windshield yourself. Contact your Subaru retailer to have the vehicle inspected.
• If the camera system becomes hot, the cooling fans may operate. Do not block or insert anything into the ventilation holes. Do not touch the camera cover, because it may be
hot due to head generated by the camera system.
• Electronic Toll Collection devices, such as EZPass
TM, must be installed in an area that
does not obstruct the stereo cameras' field of vision. See prohibited area on page 113.
• Adjust the rearview mirror so it does not obstruct the stereo cameras' field of vision.
• Do not install any interior rearview mirror accessories, such as a wide-type mirror or hanging objects. Only approved Genuine SUBARU accessories may be installed.
For more detailed information, please refer to your EyeSight
®Owner’s Manual.
WINDSHIELD GLASS AND DASHBOARD
Since the characteristics and limitations of the EyeSight®stereo cameras are similar to
human eyes, it is important that the area in front of the cameras be kept free from dirt,
scratches, cracks, fogging, or accessories mounted to the windshield, hood or dashboard.
Visual impairments or reflections can affect EyeSight
®system performance. Extra caution
should be taken when cleaning the windshield to prevent over-spray from cleaning
solutions.
The image in the following section outlines those areas that must be kept clean and free
from obstruction. Please refer to the Owner’s Manual for a complete listing of limitations.
CARE AND LIMITATIONS
112