2022 PEUGEOT 5008 airbag
[x] Cancel search: airbagPage 4 of 292
2
Contents
■
Overview
■
Eco-driving
1InstrumentsDigital instrument panels 9
Warning and indicator lamps 11
Indicators 17
Manual test 21
Distance recorders 21
Lighting dimmer 21
Trip computer 22
Touch screen 23
Remote functions (Rechargeable hybrid) 25
2AccessRemote control / Key 26
Keyless Entry and Starting 28
Central locking 30
Back-up procedures 30
Doors 32
Boot 32
Hands-free tailgate 33
Alarm 36
Electric windows 38
Panoramic sunroof 39
3Ease of use and comfortDriving position 42
Front seats 43
Steering wheel adjustment 47
Mirrors 47
Rear bench seat 49
Rear seats 50
Seat modularity 55
Heating and Ventilation 56
Dual-zone automatic air conditioning 57
Front demisting - defrosting 60
Heated windscreen 60
Rear screen demisting/defrosting 61
Temperature pre-conditioning
(Rechargeable hybrid)
61
Front fittings 62
Courtesy lamps 65
Interior ambient lighting 66
Rear fittings 66
Boot fittings 68
4Lighting and visibilityLighting control stalk 74
Direction indicators 75
Headlamp beam height adjustment 76
Automatic illumination of headlamps 76
Guide-me-home and welcome lighting 77
Automatic lighting systems - General
recommendations
77
Automatic headlamp dipping 77
Static cornering lighting 78
Night Vision 79
Wiper control stalk 80
Automatic wipers 81
Changing a wiper blade 83
5SafetyGeneral safety recommendations 84
Hazard warning lamps 84
Horn 85
Pedestrian horn (Rechargeable hybrid) 85
Emergency or assistance 85
Electronic stability control (ESC) 87
Advanced Grip Control 89
Hill Assist Descent Control 90
Seat belts 91
Airbags 95
Child seats 97
Deactivating the front passenger airbag 99
ISOFIX child seats 102
i-Size child seats 107
Child lock 108
6DrivingDriving recommendations 11 0
Starting/Switching off the engine 111
Starting rechargeable hybrid vehicles 11 2
Electric parking brake 11 4
6-speed manual gearbox 11 6
Automatic gearbox 11 6
Electric automatic gearbox
(Rechargeable hybrid)
11 9
Hill start assist 121
Driving modes 121
Gear shift indicator 123
Stop & Start 123
Tyre under-inflation detection 125
Driving and manoeuvring aids - General
recommendations
126
Memorising speeds 128
Speed Limit Recognition and
Recommendation
128
Speed limiter 132
Cruise control - Specific recommendations 133
Cruise control 134
Drive Assist Plus 135
Adaptive Cruise Control 136
Page 6 of 292
4
Overview
Presentation
These illustrations and descriptions are intended
as a guide. The presence and location of some
elements vary depending on the version or trim
level.
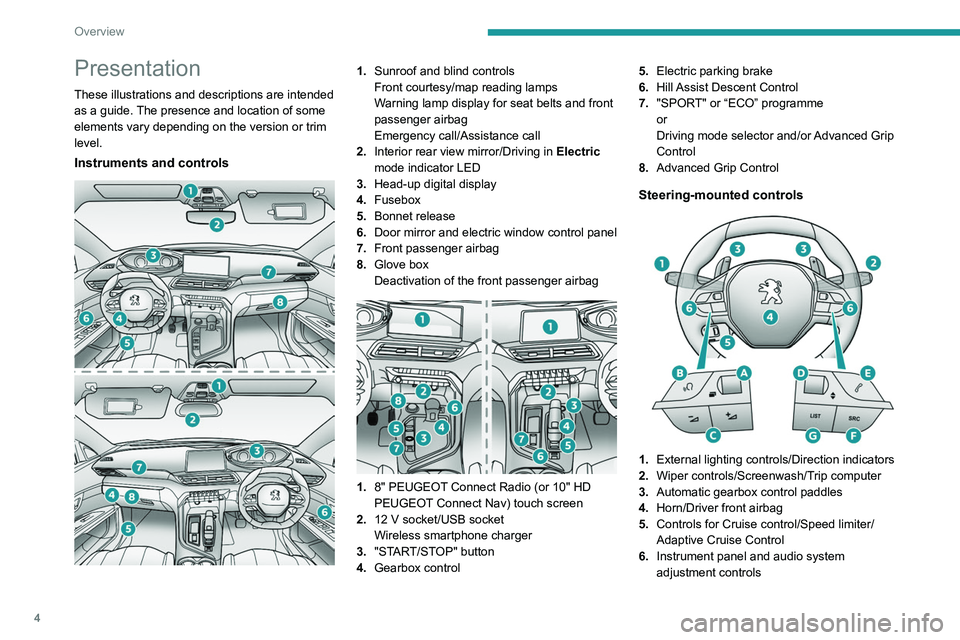
Instruments and controls
1.Sunroof and blind controls
Front courtesy/map reading lamps
Warning lamp display for seat belts and front
passenger airbag
Emergency call/Assistance call
2. Interior rear view mirror/Driving in Electric
mode indicator LED
3. Head-up digital display
4. Fusebox
5. Bonnet release
6. Door mirror and electric window control panel
7. Front passenger airbag
8. Glove box
Deactivation of the front passenger airbag
1.8" PEUGEOT Connect Radio (or 10" HD
PEUGEOT Connect Nav) touch screen
2. 12 V socket/USB socket
Wireless smartphone charger
3. "START/STOP" button
4. Gearbox control 5.
Electric parking brake
6. Hill Assist Descent Control
7. "SPORT" or “ECO” programme
or
Driving mode selector and/or Advanced Grip
Control
8. Advanced Grip Control
Steering-mounted controls
1.External lighting controls/Direction indicators
2. Wiper controls/Screenwash/Trip computer
3. Automatic gearbox control paddles
4. Horn/Driver front airbag
5. Controls for Cruise control/Speed limiter/
Adaptive Cruise Control
6. Instrument panel and audio system
adjustment controls
Page 17 of 292

15
Instruments
1Dynamic stability control (DSC)/Anti-slip
regulation (ASR)
Fixed.
The system is deactivated.
The DSC/ASR system is reactivated
automatically when the vehicle is restarted,
and at speeds above approximately 31 mph
(50
km/h).
At speeds below 31
mph (50 km/h), it can be
reactivated manually.
Flashing.
DSC/ASR regulation is activated in the
event of a loss of grip or trajectory.
Fixed.
The DSC/ASR system has a fault.
Carry out (3).
Emergency brake malfunction (with
electric parking brake)
Fixed, accompanied by the
message "Parking brake fault".
Emergency braking does not deliver optimal
performance.
If automatic release is not available, use manual
release or carry out (3).
Hill start assistFixed, accompanied by the
message "Anti roll-back system
fault".
The system has a fault.
Carry out (3).
Lane Departure Warning SystemFlashing, accompanied by an audible
signal.
A lane marking has been crossed on the left or
right.
Turn the steering wheel in the opposite direction
to return to the correct trajectory.
Fixed, accompanied by an onscreen
message.
The system has a fault.
Stay alert and drive carefully, then carry out (3).
Active Lane Keeping AssistanceFlashing.
You are about to cross a broken
lane marking without operating the direction
indicators.
The system is activated, then corrects the
trajectory on the side of the detected lane
marking.
For more information, refer to the Driving
section.
Fixed, accompanied by the display
of a message and an audible
signal.
The system has a fault.
Carry out (3).
Lane positioning assistFixed, accompanied by the
Service warning lamp.
The system has a fault.
Carry out (3).
AirbagsFixed.
One of the airbags or seat belt
pyrotechnic pretensioners is faulty.
Carry out (3).
Front passenger airbag (ON)Fixed.
The front passenger airbag is activated.
The control is in the "ON" position.
In this case, do NOT install a "rearward
facing" child seat on the front passenger seat
- risk of serious injury!
Front passenger airbag (OFF)Fixed.
The front passenger airbag is deactivated.
The control is set to the “OFF ” position.
A "rearward facing" child seat can be installed,
unless there is a fault with the airbags (Airbags
warning lamp on).
Under-inflationFixed.
The pressure in one or more tyres is too
low.
Check the pressure of the tyres as soon as
possible.
Reinitialise the detection system after adjusting
the pressure.
Under-inflation warning lamp
flashing then fixed and Service
warning lamp fixed.
The tyre pressure monitoring system is faulty.
Under-inflation detection is no longer monitored.
Page 28 of 292
26
Access
Remote control / Key
Remote control function
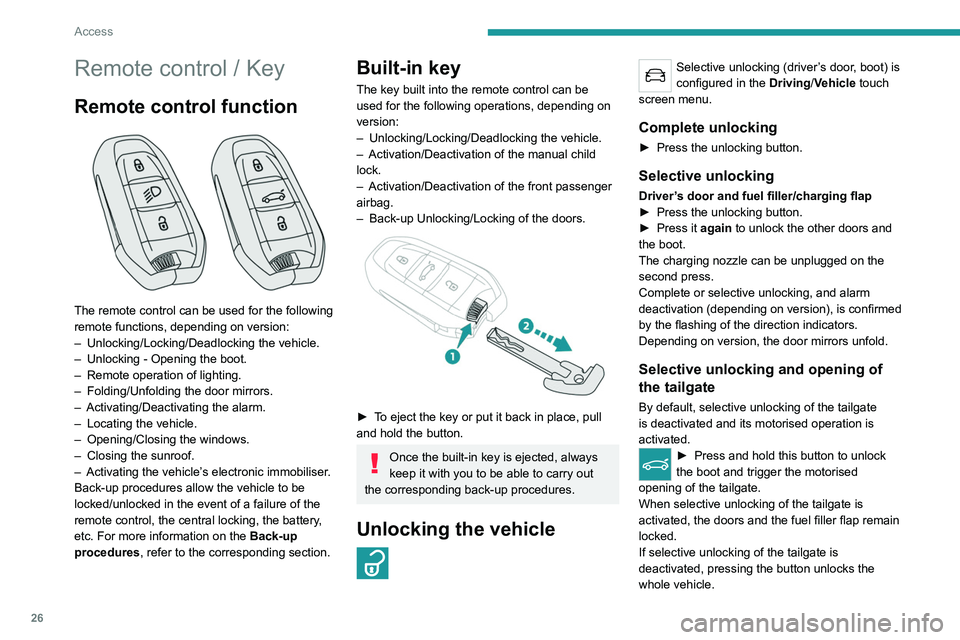
The remote control can be used for the following
remote functions, depending on version:
–
Unlocking/Locking/Deadlocking the vehicle.
–
Unlocking - Opening the boot.
–
Remote operation of lighting.
–
Folding/Unfolding the door mirrors.
–
Activating/Deactivating the alarm.
–
Locating the vehicle.
–
Opening/Closing the windows.
–
Closing the sunroof.
–
Activating the vehicle’
s electronic immobiliser.
Back-up procedures allow the vehicle to be
locked/unlocked in the event of a failure of the
remote control, the central locking, the battery,
etc. For more information on the Back-up
procedures, refer to the corresponding section.
Built-in key
The key built into the remote control can be
used for the following operations, depending on
version:
–
Unlocking/Locking/Deadlocking the vehicle.
–
Activation/Deactivation of the manual child
lock.
–
Activation/Deactivation of the front passenger
airbag.
–
Back-up Unlocking/Locking of the doors.
► To eject the key or put it back in place, pull
and hold the button.
Once the built-in key is ejected, always
keep it with you to be able to carry out
the corresponding back-up procedures.
Unlocking the vehicle
Selective unlocking (driver’s door, boot) is
configured in the Driving/Vehicle touch
screen menu.
Complete unlocking
► Press the unlocking button.
Selective unlocking
Driver’s door and fuel filler/charging flap
► Press the unlocking button.
►
Press it
again to unlock the other doors and
the boot.
The charging nozzle can be unplugged on the
second press.
Complete or selective unlocking, and alarm
deactivation (depending on version), is confirmed
by the flashing of the direction indicators.
Depending on version, the door mirrors unfold.
Selective unlocking and opening of
the tailgate
By default, selective unlocking of the tailgate
is deactivated and its motorised operation is
activated.
► Press and hold this button to unlock
the boot and trigger the motorised
opening of the tailgate.
When selective unlocking of the tailgate is
activated, the doors and the fuel filler flap remain
locked.
If selective unlocking of the tailgate is
deactivated, pressing the button unlocks the
whole vehicle.
If motorised operation of the tailgate is
deactivated, pressing the button partially
opens the tailgate.
To lock the vehicle, it is necessary to close
the tailgate again.
Locking the vehicle
Normal locking
► Press the locking button.
The locking, and the activation of the alarm
depending on version, is confirmed by the
lighting of the direction indicators.
Depending on version, the door mirrors fold.
An access (door or boot) that is not properly closed prevents locking of the
vehicle. However, if the vehicle is fitted with
an alarm, it will be activated after 45 seconds.
If the vehicle is unlocked but the doors or boot
are not subsequently opened, the vehicle
will automatically lock itself again after about
30 seconds. If the vehicle is fitted with an
alarm, it will be reactivated automatically.
Page 46 of 292
44
Ease of use and comfort
3.Lumbar support electric adjustment
The control allows independent adjustment of
the depth and vertical position of the lumbar
support.
►
Press and hold the front or rear of the
control to increase or reduce the lumbar
support.
►
Press and hold the top or bottom of the
control to raise or lower the lumbar support
area.
Placing the passenger seat
in the table position
The backrest of the passenger seat can be fully
folded forwards and secured in this position.
This function, when associated with folding
of the backrest of the rear seats, helps with
transporting long and bulky objects.
First steps:
►
Lower the head restraint.
►
Fold up the “aircraft” type table (depending
on version).
►
Move the seat backwards to allow space for
the head restraint.
►
Adjust the seat to the lowest position.
►
Check that there is nothing that might
interfere with folding of the backrest (seat belt,
child seat, items of clothing, bags, etc.).
Deactivation of the front passenger
airbag is recommended.
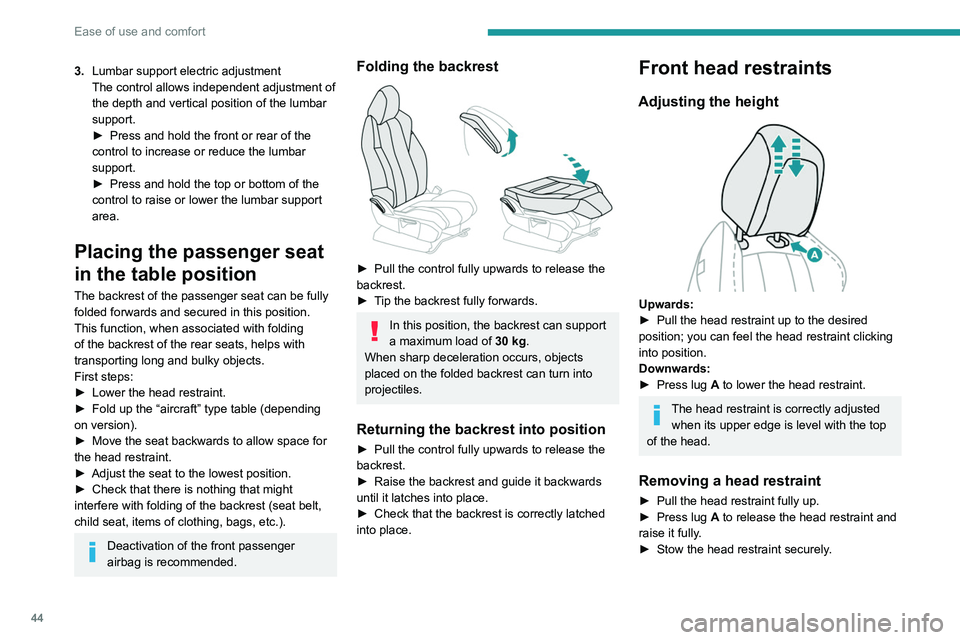
Folding the backrest
► Pull the control fully upwards to release the
backrest.
►
T
ip the backrest fully forwards.
In this position, the backrest can support
a maximum load of 30
kg.
When sharp deceleration occurs, objects
placed on the folded backrest can turn into
projectiles.
Returning the backrest into position
► Pull the control fully upwards to release the
backrest.
►
Raise the backrest and guide it backwards
until it latches into place.
►
Check that the backrest is correctly latched
into place.
Front head restraints
Adjusting the height
Upwards:
► Pull the head restraint up to the desired
position; you can feel the head restraint clicking
into position.
Downwards:
►
Press lug
A to lower the head restraint.
The head restraint is correctly adjusted when its upper edge is level with the top
of the head.
Removing a head restraint
► Pull the head restraint fully up.
► Press lug A to release the head restraint and
raise it fully.
►
Stow the head restraint securely
.
Refitting a head restraint
► Insert the head restraint rods into the guides
in the corresponding seat backrest.
► Push the head restraint fully down.
► Press the lug A to release the head restraint
and push it down.
► Adjust the height of the head restraint.
Never drive with the head restraints
removed; they should be in place and
adjusted for the occupant of the seat.
Electrically-adjusted driver's
seat
To carry out these electric adjustments, switch on the ignition or start the engine
if the vehicle has gone into energy economy
mode.
These electric adjustments are accessible
about 1 minute after opening the driver's door.
They are deactivated about 1 minute after
switching the ignition off.
Page 64 of 292
62
Ease of use and comfort
Operating conditions
– The function is only activated when the
ignition is switched off and the
vehicle
locked.
–
When the vehicle is not connected, the
function is only activated if the battery charge
level is greater than 20%.
–
When the vehicle is not connected and a
recurring programme is active (e.g. from Monday
to Friday), if two temperature pre-conditioning
sequences are run without the vehicle being
used, the programme will be deactivated.
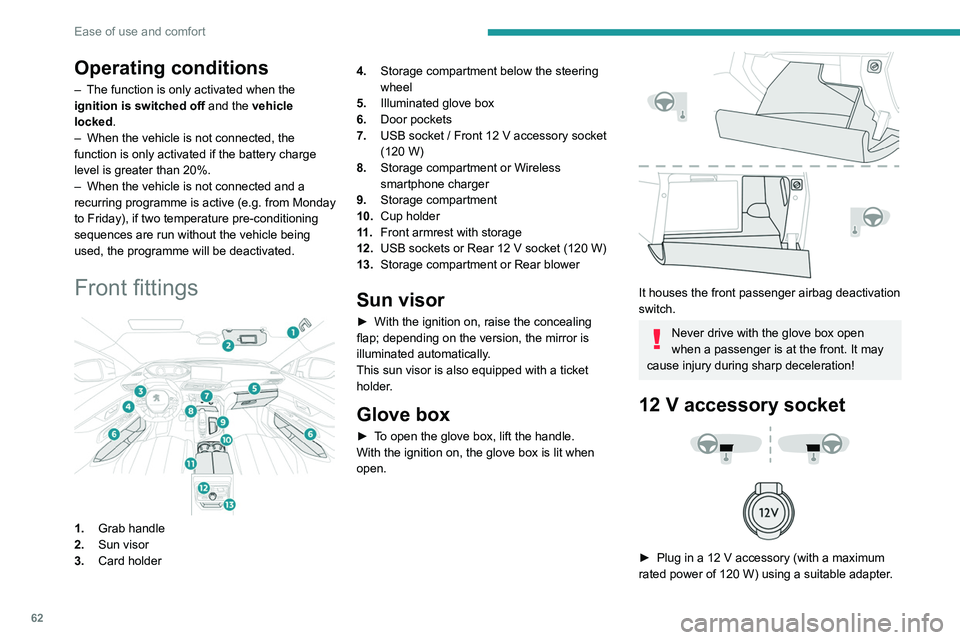
Front fittings
1. Grab handle
2. Sun visor
3. Card holder 4.
Storage compartment below the steering
wheel
5. Illuminated glove box
6. Door pockets
7. USB socket / Front 12 V accessory socket
(120 W)
8. Storage compartment or Wireless
smartphone charger
9. Storage compartment
10. Cup holder
11 . Front armrest with storage
12. USB sockets or Rear 12 V socket (120 W)
13. Storage compartment or Rear blower
Sun visor
► With the ignition on, raise the concealing
flap; depending on the version, the mirror is
illuminated automatically.
This sun visor is also equipped with a ticket
holder.
Glove box
► To open the glove box, lift the handle.
With the ignition on, the glove box is lit when
open.
It houses the front passenger airbag deactivation
switch.
Never drive with the glove box open
when a passenger is at the front. It may
cause injury during sharp deceleration!
12 V accessory socket
► Plug in a 12 V accessory (with a maximum
rated power of 120 W) using a suitable adapter.
Observe the maximum power rating to
avoid damaging the accessory.
The connection of an electrical device not approved by PEUGEOT, such as a
USB charger, may adversely affect the
operation of vehicle electrical systems,
causing faults such as poor radio reception or
interference with displays in the screens.
USB socket
These symbols determine the type of use of a USB socket:
Power supply and recharging.
Likewise, plus exchange of multimedia
data with the audio system.
Likewise, plus use of smartphone
applications with the touch screen.
The USB socket allows the connection of a
portable device or a USB memory stick.
It reads the audio files that are sent to your audio
system and played via the vehicle's speakers.
Page 87 of 292
85
Safety
5Horn
► Press the central part of the steering wheel.
Pedestrian horn
(Rechargeable hybrid)
This system alerts pedestrians that the vehicle is approaching, when driving in Electric mode
(100% electric driving).
The pedestrian horn operates once the vehicle
is moving and at speeds of up to 19 mph
(30
km/h), in forward or reverse gear.
This function cannot be deactivated.
Malfunction
In the event of a malfunction, this warning
lamp comes on on the instrument panel.
* In accordance with the general conditions of use of the service, available from dealers an\
d subject to technological and technical limitations.
** Depend ing on the geographic coverage of "Peugeot Connect SOS" and "Peugeot Connect Assistance".
The list of countries covered and the telematic services provided is ava\
ilable from dealers or on the website for your country. Have it checked by a PEUGEOT dealer or a
qualified workshop.
Emergency or assistance
call
Peugeot Connect SOS
(PE112)
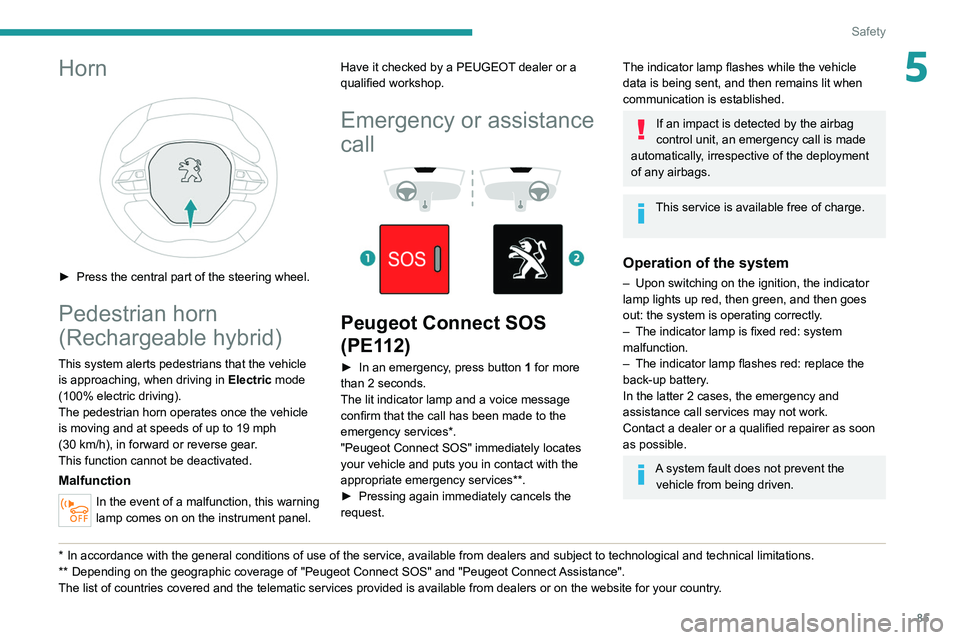
► In an emergency , press button 1 for more
than 2 seconds.
The lit indicator lamp and a voice message
confirm that the call has been made to the
emergency services*.
"Peugeot Connect SOS" immediately locates
your vehicle and puts you in contact with the
appropriate emergency services**.
►
Pressing again immediately cancels the
request.
The indicator lamp flashes while the vehicle
data is being sent, and then remains lit when
communication is established.
If an impact is detected by the airbag
control unit, an emergency call is made
automatically, irrespective of the deployment
of any airbags.
This service is available free of charge.
Operation of the system
– Upon switching on the ignition, the indicator
lamp lights up red, then green, and then goes
out: the system is operating correctly
.
–
The indicator lamp is fixed red: system
malfunction.
–
The indicator lamp flashes red: replace the
back-up battery
.
In the latter 2 cases, the emergency and
assistance call services may not work.
Contact a dealer or a qualified repairer as soon
as possible.
A system fault does not prevent the vehicle from being driven.
Page 93 of 292
91
Safety
5Switching on
By default, the system is not selected.
The state of the function is not saved when the
ignition is switched off.
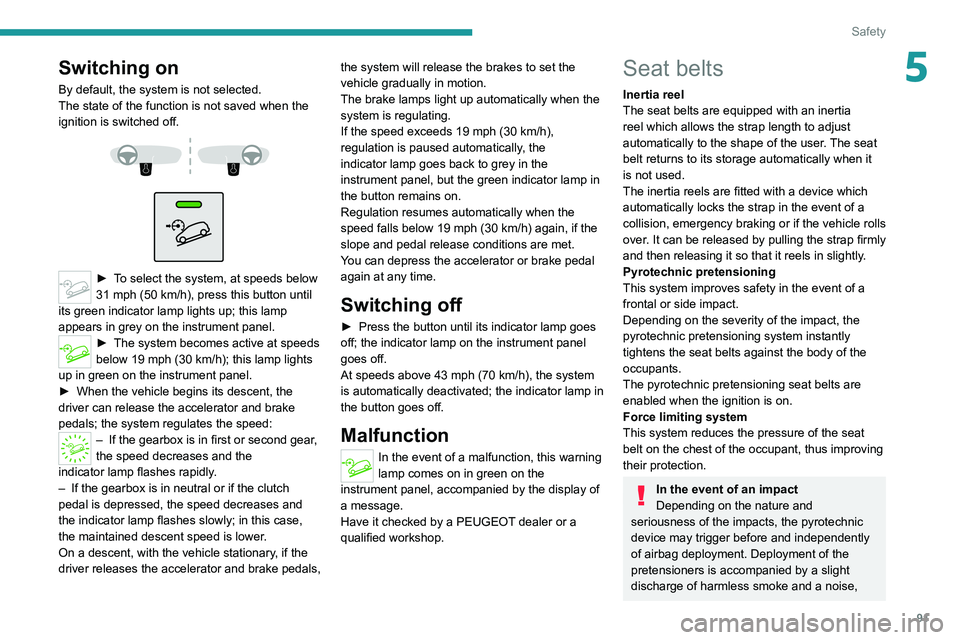
► To select the system, at speeds below
31 mph (50 km/h), press this button until
its green indicator lamp lights up; this lamp
appears in grey on the instrument panel.
► The system becomes active at speeds
below 19 mph (30 km/h); this lamp lights
up in green on the instrument panel.
►
When the vehicle begins its descent, the
driver can release the accelerator and brake
pedals; the system regulates the speed:
– If the gearbox is in first or second gear ,
the speed decreases and the
indicator
lamp flashes rapidly.
–
If the gearbox is in neutral or if the clutch
pedal is depressed, the speed decreases and
the indicator
lamp flashes slowly; in this case,
the maintained descent speed is lower.
On a descent, with the vehicle stationary, if the
driver releases the accelerator and brake pedals, the system will release the brakes to set the
vehicle gradually in motion.
The brake lamps light up automatically when the
system is regulating.
If the speed exceeds 19 mph (30
km/h),
regulation is paused automatically, the
indicator lamp goes back to grey in the
instrument panel, but the green indicator lamp in
the button remains on.
Regulation resumes automatically when the
speed falls below 19 mph (30 km/h) again, if the
slope and pedal release conditions are met.
You can depress the accelerator or brake pedal
again at any time.
Switching off
► Press the button until its indicator lamp goes
off; the indicator lamp on the instrument panel
goes off.
At speeds above 43 mph (70
km/h), the system
is automatically deactivated; the indicator lamp in
the button goes off.
Malfunction
In the event of a malfunction, this warning
lamp comes on in green on the
instrument panel, accompanied by the display of
a message.
Have it checked by a PEUGEOT dealer or a
qualified workshop.
Seat belts
Inertia reel
The seat belts are equipped with an inertia
reel which allows the strap length to adjust
automatically to the shape of the user. The seat
belt returns to its storage automatically when it
is not used.
The inertia reels are fitted with a device which
automatically locks the strap in the event of a
collision, emergency braking or if the vehicle rolls
over. It can be released by pulling the strap firmly
and then releasing it so that it reels in slightly.
Pyrotechnic pretensioning
This system improves safety in the event of a
frontal or side impact.
Depending on the severity of the impact, the
pyrotechnic pretensioning system instantly
tightens the seat belts against the body of the
occupants.
The pyrotechnic pretensioning seat belts are
enabled when the ignition is on.
Force limiting system
This system reduces the pressure of the seat
belt on the chest of the occupant, thus improving
their protection.
In the event of an impact
Depending on the nature and
seriousness of the impacts, the pyrotechnic
device may trigger before and independently
of airbag deployment. Deployment of the
pretensioners is accompanied by a slight
discharge of harmless smoke and a noise,