2022 PEUGEOT 5008 height
[x] Cancel search: heightPage 177 of 292

175
Practical information
7this device may become detached from the
vehicle - risk of an accident!
Before driving, check the headlamp height
adjustment and check that the lamps on the
trailer operate correctly.
For more information on Headlamp height
adjustment, refer to the corresponding
section.
After use
When travelling without a trailer or
load carrier, remove the towball and fit the
protective plug into the carrier, to provide
clear visibility of the number plate and/or its
lighting.
Fitting the towball
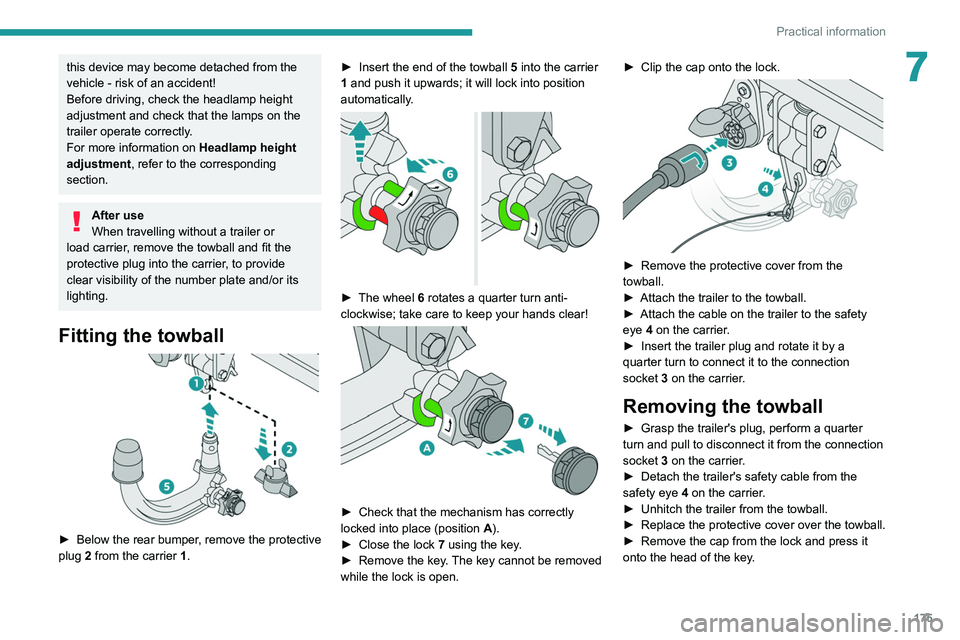
► Below the rear bumper , remove the protective
plug 2 from the carrier 1. ►
Insert the end of the towball
5 into the carrier
1 and push it upwards; it will lock into position
automatically.
► The wheel 6 rotates a quarter turn anti-
clockwise; take care to keep your hands clear!
► Check that the mechanism has correctly
locked into place (position A
).
►
Close the lock 7
using the key.
►
Remove the key
. The key cannot be removed
while the lock is open. ►
Clip the cap onto the lock.
► Remove the protective cover from the
towball.
►
Attach the trailer to the towball.
►
Attach the cable on the trailer to the safety
eye
4 on the carrier.
►
Insert the trailer plug and rotate it by a
quarter turn to connect it to the connection
socket
3 on the carrier.
Removing the towball
► Grasp the trailer's plug, perform a quarter
turn and pull to disconnect it from the connection
socket
3 on the carrier.
►
Detach the trailer's safety cable from the
safety eye
4 on the carrier.
►
Unhitch the trailer from the towball.
►
Replace the protective cover over the towball.
►
Remove the cap from the lock and press it
onto the head of the key
.
Page 178 of 292

176
Practical information
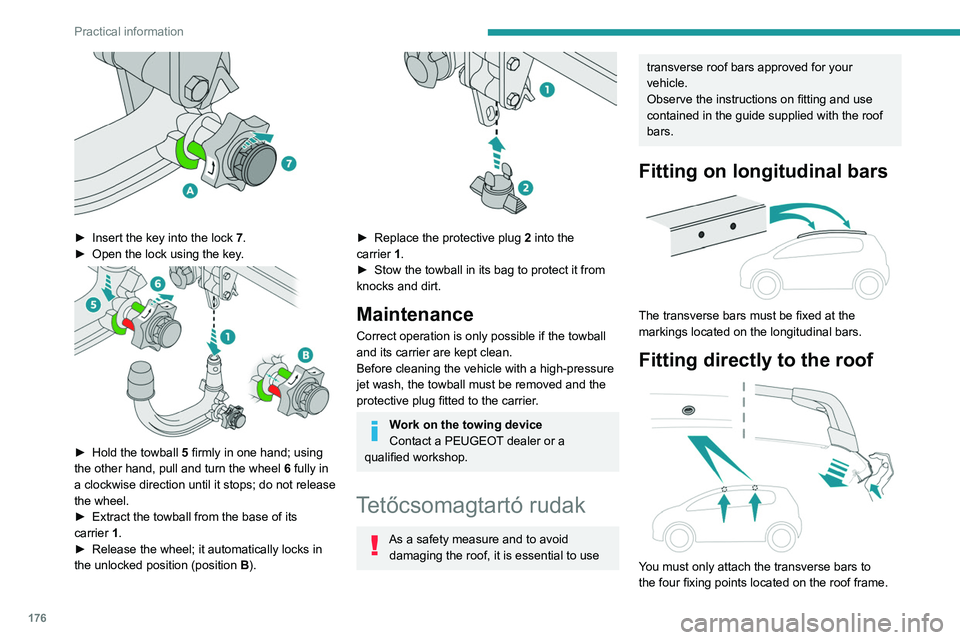
► Insert the key into the lock 7.
► Open the lock using the key .
► Hold the towball 5 firmly in one hand; using
the other hand, pull and turn the wheel 6 fully in
a clockwise direction until it stops; do not release
the wheel.
►
Extract the towball from the base of its
carrier
1.
►
Release the wheel; it automatically locks in
the unlocked position (position B
).
► Replace the protective plug 2 into the
carrier 1.
►
Stow the towball in its bag to protect it from
knocks and dirt.
Maintenance
Correct operation is only possible if the towball
and its carrier are kept clean.
Before cleaning the vehicle with a high-pressure
jet wash, the towball must be removed and the
protective plug fitted to the carrier.
Work on the towing device
Contact a PEUGEOT dealer or a
qualified workshop.
Tetőcsomagtartó rudak
As a safety measure and to avoid damaging the roof, it is essential to use
transverse roof bars approved for your
vehicle.
Observe the instructions on fitting and use
contained in the guide supplied with the roof
bars.
Fitting on longitudinal bars
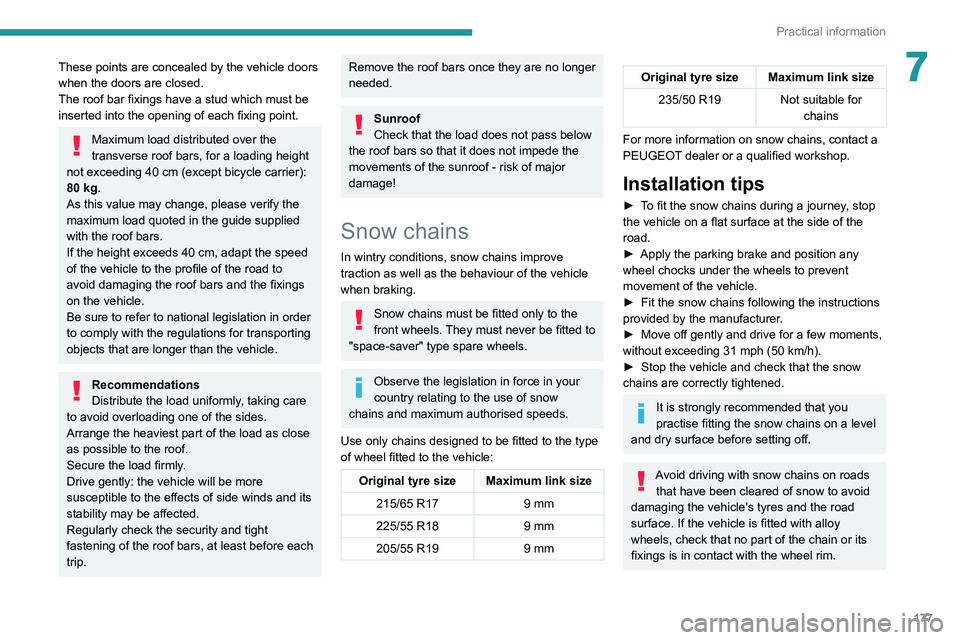
The transverse bars must be fixed at the
markings located on the longitudinal bars.
Fitting directly to the roof
You must only attach the transverse bars to
the four fixing points located on the roof frame.
These points are concealed by the vehicle doors
when the doors are closed.
The roof bar fixings have a stud which must be
inserted into the opening of each fixing point.
Maximum load distributed over the
transverse roof bars, for a loading height
not exceeding 40 cm (except bicycle carrier):
80 kg.
As this value may change, please verify the
maximum load quoted in the guide supplied
with the roof bars.
If the height exceeds 40 cm, adapt the speed
of the vehicle to the profile of the road to
avoid damaging the roof bars and the fixings
on the vehicle.
Be sure to refer to national legislation in order
to comply with the regulations for transporting
objects that are longer than the vehicle.
Recommendations
Distribute the load uniformly, taking care
to avoid overloading one of the sides.
Arrange the heaviest part of the load as close
as possible to the roof.
Secure the load firmly.
Drive gently: the vehicle will be more
susceptible to the effects of side winds and its
stability may be affected.
Regularly check the security and tight
fastening of the roof bars, at least before each
trip.
Page 179 of 292

177
Practical information
7These points are concealed by the vehicle doors
when the doors are closed.
The roof bar fixings have a stud which must be
inserted into the opening of each fixing point.
Maximum load distributed over the
transverse roof bars, for a loading height
not exceeding 40 cm (except bicycle carrier):
80
kg.
As this value may change, please verify the
maximum load quoted in the guide supplied
with the roof bars.
If the height exceeds 40 cm, adapt the speed
of the vehicle to the profile of the road to
avoid damaging the roof bars and the fixings
on the vehicle.
Be sure to refer to national legislation in order
to comply with the regulations for transporting
objects that are longer than the vehicle.
Recommendations
Distribute the load uniformly, taking care
to avoid overloading one of the sides.
Arrange the heaviest part of the load as close
as possible to the roof.
Secure the load firmly.
Drive gently: the vehicle will be more
susceptible to the effects of side winds and its
stability may be affected.
Regularly check the security and tight
fastening of the roof bars, at least before each
trip.
Remove the roof bars once they are no longer
needed.
Sunroof
Check that the load does not pass below
the roof bars so that it does not impede the
movements of the sunroof - risk of major
damage!
Snow chains
In wintry conditions, snow chains improve
traction as well as the behaviour of the vehicle
when braking.
Snow chains must be fitted only to the
front wheels. They must never be fitted to
"space-saver" type spare wheels.
Observe the legislation in force in your
country relating to the use of snow
chains and maximum authorised speeds.
Use only chains designed to be fitted to the type
of wheel fitted to the vehicle:
Original tyre size Maximum link size 215/65 R17 9 mm
225/55 R18 9 mm
205/55 R19 9 mm
Original tyre size Maximum link size
235/50 R19 Not suitable for
chains
For more information on snow chains, contact a
PEUGEOT dealer or a qualified workshop.
Installation tips
► To fit the snow chains during a journey, stop
the vehicle on a flat surface at the side of the
road.
►
Apply the parking brake and position any
wheel chocks under the wheels to prevent
movement of the vehicle.
►
Fit the snow chains following the instructions
provided by the manufacturer
.
►
Move off gently and drive for a few moments,
without exceeding 31
mph (50 km/h).
►
Stop the vehicle and check that the snow
chains are correctly tightened.
It is strongly recommended that you
practise fitting the snow chains on a level
and dry surface before setting off.
Avoid driving with snow chains on roads that have been cleared of snow to avoid
damaging the vehicle's tyres and the road
surface. If the vehicle is fitted with alloy
wheels, check that no part of the chain or its
fixings is in contact with the wheel rim.
Page 263 of 292

261
Alphabetical index
180° rear vision 157
A
ABS 87
Accelerated charging unit (Wallbox)
166
Accessories
84
Active Safety Brake
147–149
AdBlue®
18, 184
AdBlue® tank
186
Additive, Diesel
182–183
Adjusting headlamps
76
Adjusting head restraints
44
Adjusting seat
43, 45, 50–52
Adjusting the air distribution
58–60
Adjusting the air flow
58–60
Adjusting the date
234, 256
Adjusting the height and reach of
the steering wheel
47
Adjusting the lumbar support
43, 45
Adjusting the seat belt height
92
Adjusting the temperature
58
Adjusting the time
233, 257
Advanced Grip Control
89
Advice on care and maintenance
165, 187
Advice on driving
7, 110
Airbags
95–97, 99
Airbags, curtain
96–97
Airbags, front
95–97, 99
Airbags, lateral
96–97
Air conditioning
56, 59
Air conditioning, automatic 60
Air conditioning, digital
57
Air conditioning, dual-zone automatic
57
Air intake
58, 60
Air vents
56
Alarm
36–37
Amplifier, audio
63
Android Auto connection
230, 248
Anti-lock braking system (ABS)
87
Antitheft / Immobiliser
27
Apple CarPlay connection
230, 247
Applications
248
Armrest, front
64–65
Armrest, rear
67
Assistance call
85–86
Assistance, emergency braking
87, 149
Audible warning
85
Audio streaming (Bluetooth)
229, 252
B
Backrest, folding 44
Battery, 12 V
178, 183, 206–210
Battery, ancillaries
209
Battery, charging
207, 210
Battery, remote control
31
Blanking screen (snow shield)
178
Blind
39–41
Blind spot monitoring system, active
152
Blind spot sensors
151–152
Blinds, side
68
BlueHDi 18, 21, 182, 189
Bluetooth (hands-free)
231, 253
Bluetooth (telephone)
231–232, 253–254
Bodywork
188
Bonnet
179–180
Boot
32–33, 36, 73
Boot (fittings)
69
Brake discs
184
Brake lamps
201
Brakes
184
Braking
120
Braking assistance system
87
Braking, automatic emergency
147–149
Braking, dynamic emergency
114–116
Brightness
233
Bulbs (changing)
200–201
C
Cable, audio 251
Cable, Jack
251
Capacity, fuel tank
163
Care of the bodywork
188
Central locking
29–30
Changing a bulb
200–201
Changing a fuse
201–202, 204–205
Changing a wheel
190–191, 195–197
Changing a wiper blade
82–83
Changing the remote control battery
31
Charge level indicator
(Rechargeable hybrid)
20