2022 PEUGEOT 5008 warning
[x] Cancel search: warningPage 24 of 292
22
Instruments
Average speed
(mph or km/h)Calculated since the last trip computer
reset.
Distance travelled
(miles or km)Calculated since the last trip computer
reset.
Stop & Start time counter
(minutes/seconds or hours/minutes)
If your vehicle is fitted with the Stop & Start
function, a time counter calculates the time spent
in STOP mode during a journey.
The time counter is reset each time the ignition is
switched on.
Touch screen
This system gives access to the following elements:
– Permanent display of the time and outside
temperature (a blue warning lamp appears if
there is a risk of ice).
– Heating/air conditioning system controls.
– Vehicle functions and equipment setting
menus.
– Audio system and telephone controls and
display of related information.
► Select " Screen configuration".
►
Select the "
Brightness” tab.
► Adjust the instrument panel and
screen brightness by using the arrows or
moving the slider
.
► Press this button to save and exit.
You can also switch off the screen:
► Press this button to select the
Settings menu.
► Select " Turn off screen".
The screen goes off completely.
►
Press the screen again (anywhere on its
surface) to turn it on.
Trip computer
Displays information related to the current trip
(range, fuel consumption, average speed, etc.).
Data displayed on the
instrument panel
Trip computer data is displayed permanently
when the "TRIP COMPUTER" or "PERSONAL"
display mode is selected, depending on version.
In all other display modes, pressing the end of
the wiper control stalk will cause this data to
appear temporarily in a specific window.
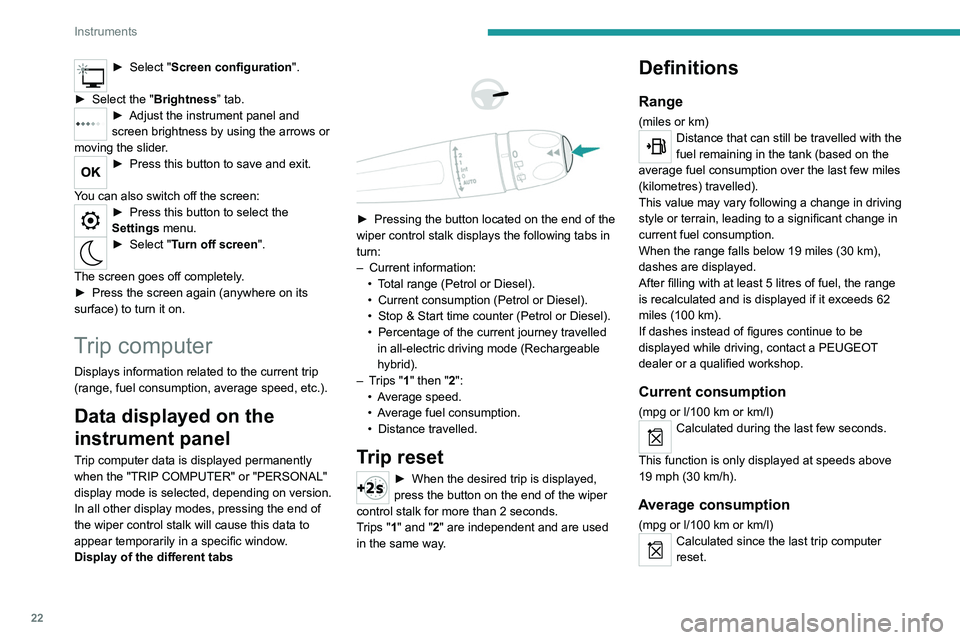
Display of the different tabs
► Pressing the button located on the end of the
wiper control stalk displays the following tabs in
turn:
–
Current information:
•
T
otal range (Petrol or Diesel).
•
Current consumption (Petrol or Diesel).
•
Stop & Start time counter (Petrol or Diesel).
•
Percentage of the current journey travelled
in all-electric driving mode (Rechargeable
hybrid).
–
T
rips "1" then "2":
•
A
verage speed.
•
A
verage fuel consumption.
•
Distance travelled.
Trip reset
► When the desired trip is displayed,
press the button on the end of the wiper
control stalk for more than 2
seconds.
Trips "1" and "2" are independent and are used
in the same way.
Definitions
Range
(miles or km)Distance that can still be travelled with the
fuel remaining in the tank (based on the
average fuel consumption over the last few miles
(kilometres) travelled).
This value may vary following a change in driving
style or terrain, leading to a significant change in
current fuel consumption.
When the range falls below 19 miles (30
km),
dashes are displayed.
After filling with at least 5 litres of fuel, the range
is recalculated and is displayed if it exceeds 62
miles (100
km).
If dashes instead of figures continue to be
displayed while driving, contact a PEUGEOT
dealer or a qualified workshop.
Current consumption
(mpg or l/100 km or km/l)Calculated during the last few seconds.
This function is only displayed at speeds above
19 mph (30
km/h).
Average consumption
(mpg or l/100 km or km/l)Calculated since the last trip computer
reset.
Page 25 of 292

23
Instruments
1Average speed
(mph or km/h)Calculated since the last trip computer
reset.
Distance travelled
(miles or km)Calculated since the last trip computer
reset.
Stop & Start time counter
(minutes/seconds or hours/minutes)
If your vehicle is fitted with the Stop & Start
function, a time counter calculates the time spent
in STOP mode during a journey.
The time counter is reset each time the ignition is
switched on.
Touch screen
This system gives access to the following elements:
–
Permanent display of the time and outside
temperature (a blue warning lamp appears if
there is a risk of ice).
–
Heating/air conditioning system controls.
–
V
ehicle functions and equipment setting
menus.
–
Audio system and telephone controls and
display of related information.
– Display of visual manoeuvring aid functions
(visual parking sensor information, Park Assist,
etc.).
–
Internet services and display of
related
information.
–
Navigation system controls and
display
of related information (depending on
version).
For safety reasons, always stop the
vehicle before performing operations
that require sustained attention.
Some functions are not accessible while
driving.
Recommendations
This screen is of the capacitive type.
– Do not use pointed objects on the touch
screen.
–
Do not touch the touch screen with wet hands.
–
Use a soft, clean cloth to clean the touch
screen.
Principles
► Use the buttons arranged below the touch
screen to access the menus, then press the
buttons that appear on the touch screen.
Some menus may display across two pages:
press the "OPTIONS" button to access the
second page.
After a few moments with no action on the second page, the first page is
displayed automatically.
To deactivate/activate a function, select " OFF"
or "ON".
Configuring a function
Access to additional information on the function
Confirm
Return to the previous page or confirm
Volume adjustment/mute.
Menus
Press the touch screen with three fingers
to show all of the menu buttons.
Page 26 of 292
24
Instruments
eSave
The eSave function makes it possible to reserve
all or part of the electrical energy in the traction
battery for later use during a journey (e.g. driving
in an urban area or in an area reserved for
electric vehicles).
► Select the electric range to be reserved ( 10
km, 20 km or the full range MAX) then activate
the function by pressing ON.
Activation of the function is confirmed by
the lighting of this indicator lamp on the
instrument panel and the indication of the energy
reserve in miles or kms.
► To use the energy reserve, choose the
Electric driving mode in the mode selector.
If the requested range exceeds the
available range (not recommended), the
internal combustion engine starts to recharge
the traction battery up to the requested
threshold. This leads to excessive fuel
consumption.
Upper bar
Certain information is displayed permanently in
the upper bar of the touch screen:
– Time and outside temperature (a blue warning
lamp appears if there is a risk of ice).
– Reminder of the air conditioning information,
and direct access to the corresponding menu.
– Reminder of information from the
RadioMedia and Telephone menus and
For more information about the menus,
refer to the sections describing the audio
and telematics systems.
Radio/Media
Climate
Settings for temperature, air flow, etc.
For more information on Mono-zone semi-
automatic air conditioning and Dual-zone
automatic air conditioning , refer to the
corresponding sections.
Navigation (Depending on equipment)
Driving or Vehicle (Depending on
equipment)
Activation, deactivation and settings for certain
functions.
The functions are organised in 2 tabs: " Driving
functions" and "Vehicle settings".
Telephone
Applications
Access to certain configurable equipment.
Energy
Access to the rechargeable hybrid system
features (energy flow, consumption statistics,
deferred charging, eSave function).
Energy menu
Flow
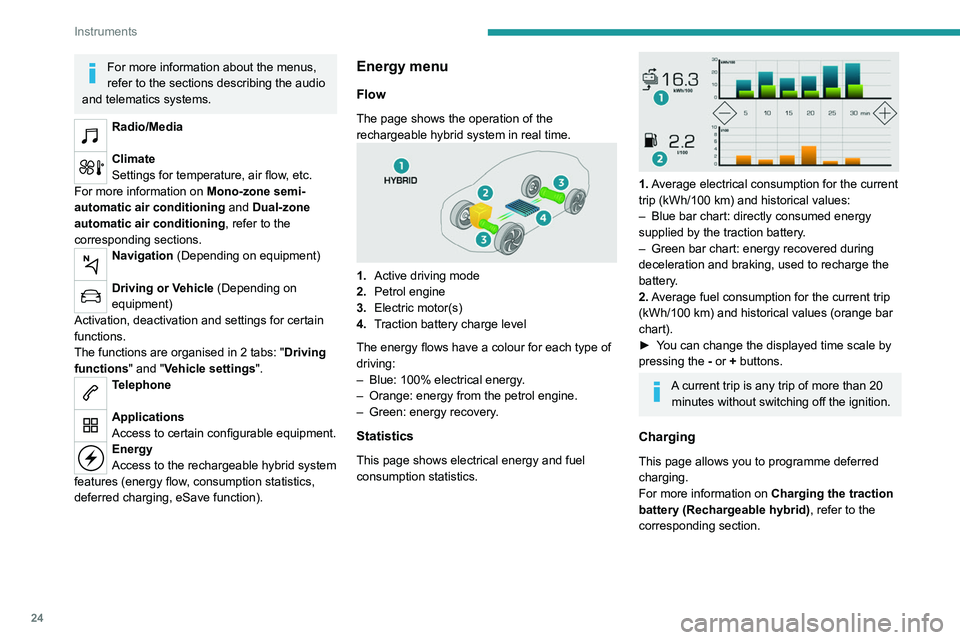
The page shows the operation of the
rechargeable hybrid system in real time.
1. Active driving mode
2. Petrol engine
3. Electric motor(s)
4. Traction battery charge level
The energy flows have a colour for each type of
driving:
–
Blue: 100% electrical energy
.
–
Orange: energy from the petrol engine.
–
Green: energy recovery
.
Statistics
This page shows electrical energy and fuel
consumption statistics.
1. Average electrical consumption for the current
trip (kWh/100 km) and historical values:
–
Blue bar chart: directly consumed energy
supplied by the traction battery
.
–
Green bar chart: energy recovered during
deceleration and braking, used to recharge the
battery
.
2. Average fuel consumption for the current trip
(kWh/100
km) and historical values (orange bar
chart).
►
Y
ou can change the displayed time scale by
pressing the
-
or + buttons.
A current trip is any trip of more than 20 minutes without switching off the ignition.
Charging
This page allows you to programme deferred
charging.
For more information on Charging the traction
battery (Rechargeable hybrid), refer to the
corresponding section.
Page 27 of 292
25
Instruments
1eSave
The eSave function makes it possible to reserve
all or part of the electrical energy in the traction
battery for later use during a journey (e.g. driving
in an urban area or in an area reserved for
electric vehicles).
►
Select the electric range to be reserved ( 10
km
, 20 km or the full range MAX) then activate
the function by pressing ON.
Activation of the function is confirmed by
the lighting of this indicator lamp on the
instrument panel and the
indication of the energy
reserve in miles or kms.
►
T
o use the energy reserve, choose the
Electric driving mode in the mode selector.
If the requested range exceeds the
available range (not recommended), the
internal combustion engine starts to recharge
the traction battery up to the requested
threshold. This leads to excessive fuel
consumption.
Upper bar
Certain information is displayed permanently in
the upper bar of the touch screen:
–
T
ime and outside temperature (a blue warning
lamp appears if there is a risk of ice).
–
Reminder of the air conditioning information,
and direct access to the corresponding menu.
–
Reminder of information from the
RadioMedia
and Telephone menus and
navigation instructions (depending on
equipment).
–
Notifications.
–
Access to the
Settings for the touch screen
and the digital instrument panel (date/time,
languages, units, etc.).
Remote functions
(Rechargeable hybrid)
These features are accessible
using a smartphone, via the
MyPeugeot
application:
–
Battery charge management.
–
T
emperature pre-conditioning management.
–
Consultation of the state of charge and range
of the vehicle.
Installation procedure
► Download the MyPeugeot app from the
appropriate online store for your smartphone.
►
Create an account.
►
Enter the vehicle’
s VIN (code beginning with
"VF" on the vehicle registration document).
For more information on Identification
markings, refer to the corresponding section.
Network coverage
In order to be able to use the various
remotely operable features, ensure that your
vehicle is located in an area covered by the
mobile network.
A lack of network coverage may prevent
communication with the vehicle (for example,
if it is in an underground car park). In such
cases, the application will display a message
indicating that the connection with the vehicle
could not be established.
Page 34 of 292

32
Access
Reinitialising the remote
control
Following replacement of the battery or in
the event of a fault, it may be necessary to
reinitialise the remote control.
► Insert the mechanical key (incorporated into
the remote control) into the lock to open the
vehicle.
►
Place the electronic key against the back-up
reader on the steering column and hold it there
until the ignition is switched on.
►
W
ith a manual gearbox, place the gear lever
in neutral then fully depress the clutch pedal.
►
W
ith an automatic gearbox, while in mode
P, depress the brake pedal.
►
Switch on the ignition by pressing the
"
START/STOP" button.
If the fault persists after reinitialisation, contact
a PEUGEOT dealer or a qualified workshop
without delay.
Doors
Opening
From outside
► After unlocking the vehicle or with the
"Keyless Entry and Starting" system electronic
key in the recognition zone, pull the door handle.
When selective unlocking is activated,
the first press of the remote control
unlocking button permits unlocking of the
driver's door only.
From inside
► Pull the interior opening control of a door; this
unlocks the vehicle completely .
With selective unlocking activated:
– Opening the driver's door unlocks
the driver's door only (if the vehicle has not
already been completely unlocked).
–
Opening one of the passenger doors
unlocks the rest of the vehicle.
Closing
If a door is not properly closed, this
warning lamp comes on accompanied by
a message if the engine is running, and an
audible signal when the vehicle is travelling at
more than 6
mph (10 km/h).
Boot
Opening the tailgate
► With the vehicle unlocked or with the
electronic key in the recognition zone, press the
central tailgate control.
►
Raise the tailgate.
When selective unlocking is activated,
the electronic key must be close to the
rear of the vehicle.
The tailgate is not designed to hold a bicycle carrier.
Closing the tailgate
► Lower the tailgate using the interior grips.
► Release the grips and press down on the
outside of the tailgate to close it.
In the event of a malfunction or if you
experience difficulty opening or closing
the tailgate, have it checked by a PEUGEOT
dealer or a qualified workshop without delay,
to avoid the issue deteriorating and prevent
any risk of the tailgate dropping, potentially
causing serious injury.
Back-up release
To manually unlock the boot in the event of a
battery or central locking failure.
Unlocking
► Fold the rear seats to gain access to the lock
from inside the boot.
► Insert a small screwdriver into hole A of the
lock to unlock the boot.
► Move the latch to the left.
Locking after closing
If the fault persists after closing again, the boot
will remain locked.
In the event of a fault with the central
locking system, it is essential to
disconnect the battery to lock the boot and so
ensure complete locking of the vehicle.
Page 76 of 292
74
Lighting and visibility
Lighting control stalk
Main lighting
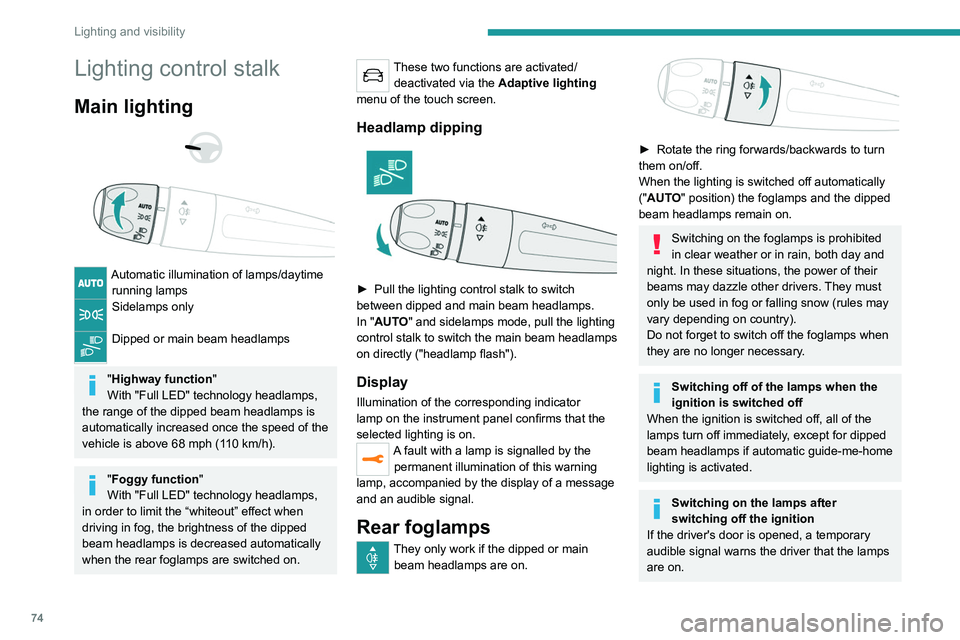
Automatic illumination of lamps/daytime running lamps
Sidelamps only
Dipped or main beam headlamps
"Highway function "
With "Full LED" technology headlamps,
the range of the dipped beam headlamps is
automatically increased once the speed of the
vehicle is above 68 mph (110
km/h).
"Foggy function"
With "Full LED" technology headlamps,
in order to limit the “whiteout” effect when
driving in fog,
the brightness of the dipped
beam headlamps is decreased automatically
when the rear foglamps are switched on.
These two functions are activated/ deactivated via the Adaptive lighting
menu of the touch screen.
Headlamp dipping
► Pull the lighting control stalk to switch
between dipped and main beam headlamps.
In "
AUTO" and sidelamps mode, pull the lighting
control stalk to switch the main beam headlamps
on directly ("headlamp flash").
Display
Illumination of the corresponding indicator
lamp on the instrument panel confirms that the
selected lighting is on.
A fault with a lamp is signalled by the permanent illumination of this warning
lamp, accompanied by the display of a message
and an audible signal.
Rear foglamps
They only work if the dipped or main beam headlamps are on.
► Rotate the ring forwards/backwards to turn
them on/off.
When the lighting is switched off automatically
("AUTO" position) the foglamps and the dipped
beam headlamps remain on.
Switching on the foglamps is prohibited
in clear weather or in rain, both day and
night. In these situations, the power of their
beams may dazzle other drivers. They must
only be used in fog or falling snow (rules may
vary depending on country).
Do not forget to switch off the foglamps when
they are no longer necessary.
Switching off of the lamps when the
ignition is switched off
When the ignition is switched off, all of the
lamps turn off immediately, except for dipped
beam headlamps if automatic guide-me-home
lighting is activated.
Switching on the lamps after
switching off the ignition
If the driver's door is opened, a temporary
audible signal warns the driver that the lamps
are on.
They will go off automatically after a period
of time that depends on the level of charge in
the battery (entering energy economy mode).
In some weather conditions (e.g. low
temperature or humidity), misting on the
internal surface of the glass of the headlamps
and rear lamps is normal, and will disappear
after the lamps have been on for a few
minutes.
Never look too closely at the light beam
of LED technology lamps - risk of serious
eye injury!
Travelling abroad
Vehicles equipped with manual
headlamp beam height adjustment:
If planning to use your vehicle in a country
that drives on the other side of the road, the
dipped beam headlamps must be adjusted to
avoid dazzling oncoming drivers. Contact a
PEUGEOT dealer or a qualified workshop.
Page 78 of 292

76
Lighting and visibility
Headlamp beam height
adjustment
Manual adjustment of LED
technology headlamps
To avoid dazzling other road users, the height
of these headlamp beams must be adjusted
according to the load in the vehicle.
0 (Initial setting) Driver only or driver + front passenger
1 5 people
2 Not used
3 5 people + load in the boot
4 Not used
5 Driver only + load in the boot
6 Not used
0 (Initial setting)
Driver only or driver + front passenger
1 Driver only or driver + front passenger + row 3
2 7 people
3 7 people + load in the boot
4 Not used
5 Driver only + load in the boot
6 Not used
Automatic adjustment of
the Full LED technology
headlamps
This system automatically adjusts the height of
the headlamp beams according to the load in the
vehicle.
In the event of a malfunction, this warning
lamp comes on on the instrument panel,
accompanied by the display of a message and
an audible signal.
The system places the headlamp beams in the
lowest position.
Have it checked by a PEUGEOT dealer or a
qualified workshop.
Do not touch the "Full LED" technology
headlamps - risk of electrocution!
Automatic illumination of lamps
With the lighting control stalk in the “ AUTO”
position and if a low level of exterior brightness
is detected by the rain/sunshine sensor, the
sidelamps and dipped beam headlamps are
switched on automatically, without any action on
the part of the driver. They may also come on if
rain is detected, at the same time as automatic
operation of the windscreen wipers.
As soon as the brightness returns to a sufficient
level or after the windscreen wipers are switched
off, the lamps are switched off automatically.
Malfunction
In the event of a malfunction of the rain/
sunshine sensor, the vehicle’s lamps
come on and this warning lamp is displayed on
the instrument panel, accompanied by an
audible signal and/or the display of a message.
Have it checked by a PEUGEOT dealer or a
qualified workshop.
Do not cover the rain/sunshine sensor
located at the top centre of the
windscreen behind the interior rear view
mirror; the associated functions would no
longer be controlled.
In fog or snow, the rain/sunshine sensor
may detect sufficient light. For this
reason, the lighting will not come on
automatically.
The inner surface of the windscreen may become misted up and affect the proper
operation of the rain/sunshine sensor.
In humid and cold weather, demist the
windscreen regularly.
Guide-me-home and
welcome lighting
Guide-me-home lighting
With the ring of the lighting control stalk in the
"AUTO" position and when the light is poor, the
dipped beam headlamps come on automatically
when the ignition is switched off.
You can activate/deactivate this function and adjust the guide-me-home lighting
duration in the Driving/Vehicle touch screen
menu.
Welcome lighting
When the vehicle is unlocked, if the ambient
light is low and the "Automatic illumination of
headlamps" function is activated, this system
automatically turns on certain exterior lamps
as well as certain lamps in the passenger
compartment.
Page 81 of 292
79
Lighting and visibility
4Activation / Deactivation
It is set via the Driving / Vehicle touch
screen menu.
Switching on / off
This system operates from a certain angle of
rotation of the steering wheel.
The system does not operate:
–
below a certain angle of rotation of the
steering wheel.
–
above 56 mph (90
km/h),
–
when reverse gear is engaged.
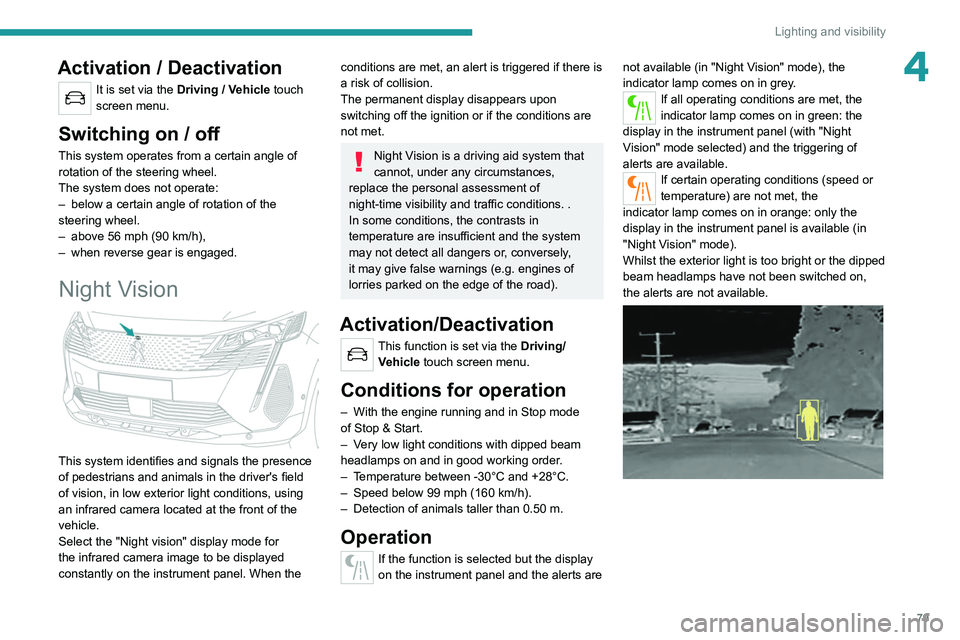
Night Vision
This system identifies and signals the presence
of pedestrians and animals in the driver's field
of vision, in low exterior light conditions, using
an infrared camera located at the front of the
vehicle.
Select the "Night vision" display mode for
the infrared camera image to be displayed
constantly on the instrument panel. When the
conditions are met, an alert is triggered if there is
a risk of collision.
The permanent display disappears upon
switching off the ignition or if the conditions are
not met.
Night Vision is a driving aid system that
cannot, under any circumstances,
replace the personal assessment of
night-time visibility and traffic conditions. .
In some conditions, the contrasts in
temperature are insufficient and the system
may not detect all dangers or, conversely,
it may give false warnings (e.g. engines of
lorries parked on the edge of the road).
Activation/Deactivation
This function is set via the Driving/ Vehicle touch screen menu.
Conditions for operation
– With the engine running and in Stop mode
of Stop & Start.
–
V
ery low light conditions with dipped beam
headlamps on and in good working order.
–
T
emperature between -30°C and +28°C.
–
Speed below 99 mph (160
km/h).
–
Detection of animals taller than 0.50 m.
Operation
If the function is selected but the display
on the instrument panel and the alerts are not available (in "Night Vision" mode), the
indicator lamp comes on in grey.
If all operating conditions are met, the
indicator lamp comes on in green: the
display in the instrument panel (with "Night
Vision" mode selected) and the triggering of
alerts are available.
If certain operating conditions (speed or
temperature) are not met, the
indicator
lamp comes on in orange: only the
display in the instrument panel is available (in
"Night Vision" mode).
Whilst the exterior light is too bright or the dipped
beam headlamps have not been switched on,
the alerts are not available.