2022 PEUGEOT 3008 lights
[x] Cancel search: lightsPage 16 of 292
14
Instruments
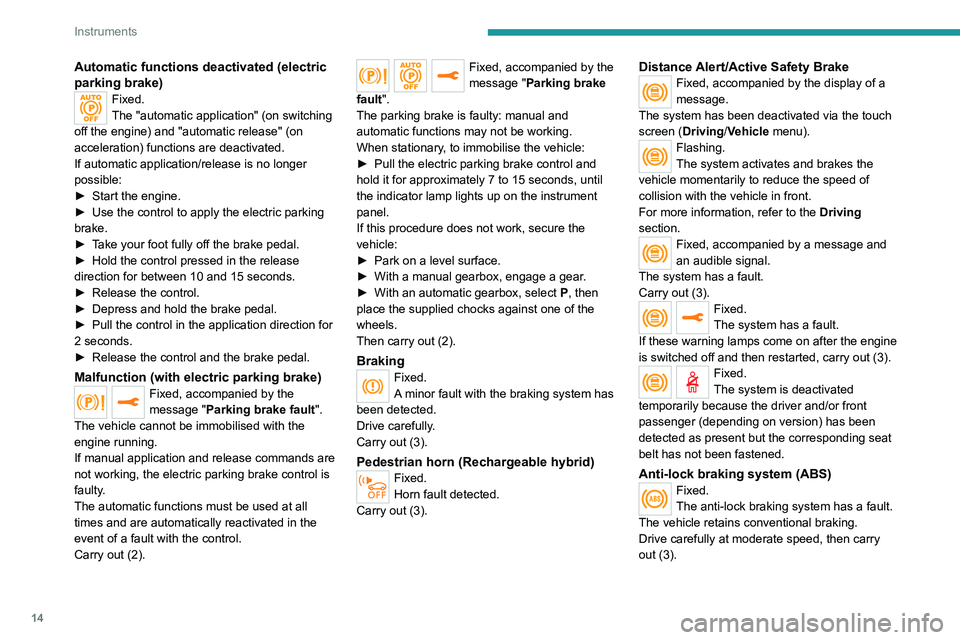
Automatic functions deactivated (electric
parking brake)
Fixed.
The "automatic application" (on switching
off the engine) and "automatic release" (on
acceleration) functions are deactivated.
If automatic application/release is no longer
possible:
►
Start the engine.
►
Use the control to apply the electric parking
brake.
►
T
ake your foot fully off the brake pedal.
►
Hold the control pressed in the release
direction for between 10 and 15 seconds.
►
Release the control.
►
Depress and hold the brake pedal.
►
Pull the control in the application direction for
2
seconds.
►
Release the control and the brake pedal.
Malfunction (with electric parking brake)Fixed, accompanied by the
message "Parking brake fault".
The vehicle cannot be immobilised with the
engine running.
If manual application and release commands are
not working, the electric parking brake control is
faulty.
The automatic functions must be used at all
times and are automatically reactivated in the
event of a fault with the control.
Carry out (2).
Fixed, accompanied by the
message "Parking brake
fault".
The parking brake is faulty: manual and
automatic functions may not be working.
When stationary, to immobilise the vehicle:
►
Pull the electric parking brake control and
hold it for approximately 7 to 15 seconds, until
the indicator lamp lights up on the instrument
panel.
If this procedure does not work, secure the
vehicle:
►
Park on a level surface.
►
With a manual gearbox, engage a gear
.
►
With an automatic gearbox, select
P
, then
place the supplied chocks against one of the
wheels.
Then carry out (2).
BrakingFixed.
A minor fault with the braking system has
been detected.
Drive carefully.
Carry out (3).
Pedestrian horn (Rechargeable hybrid)Fixed.
Horn fault detected.
Carry out (3).
Distance Alert/Active Safety BrakeFixed, accompanied by the display of a
message.
The system has been deactivated via the touch
screen (Driving/Vehicle menu).
Flashing.
The system activates and brakes the
vehicle momentarily to reduce the speed of
collision with the vehicle in front.
For more information, refer to the Driving
section.
Fixed, accompanied by a message and
an audible signal.
The system has a fault.
Carry out (3).
Fixed.
The system has a fault.
If these warning lamps come on after the engine
is switched off and then restarted, carry out (3).
Fixed.
The system is deactivated
temporarily because the driver and/or front
passenger (depending on version) has been
detected as present but the corresponding seat
belt has not been fastened.
Anti-lock braking system (ABS)Fixed.
The anti-lock braking system has a fault.
The vehicle retains conventional braking.
Drive carefully at moderate speed, then carry
out (3).
Page 18 of 292

16
Instruments
Black/white warning lamps
Automatic gearbox or Electric automatic
gearbox (e-EAT8) (Rechargeable hybrid)
Fixed.
The automatic gearbox is locked.
You must press the Unlock button to unlock it.
eSave function (Rechargeable hybrid)Fixed, accompanied by the reserved
electric range.
The eSave function is activated.
Indicators
Service indicator
The servicing information is expressed in terms
of distance (miles or kilometres) and time
(months or days).
The alert is given at whichever of these two
terms is reached first.
The servicing information is displayed in the
instrument panel. Depending on the version of
the vehicle:
– The distance recorder display line indicates
the distance remaining before the next service
is due, or the distance travelled since it was due
preceded by the "-" sign.
– An alert message indicates the distance
remaining, as well as the period before the next
service is due or how long it is overdue.
Check the tyre pressures as soon as possible
and carry out (3).
Stop & StartFixed, accompanied by the display of a
message.
The Stop & Start system has been deactivated
manually.
The engine will not switch off at the next traffic
stop.
Fixed.
The Stop & Start system has been
deactivated automatically.
The engine will not switch off at the next traffic
stop, if the exterior temperature is:
–
below 0°C.
–
above +35°C.
For more information, refer to the
Driving
section.
Flashing then fixed, accompanied by a
message.
The system has a fault.
Carry out (3).
Rear foglampsFixed.
The lamps are on.
Green warning/indicator lamps
Blind spot monitoring
Fixed.
The function has been activated.
Hill Assist Descent ControlFixed.
The function has been activated, but the
conditions for regulation are not met (gradient,
gear engaged).
Flashing.
The function is regulating the speed of
the vehicle.
The vehicle is being braked; the brake lamps
come on during the descent.
Stop & StartFixed.
When the vehicle stops, the Stop & Start
puts the engine into STOP mode.
Flashing temporarily.
STOP mode is momentarily unavailable
or START mode is automatically triggered.
For more information, refer to the Driving
section.
Vehicle ready to drive (Rechargeable
hybrid)
Fixed, accompanied by an audible signal
when it comes on.
The vehicle is ready to drive.
The indicator lamp goes out upon reaching a
speed of approximately 3 mph (5
km/h) and
lights up again when the vehicle stops moving.
The lamp will go out when you turn off the
engine and exit the vehicle.
Lane positioning assistFixed.
The function has been activated. All conditions have been met: the system is
operating.
For more information, refer to the Driving
section.
Automatic wipingFixed.
Automatic windscreen wiping is activated.
Direction indicatorsFlashing with audible signal.
The direction indicators are on.
SidelampsFixed.
The lamps are on.
Dipped beam headlampsFixed.
The lamps are on.
Automatic headlamp dippingFixed.
The function has been activated
via the touch screen (Driving/Vehicle menu).
The lighting control stalk is in the "AUTO"
position.
For more information, refer to the Lighting and
visibility section.
Blue warning/indicator lamps
Main beam headlamps
Fixed.
The lamps are on.
Page 20 of 292
18
Instruments
► Press this button to temporarily display the
driving range.
Actions required related to a lack of AdBlue®
The following warning lamps light up when the
quantity of AdBlue® is below the reserve level:
driving range of 1,500 miles (2,400 km).
Together with the warning lamps, messages
regularly remind you of the need to top up to
avoid engine starting being prevented. Refer to
the Warning and indicator lamps section for
details of the messages displayed.
For more information on AdBlue®
(BlueHDi) and in particular on topping
up, refer to the corresponding section.
Warning/indicator
lamps on Action Remaining
range
Top up. Between 1,500 miles
and 500
miles (2,400
km and 800
km)
On versions fitted with an electric gauge, the
engine oil level status is displayed on the
instrument panel for a few seconds when
the ignition is switched on, after the servicing
information, in the form of messages.
The level read will only be correct if the vehicle is on level ground and the engine
has been off for more than 30 minutes.
Low oil level
This is indicated by the message " Oil
level incorrect" on the instrument panel,
accompanied by the lighting of the Service
warning lamp and an audible signal.
If a low oil level is confirmed by a check using
the dipstick, the level must be topped up to avoid
damage to the engine.
For more information on Checking levels, refer
to the corresponding section.
Oil gauge malfunction
This is indicated by the message " Oil level
measurement invalid" on the instrument panel.
Consult a PEUGEOT dealer or a qualified
workshop.
In the event of a malfunction of the
electric gauge, the oil level is no longer
monitored.
If the system is faulty, you must check the
engine oil level using the manual dipstick
located in the engine compartment.
For more information on Checking levels,
refer to the corresponding section.
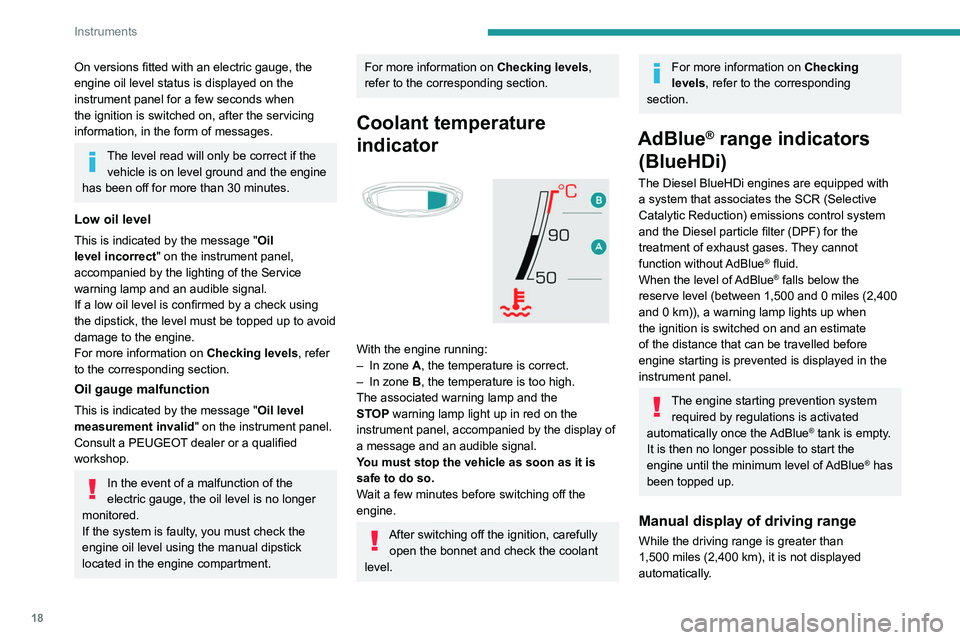
Coolant temperature
indicator
With the engine running:
– In zone A, the temperature is correct.
–
In zone
B, the temperature is too high.
The associated warning lamp and the
STOP
warning lamp light up in red on the
instrument panel, accompanied by the display of
a message and an audible signal.
You must stop the vehicle as soon as it is
safe to do so.
Wait a few minutes before switching off the
engine.
After switching off the ignition, carefully open the bonnet and check the coolant
level.
For more information on Checking
levels, refer to the corresponding
section.
AdBlue® range indicators
(BlueHDi)
The Diesel BlueHDi engines are equipped with
a system that associates the SCR (Selective
Catalytic Reduction) emissions control system
and the Diesel particle filter (DPF) for the
treatment of exhaust gases. They cannot
function without AdBlue
® fluid.
When the level of AdBlue® falls below the
reserve level (between 1,500 and 0 miles (2,400
and 0
km)), a warning lamp lights up when
the ignition is switched on and an estimate
of the distance that can be travelled before
engine starting is prevented is displayed in the
instrument panel.
The engine starting prevention system required by regulations is activated
automatically once the AdBlue
® tank is empty.
It is then no longer possible to start the
engine until the minimum level of AdBlue
® has
been topped up.
Manual display of driving range
While the driving range is greater than
1,500 miles (2,400 km), it is not displayed
automatically.
Page 60 of 292
58
Ease of use and comfort
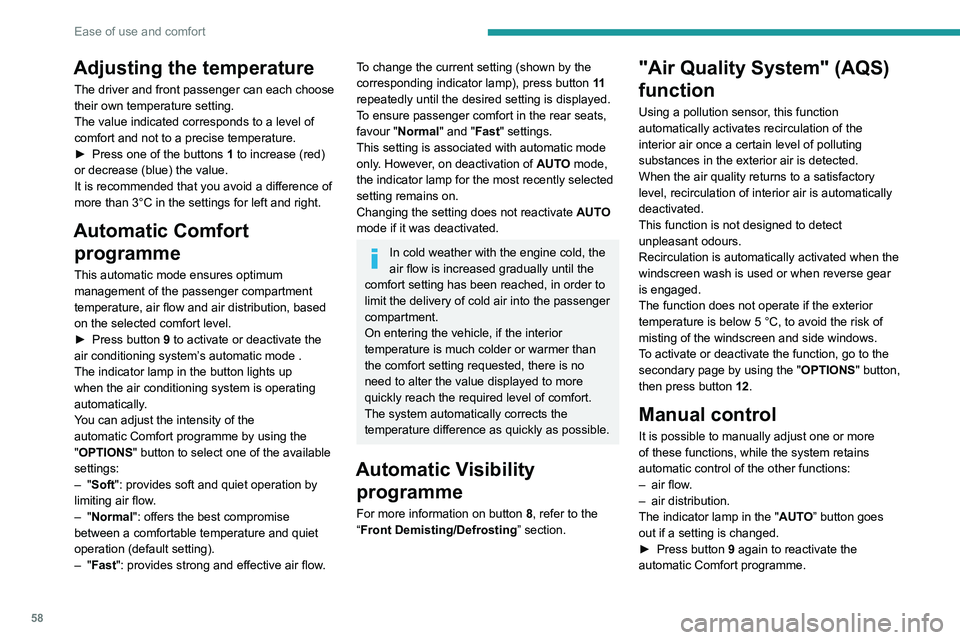
Adjusting the temperature
The driver and front passenger can each choose
their own temperature setting.
The value indicated corresponds to a level of
comfort and not to a precise temperature.
►
Press one of the buttons
1 to increase (red)
or decrease (blue) the value.
It is recommended that you avoid a difference of
more than 3°C in the settings for left and right.
Automatic Comfort programme
This automatic mode ensures optimum
management of the passenger compartment
temperature, air flow and air distribution, based
on the selected comfort level.
►
Press button
9 to activate or deactivate the
air conditioning system’s automatic mode .
The indicator lamp in the button lights up
when the air conditioning system is operating
automatically.
You can adjust the intensity of the
automatic Comfort programme by using the
"OPTIONS "
button to select one of the available
settings:
–
"Soft": provides soft and quiet operation by
limiting air flow.
–
"Normal": offers the best compromise
between a comfortable temperature and quiet
operation (default setting).
–
"Fast": provides strong and effective air flow.
To change the current setting (shown by the
corresponding indicator lamp), press button 11
repeatedly until the desired setting is displayed.
T
o ensure passenger comfort in the rear seats,
favour "Normal" and "Fast" settings.
This setting is associated with automatic mode
only. However, on deactivation of
AUTO mode,
the indicator lamp for the most recently selected
setting remains on.
Changing the setting does not reactivate AUTO
mode if it was deactivated.
In cold weather with the engine cold, the
air flow is increased gradually until the
comfort setting has been reached, in order to
limit the delivery of cold air into the passenger
compartment.
On entering the vehicle, if the interior
temperature is much colder or warmer than
the comfort setting requested, there is no
need to alter the value displayed to more
quickly reach the required level of comfort.
The system automatically corrects the
temperature difference as quickly as possible.
Automatic Visibility programme
For more information on button 8, refer to the
“Front Demisting/Defrosting ” section.
"Air Quality System" (AQS)
function
Using a pollution sensor, this function
automatically activates recirculation of the
interior air once a certain level of polluting
substances in the exterior air is detected.
When the air quality returns to a satisfactory
level, recirculation of interior air is automatically
deactivated.
This function is not designed to detect
unpleasant odours.
Recirculation is automatically activated when the
windscreen wash is used or when reverse gear
is engaged.
The function does not operate if the exterior
temperature is below 5
°C, to avoid the risk of
misting of the windscreen and side windows.
To activate or deactivate the function, go to the
secondary page by using the " OPTIONS" button,
then press button 12.
Manual control
It is possible to manually adjust one or more
of these functions, while the system retains
automatic control of the other functions:
–
air flow
.
–
air distribution.
The indicator lamp in the " AUT
O” button goes
out if a setting is changed.
►
Press button
9 again to reactivate the
automatic Comfort programme.
Adjusting the air flow
► Press one of the buttons 2 (- or +) to increase
or decrease air flow.
The air flow symbol (a fan) is filled in according
to the request.
When the air flow is reduced to a minimum,
ventilation stops.
"OFF " is displayed alongside the fan.
Adjusting the air distribution
► Press the buttons 3 to adjust the air flow
distribution inside the passenger compartment.
Windscreen and side windows.
Central and side air vents.
Footwells.
The lighting of the button indicates that air is
being blown in the specified direction.
For a uniform distribution of air in the passenger
compartment, the three buttons can be activated
simultaneously.
In AUTO mode, the indicator lamps in all three
buttons 3 are off.
Air conditioning on/off
The air conditioning system is designed to
operate effectively in all seasons, with the
windows closed.
It is used to:
– lower the temperature in summer,
Page 66 of 292
64
Ease of use and comfort
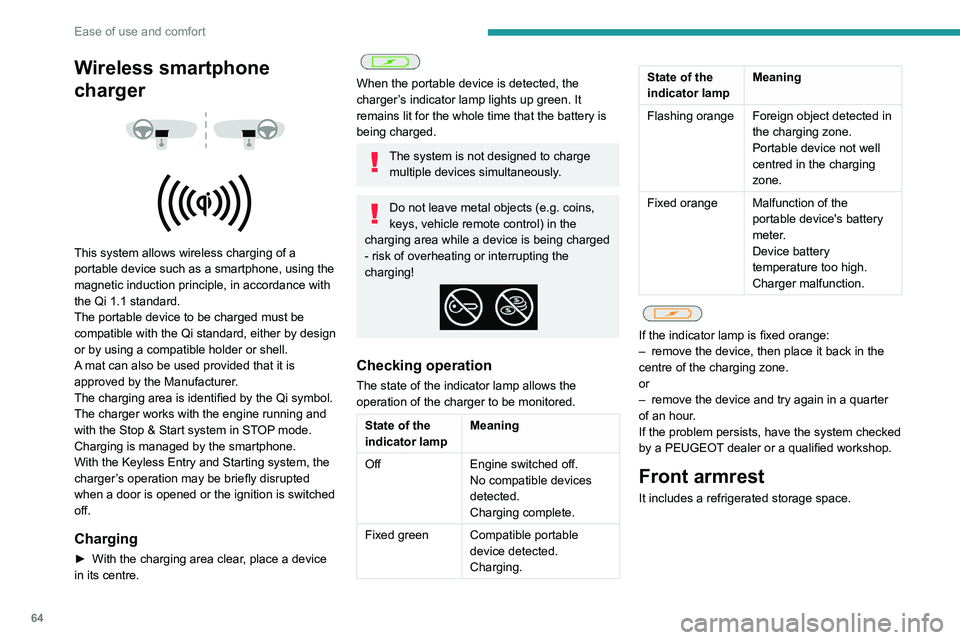
Wireless smartphone
charger
This system allows wireless charging of a
portable device such as a smartphone, using the
magnetic induction principle, in accordance with
the Qi 1.1 standard.
The portable device to be charged must be
compatible with the Qi standard, either by design
or by using a compatible holder or shell.
A mat can also be used provided that it is
approved by the Manufacturer.
The charging area is identified by the Qi symbol.
The charger works with the engine running and
with the Stop & Start system in STOP mode.
Charging is managed by the smartphone.
With the Keyless Entry and Starting system, the
charger’s operation may be briefly disrupted
when a door is opened or the ignition is switched
off.
Charging
► With the charging area clear , place a device
in its centre.
When the portable device is detected, the
charger’s indicator lamp lights up green. It
remains lit for the whole time that the battery is
being charged.
The system is not designed to charge multiple devices simultaneously.
Do not leave metal objects (e.g. coins,
keys, vehicle remote control) in the
charging area while a device is being charged
- risk of overheating or interrupting the
charging!
Checking operation
The state of the indicator lamp allows the
operation of the charger to be monitored.
State of the
indicator lamp Meaning
Off Engine switched off.
No compatible devices
detected.
Charging complete.
Fixed green Compatible portable device detected.
Charging.
State of the
indicator lampMeaning
Flashing orange Foreign object detected in the charging zone.
Portable device not well
centred in the charging
zone.
Fixed orange Malfunction of the portable device's battery
meter.
Device battery
temperature too high.
Charger malfunction.
If the indicator lamp is fixed orange:
– remove the device, then place it back in the
centre of the charging zone.
or
–
remove the device and try again in a quarter
of an hour
.
If the problem persists, have the system checked
by a PEUGEOT dealer or a qualified workshop.
Front armrest
It includes a refrigerated storage space.
Opening
► Press the lever beneath the cover.
The cover opens in two parts.
Storage
The small removable tray can be installed in
front of or behind the storage space.
A ventilation nozzle circulates fresh air.
Page 84 of 292
82
Lighting and visibility
The rainfall detection function uses a rain/
sunshine sensor located at the top centre of the
windscreen, behind the rear view mirror.
Do not cover the rain/sunshine sensor.
When using an automatic car wash,
switch off the automatic wipers and the
ignition.
In winter, wait until the windscreen is
completely clear of ice before activating the
automatic wipers.
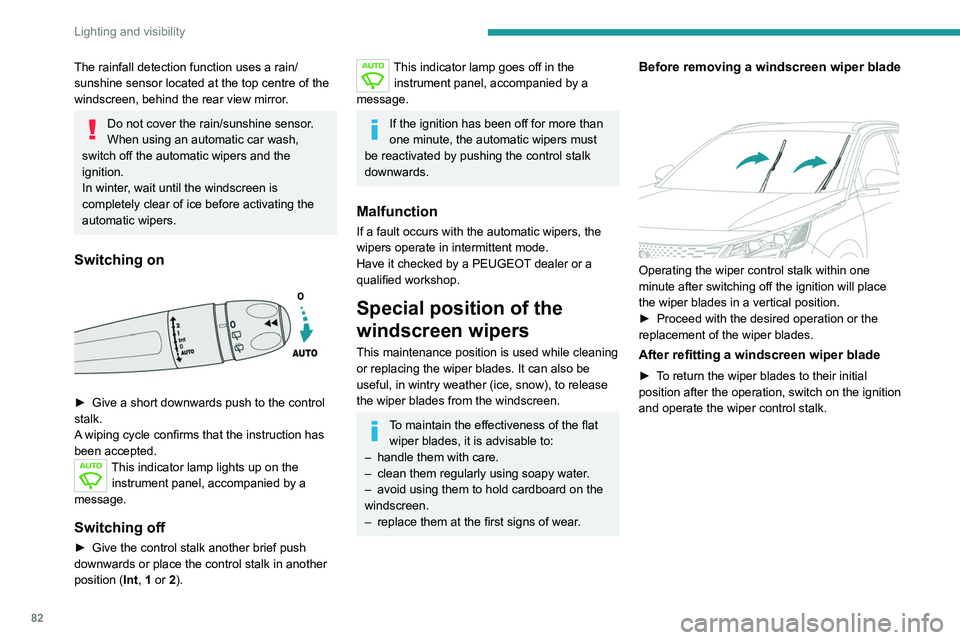
Switching on
► Give a short downwards push to the control
stalk.
A
wiping cycle confirms that the instruction has
been accepted.
This indicator lamp lights up on the instrument panel, accompanied by a
message.
Switching off
► Give the control stalk another brief push
downwards or place the control stalk in another
position ( Int
, 1 or 2).
This indicator lamp goes off in the
instrument panel, accompanied by a
message.
If the ignition has been off for more than
one minute, the automatic wipers must
be reactivated by pushing the control stalk
downwards.
Malfunction
If a fault occurs with the automatic wipers, the
wipers operate in intermittent mode.
Have it checked by a PEUGEOT dealer or a
qualified workshop.
Special position of the
windscreen wipers
This maintenance position is used while cleaning
or replacing the wiper blades. It can also be
useful, in wintry weather (ice, snow), to release
the wiper blades from the windscreen.
To maintain the effectiveness of the flat wiper blades, it is advisable to:
–
handle them with care.
–
clean them regularly using soapy water
.
–
avoid using them to hold cardboard on the
windscreen.
–
replace them at the first signs of wear
.
Before removing a windscreen wiper blade
Operating the wiper control stalk within one
minute after switching off the ignition will place
the wiper blades in a vertical position.
►
Proceed with the desired operation or the
replacement of the wiper blades.
After refitting a windscreen wiper blade
► To return the wiper blades to their initial
position after the operation, switch on the ignition
and operate the wiper control stalk.
Changing a wiper blade
Removing/Refitting at the front
► Carry out these wiper blade replacement
operations from the driver's side.
► Starting with the wiper blade farthest from
you, hold each arm by the rigid section and raise
it as far as possible.
Take care not to hold the arms at the jet locations.
Do not touch the wiper blades - risk of
irreparable deformation.
Do not release them while moving them. Risk
of damaging the windscreen!
► Clean the windscreen using screenwash
fluid.
Do not apply "Rain X" type water-
repellent products.
Page 87 of 292
85
Safety
5Horn
► Press the central part of the steering wheel.
Pedestrian horn
(Rechargeable hybrid)
This system alerts pedestrians that the vehicle is approaching, when driving in Electric mode
(100% electric driving).
The pedestrian horn operates once the vehicle
is moving and at speeds of up to 19 mph
(30
km/h), in forward or reverse gear.
This function cannot be deactivated.
Malfunction
In the event of a malfunction, this warning
lamp comes on on the instrument panel.
* In accordance with the general conditions of use of the service, available from dealers an\
d subject to technological and technical limitations.
** Depend ing on the geographic coverage of "Peugeot Connect SOS" and "Peugeot Connect Assistance".
The list of countries covered and the telematic services provided is ava\
ilable from dealers or on the website for your country. Have it checked by a PEUGEOT dealer or a
qualified workshop.
Emergency or assistance
call
Peugeot Connect SOS
(PE112)
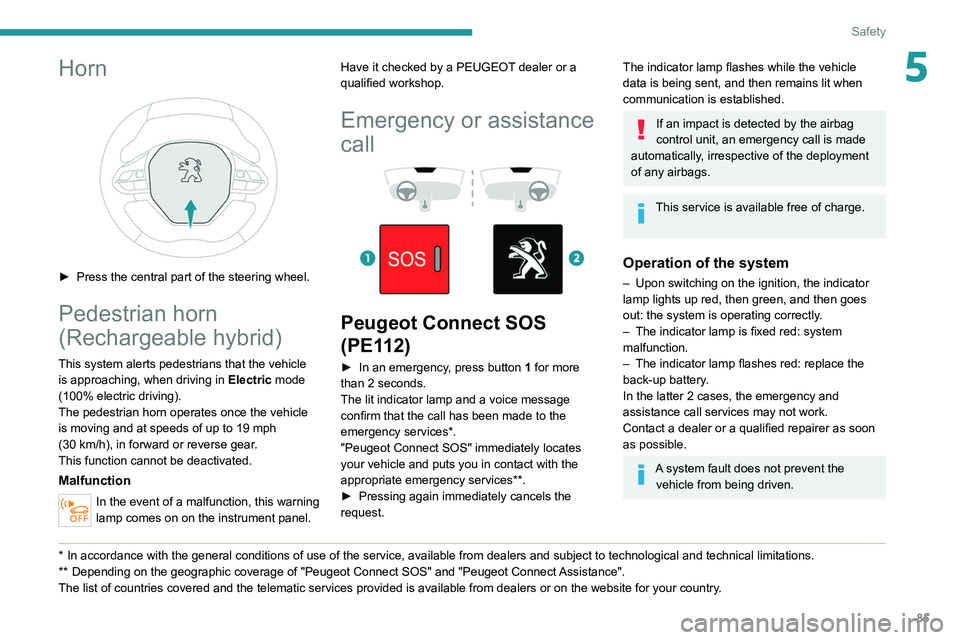
► In an emergency , press button 1 for more
than 2 seconds.
The lit indicator lamp and a voice message
confirm that the call has been made to the
emergency services*.
"Peugeot Connect SOS" immediately locates
your vehicle and puts you in contact with the
appropriate emergency services**.
►
Pressing again immediately cancels the
request.
The indicator lamp flashes while the vehicle
data is being sent, and then remains lit when
communication is established.
If an impact is detected by the airbag
control unit, an emergency call is made
automatically, irrespective of the deployment
of any airbags.
This service is available free of charge.
Operation of the system
– Upon switching on the ignition, the indicator
lamp lights up red, then green, and then goes
out: the system is operating correctly
.
–
The indicator lamp is fixed red: system
malfunction.
–
The indicator lamp flashes red: replace the
back-up battery
.
In the latter 2 cases, the emergency and
assistance call services may not work.
Contact a dealer or a qualified repairer as soon
as possible.
A system fault does not prevent the vehicle from being driven.
Page 90 of 292
88
Safety
In these situations, the system limits the amount
of wheel spin to provide the best traction and
trajectory control for the vehicle.
The use of snow tyres is strongly recommended on surfaces offering low
levels of grip.
Anti-slip regulation (ASR) / Dynamic stability control
(DSC)
Anti-slip regulation (or traction control) optimises
traction by using engine braking and by applying
the brakes on the driving wheels to avoid one
or more wheels spinning. It also enhances the
vehicle's directional stability.
If there is a difference between the vehicle’s
trajectory and the path desired by the driver, the
dynamic stability control system automatically
uses engine braking and the brakes on one or
more wheels to return the vehicle to the desired
path, within the limits of the laws of physics.
These systems are activated automatically every
time the vehicle is started.
These systems are activated in the event of a problem with grip or trajectory
(confirmed by this warning lamp flashing on the
instrument panel).
Deactivation/Reactivation
In exceptional conditions (starting a vehicle
which is bogged down, stuck in snow, on soft
ground, etc.), it may be advisable to deactivate
the ASR system, so that the wheels can turn
freely and regain grip.
Reactivate the system as soon as the level of
grip permits.
This function is set via the Driving/ Vehicle touch screen menu.
Deactivation is confirmed by the lighting
of this indicator lamp on the instrument
panel and the display of a message.
The ASR system is reactivated automatically
every time the ignition is switched off, or at
speeds over 31 mph (50
km/h).
Reactivation is manual below 31 mph (50 km/h).
Malfunction
In the event of a malfunction, this warning
lamp comes on on the instrument panel,
accompanied by the display of a message and
an audible signal.
Have it checked by a PEUGEOT dealer or a
qualified workshop.
ASR/DSC
These systems enhance safety during
normal driving, but should not encourage
the driver to take extra risks or drive at high
speed.
It is in conditions of reduced grip (rain, snow,
ice) that the risk of loss of grip increases. It
is therefore important for your safety to keep
these systems activated in all conditions, and
particularly in difficult conditions.
Correct operation of these systems depends
on compliance with the manufacturer's
recommendations relating to the wheels
(tyres and rims), braking and electronic
components, as well as the assembly and
repair procedures provided by PEUGEOT
dealers.
In order to ensure that these systems remain
effective in wintry conditions, the use of snow
or all-season tyres is recommended. All four
wheels must be fitted with tyres approved for
your vehicle.
All tyre specifications are listed on the
tyre/paint label. For more information
on Identification markings , refer to the
corresponding section.
Trailer stability assist (TSA)
When towing, this system reduces the risk of the
vehicle or trailer snaking.
Operation
The system is activated automatically when the
ignition is switched on.
The electronic stability control system (ESC)
must not have any faults.
The vehicle speed must be between 37 and 99
mph (60 and 160
km/h).
If the system detects that the trailer is
snaking, it applies the brakes to stabilise
the trailer and reduces engine power, if
necessary, to slow the vehicle (indicated by the
flashing of this warning lamp on the instrument
panel and the brake lamps coming on).
For information on weights and towed loads,
refer to the Engine technical data and towed
loads section or your vehicle’s registration
certificate.
To ensure safe driving with a Towing device,
refer to the corresponding section.
Malfunction
If a fault occurs, this warning lamp lights
up on the instrument panel, accompanied
by a message and an audible signal.
To continue towing a trailer, reduce speed and
drive carefully!
Have it checked by a PEUGEOT dealer or a
qualified workshop.
The trailer stability control system provides an extra safety feature under
normal driving conditions, when following the
recommendations for use of trailers and
current legislation in force in your country. It
must not encourage the driver to take extra
risks, such as using a trailer in unsuitable
conditions of operation (e.g. excessive load,
exceeded nose weight, worn or under-inflated
tyres, faulty braking system) or driving at
excessive speed.
In certain cases, the system may not detect
trailer snaking, particularly with a light trailer.