2022 PEUGEOT 3008 driver assist
[x] Cancel search: driver assistPage 160 of 292
158
Driving
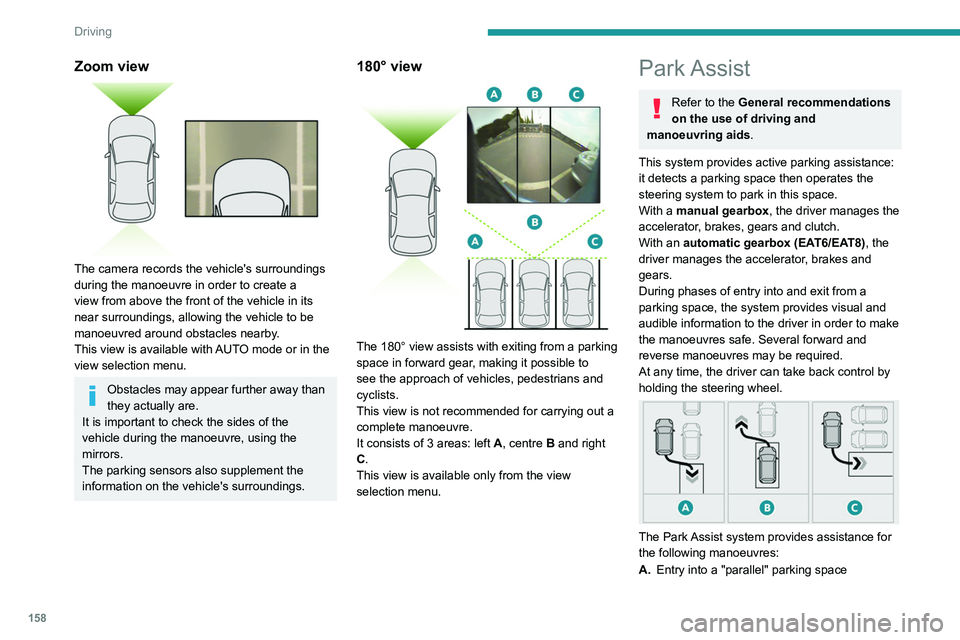
Zoom view
The camera records the vehicle's surroundings
during the manoeuvre in order to create a
view from above the front of the vehicle in its
near surroundings, allowing the vehicle to be
manoeuvred around obstacles nearby.
This view is available with AUTO mode or in the
view selection menu.
Obstacles may appear further away than
they actually are.
It is important to check the sides of the
vehicle during the manoeuvre, using the
mirrors.
The parking sensors also supplement the
information on the vehicle's surroundings.
180° view
The 180° view assists with exiting from a parking
space in forward gear, making it possible to
see the approach of vehicles, pedestrians and
cyclists.
This view is not recommended for carrying out a
complete manoeuvre.
It consists of 3 areas: left A, centre B and right
C.
This view is available only from the view
selection menu.
Park Assist
Refer to the General recommendations
on the use of driving and
manoeuvring aids.
This system provides active parking
assistance:
it detects a parking space then operates the
steering system to park in this space.
With a manual gearbox, the driver manages the
accelerator, brakes, gears and clutch.
With an automatic gearbox (EAT6/EAT8), the
driver manages the accelerator, brakes and
gears.
During phases of entry into and exit from a
parking space, the system provides visual and
audible information to the driver in order to make
the manoeuvres safe. Several forward and
reverse manoeuvres may be required.
At any time, the driver can take back control by
holding the steering wheel.
The Park Assist system provides assistance for
the following manoeuvres:
A. Entry into a "parallel" parking space
B.Exit from a "parallel" parking space
C. Entry into a "bay" parking space
The Park Assist system cannot operate
with the engine switched off.
When Park Assist is activated, it prevents
Stop & Start from going into STOP mode. In
STOP mode, activation of Park Assist restarts
the engine.
The Park Assist system takes control of the steering for a maximum of 4
manoeuvring cycles. It is deactivated after
these 4 cycles. If the vehicle is not positioned
correctly, take back control to complete the
manoeuvre.
The sequence of manoeuvres and the driving instructions are displayed in the
instrument panel.
The assistance is activated: the display of this symbol and a speed limit
indicate that the steering manoeuvres are
controlled by the system: do not touch the
steering wheel.
The assistance is deactivated: the display of this symbol indicates that the
steering manoeuvres are no longer controlled
by the system: take over the steering.
Activation of Park Assist deactivates the Blind Spot Monitoring.
Page 162 of 292
160
Driving
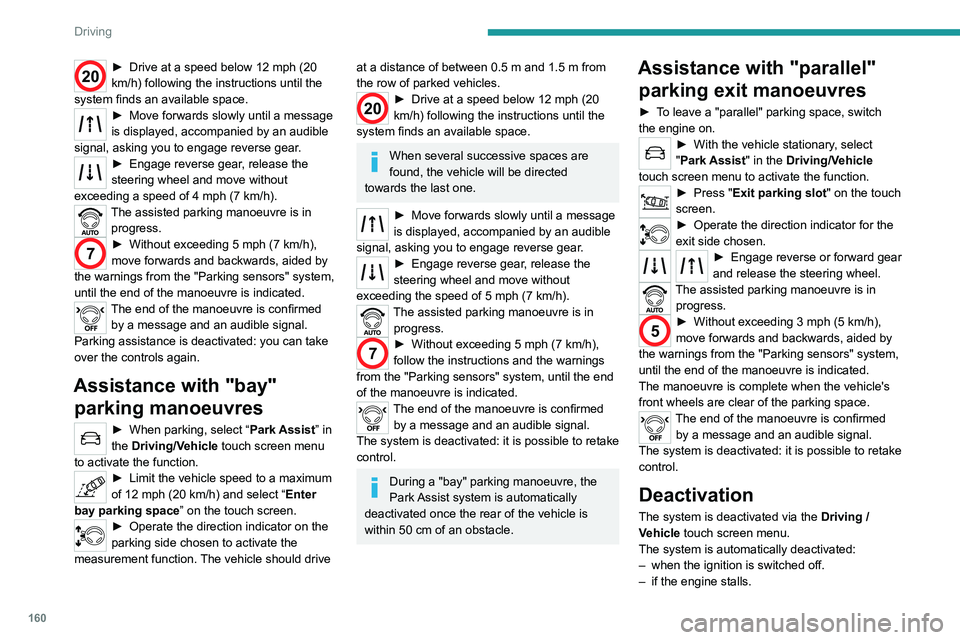
20► Drive at a speed below 12 mph (20
km/h) following the instructions until the
system finds an available space.
► Move forwards slowly until a message
is displayed, accompanied by an audible
signal, asking you to engage reverse gear
.
► Engage reverse gear, release the
steering wheel and move without
exceeding a speed of 4 mph (7 km/h).
The assisted parking manoeuvre is in progress.
7► Without exceeding 5 mph (7 km/h),
move forwards and backwards, aided by
the warnings from the "Parking sensors" system,
until the end of the manoeuvre is indicated.
The end of the manoeuvre is confirmed by a message and an audible signal.
Parking assistance is deactivated: you can take
over the controls again.
Assistance with "bay" parking manoeuvres
► When parking, select “ Park Assist ” in
the Driving/Vehicle touch screen menu
to activate the function.
► Limit the vehicle speed to a maximum
of 12 mph (20 km/h) and select “ Enter
bay parking space” on the touch screen.
► Operate the direction indicator on the
parking side chosen to activate the
measurement function.
The vehicle should drive
at a distance of between 0.5 m and 1.5 m from
the row of parked vehicles.
20► Drive at a speed below 12 mph (20
km/h) following the instructions until the
system finds an available space.
When several successive spaces are
found, the vehicle will be directed
towards the last one.
► Move forwards slowly until a message
is displayed, accompanied by an audible
signal, asking you to engage reverse gear
.
► Engage reverse gear, release the
steering wheel and move without
exceeding the speed of 5 mph (7 km/h).
The assisted parking manoeuvre is in progress.
7► Without exceeding 5 mph (7 km/h),
follow the instructions and the warnings
from the "Parking sensors" system, until the end
of the manoeuvre is indicated.
The end of the manoeuvre is confirmed by a message and an audible signal.
The system is deactivated: it is possible to retake
control.
During a "bay" parking manoeuvre, the
Park Assist system is automatically
deactivated once the rear of the vehicle is
within 50
cm of an obstacle.
Assistance with "parallel" parking exit manoeuvres
► To leave a "parallel" parking space, switch
the engine on.
► With the vehicle stationary , select
"Park Assist" in the Driving/Vehicle
touch screen menu to activate the function.
► Press " Exit parking slot " on the touch
screen.
► Operate the direction indicator for the
exit side chosen.
► Engage reverse or forward gear
and release the steering wheel.
The assisted parking manoeuvre is in progress.
5► Without exceeding 3 mph (5 km/h),
move forwards and backwards, aided by
the warnings from the "Parking sensors" system,
until the end of the manoeuvre is indicated.
The manoeuvre is complete when the vehicle's
front wheels are clear of the parking space.
The end of the manoeuvre is confirmed by a message and an audible signal.
The system is deactivated: it is possible to retake
control.
Deactivation
The system is deactivated via the Driving /
V ehicle touch screen menu.
The system is automatically deactivated:
–
when the ignition is switched off.
–
if the engine stalls.
– if the driver's seat belt is not fastened.
– on opening the driver's door.
– if no manoeuvre is performed within 5 minutes
of selecting the type of manoeuvre.
– after a prolonged stop of the vehicle during a
manoeuvre.
– if the wheel anti-slip regulation (ASR) is
triggered.
– if the speed of the vehicle exceeds the
authorised limit.
– when the driver interrupts the rotation of the
steering wheel.
– after 4 manoeuvring cycles.
– if one of the front wheels encounters an
obstacle.
Deactivation is confirmed by a message and an
audible signal.
The driver should then take back control of the
vehicle's steering.
If the system is deactivated during a
manoeuvre, the driver should reactivate
it to repeat the measurement.
Deactivation
The system is automatically deactivated:
– when towing a trailer, connected electrically;
– if the driver's door is opened;
– if the speed of the vehicle is above 43 mph
(70 km/h).
To switch the system off for a prolonged period,
contact a PEUGEOT dealer or a qualified
workshop.
Page 196 of 292
194
In the event of a breakdown
With a tyre repaired using this type of kit,
do not exceed a speed of 50 mph
(80 km/h) and do not drive more than
125 miles (200 km).
Contact a PEUGEOT dealer or a qualified
workshop to have the tyre changed.
Checking/adjusting tyre
pressures
The compressor can be used, without injecting
sealant, to check and, if necessary, adjust the
tyre pressures.
► Remove the valve cap from the tyre and keep
it in a clean place.
► Uncoil the pipe stowed under the compressor.
► Screw the pipe onto the valve and tighten
firmly.
► Check that the compressor switch is in
position " O".
► Fully uncoil the electric cable stowed under
the compressor.
► Connect the compressor's electric plug to the
vehicle's 12 V socket.
► Switch the ignition on.
► Start the compressor by placing the switch at
position " I" and adjust the pressure to the value
shown on the vehicle's tyre pressure label. To
deflate: press the black button located on the
compressor pipe, near the valve connection.
If after 7 minutes the pressure of 2 bar is
not reached, the tyre is damaged;
Connecting kit 2
► Remove the valve cap from the tyre to be
repaired, and place it in a clean place.
► Connect the pipe from the bottle of sealant to
the valve of the tyre to be repaired and tighten
firmly
.
►
Connect the pipe from the compressor to the
bottle of sealant.
Repairing the tyre
► Check that the compressor switch is in
position "O".
►
Fully uncoil the electric cable stowed under
the compressor
.
►
Connect the compressor's electric plug to the
vehicle's 12
V socket.
► Affix the speed limit sticker .
The speed limit sticker must be affixed
inside the vehicle in the area close to the
driver, to remind them that a wheel is in
temporary use.
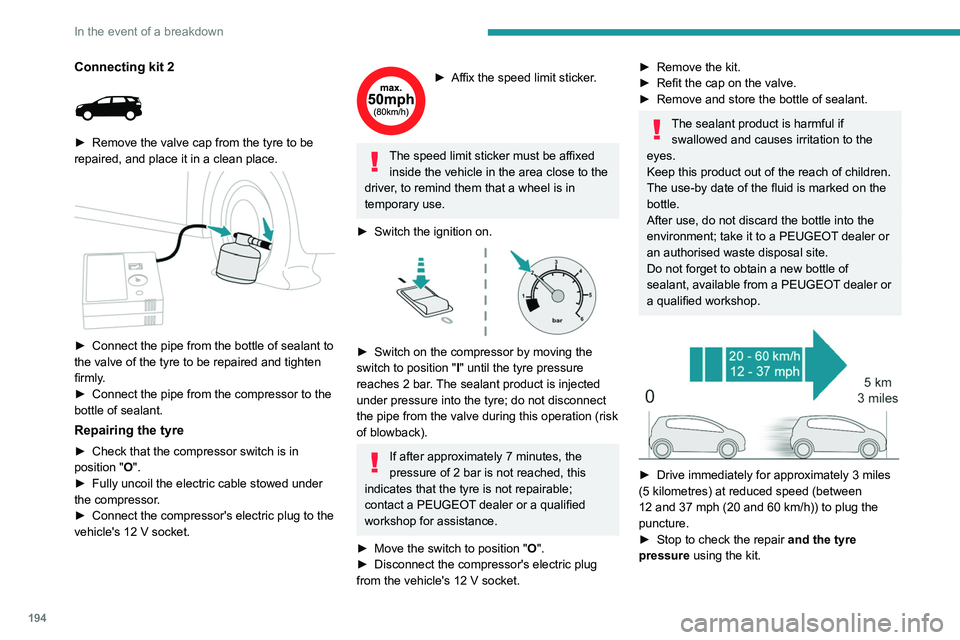
►
Switch the ignition on.
► Switch on the compressor by moving the
switch to position " I
" until the tyre pressure
reaches 2 bar. The sealant product is injected
under pressure into the tyre; do not disconnect
the pipe from the valve during this operation (risk
of blowback).
If after approximately 7 minutes, the
pressure of 2 bar is not reached, this
indicates that the tyre is not repairable;
contact a PEUGEOT dealer or a qualified
workshop for assistance.
►
Move the switch to position " O
".
►
Disconnect the compressor's electric plug
from the vehicle's 12
V socket.
► Remove the kit.
► Refit the cap on the valve.
►
Remove and store the bottle of sealant.
The sealant product is harmful if swallowed and causes irritation to the
eyes.
Keep this product out of the reach of children.
The use-by date of the fluid is marked on the
bottle.
After use, do not discard the bottle into the
environment; take it to a PEUGEOT dealer or
an authorised waste disposal site.
Do not forget to obtain a new bottle of
sealant, available from a PEUGEOT dealer or
a qualified workshop.
► Drive immediately for approximately 3 miles
(5 kilometres) at reduced speed (between
12 and 37 mph (20 and 60
km/h)) to plug the
puncture.
►
Stop to check the repair
and the tyre
pressure using the kit.
Page 214 of 292
212
In the event of a breakdown
Accessing the tools
General recommendations
Observe the legislation in force in the country where you are driving.
Check that the towing vehicle is heavier than the towed vehicle.
The driver must remain at the wheel of the towed vehicle and must have a\
valid driving licence.
When towing a vehicle with all four wheels on the ground, always use an \
approved towbar; ropes and straps are prohibited.
The towing vehicle must move off gently.
When the vehicle is towed with its engine off, there is no longer braking and steering assistance.
A professional recovery service must be called in the following cases:
– broken down on a motorway or main road;
–
not possible to put the gearbox into neutral, unlock the steering, or re\
lease the parking brake;
–
not possible to tow a vehicle with an automatic gearbox, with the engine\
running;
–
towing with only two wheels on the ground;
–
four-wheel drive vehicle;
–
no approved towbar available.
Rechargeable hybrid vehicles
Before any intervention, with the ignition
on, depress the brake pedal and select mode N, then switch off the hybrid system (READY
indicator lamp off).
Always call on professionals for recovery of
the vehicle on a flatbed lorry or trailer.Use the towing eye only to free the vehicle
if it is stuck, or to secure it for recovery on a
flatbed lorry or trailer.
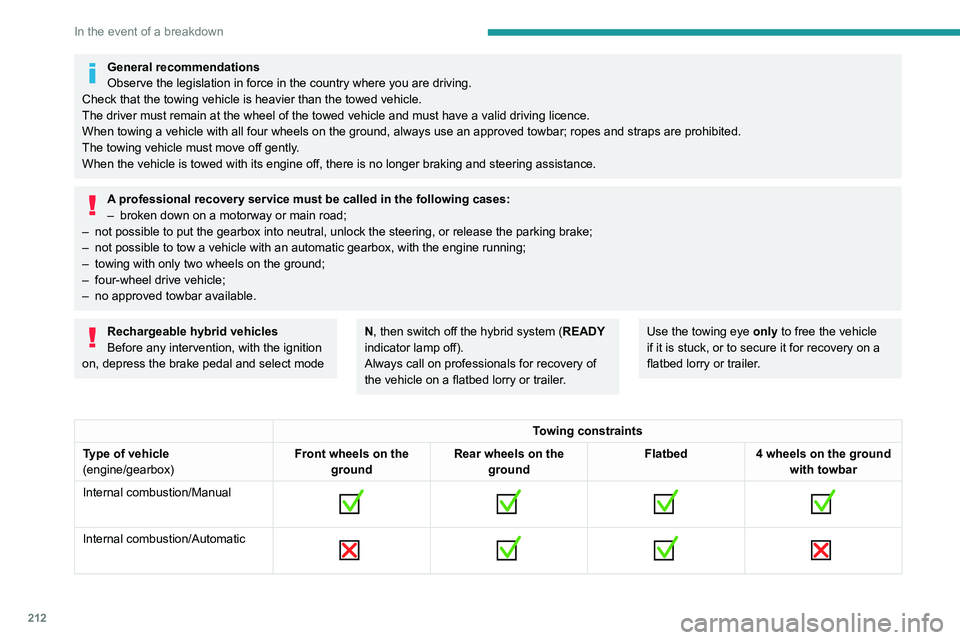
Towing constraints
Type of vehicle
(engine/gearbox) Front wheels on the
ground Rear wheels on the
ground Flatbed
4 wheels on the ground
with towbar
Internal combustion/Manual
Internal combustion/Automatic
Page 264 of 292
262
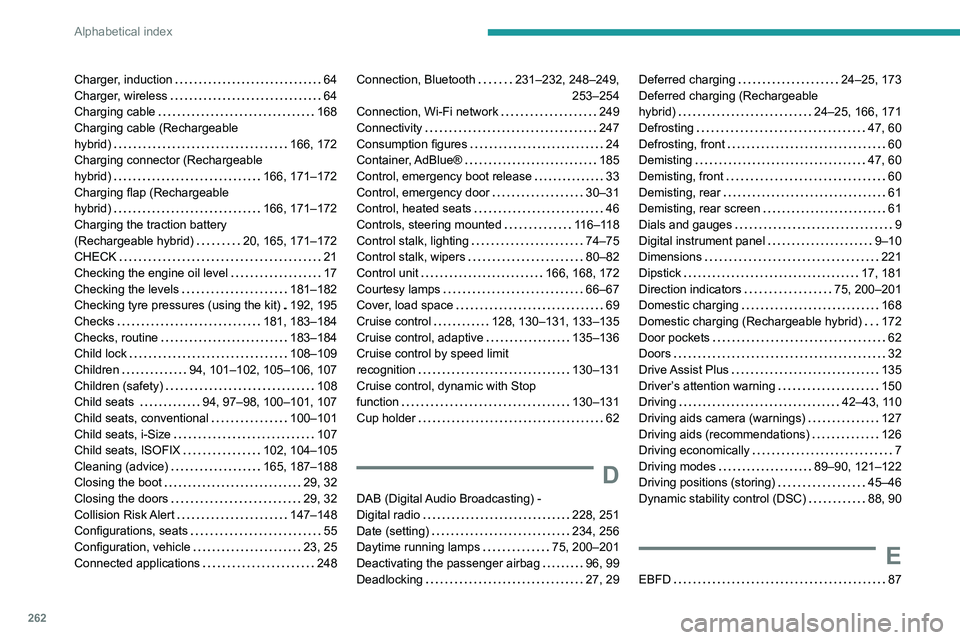
Alphabetical index
Charger, induction 64
Charger, wireless
64
Charging cable
168
Charging cable (Rechargeable
hybrid)
166, 172
Charging connector (Rechargeable
hybrid)
166, 171–172
Charging flap (Rechargeable
hybrid)
166, 171–172
Charging the traction battery
(Rechargeable hybrid)
20, 165, 171–172
CHECK
21
Checking the engine oil level
17
Checking the levels
181–182
Checking tyre pressures (using the kit)
192, 195
Checks
181, 183–184
Checks, routine
183–184
Child lock
108–109
Children
94, 101–102, 105–106, 107
Children (safety)
108
Child seats
94, 97–98, 100–101, 107
Child seats, conventional
100–101
Child seats, i-Size
107
Child seats, ISOFIX
102, 104–105
Cleaning (advice)
165, 187–188
Closing the boot
29, 32
Closing the doors
29, 32
Collision Risk Alert
147–148
Configurations, seats
55
Configuration, vehicle
23, 25
Connected applications
248Connection, Bluetooth 231–232, 248–249,
253–254
Connection, Wi-Fi network
249
Connectivity
247
Consumption figures
24
Container, AdBlue®
185
Control, emergency boot release
33
Control, emergency door
30–31
Control, heated seats
46
Controls, steering mounted
116–118
Control stalk, lighting
74–75
Control stalk, wipers
80–82
Control unit
166, 168, 172
Courtesy lamps
66–67
Cover, load space
69
Cruise control
128, 130–131, 133–135
Cruise control, adaptive
135–136
Cruise control by speed limit
recognition
130–131
Cruise control, dynamic with Stop
function
130–131
Cup holder
62
D
DAB (Digital Audio Broadcasting) -
Digital radio
228, 251
Date (setting)
234, 256
Daytime running lamps
75, 200–201
Deactivating the passenger airbag
96, 99
Deadlocking
27, 29
Deferred charging 24–25, 173
Deferred charging (Rechargeable
hybrid)
24–25, 166, 171
Defrosting
47, 60
Defrosting, front
60
Demisting
47, 60
Demisting, front
60
Demisting, rear
61
Demisting, rear screen
61
Dials and gauges
9
Digital instrument panel
9–10
Dimensions
221
Dipstick
17, 181
Direction indicators
75, 200–201
Domestic charging
168
Domestic charging (Rechargeable hybrid)
172
Door pockets
62
Doors
32
Drive Assist Plus
135
Driver’s attention warning
150
Driving
42–43, 110
Driving aids camera (warnings)
127
Driving aids (recommendations)
126
Driving economically
7
Driving modes
89–90, 121–122
Driving positions (storing)
45–46
Dynamic stability control (DSC)
88, 90
E
EBFD 87
Page 269 of 292
267
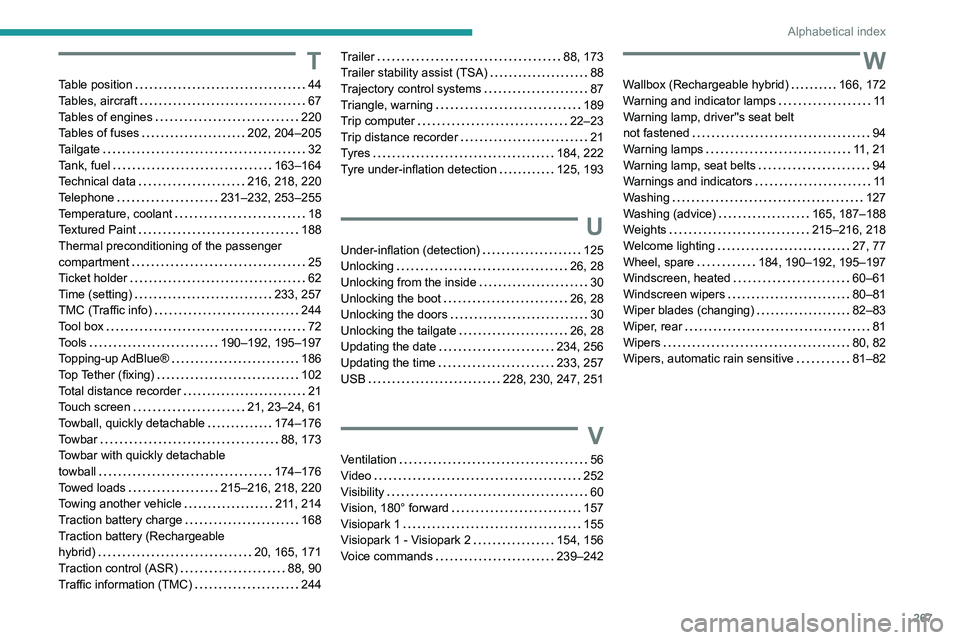
Alphabetical index
T
Table position 44
Tables, aircraft
67
Tables of engines
220
Tables of fuses
202, 204–205
Tailgate
32
Tank, fuel
163–164
Technical data
216, 218, 220
Telephone
231–232, 253–255
Temperature, coolant
18
Textured Paint
188
Thermal preconditioning of the passenger
compartment
25
Ticket holder
62
Time (setting)
233, 257
TMC (Traffic info)
244
Tool box
72
Tools
190–192, 195–197
Topping-up AdBlue®
186
Top Tether (fixing)
102
Total distance recorder
21
Touch screen
21, 23–24, 61
Towball, quickly detachable
174–176
Towbar
88, 173
Towbar with quickly detachable
towball
174–176
Towed loads
215–216, 218, 220
Towing another vehicle
211, 214
Traction battery charge
168
Traction battery (Rechargeable
hybrid)
20, 165, 171
Traction control (ASR)
88, 90
Traffic information (TMC)
244
Trailer 88, 173
Trailer stability assist (TSA)
88
Trajectory control systems
87
Triangle, warning
189
Trip computer
22–23
Trip distance recorder
21
Tyres
184, 222
Tyre under-inflation detection
125, 193
U
Under-inflation (detection) 125
Unlocking
26, 28
Unlocking from the inside
30
Unlocking the boot
26, 28
Unlocking the doors
30
Unlocking the tailgate
26, 28
Updating the date
234, 256
Updating the time
233, 257
USB
228, 230, 247, 251
V
Ventilation 56
Video
252
Visibility
60
Vision, 180° forward
157
Visiopark 1
155
Visiopark 1 - Visiopark 2
154, 156
Voice commands
239–242
W
Wallbox (Rechargeable hybrid) 166, 172
Warning and indicator lamps
11
Warning lamp, driver''s seat belt
not fastened
94
Warning lamps
11, 21
Warning lamp, seat belts
94
Warnings and indicators
11
Washing
127
Washing (advice)
165, 187–188
Weights
215–216, 218
Welcome lighting
27, 77
Wheel, spare
184, 190–192, 195–197
Windscreen, heated
60–61
Windscreen wipers
80–81
Wiper blades (changing)
82–83
Wiper, rear
81
Wipers
80, 82
Wipers, automatic rain sensitive
81–82