2022 PEUGEOT 3008 sunroof
[x] Cancel search: sunroofPage 43 of 292
41
Access
2Reinitialisation
Following reconnection of the battery or in the
event of a fault or jerky movement of the sunroof
or blind, reinitialisation is required.
►
Check that nothing is interfering with the
sunroof or blind and that the seals are clean.
►
With the ignition on, fully close the sunroof
and blind.
►
Press and hold the front part of button
B, until
the sunroof and blind move slightly, then hold for
a further 1 second before releasing.
►
W
ait 2 seconds and then press and hold the
front part of button B. The blind and the sunroof
will open and close, one after the other. When
both are completely closed again, hold for a
further 2 seconds and release.
If there is an operating fault, restart the
whole procedure.
Page 179 of 292
177
Practical information
7These points are concealed by the vehicle doors
when the doors are closed.
The roof bar fixings have a stud which must be
inserted into the opening of each fixing point.
Maximum load distributed over the
transverse roof bars, for a loading height
not exceeding 40 cm (except bicycle carrier):
80
kg.
As this value may change, please verify the
maximum load quoted in the guide supplied
with the roof bars.
If the height exceeds 40 cm, adapt the speed
of the vehicle to the profile of the road to
avoid damaging the roof bars and the fixings
on the vehicle.
Be sure to refer to national legislation in order
to comply with the regulations for transporting
objects that are longer than the vehicle.
Recommendations
Distribute the load uniformly, taking care
to avoid overloading one of the sides.
Arrange the heaviest part of the load as close
as possible to the roof.
Secure the load firmly.
Drive gently: the vehicle will be more
susceptible to the effects of side winds and its
stability may be affected.
Regularly check the security and tight
fastening of the roof bars, at least before each
trip.
Remove the roof bars once they are no longer
needed.
Sunroof
Check that the load does not pass below
the roof bars so that it does not impede the
movements of the sunroof - risk of major
damage!
Snow chains
In wintry conditions, snow chains improve
traction as well as the behaviour of the vehicle
when braking.
Snow chains must be fitted only to the
front wheels. They must never be fitted to
"space-saver" type spare wheels.
Observe the legislation in force in your
country relating to the use of snow
chains and maximum authorised speeds.
Use only chains designed to be fitted to the type
of wheel fitted to the vehicle:
Original tyre size Maximum link size 215/65 R17 9 mm
225/55 R18 9 mm
205/55 R19 9 mm
Original tyre size Maximum link size
235/50 R19 Not suitable for
chains
For more information on snow chains, contact a
PEUGEOT dealer or a qualified workshop.
Installation tips
► To fit the snow chains during a journey, stop
the vehicle on a flat surface at the side of the
road.
►
Apply the parking brake and position any
wheel chocks under the wheels to prevent
movement of the vehicle.
►
Fit the snow chains following the instructions
provided by the manufacturer
.
►
Move off gently and drive for a few moments,
without exceeding 31
mph (50 km/h).
►
Stop the vehicle and check that the snow
chains are correctly tightened.
It is strongly recommended that you
practise fitting the snow chains on a level
and dry surface before setting off.
Avoid driving with snow chains on roads that have been cleared of snow to avoid
damaging the vehicle's tyres and the road
surface. If the vehicle is fitted with alloy
wheels, check that no part of the chain or its
fixings is in contact with the wheel rim.
Page 210 of 292
208
In the event of a breakdown
approximately 15 minutes before starting the
engine.
If minor problems nevertheless persist following
this operation, contact a PEUGEOT dealer or a
qualified workshop.
Referring to the relevant section, reinitialise
certain equipment:
– Remote control key or electronic key
(depending on version).
– Sunroof and electric blind.
– Electric windows.
– Date and time.
– Preset radio stations.
After reconnecting the battery, the
message "Collision risk detection
system fault" is displayed on the instrument
panel when the ignition is switched on. This
operation is perfectly normal. The message
will disappear while driving.
The Stop & Start system may not be operational during the trip following the
first engine start.
In this case, the system will only be available
again after a continuous period with the
vehicle immobilised, the duration of which
depends on the exterior temperature and the
state of charge of the battery (up to about 8
hours).
► At the end of the charging operation, switch
off charger B
before disconnecting the cables
from battery A.
If this label is present, use only a 12 V
charger to avoid causing irreversible
damage to the electrical components.
24V
12V
Never try to charge a frozen battery - risk
of explosion!
If the battery has frozen, have it checked by a
PEUGEOT dealer or by a qualified workshop
who will verify that the internal components
have not been damaged and that the case
has not cracked, which would mean a risk of
toxic and corrosive acid leaking.
Some functions, including Stop & Start,
are not available if the battery is not
sufficiently charged.
Disconnecting the battery
In order to maintain an adequate state of
charge for starting the engine, we recommend
disconnecting the battery if the vehicle is to be
unused for an extended period. Before disconnecting the battery:
►
Close all openings (doors, boot, windows,
roof).
►
Switch off all electricity-consuming devices
(audio system, wipers, lamps, etc.).
►
Switch off the ignition and wait for 4
minutes.
After accessing the battery, it is only necessary
to disconnect the (+) terminal.
Quick-release terminal clamp
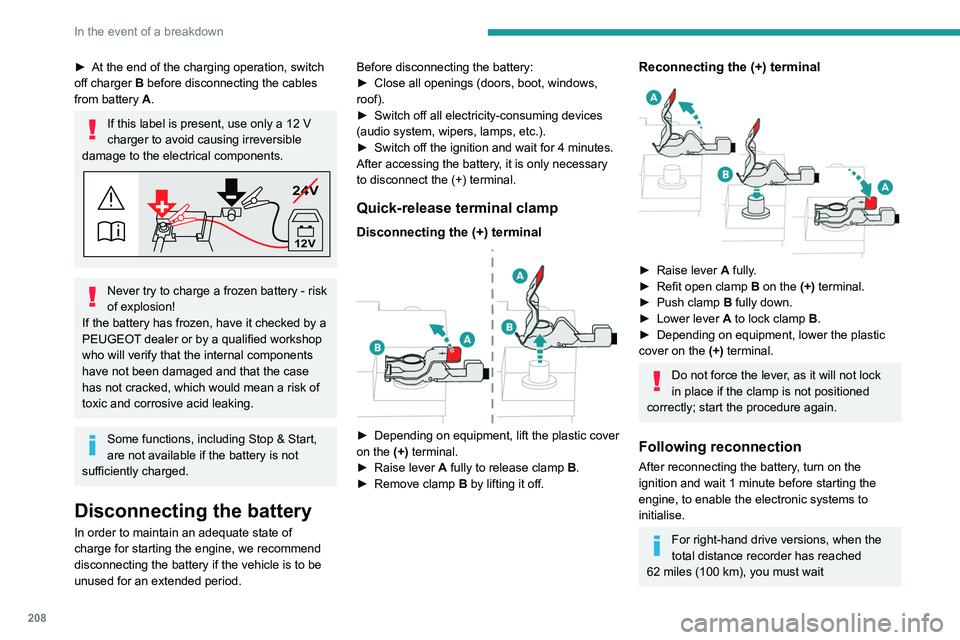
Disconnecting the (+) terminal
► Depending on equipment, lift the plastic cover
on the (+) terminal.
►
Raise lever
A
fully to release clamp
B
.
►
Remove clamp
B
by lifting it off.
Reconnecting the (+) terminal
► Raise lever A fully.
► Refit open clamp B on the (+) terminal.
►
Push clamp
B fully down.
►
Lower lever
A
to lock clamp B.
►
Depending on equipment, lower the plastic
cover on the
(+) terminal.
Do not force the lever, as it will not lock
in place if the clamp is not positioned
correctly; start the procedure again.
Following reconnection
After reconnecting the battery, turn on the
ignition and wait 1 minute before starting the
engine, to enable the electronic systems to
initialise.
For right-hand drive versions, when the
total distance recorder has reached
62
miles (100 km), you must wait
Page 211 of 292
209
In the event of a breakdown
8approximately 15 minutes before starting the
engine.
If minor problems nevertheless persist following
this operation, contact a PEUGEOT
dealer or a
qualified workshop.
Referring to the relevant section, reinitialise
certain equipment:
–
Remote control key or electronic key
(depending on version).
–
Sunroof and electric blind.
–
Electric windows.
–
Date and time.
–
Preset radio stations.
After reconnecting the battery, the message "Collision risk detection
system fault" is displayed on the instrument
panel when the ignition is switched on. This
operation is perfectly normal. The message
will disappear while driving.
The Stop & Start system may not be operational during the trip following the
first engine start.
In this case, the system will only be available
again after a continuous period with the
vehicle immobilised, the duration of which
depends on the exterior temperature and the
state of charge of the battery (up to about 8
hours).
Accessory battery (Rechargeable hybrid)
The rechargeable hybrid system has two
accessory batteries: one at the front and one at
the rear of the vehicle.
The batteries contain harmful substances (sulphuric acid and lead).
They must be disposed of in accordance
with regulations and must never under any
circumstances be discarded with household
waste.
Take used remote control batteries and
vehicle batteries to a special collection point.
Protect your eyes and face before
handling batteries.
All operations on the batteries must be carried
out in a well ventilated area and away from
naked flames and sources of sparks, so as to
avoid the risk of explosion or fire.
Wash your hands afterwards.
For the replacement of batteries,
contact a
PEUGEOT dealer or a qualified workshop.
Do not start or jump start another vehicle
from the vehicle’s batteries.
Accessing the batteries
Front
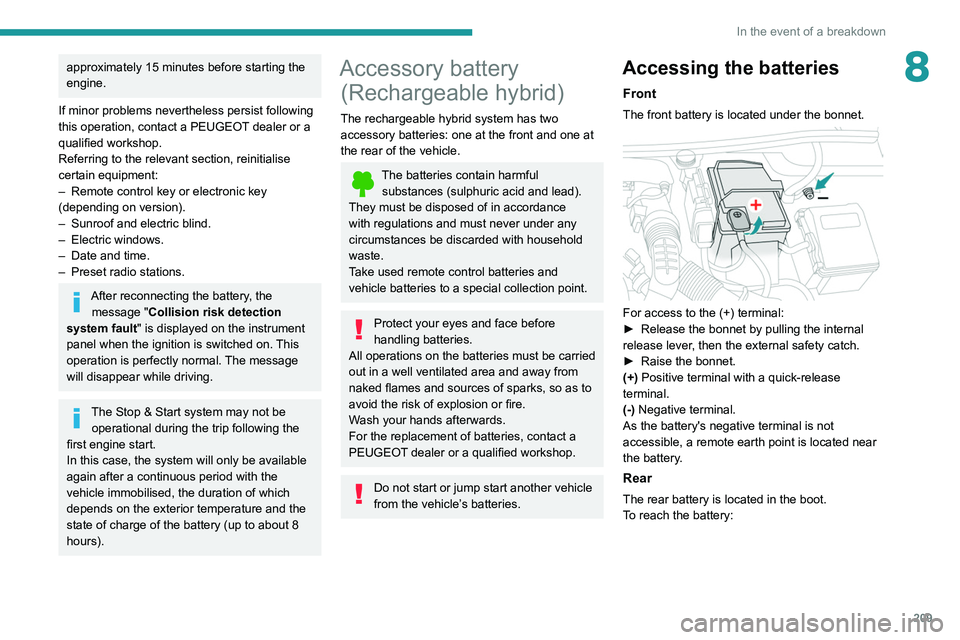
The front battery is located under the bonnet.
For access to the (+) terminal:
► Release the bonnet by pulling the internal
release lever
, then the external safety catch.
►
Raise the bonnet.
(+)
Positive terminal with a quick-release
terminal.
(-) Negative terminal.
As the battery's negative terminal is not
accessible, a remote earth point is located near
the battery.
Rear
The rear battery is located in the boot.
To reach the battery:
Page 213 of 292
2 11
In the event of a breakdown
8► Close all other doors.
► Switch off all electrical consumers (audio
system, wipers, lamps, etc.).
►
Switch
off the ignition and wait for the READY
indicator lamp to go out.
►
Observe a waiting time of 4 minutes.
Never reverse the order of the battery
disconnection and reconnection steps
- risk of irreversible damage!
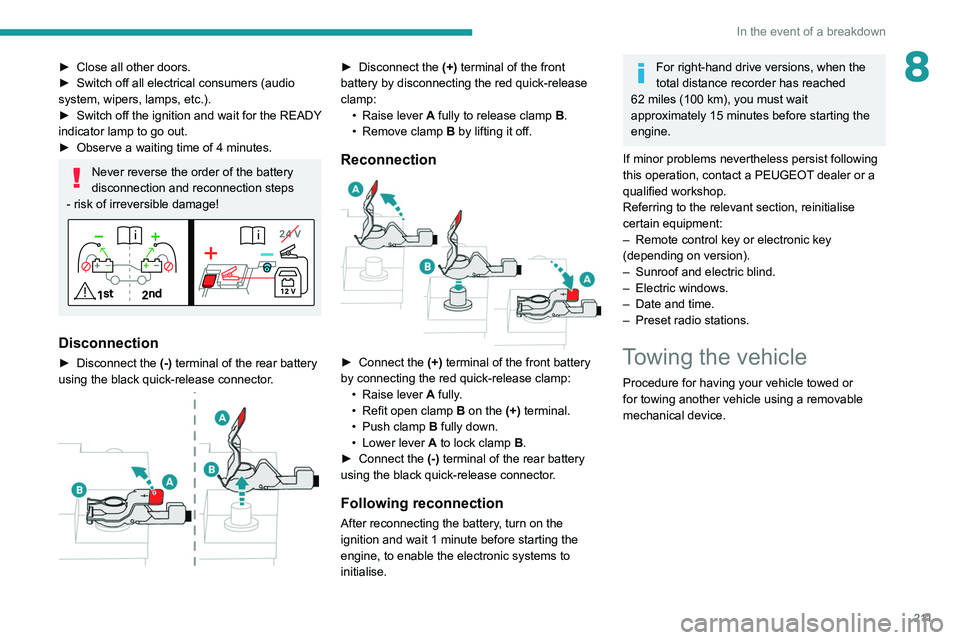
Disconnection
► Disconnect the (-) terminal of the rear battery
using the black quick-release connector.
► Disconnect the (+) terminal of the front
battery by disconnecting the red quick-release
clamp: •
Raise lever
A
fully to release clamp
B
.
•
Remove clamp
B
by lifting it off.
Reconnection
► Connect the (+) terminal of the front battery
by connecting the red quick-release clamp: •
Raise lever
A
fully.
•
Refit open clamp
B
on the (+) terminal.
•
Push clamp
B fully down.
•
Lower lever
A
to lock clamp B.
►
Connect the
(-) terminal of the rear battery
using the black quick-release connector.
Following reconnection
After reconnecting the battery, turn on the
ignition and wait 1 minute before starting the
engine, to enable the electronic systems to
initialise.
For right-hand drive versions, when the
total distance recorder has reached
62
miles (100 km), you must wait
approximately 15
minutes before starting the
engine.
If minor problems nevertheless persist following
this operation, contact a PEUGEOT dealer or a
qualified workshop.
Referring to the relevant section, reinitialise
certain equipment:
–
Remote control key or electronic key
(depending on version).
–
Sunroof and electric blind.
–
Electric windows.
–
Date and time.
–
Preset radio stations.
Towing the vehicle
Procedure for having your vehicle towed or
for towing another vehicle using a removable
mechanical device.
Page 240 of 292
238
PEUGEOT Connect Nav
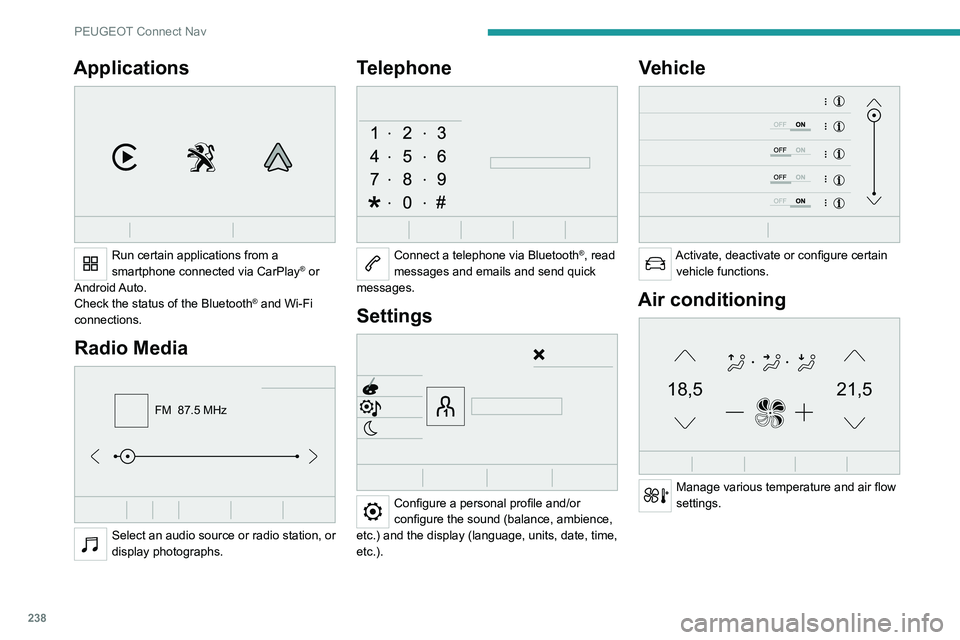
Applications
Run certain applications from a
smartphone connected via CarPlay® or
Android Auto.
Check the status of the
Bluetooth
® and Wi-Fi
connections.
Radio Media
FM 87.5 MHz
Select an audio source or radio station, or
display photographs.
Telephone
Connect a telephone via Bluetooth®, read
messages and emails and send quick
messages.
Settings
Configure a personal profile and/or
configure the sound (balance, ambience,
etc.) and the display (language, units, date, time,
etc.).
Vehicle
Activate, deactivate or configure certain vehicle functions.
Air conditioning
21,518,5
Manage various temperature and air flow
settings.
Voice commands
Steering wheel-mounted
controls
Voice commands:
Voice commands can be issued from any
screen page after a short press on the "Voice
commands" button located on the steering
wheel or at the end of the lighting control stalk
(depending on equipment), as long as there is no
telephone call in progress.
To ensure that voice commands are always recognised by the system, please
follow these recommendations:
– use natural language in a normal tone
without breaking up words or raising your
voice.
– always wait for the "beep" (audible signal)
before speaking.
– for best results, closing the windows and
sunroof is recommended, to avoid extraneous
interference (depending on version).
– before issuing a voice command, ask any
other passengers to refrain from speaking.
First steps
Example of a "voice command" for
navigation:
"Navigate to address 11 regent street,
London"
Page 241 of 292
239
PEUGEOT Connect Nav
11Voice commands
Steering wheel-mounted
controls
Voice commands:
Voice commands can be issued from any
screen page after a short press on the "Voice
commands" button located on the steering
wheel or at the end of the lighting control stalk
(depending on equipment), as long as there is no
telephone call in progress.
To ensure that voice commands are always recognised by the system, please
follow these recommendations:
–
use natural language in a normal tone
without breaking up words or raising your
voice.
–
always wait for the "beep" (audible signal)
before speaking.
–
for best results, closing the windows and
sunroof is recommended, to avoid extraneous
interference (depending on version).
–
before issuing a voice command, ask any
other passengers to refrain from speaking.
First steps
Example of a "voice command" for
navigation:
"Navigate to address 11 regent street,
London"
Example of a "voice command" for the radio and
media:
"Play artist Madonna"
Example of a "voice command" for the
telephone:
"Call David Miller"
The voice commands, with a choice of 17 languages (Arabic, Brazilian, Czech,
Danish, Dutch, English, Farsi, French,
German, Italian, Norwegian, Polish,
Portuguese, Russian, Spanish, Swedish,
Turkish), are made using the language
previously chosen and set in the system.
For some voice commands, there are
alternative synonyms.
Example: Guide to / Navigate to / Go to / ...
The voice commands in Arabic for: "Navigate
to address" and "Display POI in the city", are
not available.
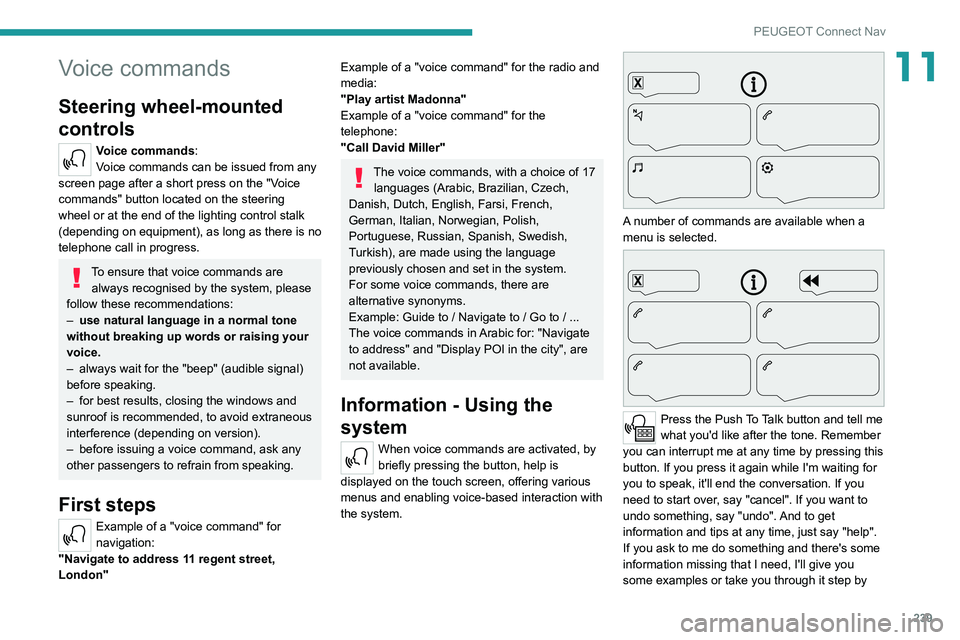
Information - Using the
system
When voice commands are activated, by
briefly pressing the button, help is
displayed on the touch screen, offering various
menus and enabling voice-based interaction with
the system.
A number of commands are available when a
menu is selected.
Press the Push To Talk button and tell me
what you'd like after the tone. Remember
you can interrupt me at any time by pressing this
button. If you press it again while I'm waiting for
you to speak, it'll end the conversation. If you
need to start over, say "cancel". If you want to
undo something, say "undo". And to get
information and tips at any time, just say "help".
If you ask to me do something and there's some
information missing that I need, I'll give you
some examples or take you through it step by
Page 268 of 292
266
Alphabetical index
Regenerative braking (deceleration
by engine braking)
120
Reinitialisation of the under-inflation
detection system
126
Reinitialising the remote control
32
Reminder, lighting on
74
Remote control
26–30
Remote functions
25, 173
Remotely operable functions (Rechargeable
hybrid)
25, 61
Removing a wheel
198–199
Removing the mat
65
Replacing bulbs
200–201
Replacing fuses
201–202
Replacing the air filter
183
Replacing the oil filter
183
Replacing the passenger compartment
filter
183
Reservoir, screenwash
182
Resetting the trip recorder
21
Reset trip
22
Rev counter
9
Reversing camera
127, 154–156
Reversing lamps
201
Roof bars
176–177
Running out of fuel (Diesel)
189
S
Safety, children 95–99, 101–102,
105–106, 107
Saturation of the particle filter (Diesel)
183
Screen menu map 230
Screens, very cold conditions
178
Screenwash
81
Screenwash, front
81
Screenwash, rear
81
SCR (Selective Catalytic Reduction)
19, 184
Seat belts
91–92, 94, 100
Seat belts, rear
92–93
Seat, rear bench
48–49
Seats, additional
53–55
Seats, electric
45–46
Seats, front
43, 45–46
Seats, heated
46
Seats, rear
48–55, 98
Selector, gear
116–120
Sensors (warnings)
127
Serial number, vehicle
222
Service indicator
17, 21
Servicing
17, 183–184
Settings, equipment
23, 25
Settings, system
233, 256
Sidelamps
75, 200–201
Silent vehicle warning sound (Rechargeable
hybrid)
85
Ski flap
67
Smartphone
25, 64
Snow chains
125, 177–178
Snow screen
178
Socket, 12 V accessory
62, 66, 72
Socket, auxiliary
229, 251
Socket, Jack
251
Speakers
63
Speed limiter
128, 130–133Speed limit recognition 128, 130
Speedometer
9, 127
Sport mode
122–123
Spotlamps, side
77
Stability control (ESC)
87–88, 90
Starting a Diesel engine
163
Starting the engine
11 2
Starting the vehicle
111, 116–119
Starting using another battery
113, 206
State of charge, battery
24
Station, radio
226–227, 250
Stay, bonnet
179–180
Steering mounted controls, audio
224, 237
Steering wheel, adjustment
47
Stickers, customising ~ Stickers,
expressive
188
Stopping the vehicle
112, 116–119
Stop & Start
23, 57, 60, 123–124, 163, 179, 183, 209
Storage
62, 64–65, 67–68
Storage box
72
Storage boxes
68
Storage compartments
62
Storage wells
72
Storing driving positions
45–46
Sunroof, panoramic
39–41
Sunshine sensor
56
Sun visor
62
Suspension
184
Synchronising the remote control
32