2022 PEUGEOT 3008 light
[x] Cancel search: lightPage 21 of 292

19
Instruments
1
► Press this button to temporarily display the
driving range.
Actions required related to a lack of AdBlue®
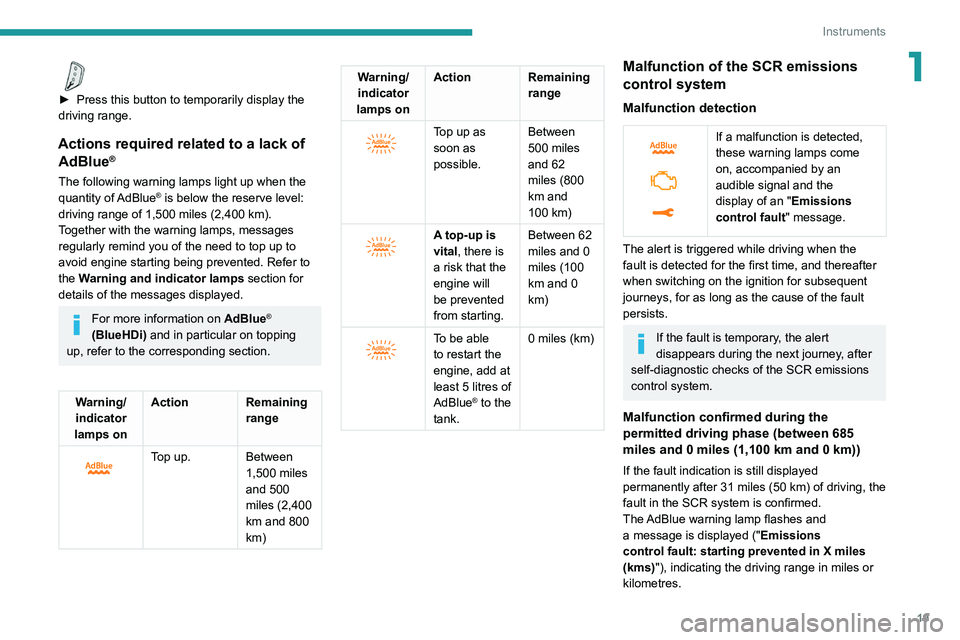
The following warning lamps light up when the
quantity of AdBlue® is below the reserve level:
driving range of 1,500 miles (2,400 km).
Together with the warning lamps, messages
regularly remind you of the need to top up to
avoid engine starting being prevented. Refer to
the Warning and indicator lamps section for
details of the messages displayed.
For more information on AdBlue®
(BlueHDi) and in particular on topping
up, refer to the corresponding section.
Warning/ indicator
lamps on Action Remaining
range
Top up. Between 1,500 miles
and 500
miles (2,400
km and 800
km)
Warning/indicator
lamps on Action Remaining
range
Top up as
soon as
possible.Between
500 miles
and 62
miles (800
km and
100
km)
A top-up is
vital, there is
a risk that the
engine will
be prevented
from starting.Between 62
miles and 0
miles (100
km and 0
km)
To be able
to restart the
engine, add at
least 5 litres of
AdBlue
® to the
tank. 0 miles (km)
Malfunction of the SCR emissions
control system
Malfunction detection
If a malfunction is detected,
these warning lamps come
on, accompanied by an
audible signal and the
display of an "
Emissions
control
fault" message.
The alert is triggered while driving when the
fault is detected for the first time, and thereafter
when switching on the ignition for subsequent
journeys, for as long as the cause of the fault
persists.
If the fault is temporary, the alert
disappears during the next journey, after
self-diagnostic checks of the SCR emissions
control system.
Malfunction confirmed during the
permitted driving phase (between 685
miles and 0
miles (1,100 km and 0 km))
If the fault indication is still displayed
permanently after 31 miles (50 km) of driving, the
fault in the SCR system is confirmed.
The AdBlue warning lamp flashes and
a message is displayed (" Emissions
control
fault: starting prevented in X miles
(kms)"), indicating the driving range in miles or
kilometres.
Page 23 of 292

21
Instruments
1Manual test on the
instrument panel
This function allows you, at any time, to check
certain indicators and to display the alerts log.
► With the engine running, briefly press this
button.
The following information is displayed on the
instrument panel:
–
Engine oil level.
–
Next service due.
–
Driving range associated with the
AdBlue® and
the SCR system (BlueHDi Diesel).
–
Current alerts.
This information is also displayed automatically every time the ignition is
switched on.
Distance recorders
With the ignition on, the distances are
permanently indicated. They are deactivated
about 30 seconds after switching the ignition
off. They are displayed when the driver's door
is opened, and when the vehicle is locked or
unlocked.
When travelling abroad, you may have to
change the distance units (km or miles):
the road speed must be displayed in the local
country’s official unit (km/h or mph).
The unit is changed via the screen
configuration menu, with the vehicle
stationary.
Total distance recorder
This recorder measures the total distance
travelled by the vehicle since its initial
registration.
Trip distance recorder
This measures the distance travelled since it was
last reset by the driver.
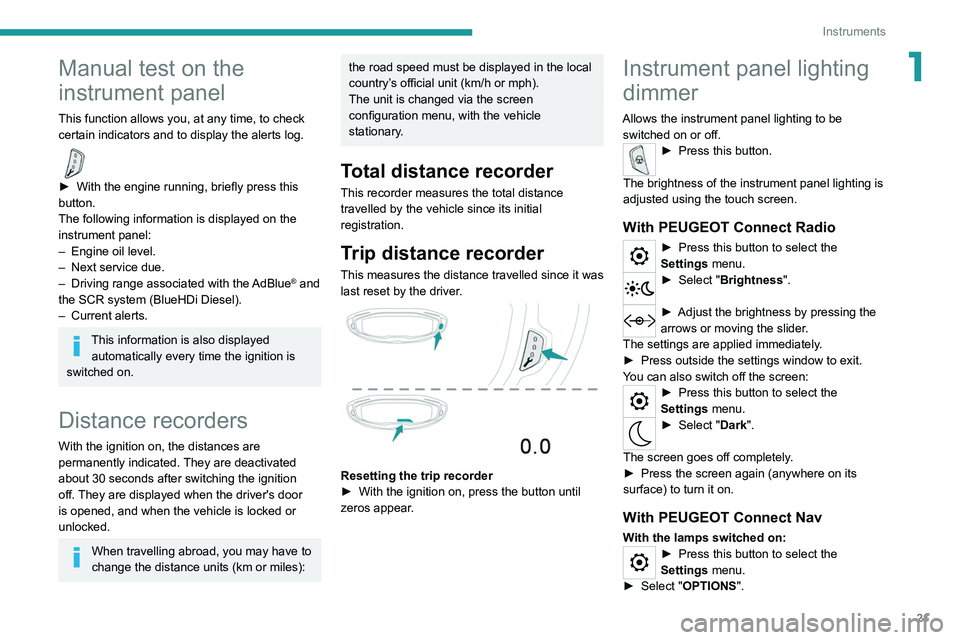
Resetting the trip recorder
► With the ignition on, press the button until
zeros appear
.
Instrument panel lighting
dimmer
Allows the instrument panel lighting to be switched on or off.
► Press this button.
The brightness of the instrument panel lighting is
adjusted using the touch screen.
With PEUGEOT Connect Radio
► Press this button to select the
Settings menu.
► Select " Brightness".
► Adjust the brightness by pressing the
arrows or moving the slider .
The settings are applied immediately.
►
Press outside the settings window to exit.
Y
ou can also switch off the screen:
► Press this button to select the
Settings menu.
► Select " Dark".
The screen goes off completely.
►
Press the screen again (anywhere on its
surface) to turn it on.
With PEUGEOT Connect Nav
With the lamps switched on:► Press this button to select the
Settings menu.
►
Select "
OPTIONS".
Page 26 of 292

24
Instruments
eSave
The eSave function makes it possible to reserve
all or part of the electrical energy in the traction
battery for later use during a journey (e.g. driving
in an urban area or in an area reserved for
electric vehicles).
► Select the electric range to be reserved ( 10
km, 20 km or the full range MAX) then activate
the function by pressing ON.
Activation of the function is confirmed by
the lighting of this indicator lamp on the
instrument panel and the indication of the energy
reserve in miles or kms.
► To use the energy reserve, choose the
Electric driving mode in the mode selector.
If the requested range exceeds the
available range (not recommended), the
internal combustion engine starts to recharge
the traction battery up to the requested
threshold. This leads to excessive fuel
consumption.
Upper bar
Certain information is displayed permanently in
the upper bar of the touch screen:
– Time and outside temperature (a blue warning
lamp appears if there is a risk of ice).
– Reminder of the air conditioning information,
and direct access to the corresponding menu.
– Reminder of information from the
RadioMedia and Telephone menus and
For more information about the menus,
refer to the sections describing the audio
and telematics systems.
Radio/Media
Climate
Settings for temperature, air flow, etc.
For more information on Mono-zone semi-
automatic air conditioning and Dual-zone
automatic air conditioning , refer to the
corresponding sections.
Navigation (Depending on equipment)
Driving or Vehicle (Depending on
equipment)
Activation, deactivation and settings for certain
functions.
The functions are organised in 2 tabs: " Driving
functions" and "Vehicle settings".
Telephone
Applications
Access to certain configurable equipment.
Energy
Access to the rechargeable hybrid system
features (energy flow, consumption statistics,
deferred charging, eSave function).
Energy menu
Flow
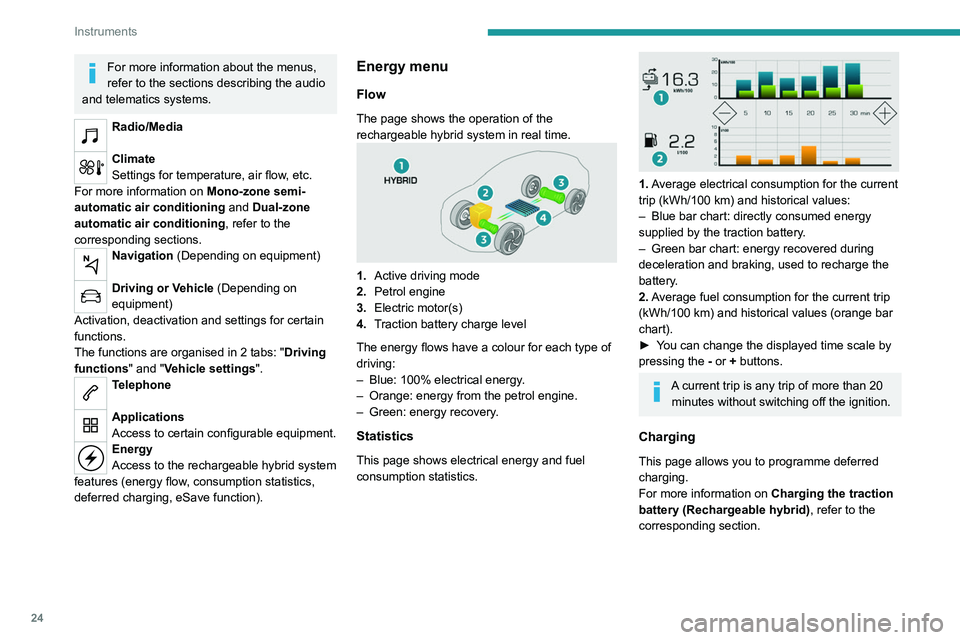
The page shows the operation of the
rechargeable hybrid system in real time.
1. Active driving mode
2. Petrol engine
3. Electric motor(s)
4. Traction battery charge level
The energy flows have a colour for each type of
driving:
–
Blue: 100% electrical energy
.
–
Orange: energy from the petrol engine.
–
Green: energy recovery
.
Statistics
This page shows electrical energy and fuel
consumption statistics.
1. Average electrical consumption for the current
trip (kWh/100 km) and historical values:
–
Blue bar chart: directly consumed energy
supplied by the traction battery
.
–
Green bar chart: energy recovered during
deceleration and braking, used to recharge the
battery
.
2. Average fuel consumption for the current trip
(kWh/100
km) and historical values (orange bar
chart).
►
Y
ou can change the displayed time scale by
pressing the
-
or + buttons.
A current trip is any trip of more than 20 minutes without switching off the ignition.
Charging
This page allows you to programme deferred
charging.
For more information on Charging the traction
battery (Rechargeable hybrid), refer to the
corresponding section.
Page 27 of 292

25
Instruments
1eSave
The eSave function makes it possible to reserve
all or part of the electrical energy in the traction
battery for later use during a journey (e.g. driving
in an urban area or in an area reserved for
electric vehicles).
►
Select the electric range to be reserved ( 10
km
, 20 km or the full range MAX) then activate
the function by pressing ON.
Activation of the function is confirmed by
the lighting of this indicator lamp on the
instrument panel and the
indication of the energy
reserve in miles or kms.
►
T
o use the energy reserve, choose the
Electric driving mode in the mode selector.
If the requested range exceeds the
available range (not recommended), the
internal combustion engine starts to recharge
the traction battery up to the requested
threshold. This leads to excessive fuel
consumption.
Upper bar
Certain information is displayed permanently in
the upper bar of the touch screen:
–
T
ime and outside temperature (a blue warning
lamp appears if there is a risk of ice).
–
Reminder of the air conditioning information,
and direct access to the corresponding menu.
–
Reminder of information from the
RadioMedia
and Telephone menus and
navigation instructions (depending on
equipment).
–
Notifications.
–
Access to the
Settings for the touch screen
and the digital instrument panel (date/time,
languages, units, etc.).
Remote functions
(Rechargeable hybrid)
These features are accessible
using a smartphone, via the
MyPeugeot
application:
–
Battery charge management.
–
T
emperature pre-conditioning management.
–
Consultation of the state of charge and range
of the vehicle.
Installation procedure
► Download the MyPeugeot app from the
appropriate online store for your smartphone.
►
Create an account.
►
Enter the vehicle’
s VIN (code beginning with
"VF" on the vehicle registration document).
For more information on Identification
markings, refer to the corresponding section.
Network coverage
In order to be able to use the various
remotely operable features, ensure that your
vehicle is located in an area covered by the
mobile network.
A lack of network coverage may prevent
communication with the vehicle (for example,
if it is in an underground car park). In such
cases, the application will display a message
indicating that the connection with the vehicle
could not be established.
Page 28 of 292

26
Access
Remote control / Key
Remote control function
The remote control can be used for the following
remote functions, depending on version:
–
Unlocking/Locking/Deadlocking the vehicle.
–
Unlocking - Opening the boot.
–
Remote operation of lighting.
–
Folding/Unfolding the door mirrors.
–
Activating/Deactivating the alarm.
–
Locating the vehicle.
–
Opening/Closing the windows.
–
Closing the sunroof.
–
Activating the vehicle’
s electronic immobiliser.
Back-up procedures allow the vehicle to be
locked/unlocked in the event of a failure of the
remote control, the central locking, the battery,
etc. For more information on the Back-up
procedures, refer to the corresponding section.
Built-in key
The key built into the remote control can be
used for the following operations, depending on
version:
–
Unlocking/Locking/Deadlocking the vehicle.
–
Activation/Deactivation of the manual child
lock.
–
Activation/Deactivation of the front passenger
airbag.
–
Back-up Unlocking/Locking of the doors.
► To eject the key or put it back in place, pull
and hold the button.
Once the built-in key is ejected, always
keep it with you to be able to carry out
the corresponding back-up procedures.
Unlocking the vehicle
Selective unlocking (driver’s door, boot) is
configured in the Driving/Vehicle touch
screen menu.
Complete unlocking
► Press the unlocking button.
Selective unlocking
Driver’s door and fuel filler/charging flap
► Press the unlocking button.
►
Press it
again to unlock the other doors and
the boot.
The charging nozzle can be unplugged on the
second press.
Complete or selective unlocking, and alarm
deactivation (depending on version), is confirmed
by the flashing of the direction indicators.
Depending on version, the door mirrors unfold.
Selective unlocking and opening of
the tailgate
By default, selective unlocking of the tailgate
is deactivated and its motorised operation is
activated.
► Press and hold this button to unlock
the boot and trigger the motorised
opening of the tailgate.
When selective unlocking of the tailgate is
activated, the doors and the fuel filler flap remain
locked.
If selective unlocking of the tailgate is
deactivated, pressing the button unlocks the
whole vehicle.
If motorised operation of the tailgate is
deactivated, pressing the button partially
opens the tailgate.
To lock the vehicle, it is necessary to close
the tailgate again.
Locking the vehicle
Normal locking
► Press the locking button.
The locking, and the activation of the alarm
depending on version, is confirmed by the
lighting of the direction indicators.
Depending on version, the door mirrors fold.
An access (door or boot) that is not properly closed prevents locking of the
vehicle. However, if the vehicle is fitted with
an alarm, it will be activated after 45 seconds.
If the vehicle is unlocked but the doors or boot
are not subsequently opened, the vehicle
will automatically lock itself again after about
30 seconds. If the vehicle is fitted with an
alarm, it will be reactivated automatically.
Page 29 of 292

27
Access
2If motorised operation of the tailgate is
deactivated, pressing the button partially
opens the tailgate.
To lock the vehicle, it is necessary to close
the tailgate again.
Locking the vehicle
Normal locking
► Press the locking button.
The locking, and the activation of the alarm
depending on version, is confirmed by the
lighting of the direction indicators.
Depending on version, the door mirrors fold.
An access (door or boot) that is not properly closed prevents locking of the
vehicle. However, if the vehicle is fitted with
an alarm, it will be activated after 45
seconds.
If the vehicle is unlocked but the doors or boot
are not subsequently opened,
the vehicle
will automatically lock itself again after about
30
seconds. If the vehicle is fitted with an
alarm, it will be reactivated automatically.
Deadlocking
Deadlocking renders the interior door
controls inoperative. It also disables the
central locking button.
The horn remains operational.
Never leave anyone inside the vehicle
when it is deadlocked.
►
Press the locking button again within 5
seconds to deadlock the vehicle (confirmed by
the temporary lighting of the direction indicators).
Az ablakok felhúzása
A reteszelőgomb több mint 3 másodpercig történő lenyomva tartásával lehet felhúzni
az ablakokat.
Az ablakok felhúzásakor ügyeljen arra, hogy semmi ne akadályozza az ablakok
megfelelő záródását.
Ha riasztóval szerelt változatoknál résnyire
nyitva szeretné hagyni az ablakokat, először
kapcsolja ki a riasztó belső térvédelmi
funkcióját.
A riasztórendszerről a megfelelő részben
olvashat további tudnivalókat.
Locating the vehicle
Helps you to locate your vehicle from a distance,
with the vehicle locked:
–
The direction indicators flash for approximately
10 seconds.
–
The door mirror spotlamps come on.
– The courtesy lamps come on.► Press this button.
Remote lighting of the
lamps
Availability of this function depends on version.► Press this button. The sidelamps,
dipped beam headlamps, number plate
lamps and door mirror spotlamps come on for 30
seconds.
Pressing again before the end of the timed
period switches off the lamps immediately.
Advice
Remote control
The remote control is a sensitive, high-
frequency device; avoid handling it in your
pocket, due to the risk of unintentionally
unlocking the vehicle.
Avoid pressing the remote control buttons
while out of range of the vehicle, due to
the risk of rendering the remote control
inoperative. It would then be necessary to
reset it.
Anti-theft protection
Do not modify the electronic vehicle
immobiliser, as this might result in
malfunctions.
Remember to turn the steering wheel to
engage the steering lock.
Page 30 of 292

28
Access
Locking the vehicle
Driving with the doors locked could make
it more difficult for the emergency services
to enter the passenger compartment in an
emergency.
As a safety precaution, take the electronic key
with you when leaving the vehicle, even for a
short time.
Purchasing a second-hand vehicle
Have the key codes memorised by a
PEUGEOT dealer, to ensure that the keys
in your possession are the only ones able to
start the vehicle.
Keyless Entry and
Starting
This system allows the unlocking, locking
and starting of the vehicle, while carrying the electronic key on your person in the recognition
zone A.
Unlocking the vehicle
Selective unlocking (driver’s door, boot) is
configured in the
Driving/Vehicle touch
screen menu.
Selective unlocking is deactivated by default.
Complete unlocking
► Pass your hand behind the handle of one
of the front doors or press the tailgate opening
control.
If the motorised tailgate opening control is
activated, this action triggers its automatic
opening.
Opening the windows
Depending on version, keeping your hand
behind the door handle or maintaining the
press on the tailgate opening control allows the
windows to be opened to the desired position.
Selective unlocking
Driver’s door and fuel/charging flap
► Pass your hand behind the driver ’s door
handle.
►
T
o unlock the vehicle completely, pass your
hand behind the front passenger door handle
with the electronic key close to the passenger
door.
Complete or selective unlocking, and
deactivation of the alarm
depending on
version,
is confirmed by the flashing of the
direction indicators.
Depending on version, the door mirrors unfold.
Selective unlocking of the tailgate
► Press the tailgate opening control to unlock
just the boot.
The doors remain locked.
If selective unlocking of the tailgate is
deactivated, pressing this control also
unlocks the doors.
Selective unlocking of the tailgate can be
activated or deactivated via the Driving/
Vehicle menu of the touch screen.
Locking the vehicle
Normal locking
► Press the handle on one of the front doors
(at the markings) or the locking control on the
tailgate.
It is not possible to lock the vehicle if one of the
electronic keys is left inside the vehicle.
Closing the windows and sunroof
Maintaining pressure on the door handle or
the tailgate control allows the windows and,
depending on version, the sunroof to be closed
to the desired position.
This operation also closes the sunroof blind.
Make sure that no item or person could
prevent the correct closing of the
windows and sunroof.
Pay particular attention to children when
operating windows.
The locking, and the activation of the alarm
depending on version, is confirmed by the
temporary lighting of the direction indicators.
Page 31 of 292

29
Access
2Locking the vehicle
Normal locking
► Press the handle on one of the front doors
(at the markings) or the locking control on the
tailgate.
It is not possible to lock the vehicle if one of the
electronic keys is left inside the vehicle.
Closing the windows and sunroof
Maintaining pressure on the door handle or
the tailgate control allows the windows and,
depending on version, the sunroof to be closed
to the desired position.
This operation also closes the sunroof blind.
Make sure that no item or person could
prevent the correct closing of the
windows and sunroof.
Pay particular attention to children when
operating windows.
The locking, and the activation of the alarm
depending on version, is confirmed by the
temporary lighting of the direction indicators.
Depending on version, the door mirrors fold.
Deadlocking
Deadlocking renders the interior door
controls inoperative. It also disables the
central locking button.
The horn remains operational.
Never leave anyone inside the vehicle when it
is deadlocked.
► Press the handle on one of the front doors
(at the markings) or the locking control on the
tailgate to lock the vehicle.
►
Press it again within 5 seconds to deadlock
the vehicle (confirmed by the temporary lighting
of the direction indicators).
If one of the doors or the boot is still open
or if the electronic key for the Keyless
Entry and Starting
system has been left inside
the vehicle, central locking will not take place.
However
, if the vehicle is fitted with an alarm,
it will be activated after 45
seconds.
If the vehicle is unlocked but the doors or
boot are not subsequently opened, the
vehicle will automatically lock itself again after
about 30
seconds. If the vehicle is fitted with
an alarm, it will be reactivated automatically.
Depending on version, the automatic
door mirror folding/unfolding function is
configured via the touch screen's
Driving/Vehicle menu.
Otherwise, this setting can be carried out at a
PEUGEOT dealer or a qualified workshop.
As a safety measure, never leave the vehicle, even for a short time, without
taking the Keyless Entry and Starting
system’s electronic key with you.
Be aware of the risk of theft of the vehicle if
the key is present in one of the defined areas
while the vehicle is unlocked.
To preserve the battery charge in the electronic key and the vehicle's battery,
the "hands-free" functions are set to
hibernation mode after 21 days without use.
To restore these functions, press one of the
remote control buttons or start the engine with
the electronic key against the back-up reader.
For more information on starting with the
Keyless Entry and Starting system, refer to
the corresponding section.