2022 NISSAN TITAN seats
[x] Cancel search: seatsPage 106 of 635

MEMO
1-86Safety-Seats, seat belts and supplemental restraint system
Page 159 of 635
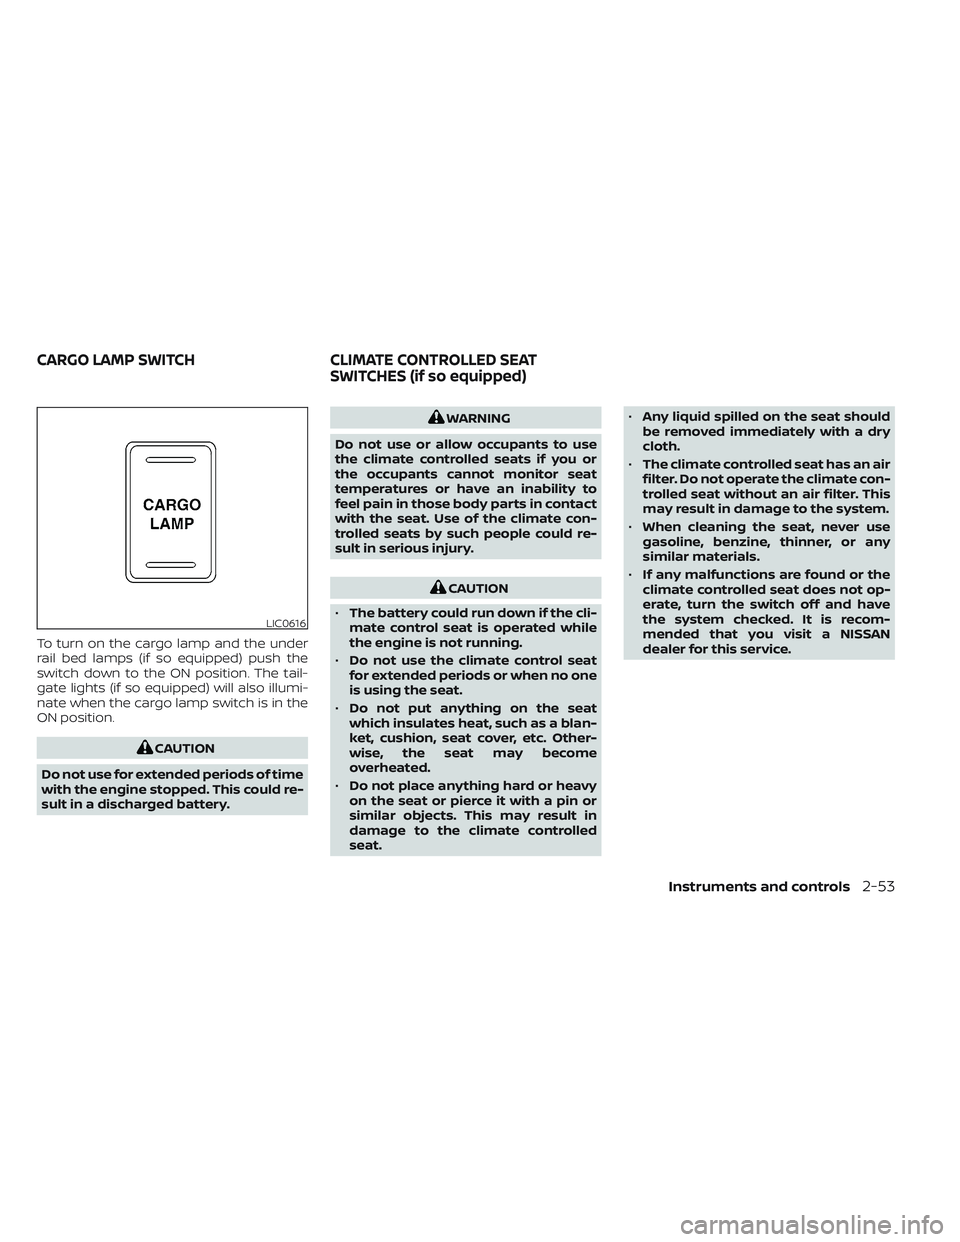
To turn on the cargo lamp and the under
rail bed lamps (if so equipped) push the
switch down to the ON position. The tail-
gate lights (if so equipped) will also illumi-
nate when the cargo lamp switch is in the
ON position.
CAUTION
Do not use for extended periods of time
with the engine stopped. This could re-
sult in a discharged battery.
WARNING
Do not use or allow occupants to use
the climate controlled seats if you or
the occupants cannot monitor seat
temperatures or have an inability to
feel pain in those body parts in contact
with the seat. Use of the climate con-
trolled seats by such people could re-
sult in serious injury.
CAUTION
• The battery could run down if the cli-
mate control seat is operated while
the engine is not running.
• Do not use the climate control seat
for extended periods or when no one
is using the seat.
• Do not put anything on the seat
which insulates heat, such as a blan-
ket, cushion, seat cover, etc. Other-
wise, the seat may become
overheated.
• Do not place anything hard or heavy
on the seat or pierce it with a pin or
similar objects. This may result in
damage to the climate controlled
seat. •
Any liquid spilled on the seat should
be removed immediately with a dry
cloth.
• The climate controlled seat has an air
filter. Do not operate the climate con-
trolled seat without an air filter. This
may result in damage to the system.
• When cleaning the seat, never use
gasoline, benzine, thinner, or any
similar materials.
• If any malfunctions are found or the
climate controlled seat does not op-
erate, turn the switch off and have
the system checked. It is recom-
mended that you visit a NISSAN
dealer for this service.
LIC0616
CARGO LAMP SWITCH CLIMATE CONTROLLED SEAT
SWITCHES (if so equipped)
Instruments and controls2-53
Page 162 of 635
•When cleaning the seat, never use
gasoline, benzine, thinner, or any
similar materials.
• If any malfunctions are found or the
heated seat does not operate, turn
the switch off and have the system
checked. It is recommended that you
visit a NISSAN dealer for this service.
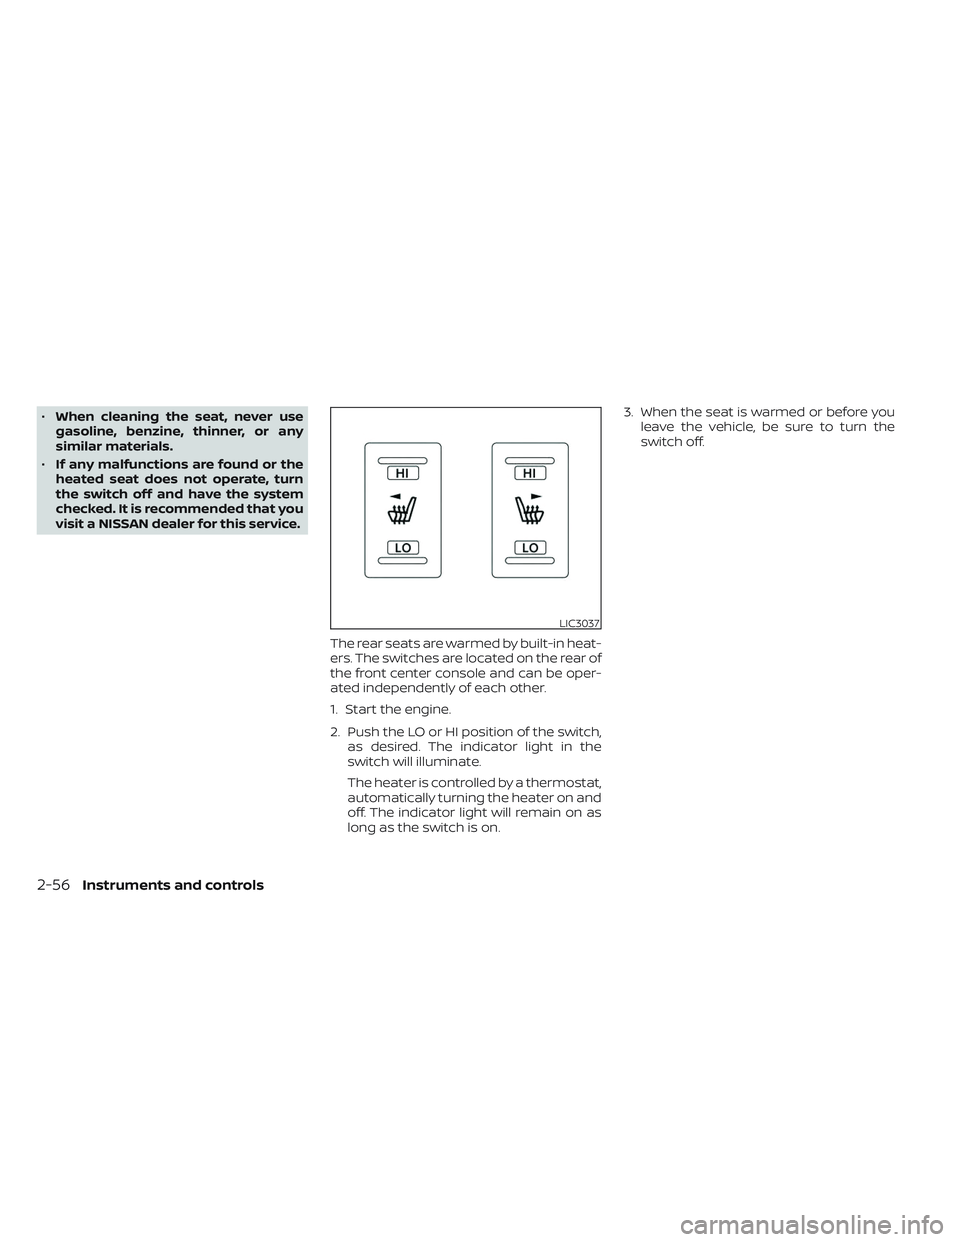
The rear seats are warmed by built-in heat-
ers. The switches are located on the rear of
the front center console and can be oper-
ated independently of each other.
1. Start the engine.
2. Push the LO or HI position of the switch,as desired. The indicator light in the
switch will illuminate.
The heater is controlled by a thermostat,
automatically turning the heater on and
off. The indicator light will remain on as
long as the switch is on. 3. When the seat is warmed or before you
leave the vehicle, be sure to turn the
switch off.
LIC3037
2-56Instruments and controls
Page 187 of 635
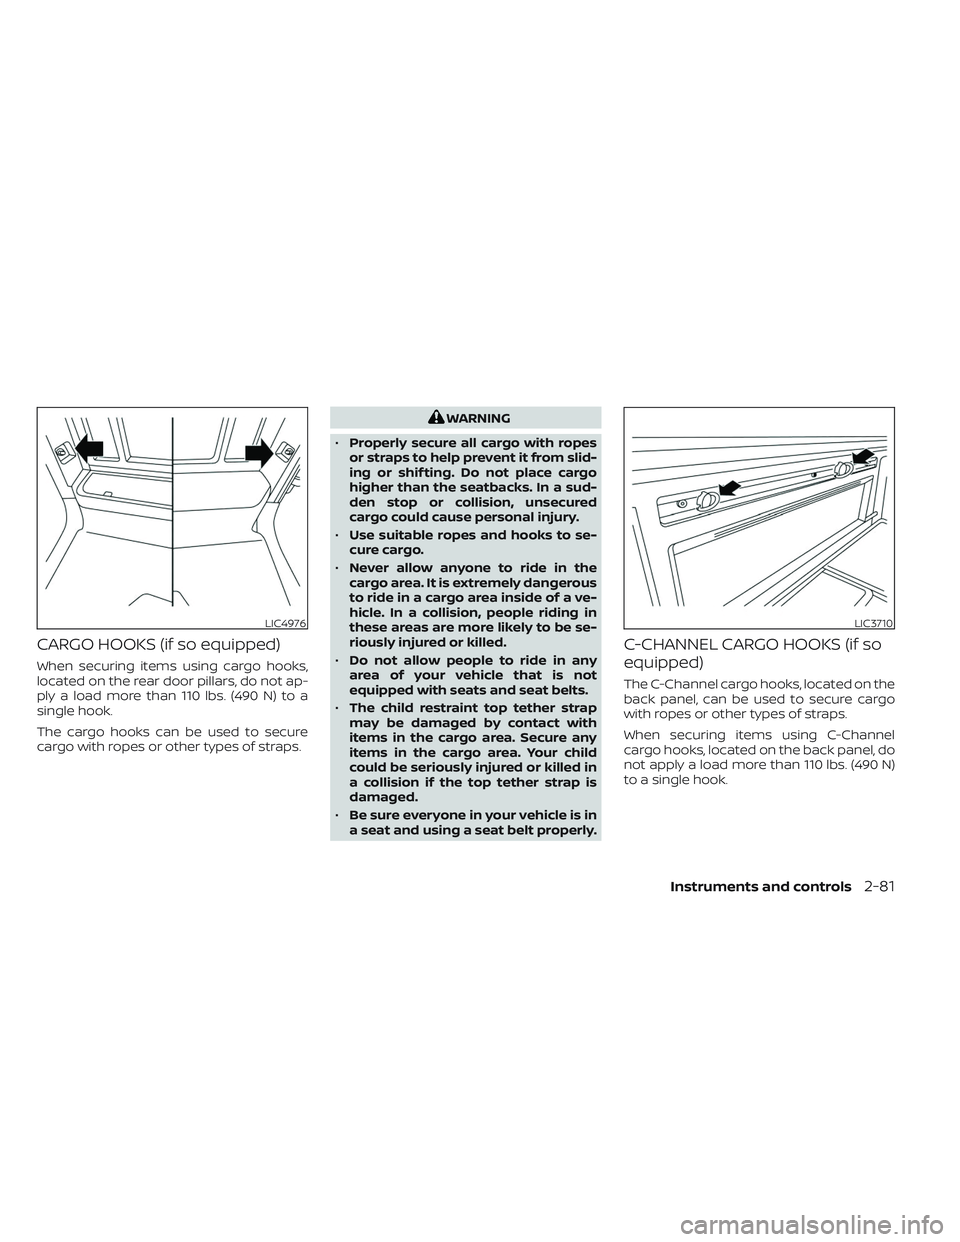
CARGO HOOKS (if so equipped)
When securing items using cargo hooks,
located on the rear door pillars, do not ap-
ply a load more than 110 lbs. (490 N) to a
single hook.
The cargo hooks can be used to secure
cargo with ropes or other types of straps.
WARNING
• Properly secure all cargo with ropes
or straps to help prevent it from slid-
ing or shif ting. Do not place cargo
higher than the seatbacks. In a sud-
den stop or collision, unsecured
cargo could cause personal injury.
• Use suitable ropes and hooks to se-
cure cargo.
• Never allow anyone to ride in the
cargo area. It is extremely dangerous
to ride in a cargo area inside of a ve-
hicle. In a collision, people riding in
these areas are more likely to be se-
riously injured or killed.
• Do not allow people to ride in any
area of your vehicle that is not
equipped with seats and seat belts.
• The child restraint top tether strap
may be damaged by contact with
items in the cargo area. Secure any
items in the cargo area. Your child
could be seriously injured or killed in
a collision if the top tether strap is
damaged.
• Be sure everyone in your vehicle is in
a seat and using a seat belt properly.
C-CHANNEL CARGO HOOKS (if so
equipped)
The C-Channel cargo hooks, located on the
back panel, can be used to secure cargo
with ropes or other types of straps.
When securing items using C-Channel
cargo hooks, located on the back panel, do
not apply a load more than 110 lbs. (490 N)
to a single hook.
LIC4976LIC3710
Instruments and controls2-81
Page 188 of 635
WARNING
• Properly secure all cargo with ropes
or straps to help prevent it from slid-
ing or shif ting. Do not place cargo
higher than the seatbacks. In a sud-
den stop or collision, unsecured
cargo could cause personal injury.
• Use suitable ropes and hooks to se-
cure cargo.
• Never allow anyone to ride in the
cargo area. It is extremely dangerous
to ride in a cargo area inside of a ve-
hicle. In a collision, people riding in
these areas are more likely to be se-
riously injured or killed.
• Do not allow people to ride in any
area of your vehicle that is not
equipped with seats and seat belts.
• The child restraint top tether strap
may be damaged by contact with
items in the cargo area. Secure any
items in the cargo area. Your child
could be seriously injured or killed in
a collision if the top tether strap is
damaged.
• Be sure everyone in your vehicle is in
a seat and using a seat belt properly.POWER WINDOWS
WARNING
• Make sure that all passengers have
their hands, etc., inside the vehicle
while it is in motion and before clos-
ing the windows. Use the window
lock switch to prevent unexpected
use of the power windows.
• To help avoid risk of injury or death
through unintended operation of the
vehicle and/or its systems, including
entrapment in windows or inadver-
tent door lock activation, do not
leave children, people who require
the assistance of others or pets unat-
tended in your vehicle. Additionally,
the temperature inside a closed ve-
hicle on a warm day can quickly be-
come high enough to cause a signifi-
cant risk of injury or death to people
and pets.
The power windows operate when the ig-
nition switch is placed in the ON position or
for a period of time af ter the ignition switch
is placed in the OFF position. If the driver's
or passenger's door is opened during this
period of time, the power to the windows is
canceled.
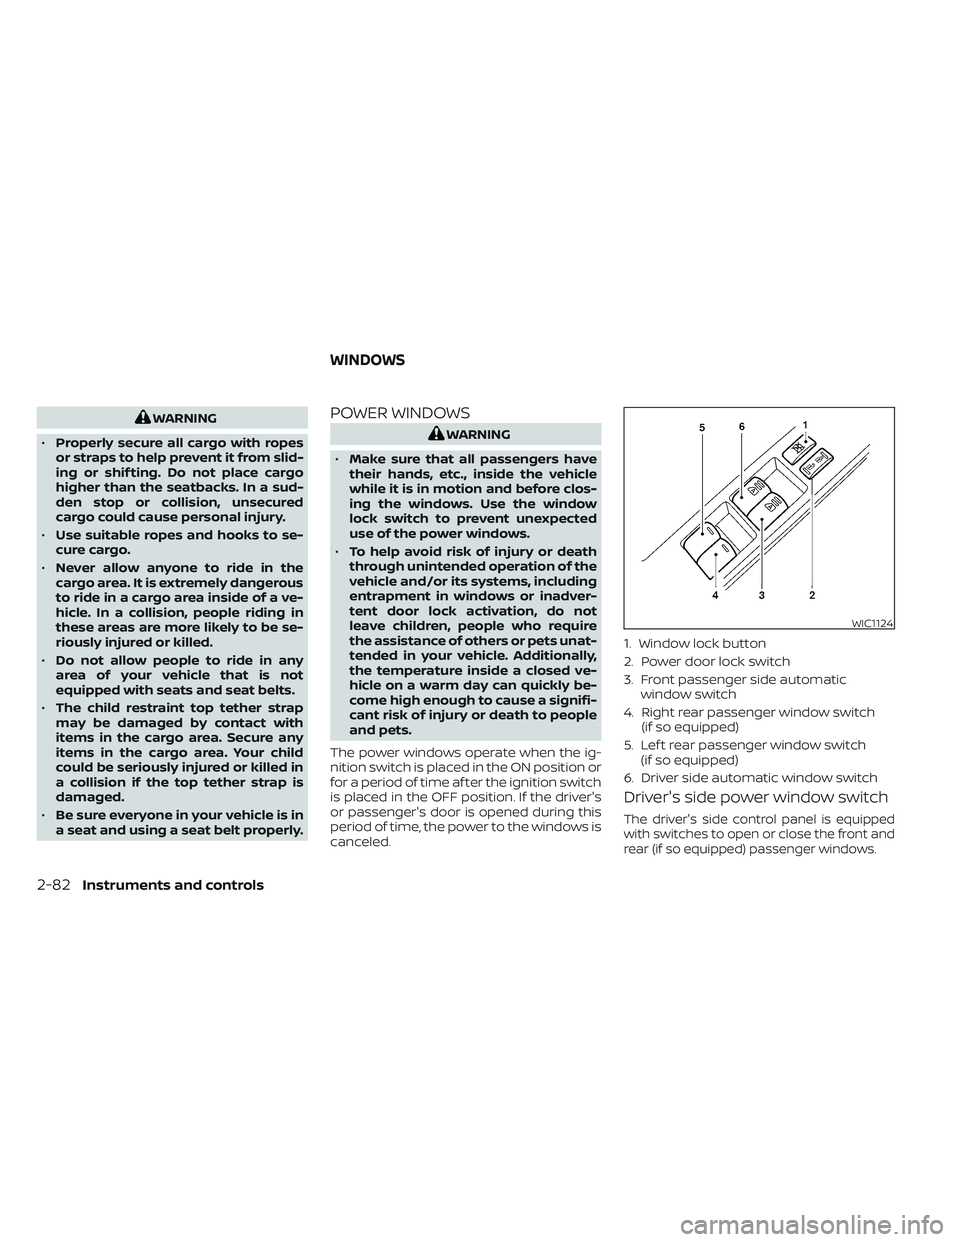
Driver's side power window switch
The driver's side control panel is equipped
with switches to open or close the front and
rear (if so equipped) passenger windows.
WIC1124
1. Window lock button
2. Power door lock switch
3. Front passenger side automatic window switch
4. Right rear passenger window switch (if so equipped)
5. Lef t rear passenger window switch (if so equipped)
6. Driver side automatic window switch
WINDOWS
2-82Instruments and controls
Page 234 of 635

Heated mirrors (if so equipped)
Some outside mirrors can be heated to
defrost, defog, or de-ice for improved vis-
ibility. For additional information, see “Rear
window and/or outside mirror defroster
switch” (P. 2-44).
TAILGATE
Opening the tailgate
Pull the tailgate handle upward and lower
the tailgate. The support cables hold the
tailgate open.
When closing the tailgate, make sure the
latches are securely locked.
Do not drive the vehicle with the tailgate
down, unless equipped with NISSAN's
Bed Extender (accessory) or equivalent
in the extended position.For additional information on proper truck
box loading, see “Vehicle loading informa-
tion” (P. 10-20).
WARNING
• Never allow anyone to ride in the
cargo area or on the rear seat (if so
equipped) when it is in the folded po-
sition. Use of these areas by passen-
gers without proper restraints could
result in serious injury or death in an
accident or sudden stop.
• It is extremely dangerous to ride in a
cargo area inside a vehicle. In a colli-
sion, people riding in these areas are
more likely to be seriously injured or
killed.
• Do not allow people to ride in any
area of your vehicle that is not
equipped with seats and seat belts.
• Be sure everyone in your vehicle is in
a seat and using a seat belt properly.
LPD3103
TRUCK BOX
3-34Pre-driving checks and adjustments
Page 239 of 635
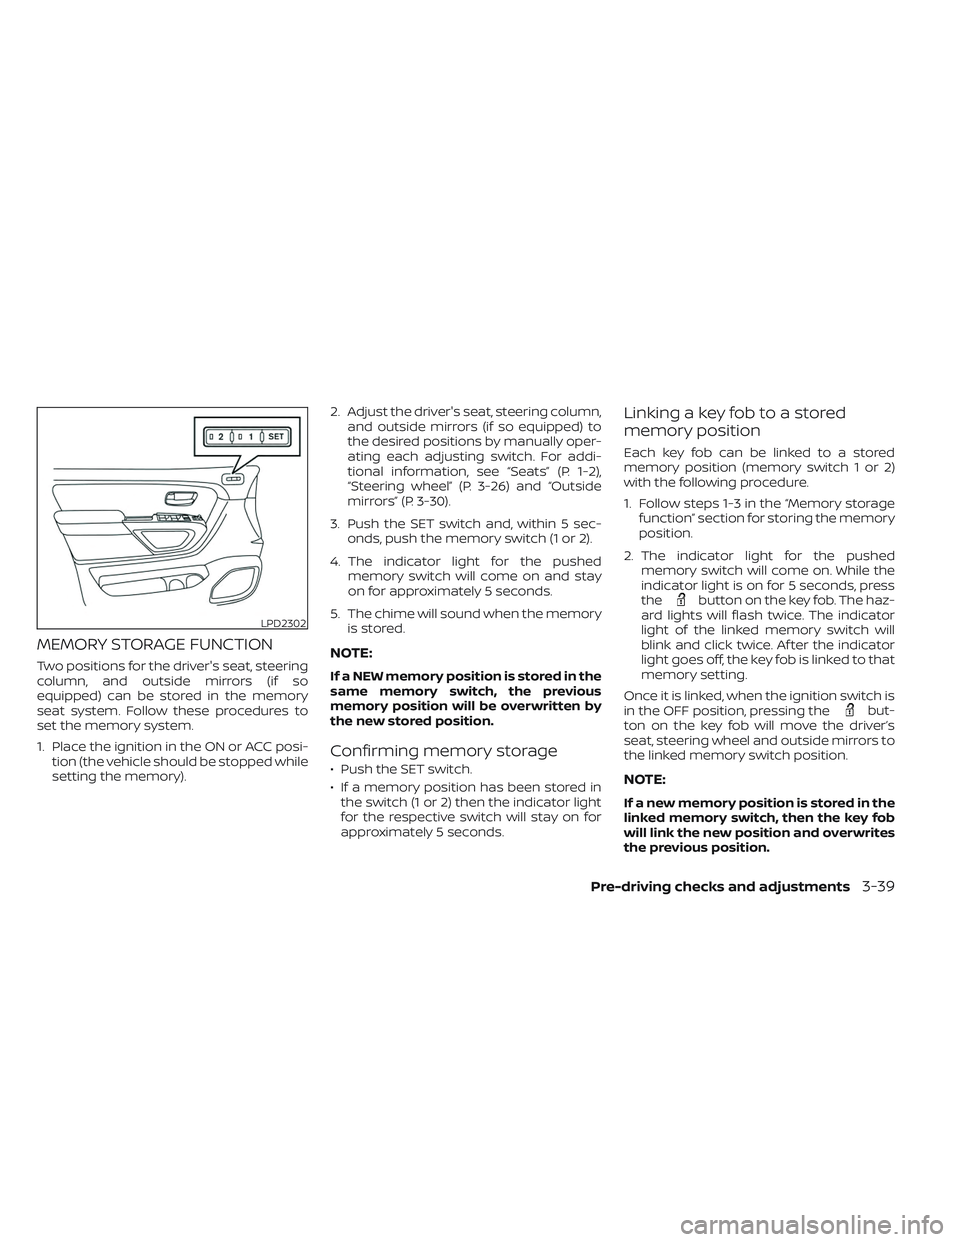
MEMORY STORAGE FUNCTION
Two positions for the driver's seat, steering
column, and outside mirrors (if so
equipped) can be stored in the memory
seat system. Follow these procedures to
set the memory system.
1. Place the ignition in the ON or ACC posi-tion (the vehicle should be stopped while
setting the memory). 2. Adjust the driver's seat, steering column,
and outside mirrors (if so equipped) to
the desired positions by manually oper-
ating each adjusting switch. For addi-
tional information, see “Seats” (P. 1-2),
“Steering wheel” (P. 3-26) and “Outside
mirrors” (P. 3-30).
3. Push the SET switch and, within 5 sec- onds, push the memory switch (1 or 2).
4. The indicator light for the pushed memory switch will come on and stay
on for approximately 5 seconds.
5. The chime will sound when the memory is stored.NOTE:
If a NEW memory position is stored in the
same memory switch, the previous
memory position will be overwritten by
the new stored position.
Confirming memory storage
• Push the SET switch.
• If a memory position has been stored inthe switch (1 or 2) then the indicator light
for the respective switch will stay on for
approximately 5 seconds.
Linking a key fob to a stored
memory position
Each key fob can be linked to a stored
memory position (memory switch 1 or 2)
with the following procedure.
1. Follow steps 1-3 in the “Memory storage function” section for storing the memory
position.
2. The indicator light for the pushed memory switch will come on. While the
indicator light is on for 5 seconds, press
the
button on the key fob. The haz-
ard lights will flash twice. The indicator
light of the linked memory switch will
blink and click twice. Af ter the indicator
light goes off, the key fob is linked to that
memory setting.
Once it is linked, when the ignition switch is
in the OFF position, pressing the
but-
ton on the key fob will move the driver’s
seat, steering wheel and outside mirrors to
the linked memory switch position.
NOTE:
If a new memory position is stored in the
linked memory switch, then the key fob
will link the new position and overwrites
the previous position.
LPD2302
Pre-driving checks and adjustments3-39
Page 281 of 635
3. Turn the temperature dial to the lef t orright to set the desired temperature.
• To quickly remove ice from the outside of the windows, press the
fan speed
control button to the maximum position.
• As soon as possible af ter the windshield is clean, press the AUTO button to return
to the auto mode.
• When the
control is activated, the air
conditioner will automatically be turned
on at outside temperatures approxi-
mately at or below freezing. This dehu-
midifies the air which helps defog the
windshield. Under this condition, the indi-
cator light on the A/C button indicator will
not turn on if the user had selected A/C
off prior to entering this mode. Turning off
the air condition via the A/C button is not
allowed in this mode. If the A/C button
indicator was on when entering this
mode, and the A/C button is selected in
this mode, the A/C compressor will still be
automatically enabled. The air recircula-
tion mode automatically turns off, allow-
ing outside air to be drawn into the pas-
senger compartment to further improve
the defogging performance.
Remote Engine Start with
Intelligent Climate Control (if so
equipped)
Vehicles equipped with automatic climate
controls and Remote Engine Start function
may go into automatic heating or cooling
mode when Remote Engine Start is acti-
vated depending on outside and cabin
temperatures. During this period, the cli-
mate control display and buttons will be
inoperable until the ignition switch is
turned on. In Remote Engine Start defrost-
ing mode, the rear window defroster (if so
equipped), heated seats (if so equipped)
and heated steering wheel (if so equipped)
may be activated automatically.
Voice Recognition logic (if so
equipped)
When the climate control system is on, the
front and rear (if so equipped) fan speeds
may be automatically lowered so that
commands are more easily recognized.
Fan speed can be adjusted using the fan
speed
decrease andincrease
buttons, if desired.
MANUAL OPERATION
Fan speed control
Press thefan speed control buttons
to manually control the fan speed.
Press the AUTO button to return to auto-
matic control of the fan speed.
When adjusting the manual fan from auto
mode, the outlet direction (floor, floor/
defrost, vent, bi-level) will still automatically
change. To fix the outlet to a manual mode,
select the desired air flow location using
the MODE button.
Temperature control dial
The temperature control dial allows you to
adjust the temperature of the outlet air. To
lower the temperature, turn the dial to the
lef t. To increase the temperature, turn the
dial to the right. Temperature can be ad-
justed on the driver’s and passenger’s side.
Air recirculation
Press theair recirculation button to
recirculate interior air inside the vehicle
when:
• driving on a dusty road
• to prevent traffic fumes from entering passenger compartment.
Monitor, climate, audio, phone and voice recognition systems4-39