2022 NISSAN MURANO engine
[x] Cancel search: enginePage 184 of 508
button is not pressed and held
for at least 2 seconds.
• The
button is not pressed and held
within 5 seconds of pressing the lock
button.
• The brake is pressed.
• The doors are not closed and locked.
• The lif tgate is open.
• The Key System Fault warning light re- mains solid is in the vehicle information
display.
• The alarm sounds due to illegal entry into the vehicle. • Two Remote Engine Starts, or a single
Remote Engine Start with an extension,
have already been used.
• The vehicle is not in P (Park).
• There is a detected registered key already inside of the vehicle.
• The Remote Engine Start function has been switched to the OFF position in Ve-
hicle Settings of the vehicle information
display. For additional information, see
“Vehicle information display” (P. 2-17).
The Remote Engine Start may display a
warning or indicator in the vehicle informa-
tion display. For additional information, see
“Vehicle information display” (P. 2-17).
3-20Pre-driving checks and adjustments
Page 233 of 508
front defroster button on.
The indicator light on the button will
come on.
2. Turn the temperature control dial to set the maximum temperature to aid in de-
frosting or defogging.
• To quickly remove ice from the outside of the windows, use the
fan speed con-
trol buttons to set the fan speed to
maximum. • As soon as possible af ter the windshield
is clean, press the AUTO button to return
to the automatic mode.
•
When thefront defroster button is
pressed, the air conditioner will automati-
cally be turned on at outside temperatures
above 36°F (2°C). The air recirculate mode
automatically turns off, allowing outside air
to be drawn into the passenger compart-
ment to further improve the defogging
performance. When the air recirculate
mode automatically turns off, the air fresh
mode will automatically turn on.
Remote Engine Start with
Intelligent Climate Control (if so
equipped)
Vehicles equipped with automatic climate
controls and Remote Engine Start function
may go into automatic heating or cooling
mode when Remote Engine Start is acti-
vated depending on outside and cabin
temperatures. During this period, the cli-
mate control display and buttons will be
inoperable until the ignition switch is
turned on. In Remote Engine Start defrost-
ing mode, the rear window defroster,
heated seats (if so equipped) and heated
steering wheel (if so equipped) may be ac-
tivated automatically.
Monitor, climate, audio, phone and voice recognition systems4-29
Page 234 of 508
fan speed control buttons
to manually control the fan speed.
Press the AUTO button to return to auto-
matic control of the fan speed.
Temperature control dial
The temperature control dial allows you to
adjust the temperature of the outlet air. To
lower the temperature, turn the dial to the
lef t. To increase the temperature, turn the
dial to the right. Temperature can be ad-
justed on the driver’s and passenger’s side.
Air recirculation
Press theair recirculation button to
recirculate interior air inside the vehicle.
The
indicator light on the button will
come on.
The air recirculation cannot be activated
when the air conditioner is in the
front
defrosting mode. When the outside temperature exceeds
70°F (21°C), the air conditioning system may
default to air recirculation mode automati-
cally to reduce overall power consumption.
To exit air recirculation mode, select the
fresh air intake button to enter fresh air
mode.
Fresh air intake
Press thefresh air intake button to
draw outside air into the passenger
compartment.
A/C (air conditioner) button
Start the engine, press thefan speed
control buttons to the desired position and
press the
button to turn on the air
conditioner. To turn off the air conditioner,
press the
button again.
The air conditioner cooling function op-
erates only when the engine is running.
Air flow control
Pressing the MODE button manually con-
trols air flow and selects the air outlet:
— Air flows mainly from center and side vents.
— Air flows mainly from center andside vents and foot outlets.
— Air flows mainly from foot outletsand partly from defroster.
— Air flows mainly from defrosterand foot outlets.
To turn system off
Press the ON-OFF button.
Rear window and outside mirror
(if so equipped) defroster switch
For additional information, see “Rear win-
dow and outside mirror (if so equipped)
defroster switch” (P. 2-34).
4-30Monitor, climate, audio, phone and voice recognition systems
Page 235 of 508
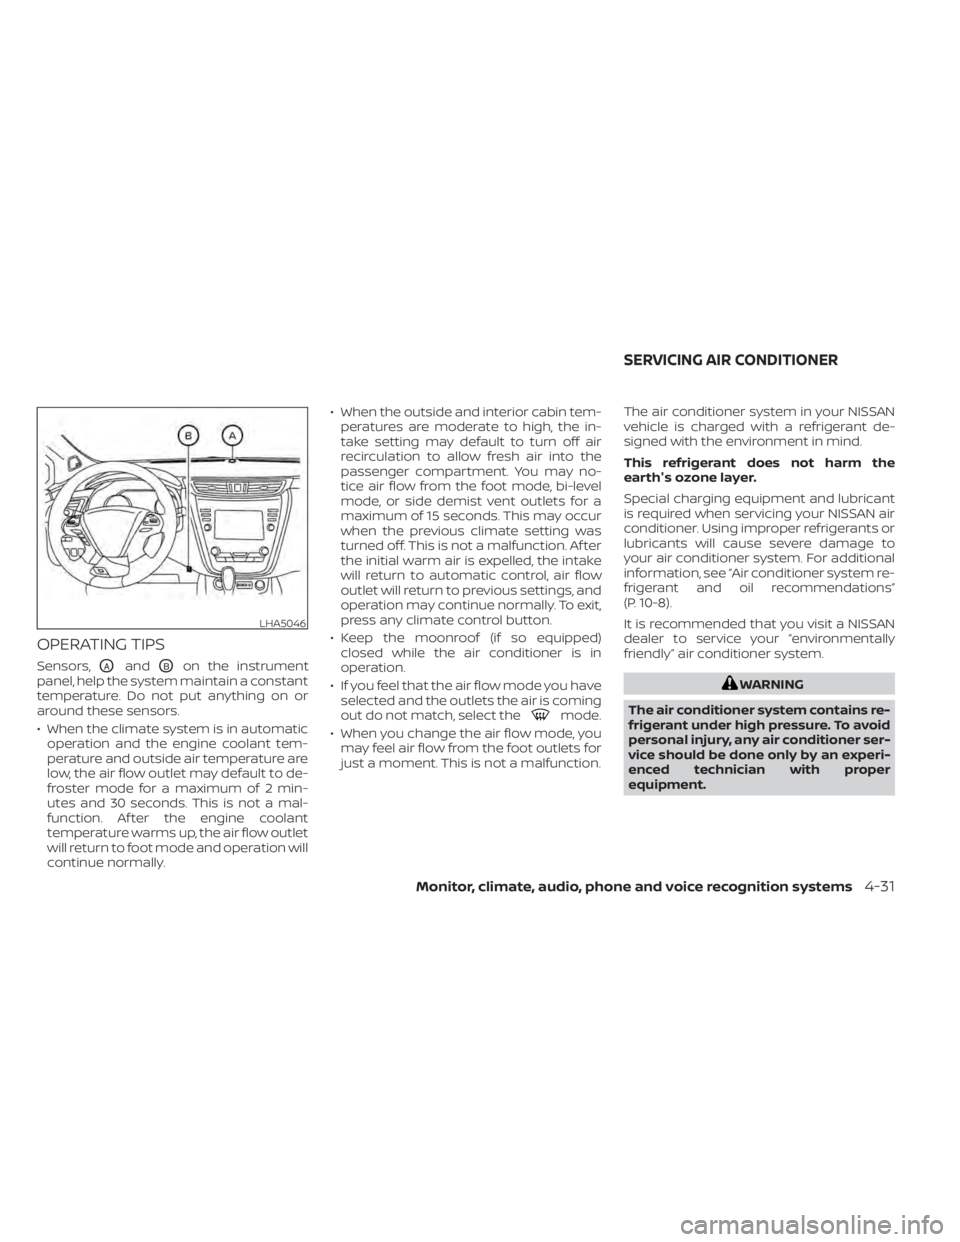
OPERATING TIPS
Sensors,OAandOBon the instrument
panel, help the system maintain a constant
temperature. Do not put anything on or
around these sensors.
• When the climate system is in automatic operation and the engine coolant tem-
perature and outside air temperature are
low, the air flow outlet may default to de-
froster mode for a maximum of 2 min-
utes and 30 seconds. This is not a mal-
function. Af ter the engine coolant
temperature warms up, the air flow outlet
will return to foot mode and operation will
continue normally. • When the outside and interior cabin tem-
peratures are moderate to high, the in-
take setting may default to turn off air
recirculation to allow fresh air into the
passenger compartment. You may no-
tice air flow from the foot mode, bi-level
mode, or side demist vent outlets for a
maximum of 15 seconds. This may occur
when the previous climate setting was
turned off. This is not a malfunction. Af ter
the initial warm air is expelled, the intake
will return to automatic control, air flow
outlet will return to previous settings, and
operation may continue normally. To exit,
press any climate control button.
• Keep the moonroof (if so equipped) closed while the air conditioner is in
operation.
• If you feel that the air flow mode you have selected and the outlets the air is coming
out do not match, select the
mode.
• When you change the air flow mode, you may feel air flow from the foot outlets for
just a moment. This is not a malfunction. The air conditioner system in your NISSAN
vehicle is charged with a refrigerant de-
signed with the environment in mind.
This refrigerant does not harm the
earth's ozone layer.
Special charging equipment and lubricant
is required when servicing your NISSAN air
conditioner. Using improper refrigerants or
lubricants will cause severe damage to
your air conditioner system. For additional
information, see “Air conditioner system re-
frigerant and oil recommendations”
(P. 10-8).
It is recommended that you visit a NISSAN
dealer to service your “environmentally
friendly ” air conditioner system.
Monitor, climate, audio, phone and voice recognition systems4-31
Page 243 of 508
WARNING
• The exhaust gas and the exhaust
system are very hot. Keep people,
animals or flammable materials
away from the exhaust system
components.
• Do not stop or park the vehicle over
flammable materials such as dry
grass, waste paper or rags. They may
ignite and cause a fire.
CAUTION
• Do not use leaded gasoline. Deposits
from leaded gasoline will seriously
reduce the three-way catalyst's abil-
ity to help reduce exhaust pollutants.
• Keep your engine tuned up. Malfunc-
tions in the ignition, fuel injection, or
electrical systems can cause overrich
fuel flow into the three-way catalyst,
causing it to overheat. Do not keep
driving if the engine misfires, or if no-
ticeable loss of performance or other
unusual operating conditions are de-
tected. Have the vehicle inspected
promptly. It is recommended that
you visit a NISSAN dealer for this
service. •
Avoid driving with an extremely low
fuel level. Running out of fuel could
cause the engine to misfire, damag-
ing the three-way catalyst.
• Do not race the engine while warm-
ing it up.
• Do not push or tow your vehicle to
start the engine.
TIRE PRESSURE MONITORING
SYSTEM (TPMS)
Each tire, including the spare (if provided),
should be checked monthly when cold and
inflated to the inflation pressure recom-
mended by the vehicle manufacturer on
the vehicle placard or tire inflation pressure
label. (If your vehicle has tires of a different
size than the size indicated on the vehicle
placard or tire inflation pressure label, you
should determine the proper tire inflation
pressure for those tires.)
As an added safety feature, your vehicle
has been equipped with a Tire Pressure
Monitoring System (TPMS) that illuminates
a low tire pressure telltale when one or
more of your tires is significantly under-
inflated. Accordingly, when the low tire
pressure telltale illuminates, you should
stop and check your tires as soon as pos-
sible, and inflate them to the proper pres- sure. Driving on a significantly under-
inflated tire causes the tire to overheat and
can lead to tire failure. Under-inflation also
reduces fuel efficiency and tire tread life,
and may affect the vehicle’s handling and
stopping ability.
Please note that the TPMS is not a substi-
tute for proper tire maintenance, and it is
the driver’s responsibility to maintain cor-
rect tire pressure, even if under-inflation
has not reached the level to trigger illumi-
nation of the TPMS low tire pressure telltale.
Your vehicle has also been equipped with a
TPMS malfunction indicator to indicate
when the system is not operating properly.
The TPMS malfunction indicator is com-
bined with the low tire pressure telltale.
When the system detects a malfunction,
the telltale will flash for approximately one
minute and then remain continuously illu-
minated. This sequence will continue upon
subsequent vehicle start-ups as long as
the malfunction exists. When the malfunc-
tion indicator is illuminated, the system
may not be able to detect or signal low tire
pressure as intended. TPMS malfunctions
may occur for a variety of reasons, includ-
ing the installation of replacement or alter-
nate tires or wheels on the vehicle that
Starting and driving5-5
Page 250 of 508
•Secure heavy loads in the cargo area
as far forward and as low as possible.
Do not equip the vehicle with tires
larger than specified in this manual.
This could cause your vehicle to roll
over.
• Do not grip the inside or spokes of
the steering wheel when driving off-
road. The steering wheel could move
suddenly and injure your hands. In-
stead drive with your fingers and
thumbs on the outside of the rim.
• Before operating the vehicle, ensure
that the driver and all passengers
have their seat belts fastened.
• Always drive with the floor mats in
place as the floor may become hot.
• Lower your speed when encounter-
ing strong crosswinds. With a higher
center of gravity, your NISSAN is more
affected by strong side winds. Slower
speeds ensure better vehicle control.
• Do not drive beyond the perfor-
mance capability of the tires, even
with AWD engaged. •
For AWD equipped vehicles, do not
attempt to raise two wheels off the
ground and shif t the transmission to
any drive or reverse position with the
engine running. Doing so may result
in drivetrain damage or unexpected
vehicle movement which could result
in serious vehicle damage or per-
sonal injury.
• Do not attempt to test an AWD
equipped vehicle on a 2-wheel dyna-
mometer (such as the dynamom-
eters used by some states for emis-
sions testing) or similar equipment
even if the other two wheels are
raised off the ground. Make sure you
inform test facility personnel that
your vehicle is equipped with AWD
before it is placed on a dynamom-
eter. Using the wrong test equipment
may result in drivetrain damage or
unexpected vehicle movement
which could result in serious vehicle
damage or personal injury.
• When a wheel is off the ground due to
an unlevel surface, do not spin the
wheel excessively.
• Accelerating quickly, sharp steering
maneuvers or sudden braking may
cause loss of control. •
If at all possible, avoid sharp turning
maneuvers, particularly at high
speeds. Your NISSAN vehicle has a
higher center of gravity than a pas-
senger car. The vehicle is not de-
signed for cornering at the same
speeds as passenger cars.
• Failure to operate this vehicle cor-
rectly could result in loss of control
and/or a rollover accident.
• Always use tires of the same type,
size, brand, construction (bias, bias-
belted, or radial), and tread pattern
on all four wheels. Install tire chains
on the front wheels when driving on
slippery roads and drive carefully.
• Be sure to check the brakes immedi-
ately af ter driving in mud or water.
For additional information, see
“Brake precautions” (P. 5-119).
• Avoid parking your vehicle on steep
hills. If you get out of the vehicle and
it rolls forward, backward or side-
ways, you could be injured.
5-12Starting and driving
Page 251 of 508
•Whenever you drive off-road through
sand, mud or water as deep as the
wheel hub, more frequent mainte-
nance may be required. For addi-
tional information, see “Maintenance
schedules” (P. 9-7).
WARNING
Do not operate the push-button igni-
tion switch while driving the vehicle ex-
cept in an emergency. (The engine will
stop when the ignition switch is pushed
three consecutive times in less than 1.5
seconds or the ignition switch is
pushed and held for more than 2 sec-
onds.) If the engine stops while the ve-
hicle is being driven, this could lead to a
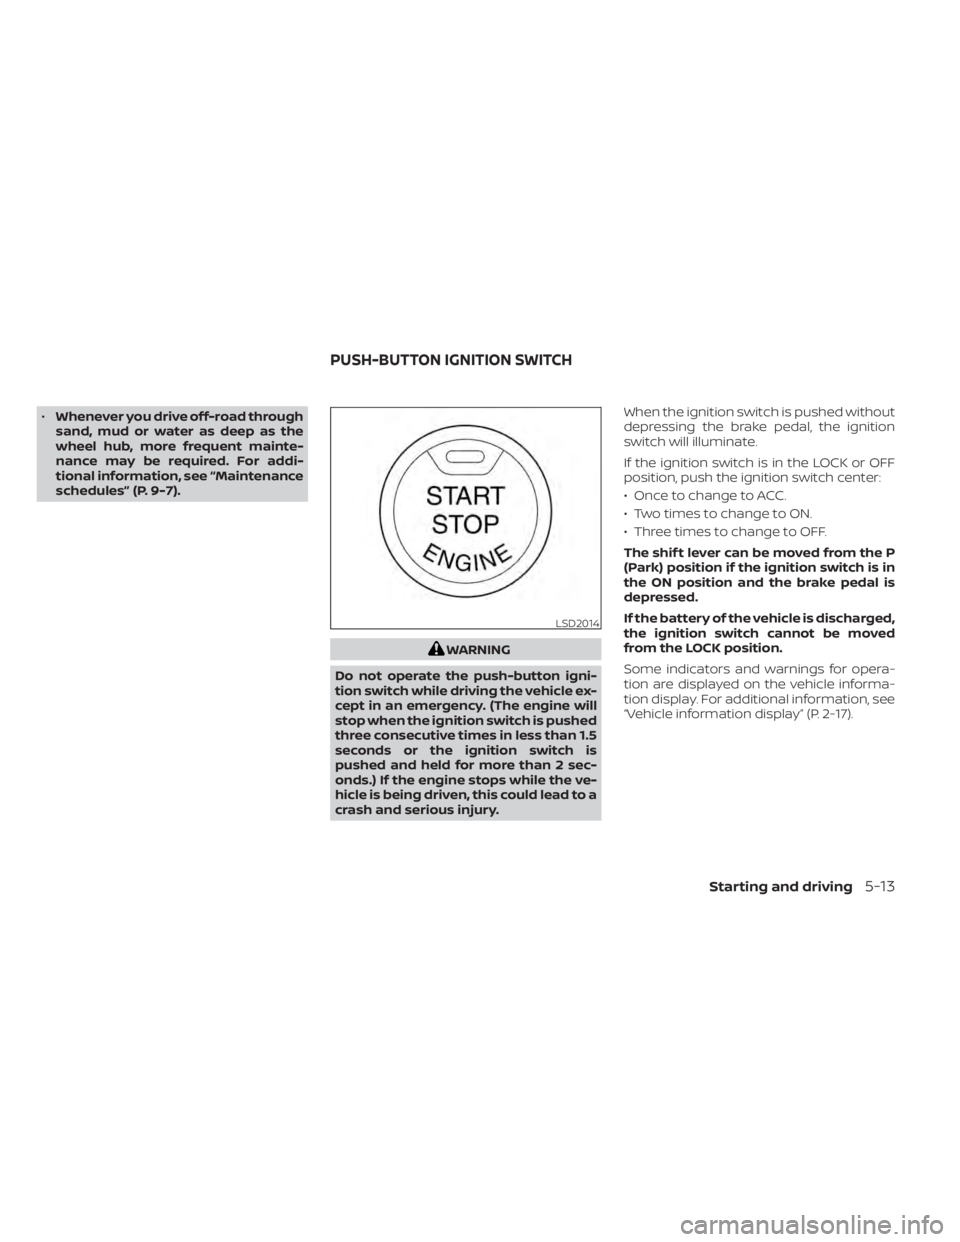
crash and serious injury. When the ignition switch is pushed without
depressing the brake pedal, the ignition
switch will illuminate.
If the ignition switch is in the LOCK or OFF
position, push the ignition switch center:
• Once to change to ACC.
• Two times to change to ON.
• Three times to change to OFF.
The shif t lever can be moved from the P
(Park) position if the ignition switch is in
the ON position and the brake pedal is
depressed.
If the battery of the vehicle is discharged,
the ignition switch cannot be moved
from the LOCK position.
Some indicators and warnings for opera-
tion are displayed on the vehicle informa-
tion display. For additional information, see
“Vehicle information display” (P. 2-17).
LSD2014
PUSH-BUTTON IGNITION SWITCH
Starting and driving5-13
Page 255 of 508
1. Apply the parking brake.
2. Move the shif t lever to P (Park) or N (Neu-tral). P (Park) is recommended.
The starter is designed not to operate
unless the shif t lever is in either P
(Park) or N (Neutral).
3. Push the ignition switch to the ON posi- tion. Depress the brake pedal and push
the ignition switch to start the engine.
To start the engine immediately, push
and release the ignition switch while de-
pressing the brake pedal with the igni-
tion switch in any position.
• If the engine is very hard to start in extremely cold weather or when re-
starting, depress the accelerator
pedal a little (approximately 1/3 to the
floor) and while holding, crank the en-
gine. Release the accelerator pedal
when the engine starts.
• If the engine is very hard to start be- cause it is flooded, depress the accel-
erator pedal all the way to the floor
and hold it. Push the ignition switch to
the ON position to start cranking the
engine. Af ter 5 or 6 seconds, stop
cranking by pushing the ignition
switch to the LOCK position. Af ter
cranking the engine, release the accel- erator pedal. Crank the engine with
your foot off the accelerator pedal by
depressing the brake pedal and push-
ing the ignition switch to start the en-
gine. If the engine starts, but fails to
run, repeat the above procedure.