2022 NISSAN KICKS warning light
[x] Cancel search: warning lightPage 14 of 500
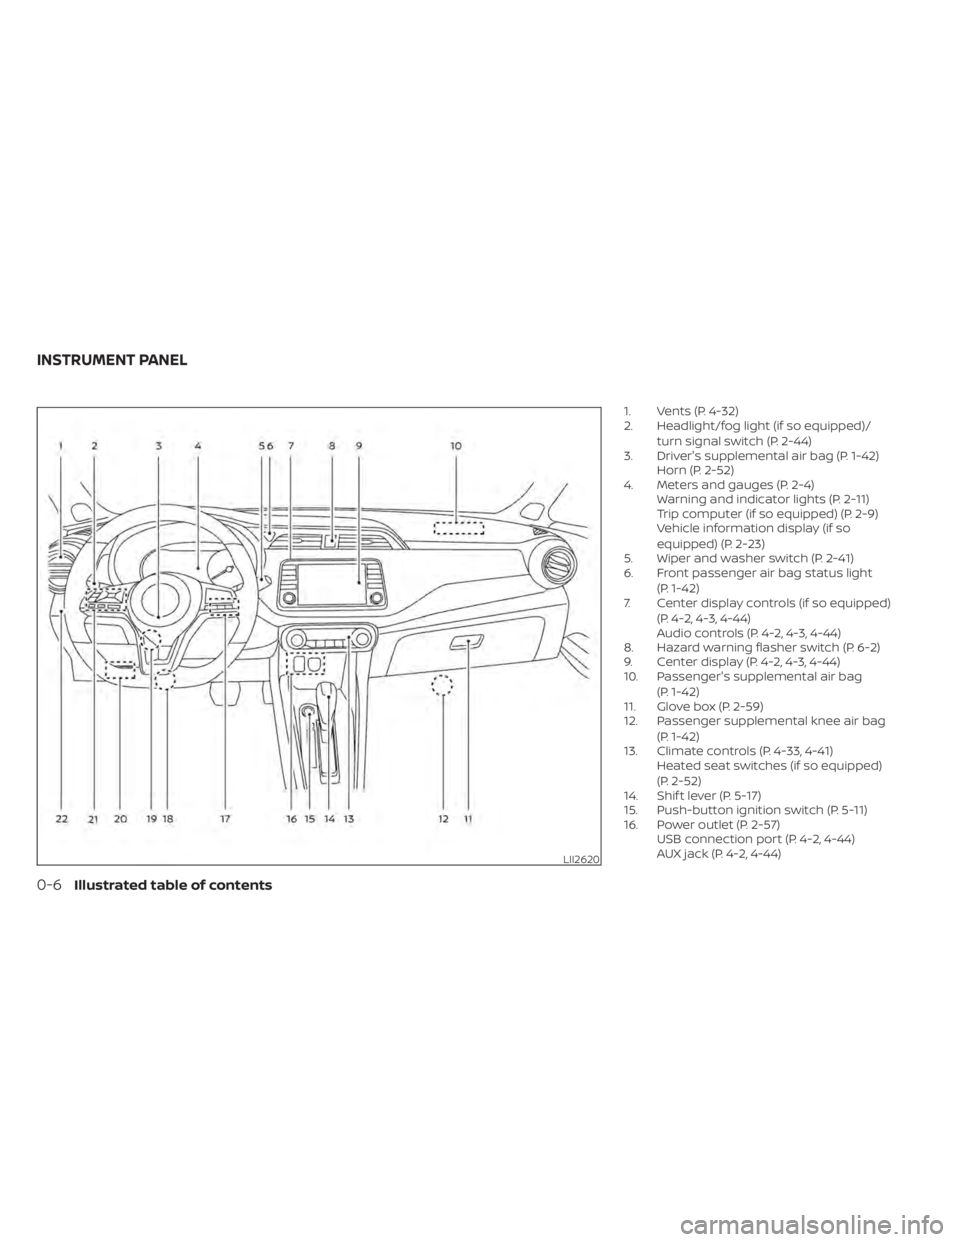
1. Vents (P. 4-32)
2. Headlight/fog light (if so equipped)/turn signal switch (P. 2-44)
3. Driver's supplemental air bag (P. 1-42) Horn (P. 2-52)
4. Meters and gauges (P. 2-4) Warning and indicator lights (P. 2-11)
Trip computer (if so equipped) (P. 2-9)
Vehicle information display (if so
equipped) (P. 2-23)
5. Wiper and washer switch (P. 2-41)
6. Front passenger air bag status light
(P. 1-42)
7. Center display controls (if so equipped)
(P. 4-2, 4-3, 4-44)
Audio controls (P. 4-2, 4-3, 4-44)
8. Hazard warning flasher switch (P. 6-2)
9. Center display (P. 4-2, 4-3, 4-44)
10. Passenger's supplemental air bag
(P. 1-42)
11. Glove box (P. 2-59)
12. Passenger supplemental knee air bag
(P. 1-42)
13. Climate controls (P. 4-33, 4-41) Heated seat switches (if so equipped)
(P. 2-52)
14. Shif t lever (P. 5-17)
15. Push-button ignition switch (P. 5-11)
16. Power outlet (P. 2-57) USB connection port (P. 4-2, 4-44)
AUX jack (P. 4-2, 4-44)
LII2620
INSTRUMENT PANEL
Page 17 of 500
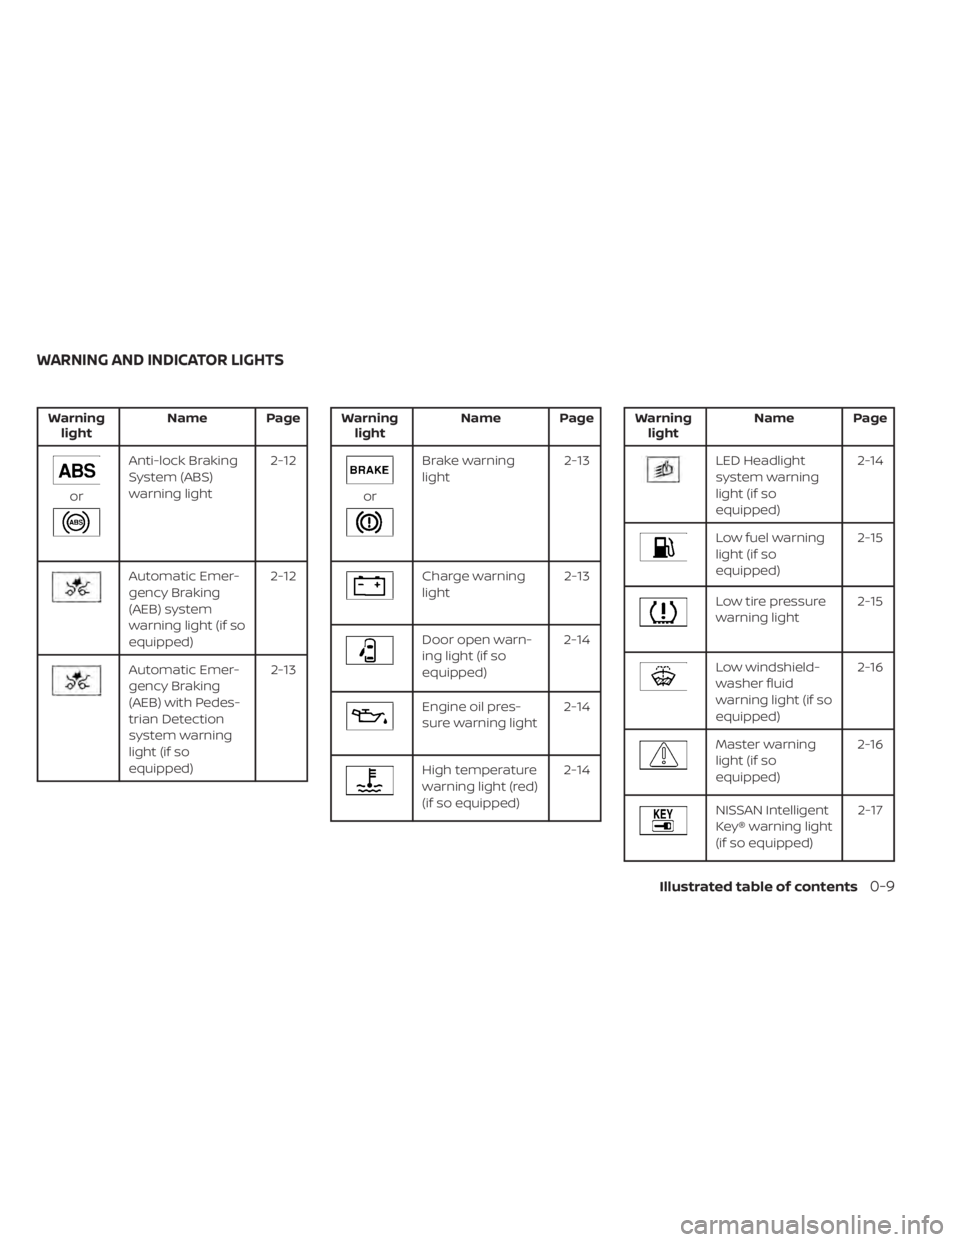
Warninglight Name Page
Anti-lock Braking
System (ABS)
warning light 2-12
Automatic Emer-
gency Braking
(AEB) system
warning light (if so
equipped)2-12
Automatic Emer-
gency Braking
(AEB) with Pedes-
trian Detection
system warning
light (if so
equipped) 2-13
Brake warning
light
2-13
Charge warning
light2-13
Door open warn-
ing light (if so
equipped)2-14
Engine oil pres-
sure warning light
2-14
High temperature
warning light (red)
(if so equipped)2-14
Low fuel warning
light (if so
equipped) 2-15
Low tire pressure
warning light
2-15
Low windshield-
washer fluid
warning light (if so
equipped)2-16
Master warning
light (if so
equipped)
2-16
NISSAN Intelligent
Key® warning light
(if so equipped) 2-17
WARNING AND INDICATOR LIGHTS
Illustrated table of contents0-9
Page 18 of 500
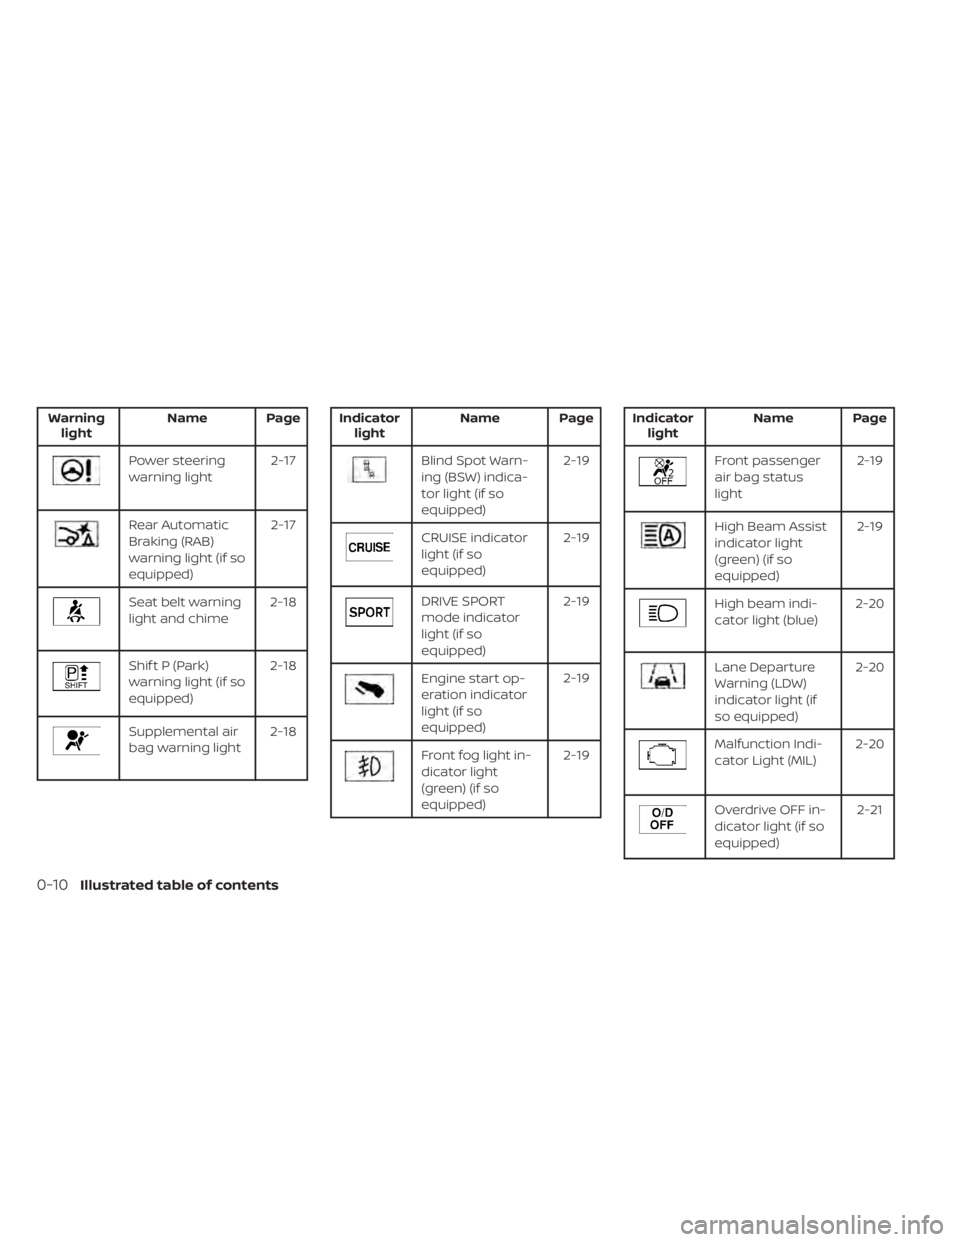
Warninglight Name Page
Rear Automatic
Braking (RAB)
warning light (if so
equipped) 2-17
Seat belt warning
light and chime
2-18
Shif t P (Park)
warning light (if so
equipped)2-18
Supplemental air
bag warning light
2-18
CRUISE indicator
light (if so
equipped) 2-19
DRIVE SPORT
mode indicator
light (if so
equipped)2-19
Engine start op-
eration indicator
light (if so
equipped)2-19
Front fog light in-
dicator light
(green) (if so
equipped)2-19
High Beam Assist
indicator light
(green) (if so
equipped)2-19
High beam indi-
cator light (blue)
2-20
Lane Departure
Warning (LDW)
indicator light (if
so equipped)2-20
Malfunction Indi-
cator Light (MIL)
2-20
Overdrive OFF in-
dicator light (if so
equipped) 2-21
0-10Illustrated table of contents
Page 32 of 500
WARNING
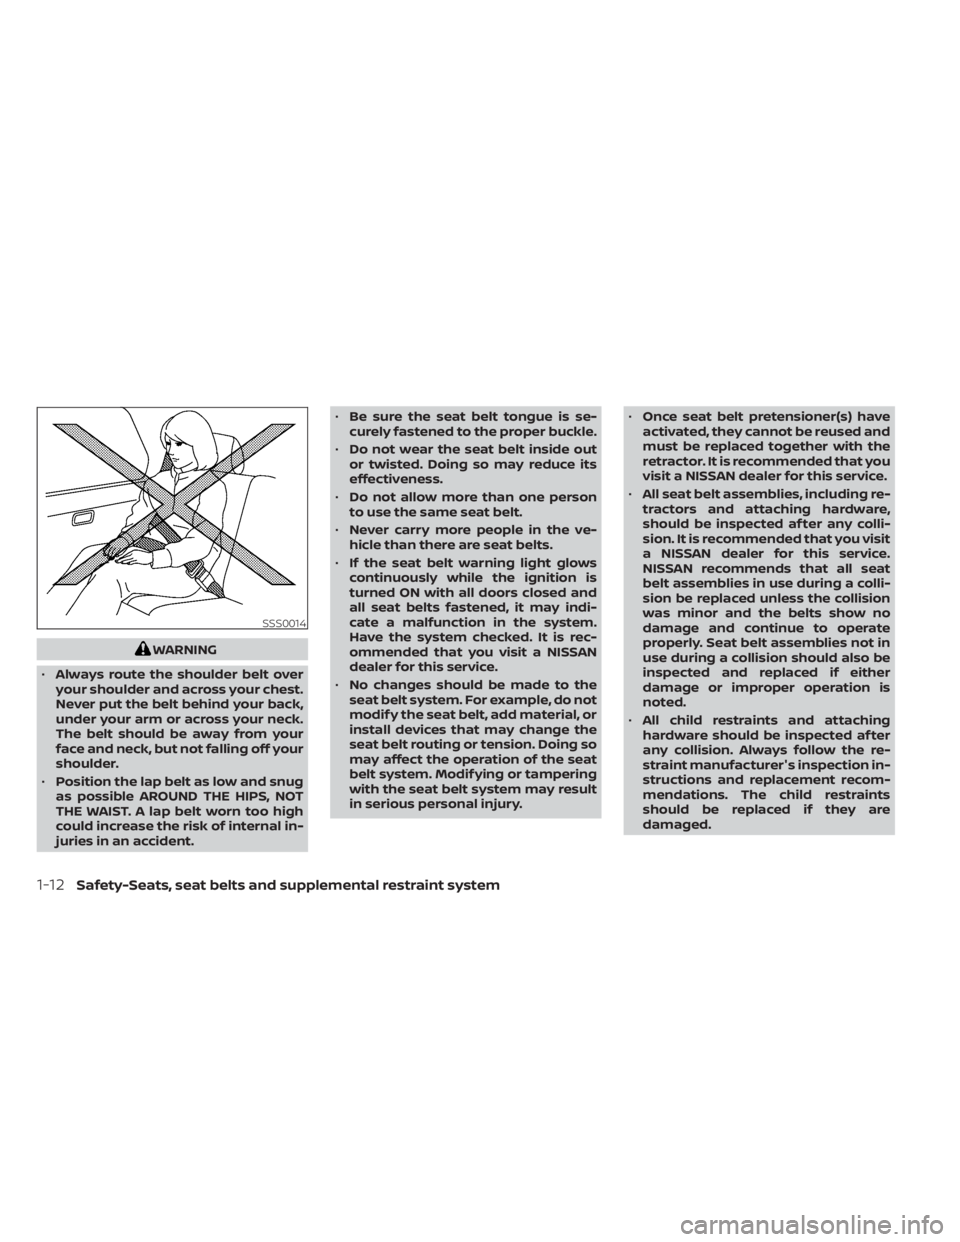
• Always route the shoulder belt over
your shoulder and across your chest.
Never put the belt behind your back,
under your arm or across your neck.
The belt should be away from your
face and neck, but not falling off your
shoulder.
• Position the lap belt as low and snug
as possible AROUND THE HIPS, NOT
THE WAIST. A lap belt worn too high
could increase the risk of internal in-
juries in an accident. •
Be sure the seat belt tongue is se-
curely fastened to the proper buckle.
• Do not wear the seat belt inside out
or twisted. Doing so may reduce its
effectiveness.
• Do not allow more than one person
to use the same seat belt.
• Never carry more people in the ve-
hicle than there are seat belts.
• If the seat belt warning light glows
continuously while the ignition is
turned ON with all doors closed and
all seat belts fastened, it may indi-
cate a malfunction in the system.
Have the system checked. It is rec-
ommended that you visit a NISSAN
dealer for this service.
• No changes should be made to the
seat belt system. For example, do not
modif y the seat belt, add material, or
install devices that may change the
seat belt routing or tension. Doing so
may affect the operation of the seat
belt system. Modif ying or tampering
with the seat belt system may result
in serious personal injury. •
Once seat belt pretensioner(s) have
activated, they cannot be reused and
must be replaced together with the
retractor. It is recommended that you
visit a NISSAN dealer for this service.
• All seat belt assemblies, including re-
tractors and attaching hardware,
should be inspected af ter any colli-
sion. It is recommended that you visit
a NISSAN dealer for this service.
NISSAN recommends that all seat
belt assemblies in use during a colli-
sion be replaced unless the collision
was minor and the belts show no
damage and continue to operate
properly. Seat belt assemblies not in
use during a collision should also be
inspected and replaced if either
damage or improper operation is
noted.
• All child restraints and attaching
hardware should be inspected af ter
any collision. Always follow the re-
straint manufacturer's inspection in-
structions and replacement recom-
mendations. The child restraints
should be replaced if they are
damaged.
1-12Safety-Seats, seat belts and supplemental restraint system
Page 33 of 500
SEAT BELT WARNING LIGHT
Both the driver's and passenger's front
seats are equipped with a seat belt warn-
ing light. The warning light, located on the
instrument panel, will show the status of
the driver and passenger seat belt.
NOTE:
The front passenger seat belt warning
light will not light up if the seat is not
occupied.For additional information, refer to “Warn-
ing lights, indicator lights and audible re-
minders” in the “Instruments and controls”
section of this manual.
PREGNANT WOMEN
NISSAN recommends that pregnant
women use seat belts. The seat belt should
be worn snug and always position the lap
belt as low as possible around the hips, not
the waist. Place the shoulder belt over your
shoulder and across your chest. Never run
the lap/shoulder belt over your abdominal
area. Contact your doctor for specific rec-
ommendations.
INJURED PERSONS
NISSAN recommends that injured persons
use seat belts. Check with your doctor for
specific recommendations.
THREE-POINT TYPE SEAT BELT
WITH RETRACTOR
Page 35 of 500
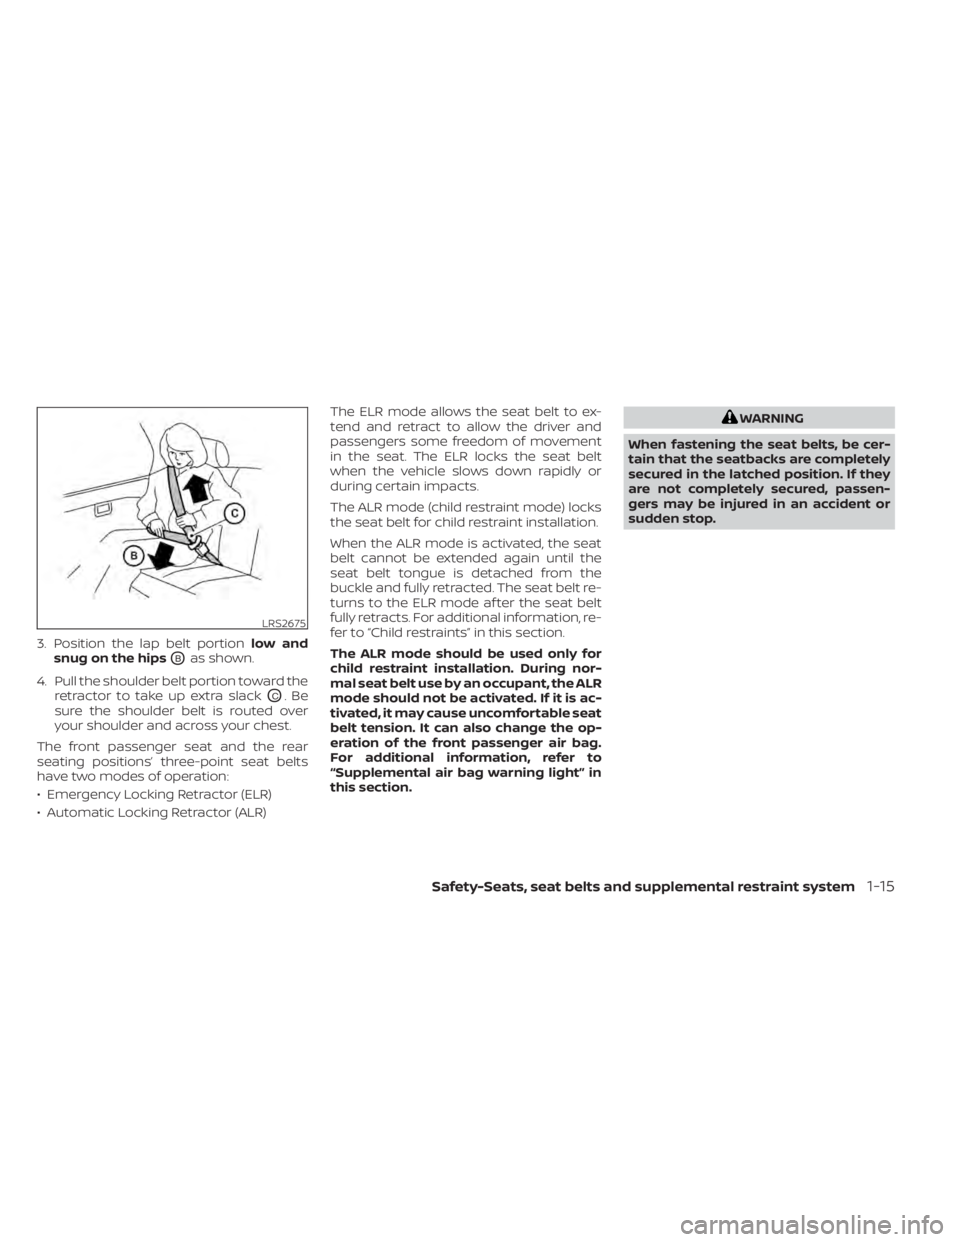
3. Position the lap belt portionlow and
snug on the hips
OBas shown.
4. Pull the shoulder belt portion toward the retractor to take up extra slack
OC.Be
sure the shoulder belt is routed over
your shoulder and across your chest.
The front passenger seat and the rear
seating positions’ three-point seat belts
have two modes of operation:
• Emergency Locking Retractor (ELR)
• Automatic Locking Retractor (ALR) The ELR mode allows the seat belt to ex-
tend and retract to allow the driver and
passengers some freedom of movement
in the seat. The ELR locks the seat belt
when the vehicle slows down rapidly or
during certain impacts.
The ALR mode (child restraint mode) locks
the seat belt for child restraint installation.
When the ALR mode is activated, the seat
belt cannot be extended again until the
seat belt tongue is detached from the
buckle and fully retracted. The seat belt re-
turns to the ELR mode af ter the seat belt
fully retracts. For additional information, re-
fer to “Child restraints” in this section.
The ALR mode should be used only for
child restraint installation. During nor-
mal seat belt use by an occupant, the ALR
mode should not be activated. If it is ac-
tivated, it may cause uncomfortable seat
belt tension. It can also change the op-
eration of the front passenger air bag.
For additional information, refer to
“Supplemental air bag warning light” in
this section.
WARNING
When fastening the seat belts, be cer-
tain that the seatbacks are completely
secured in the latched position. If they
are not completely secured, passen-
gers may be injured in an accident or
sudden stop.
Page 61 of 500
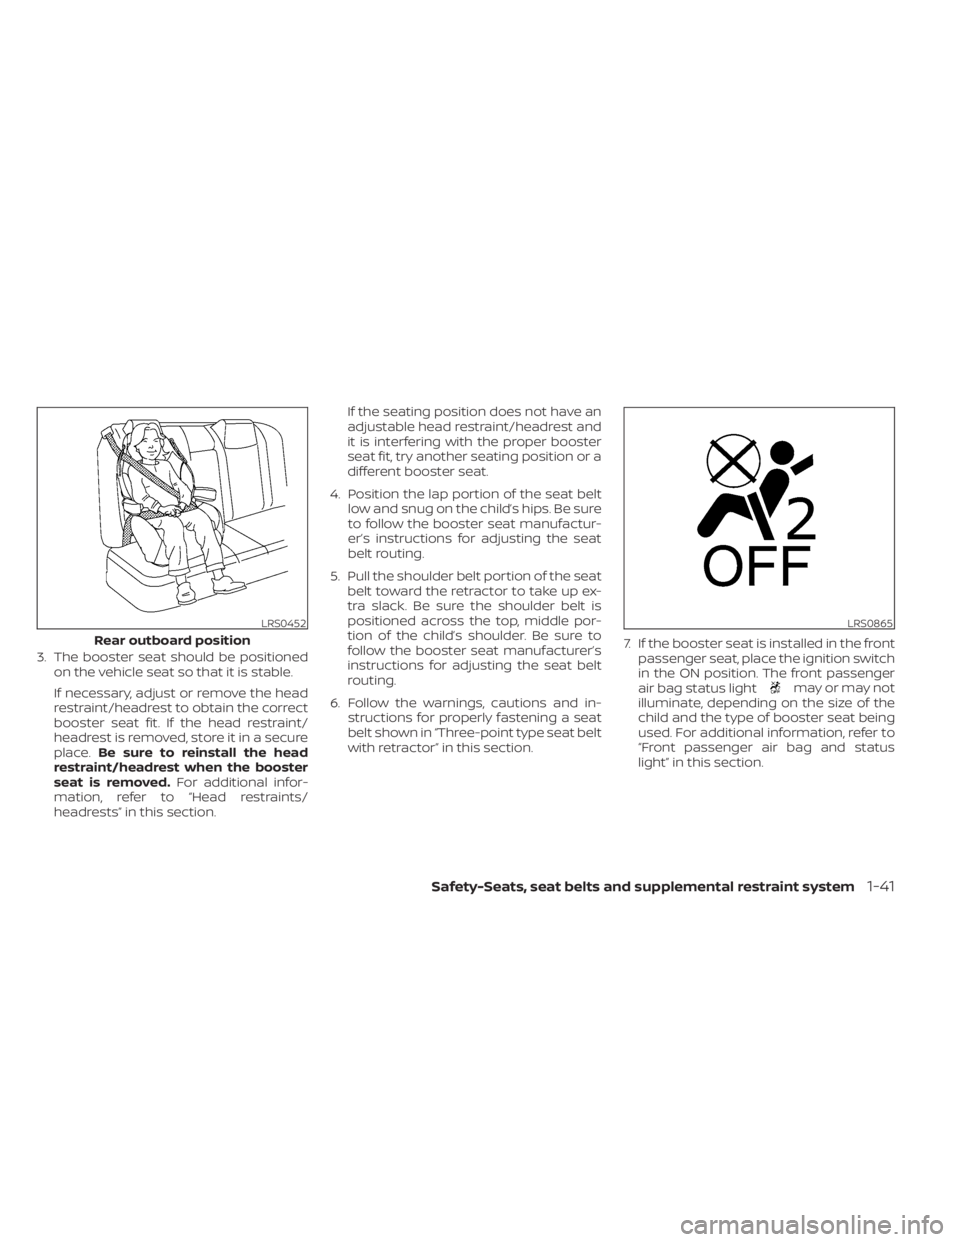
3. The booster seat should be positionedon the vehicle seat so that it is stable.
If necessary, adjust or remove the head
restraint/headrest to obtain the correct
booster seat fit. If the head restraint/
headrest is removed, store it in a secure
place. Be sure to reinstall the head
restraint/headrest when the booster
seat is removed. For additional infor-
mation, refer to “Head restraints/
headrests” in this section. If the seating position does not have an
adjustable head restraint/headrest and
it is interfering with the proper booster
seat fit, try another seating position or a
different booster seat.
4. Position the lap portion of the seat belt low and snug on the child’s hips. Be sure
to follow the booster seat manufactur-
er’s instructions for adjusting the seat
belt routing.
5. Pull the shoulder belt portion of the seat belt toward the retractor to take up ex-
tra slack. Be sure the shoulder belt is
positioned across the top, middle por-
tion of the child’s shoulder. Be sure to
follow the booster seat manufacturer’s
instructions for adjusting the seat belt
routing.
6. Follow the warnings, cautions and in- structions for properly fastening a seat
belt shown in “Three-point type seat belt
with retractor” in this section. 7. If the booster seat is installed in the front
passenger seat, place the ignition switch
in the ON position. The front passenger
air bag status light
may or may not
illuminate, depending on the size of the
child and the type of booster seat being
used. For additional information, refer to
“Front passenger air bag and status
light” in this section.
LRS0452
Rear outboard position
Page 62 of 500
PRECAUTIONS ON SRS
This SRS section contains important infor-
mation concerning the following systems:
• Driver and front passenger supplementalfront-impact air bag (NISSAN Advanced
Air Bag System)
• Front seat-mounted side-impact supple- mental air bag
• Rear outboard seat-mounted side- impact supplemental air bag
• Roof-mounted curtain side-impact and rollover supplemental air bag
• Driver and passenger supplemental knee air bag
• Seat belt with pretensioner(s) (front seats)
Supplemental front-impact air bag system
The NISSAN Advanced Air Bag System can
help cushion the impact force to the head
and chest of the driver and front passenger
in certain frontal collisions.
Front seat-mounted side-impact
supplemental air bag system
This system can help cushion the impact
force to the chest area of the driver and front
passenger in certain side-impact collisions.
The side air bags are designed to inflate on
the side where the vehicle is impacted.
Rear outboard seat-mounted side-
impact supplemental air bag system
This system can help cushion the impact
force to the chest area of the rear outboard
seat passengers in certain side-impact
collisions. The side air bags are designed to
inflate on the side where the vehicle is im-
pacted.
Roof-mounted curtain side-impact and
rollover supplemental air bag system
This system can help cushion the impact
force to the head of occupants in front and
rear outboard seating positions in certain
side-impact collisions. The curtain air bags
are designed to inflate on the side where
the vehicle is impacted. In a rollover, the
curtain air bags are designed to inflate and
remain inflated for a short time.
Driver and passenger supplemental
knee air bags
This system can help cushion the impact
force to the driver’s and front passenger’s
knees in certain collisions.
The SRS is designed to supplementthe
crash protection provided by the driver and
front passenger and rear seat belts and is
not a substitute for them. Seat belts
should always be correctly worn and the occupant seated a suitable distance away
from the steering wheel, instrument panel
and door finishers. For additional informa-
tion, refer to “Seat belts” in this section.
The supplemental air bags operate only
when the ignition switch is placed in the
ON position.
Af ter placing the ignition switch in the
ON position, the supplemental air bag
warning light illuminates. The supple-
mental air bag warning light will turn off
af ter about 7 seconds if the system is
operational.
SUPPLEMENTAL RESTRAINT SYSTEM
(SRS)
1-42Safety-Seats, seat belts and supplemental restraint system