2022 NISSAN ARMADA lights
[x] Cancel search: lightsPage 412 of 604
5-100Starting and driving
serious injury or death.
.The AEB with pedestrian detec-
tion system cannot detect all
vehicles or pedestrians under all
conditions.
. The AEB with pedestrian detec-
tion system does not detect the
following:
— Pedestrians that are small (for
example, children), in a sitting
position, operating toys/ska-
teboards, on scooters or in
wheelchairs, or not in an up-
right standing or walking po-
sition.
— Animals of any size.
— Obstacles (for example, cargo or debris) on the roadway or
roadside.
— Oncoming or crossing vehi- cles.
— Vehicles where the tires are difficult to see or the shape of
the rear of the vehicle is un-
clear or obstructed.
— Parked vehicles.
. The AEB with pedestrian detec-
tion system has some perfor-
mance limitations. — If a stationary vehicle is in the
vehicle’s path, the system will
not function when the vehicle
approaches the stationary ve-
hicle at speeds over approxi-
mately 50 MPH (80 km/h).
— Pedestrian detection will not function when the vehicle is
driven at speeds over ap-
proximately 37 MPH (60
km/h) or below approxi-
mately 6 MPH (10 km/h).
. For pedestrians, the AEB with
pedestrian detection system will
not issue the first warning.
. The AEB with pedestrian detec-
tion system may not function
properly or detect a vehicle or
pedestrian ahead in the following
conditions:
— In poor visibility conditions
(such as rain, snow, fog, dust
storms, sand storms, smoke,
and road spray from other
vehicles).
— If dirt, ice, snow, fog or other material is covering the radar
sensor area or camera area of
the windshield. — If strong light (for example,
sunlight or high beams) en-
ters the front camera or a
sudden change in brightness
occurs (for example, entering
a tunnel or driving in light-
ning).
— In dark or dimly lit conditions, such as at night or in tunnels,
including cases where your
vehicle’s headlights are off or
dim, or the tail lights of the
vehicle ahead are off.
— When the direction of the camera is misaligned.
— When driving on a steep downhill slope, on roads with
sharp curves, and/or bumpy
or dirt roads.
— If there is interference by other radar sources.
— When your vehicle’s position or movement is changed
quickly or significantly (for
example, lane change, turning
vehicle, abrupt steering, sud-
den acceleration or decelera-
tion).
Page 413 of 604

— When your vehicle or the ve-hicle or pedestrian ahead
moves quickly or significantly
such that the system cannot
detect and react in time (for
example, pedestrian moving
quickly toward the vehicle at
close range, vehicle cutting in,
changing lanes, making a
turn, steering abruptly, sud-
den acceleration or decelera-
tion).
— When the vehicle or pedes- trian is offset from the vehi-
cle’s forward path.
— If the speed difference be- tween the two vehicles is
small.
— The pedestrian’s profile is par- tially obscured or unidentifi-
able; for example, due to
transporting luggage, push-
ing a stroller, wearing bulky
or very loose-fitting clothing
or accessories, or being in a
unique posture (such as rais-
ing hands).
— There is poor contrast of a person to the background,
such as having clothing color
or pattern which is similar to the background.
— For approximately 15 seconds after starting the engine
— If the vehicle ahead has a unique or unusual shape, ex-
tremely low or high clearance
heights, or unusual cargo
loading or is narrow (for ex-
ample, a motorcycle).
— When the vehicle or pedes- trian is located near a traffic
sign, a reflective area (for ex-
ample, water on road), or is in
a shadow.
— When multiple pedestrians are grouped together.
— When the view of the pedes- trian is obscured by a vehicle
or other object.
— While towing a trailer or other vehicle.
. The system performance may be
degraded in the following condi-
tions:
— The vehicle is driven on a
slippery road.
— The vehicle is driven on a slope. — Excessively heavy baggage is
loaded in the rear seat or the
cargo area of your vehicle.
. The system is designed to auto-
matically check the sensor (radar
and camera)’s functionality, with-
in certain limitations. The system
may not detect some forms of
obstruction of the sensor area
such as ice, snow or stickers, for
example. In these cases, the sys-
tem may not be able to warn the
driver properly. Be sure that you
check, clean and clear sensor
areas regularly.
. In some road and traffic condi-
tions, the AEB with pedestrian
detection system may unexpect-
edly apply partial braking. When
acceleration is necessary, de-
press the accelerator pedal to
override the system.
. The AEB with pedestrian detec-
tion system may operate when a
pattern, object, shadow or lights
are detected that are similar to
the outline of vehicles or pedes-
trians, or if they are the same size
and position as a vehicle or mo-
torcycle’s tail lights.
Starting and driving5-101
Page 430 of 604
5-118Starting and driving
RAB SYSTEM OPERATION
When the shift lever is in the R (Reverse)
position and the vehicle speed is less than
approximately 9 MPH (15 km/h), the RAB
system operates.
If a risk of a collision with an obstacle is
detected when your vehicle is backing up,
the RAB system warning indicator will
flash in the vehicle information display, a
red frame will appear in the touch screen
display (models with the Intelligent
Around View® Monitor system), and the
system will chime three times. The system
will then automatically apply the brakes.
After the automatic brake application, the
driver must depress the brake pedal to
maintain brake pressure.
NOTE:
.The stop lights of the vehicle come
on when braking is performed by
the RAB system.
. When the brakes operate, a noise
may be heard. This is not a malfunc-
tion.
. When the “P” key is touched, the
indicator light on the key will turn off
and the the Rear Automatic Braking
(RAB) system will turn off tempora-
rily. The Moving Object Detection
(MOD) (if so equipped), the Intelligent
Back-up Intervention (I-BI) (if so
equipped) and the sonar systems will also be turned off at the same
time.
. When the sonar and MOD systems is
turned off on the settings menu in
the touch screen display, the “P” key
will disappear.
To enable or disable the RAB system,
use the vehicle information display. See
“Turning the RAB system ON/OFF” (P.5-
119).
Page 435 of 604
Follow these easy-to-use Fuel Efficient
Driving Tips to help you achieve the most
fuel economy from your vehicle.
1. Use smooth accelerator and brakepedal application.
.Avoid rapid starts and stops..Use smooth, gentle accelerator andbrake application whenever possi-
ble.
.Maintain constant speed whilecommuting and coast whenever
possible.
2. Maintain constant speed.
.Look ahead to try and anticipate and minimize stops.
.Synchronizing your speed with traf-fic lights allows you to reduce your
number of stops.
.Maintaining a steady speed canminimize red light stops and im-
prove fuel efficiency.
3. Use air conditioning (A/C) at higher vehicle speeds.
.Below 40 MPH (64 km/h), it is moreefficient to open windows to cool
the vehicle due to reduced engine
load.
.Above 40 MPH (64 km/h), it is more
efficient to use A/C to cool the
vehicle due to increased aerody-
namic drag.
.Recirculating the cool air in thecabin when the A/C is on reduces
cooling load.
4. Drive at economical speeds and dis- tances.
.Observing the speed limit and notexceeding 60 MPH (97 km/h)
(where legally allowed) can improve
fuel efficiency due to reduced aero-
dynamic drag.
.Maintaining a safe following dis-tance behind other vehicles re-
duces unnecessary braking.
.Safely monitoring traffic to antici- pate changes in speed permits
reduced braking and smooth accel-
eration changes.
.Select a gear range suitable to roadconditions.
5. Use cruise control.
.Using cruise control during highway driving helps maintain a steady
speed.
.Cruise control is particularly effec-tive in providing fuel savings when
driving on flat terrains.
6. Plan for the shortest route.
.Utilize a map or navigation system to determine the best route to save
time. 7. Avoid idling.
.Shutting off your engine when safe
for stops exceeding 30-60 seconds
saves fuel and reduces emissions.
8. Buy an automated pass for toll roads.
.Automated passes permit drivers to use special lanes to maintain cruis-
ing speed through the toll and
avoid stopping and starting.
9. Winter warm up.
.Limit idling time to minimize impact to fuel economy.
.Vehicles typically need no morethan 30 seconds of idling at start-
up to effectively circulate the en-
gine oil before driving.
.Your vehicle will reach its ideal
operating temperature more
quickly while driving versus idling.
10. Keeping your vehicle cool.
.Park your vehicle in a covered parking area or in the shade when-
ever possible.
.When entering a hot vehicle, open- ing the windows will help to reduce
the inside temperature faster, re-
sulting in reduced demand on your
A/C system.
Starting and driving5-123
FUEL EFFICIENT DRIVING TIPS
Page 444 of 604
5-132Starting and driving
WARNING
.Never rely solely on the hill start
assist system to prevent the ve-
hicle from moving backward on a
hill. Always drive carefully and
attentively. Depress the brake
pedal when the vehicle is stopped
on a steep hill. Be especially care-
ful when stopped on a hill on
frozen or muddy roads. Failure
to prevent the vehicle from rolling
backwards may result in a loss of
control of the vehicle and possi-
ble serious injury or death.
. The hill start assist system is not
designed to hold the vehicle at a
standstill on a hill. Depress the
brake pedal when the vehicle is
stopped on a steep hill. Failure to
do so may cause the vehicle to
roll backwards and may result in
a collision or serious personal
injury.
. The hill start assist system may
not prevent the vehicle from roll-
ing backwards on a hill under all
load or road conditions. Always
be prepared to depress the brake
pedal to prevent the vehicle from
rolling backwards. Failure to do so may result in a collision or
serious personal injury.
The hill start assist system automatically
keeps the brakes applied to help prevent
the vehicle from rolling backwards in the
time it takes the driver to release the
brake pedal and apply the accelerator
when the vehicle is stopped on a hill.
The hill start assist system will operate
automatically under the following condi-
tions:
. The transmission is shifted to a for-
ward or reverse gear.
. The vehicle is stopped completely on a
hill by applying the brake.
The maximum holding time is 2 seconds.
After 2 seconds the vehicle will begin to
roll back and the hill start assist system
will stop operating completely.
The hill start assist system will not
operate when the transmission is shifted
to the N (Neutral) or P (Park) position or
on a flat and level road.
When the Vehicle Dynamic Control (VDC)
warning light illuminates in the meter, the
hill start assist system will not operate.
(See “Warning lights, indicator lights and
audible reminders” (P.2-11).)
HILL START ASSIST SYSTEM
Page 462 of 604
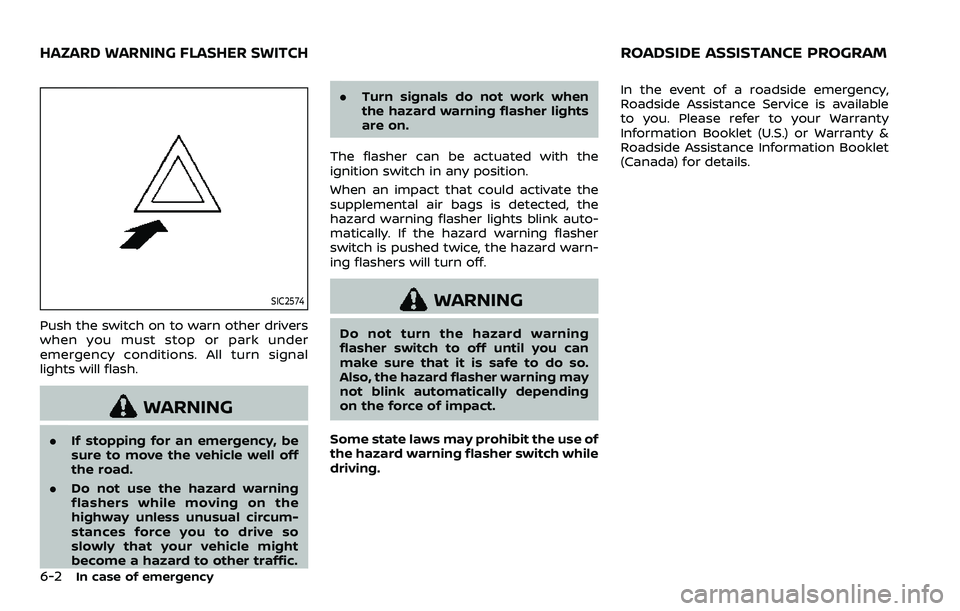
6-2In case of emergency
SIC2574
Push the switch on to warn other drivers
when you must stop or park under
emergency conditions. All turn signal
lights will flash.
WARNING
.If stopping for an emergency, be
sure to move the vehicle well off
the road.
. Do not use the hazard warning
flashers while moving on the
highway unless unusual circum-
stances force you to drive so
slowly that your vehicle might
become a hazard to other traffic. .
Turn signals do not work when
the hazard warning flasher lights
are on.
The flasher can be actuated with the
ignition switch in any position.
When an impact that could activate the
supplemental air bags is detected, the
hazard warning flasher lights blink auto-
matically. If the hazard warning flasher
switch is pushed twice, the hazard warn-
ing flashers will turn off.
WARNING
Do not turn the hazard warning
flasher switch to off until you can
make sure that it is safe to do so.
Also, the hazard flasher warning may
not blink automatically depending
on the force of impact.
Some state laws may prohibit the use of
the hazard warning flasher switch while
driving. In the event of a roadside emergency,
Roadside Assistance Service is available
to you. Please refer to your Warranty
Information Booklet (U.S.) or Warranty &
Roadside Assistance Information Booklet
(Canada) for details.
HAZARD WARNING FLASHER SWITCHROADSIDE ASSISTANCE PROGRAM
Page 493 of 604

8 Do-it-yourself
Maintenance precautions ...................................................... 8-2
Engine compartment check locations ........................ 8-3VK56VD engine ....................................................................... 8-3
Engine cooling system ............................................................. 8-4 Checking engine coolant level .................................... 8-5
Changing engine coolant ................................................ 8-5
Engine oil ........................................................................\
..................... 8-6 Checking engine oil level ................................................. 8-6
Changing engine oil and filter ..................................... 8-6
Automatic Transmission Fluid (ATF) ............................. 8-8
Power steering fluid ................................................................... 8-8
Brake fluid ........................................................................\
.................. 8-9
Window washer fluid .............................................................. 8-10
Battery ........................................................................\
........................ 8-11 Jump starting ........................................................................\
. 8-13
Variable voltage control system ................................... 8-13
Drive belts ........................................................................\
................ 8-13
Spark plugs ........................................................................\
............. 8-14 Replacing spark plugs ..................................................... 8-14
Air cleaner ........................................................................\
............... 8-15 Windshield wiper blades ..................................................... 8-16
Cleaning ........................................................................\
........... 8-16
Replacing ........................................................................\
........ 8-16
Rear window wiper blades ............................................... 8-17
Brakes ........................................................................\
........................ 8-17 Self-adjusting brakes ..................................................... 8-17
Brake pad wear warning ............................................ 8-17
Brake booster ...................................................................... 8-17
Fuses ........................................................................\
........................... 8-18 Engine compartment .................................................... 8-18
Passenger compartment ........................................... 8-20
Intelligent Key battery replacement .......................... 8-21
Lights ........................................................................\
.......................... 8-24
Headlights ........................................................................\
...... 8-25
Exterior and interior lights ........................................ 8-26
Wheels and tires ........................................................................\
8-28
Tire pressure ........................................................................\
8-28
Tire labeling ........................................................................\
.. 8-32
Types of tires ....................................................................... 8-34
Tire chains ........................................................................\
...... 8-35
Changing wheels and tires ...................................... 8-36
Page 510 of 604

8-18Do-it-yourself
each depression as the hydraulic
pressure decreases.
If the brakes do not operate properly,
have the brakes checked. It is recom-
mended that you visit a NISSAN dealer for
repair.
SDI2518
SDI2532
ENGINE COMPARTMENT
WARNING
Never use a fuse of a higher or lower
amperage rating than that specified
on the fuse box cover. This could
damage the electrical system or
electronic control units or cause a
fire.
If any electrical equipment does not
operate, check for an open fuse.
1. Be sure the ignition switch is pushed to the OFF or LOCK position and the
headlights are off.
2. Open the engine hood and remove the cover on the battery.
3. Remove the fuse/fusible link holder cover
,or.
4. Remove the fuse with the fuse puller.
FUSES