2022 NISSAN ARMADA window
[x] Cancel search: windowPage 269 of 604
and fan speed are also controlled
automatically.
NOTE:
. Do not set the temperature lower
than the outside air temperature or
the system may not work properly.
. Not recommended if windows fog
up.
Dehumidified defrosting or defogging:
1. Push the
button. (The indicator
light on the button will illuminate.)
2. Turn the temperature control dial on the corresponding side to set the
desired temperature.
.To quickly remove ice from theoutside of the windows, use the
button to set the fan speed to
maximum.
.As soon as possible after the wind- shield is cleared, push the AUTO
button to return to the automatic
mode.
Manual operation
Fan speed control:
Push the
buttons to manually control
the fan speed.
Air intake control:
. Push the
button to recirculate
interior air inside the vehicle. (The
indicator light on the button will
illuminate.)
. Push the
button to draw outside
air into the passenger compartment.
(The indicator light on the button will
illuminate.)
. To control the air intake automatically,
push and hold either the
button
or thebutton. The indicator light
will blink, and then the air intake will
switch to automatic control. When the
automatic control is set, the system
automatically alternates between the
outside air circulation and the air
recirculation modes. (The indicator
light of the active mode will illumi-
nate.) Air flow control:
Pushing the
button manually con-
trols air flow and selects the air outlet:
— Air flows mainly from center and side
ventilators.
— Air flows mainly from center and sideventilators and foot outlets.
— Air flows mainly from the foot outletand partly from the defroster.
— Air flows mainly from the defrosterand foot outlets.
Synchronize temperature settings:
Push the SYNC button to turn on the
SYNC mode. (The indicator light on the
button will illuminate.)
When the SYNC mode is active, the
driver’s side temperature control dial will
control the driver’s side, front passenger’s
side and rear temperatures.
When the passenger’s side temperature
setting or the rear temperature setting is
changed, it will cancel the SYNC mode of
the operated individual zone. (The indica-
tor light on the SYNC button will turn off.)
Changing both the passenger’s side tem-
perature setting and the rear tempera-
ture setting will completely turn off the
SYNC mode.
Monitor, heater, air conditioner, audio, phone and voice recognition systems4-39
Page 273 of 604
OPERATING TIPS
When the engine coolant temperature
and outside air temperature are low, the
air flow from the foot outlets may not
operate. However, this is not a malfunc-
tion. After the coolant temperature
warms up, the air flow from the foot
outlets will operate normally.
The sensors
andlocated on the
instrument panel help maintain a con-
stant temperature. Do not put anything
on or around the sensors.
LINKING INTELLIGENT KEY (if so
equipped)
The air conditioner system settings can
be memorized for each Intelligent Key.
For more details, see “Setting memory
function” (P.3-42).
IN-CABIN MICROFILTER
The air conditioner system is equipped
with an in-cabin microfilter which collects
dirt, pollen, dust, etc.
To make sure the air conditioner heats,
defogs, and ventilates efficiently, replace
the filter in accordance with the specified
maintenance intervals listed in the “9.
Maintenance and schedules” section. It is
recommended to see a NISSAN dealer to
replace the filter.
The filter should be replaced if the air flow decreases significantly or if win-
dows fog up easily when operating the
heater or air conditioner.
SERVICING AIR CONDITIONER
The air conditioner system in your NISSAN
is charged with a refrigerant designed
with the environment in mind.
This re-
frigerant will not harm the earth’s
ozone layer. However, special charging
equipment and lubricant are required
when servicing your NISSAN air condi-
tioner. Using improper refrigerants or
lubricants will cause severe damage to
your air conditioner system. (See “Capa-
cities and recommended fluids/lubri-
cants” (P.10-2) for air conditioner system
refrigerant and lubricant recommenda-
tions.)
Your NISSAN dealer will be able to service
your environmentally friendly air condi-
tioner system.
WARNING
The system contains refrigerant un-
der high pressure. To avoid personal
injury, any air conditioner service
should be done only by an experi-
enced technician with the proper
equipment.
WINDOW ANTENNA
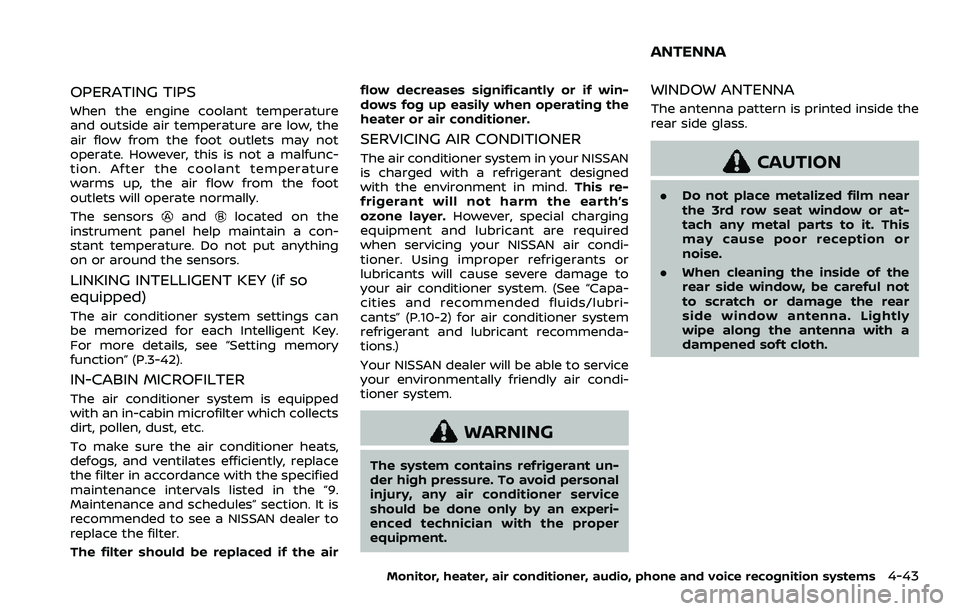
The antenna pattern is printed inside the
rear side glass.
CAUTION
. Do not place metalized film near
the 3rd row seat window or at-
tach any metal parts to it. This
may cause poor reception or
noise.
. When cleaning the inside of the
rear side window, be careful not
to scratch or damage the rear
side window antenna. Lightly
wipe along the antenna with a
dampened soft cloth.
Monitor, heater, air conditioner, audio, phone and voice recognition systems4-43
ANTENNA
Page 305 of 604
close the window. To unpair a Bluetooth®
device, select Device name then Unpair.
If the device is not listed, select Refresh
Symbol and the device will appear in
Available device list. If device does not
appear, double check that the device is in
pairing mode (refer to the device’s man-
ual for instructions).
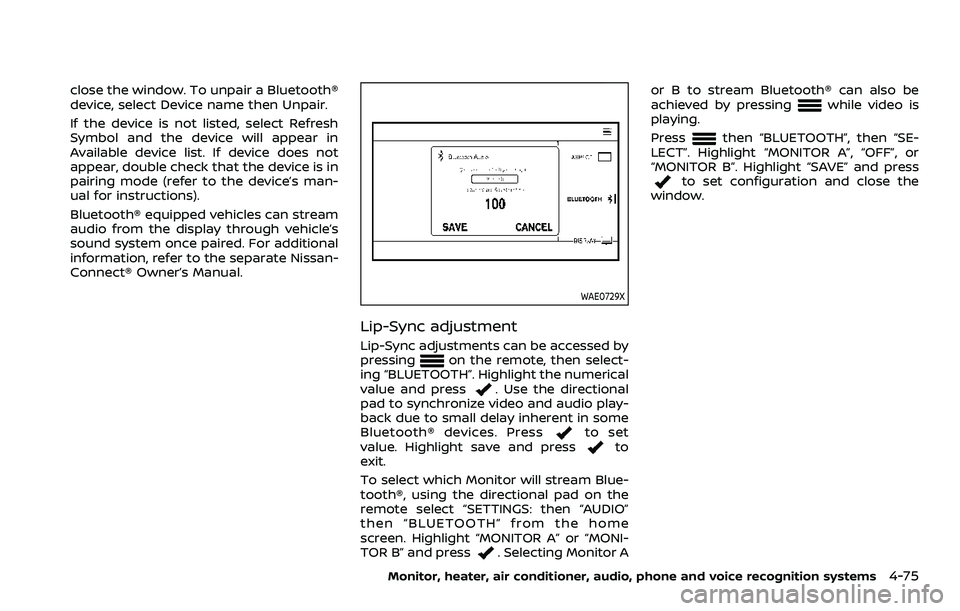
Bluetooth® equipped vehicles can stream
audio from the display through vehicle’s
sound system once paired. For additional
information, refer to the separate Nissan-
Connect® Owner’s Manual.
WAE0729X
Lip-Sync adjustment
Lip-Sync adjustments can be accessed by
pressingon the remote, then select-
ing “BLUETOOTH”. Highlight the numerical
value and press
. Use the directional
pad to synchronize video and audio play-
back due to small delay inherent in some
Bluetooth® devices. Press
to set
value. Highlight save and pressto
exit.
To select which Monitor will stream Blue-
tooth®, using the directional pad on the
remote select “SETTINGS: then “AUDIO”
then “BLUETOOTH” from the home
screen. Highlight “MONITOR A” or “MONI-
TOR B” and press
. Selecting Monitor A or B to stream Bluetooth® can also be
achieved by pressing
while video is
playing.
Press
then “BLUETOOTH”, then “SE-
LECT”. Highlight “MONITOR A”, “OFF”, or
“MONITOR B”. Highlight “SAVE” and press
to set configuration and close the
window.
Monitor, heater, air conditioner, audio, phone and voice recognition systems4-75
Page 310 of 604
4-80Monitor, heater, air conditioner, audio, phone and voice recognition systems
application which is used to encode.
FLAC
Copyright © 2000-2009 Josh Coalson
Copyright © 2011-2013 Xiph.Org Founda-
tion
Redistribution and use in source and
binary forms, with or without modifica-
tion, are permitted provided that the
following conditions are met:
Redistributions of source code must re-
tain the above copyright notice, this list of
conditions and the following disclaimer.
Redistributions in binary form must re-
produce the above copyright notice, this
list of conditions and the following dis-
claimer in the documentation and/or
other materials provided with the distri-
bution.
Neither the name of the Xiph.org Founda-
tion nor the names of its contributors
may be used to endorse or promote
products derived from this software with-
out specific prior written permission.
THIS SOFTWARE IS PROVIDED BY THE
COPYRIGHT HOLDERS AND CONTRIBU-
TORS “AS IS” AND ANY EXPRESS OR
IMPLIED WARRANTIES, INCLUDING, BUT
NOT LIMITED TO, THE IMPLIED WARRAN-
TIES OF MERCHANTABILITY AND FITNESS
FOR A PARTICULAR PURPOSE ARE DIS-CLAIMED. IN NO EVENT SHALL THE FOUN-
DATION OR CONTRIBUTORS BE LIABLE
FOR ANY DIRECT, INDIRECT, INCIDENTAL,
SPECIAL, EXEMPLARY, OR CONSEQUEN-
TIAL DAMAGES (INCLUDING, BUT NOT
LIMITED TO, PROCUREMENT OF SUBSTI-
TUTE GOODS OR SERVICES; LOSS OF USE,
DATA, OR PROFITS; OR BUSINESS INTER-
RUPTION) HOWEVER CAUSED AND ON ANY
THEORY OF LIABILITY, WHETHER IN CON-
TRACT, STRICT LIABILITY, OR TORT (IN-
CLUDING NEGLIGENCE OR OTHERWISE)
ARISING IN ANY WAY OUT OF THE USE OF
THIS SOFTWARE, EVEN IF ADVISED OF THE
POSSIBILITY OF SUCH DAMAGE.
WMA/WMV
Windows Media is either a registered
trademark or trademark of Microsoft
Corporation in the United States and/or
other countries. This product includes
technology owned by Microsoft Corpora-
tion and cannot be used or distributed
without a license from Microsoft Licen-
sing, Inc.
SD/SDHC/SDXC
SD, SDHC and SDXC Logos are trade-
marks or registered trademarks of SD-
3C LLC in the United States, other coun-
tries or both.
WAE0753X
HDMI
The terms HDMI and HDMI High-Definition
Multimedia Interface, and the HDMI Logo
are trademarks or registered trademarks
of HDMI Licensing, LLC in the United
States and other countries.
MHL
MHL, the MHL Logo, and Mobile High-
Definition Link are trademarks or regis-
tered trademarks of MHL, LLC in the
United States and other countries.
Page 316 of 604
5-4Starting and driving
WARNING
.Do not leave children or adults
who would normally require the
support of others alone in your
vehicle. Pets should not be left
alone either. They could acciden-
tally injure themselves or others
through inadvertent operation of
the vehicle. Also, on hot, sunny
days, temperatures in a closed
vehicle could quickly become
high enough to cause severe or
possibly fatal injuries to people or
animals.
. Properly secure all cargo to help
prevent it from sliding or shifting.
Do not place cargo higher than
the seatbacks. In a sudden stop
or collision, unsecured cargo
could cause personal injury.
EXHAUST GAS (carbon monoxide)
WARNING
.Do not breathe exhaust gases;
they contain colorless and odor-
less carbon monoxide. Carbon
monoxide is dangerous. It can cause unconsciousness or death.
. If you suspect that exhaust fumes
are entering the vehicle, drive
with all windows fully open, and
have the vehicle inspected imme-
diately.
. Do not run the engine in closed
spaces such as a garage.
. Do not park the vehicle with the
engine running for any extended
length of time.
. Keep the liftgate closed while
driving, otherwise exhaust gases
could be drawn into the passen-
ger compartment. If you must
drive with the liftgate open, fol-
low these precautions:
1) Open all the windows.
2) Set the
air recirculation to
off and the fan control to high
to circulate the air.
. If electrical wiring or other cable
connections must pass to a trailer
through the seal on the liftgate or
the body, follow the manufac-
turer’s recommendation to pre-
vent carbon monoxide entry into
the vehicle.
. The exhaust system and body
should be inspected by a quali- fied mechanic whenever:
— The vehicle is raised for ser-
vice.
— You suspect that exhaust fumes are entering into the
passenger compartment.
— You notice a change in the sound of the exhaust system.
— You have had an accident involving damage to the ex-
haust system, underbody, or
rear of the vehicle.
THREE-WAY CATALYST
The three-way catalyst is an emission
control device installed in the exhaust
system. Exhaust gases in the three-way
catalyst are burned at high temperatures
to help reduce pollutants.
WARNING
. The exhaust gas and the exhaust
system are very hot. Keep people,
animals or flammable materials
away from the exhaust system
components.
. Do not stop or park the vehicle
over flammable materials such as
PRECAUTIONS WHEN STARTING
AND DRIVING
Page 319 of 604

recommended you consult a
NISSAN dealer.
. Since the spare tire is not
equipped with the TPMS, when a
spare tire is mounted or a wheel
is replaced, the TPMS will not
function and the low tire pressure
warning light will flash for ap-
proximately 1 minute. The light
will remain on after 1 minute.
Have your tires replaced and/or
TPMS system reset as soon as
possible. It is recommended you
visit a NISSAN dealer for these
services.
. Replacing tires with those not
originally specified by NISSAN
could affect the proper operation
of the TPMS.
. Do not inject any tire liquid or
aerosol tire sealant into the tires,
as this may cause a malfunction
of the tire pressure sensors.
CAUTION
.The TPMS may not function prop-
erly when the wheels are
equipped with tire chains or the
wheels are buried in snow. .
Do not place metalized film or
any metal parts (antenna, etc.) on
the windows. This may cause
poor reception of the signals
from the tire pressure sensors,
and the TPMS will not function
properly.
Some devices and transmitters may tem-
porarily interfere with the operation of
the TPMS and cause the low tire pressure
warning light to illuminate. Some exam-
ples are:
. Facilities or electric devices using
similar radio frequencies are near the
vehicle.
. If a transmitter set to similar frequen-
cies is being used in or near the
vehicle.
. If a computer (or similar equipment) or
a DC/AC converter is being used in or
near the vehicle.
Low tire pressure warning light may
illuminate in the following cases.
. If the vehicle is equipped with a wheel
and tire without TPMS.
. If the TPMS has been replaced and the
ID has not been registered.
. If the wheel is not originally specified
by NISSAN. FCC Notice:
For USA:
This device complies with Part 15 of the
FCC Rules. Operation is subject to the
following two conditions: (1) This device
may not cause harmful interference,
and (2) this device must accept any
interference received, including inter-
ference that may cause undesired op-
eration.
Note: Changes or modifications not
expressly approved by the party re-
sponsible for compliance could void
the user’s authority to operate the
equipment.
For Canada:
This device complies with Industry Ca-
nada licence-exempt RSS standard(s).
Operation is subject to the following
two conditions: (1) this device may not
cause interference, and (2) this device
must accept any interference, including
interference that may cause undesired
operation of the device.
Starting and driving5-7
Page 328 of 604
5-16Starting and driving
.Make sure the area around the vehicle
is clear.
. Check fluid levels such as engine oil,
coolant, brake fluid and window
washer fluid as frequently as possible,
or at least whenever you refuel.
. Check that all windows and lights are
clean.
. Visually inspect tires for their appear-
ance and condition. Also check tires
for proper inflation.
. Lock all doors.
. Position seat and adjust head re-
straints/headrests.
. Adjust inside and outside mirrors.
. Fasten seat belts and ask all passen-
gers to do likewise.
. Check the operation of warning lights
when the ignition switch is pushed to
the ON position. (See “Warning lights,
indicator lights and audible remin-
ders” (P.2-11).) 1. Apply the parking brake.
2. Move the shift lever to the P (Park) or N
(Neutral) position. (P is recommended.)
The starter is designed not to operate
unless the shift lever is in either of the
above positions.
3. Push the ignition switch to the ON position. Firmly depress the brake
pedal and push the ignition switch to
start the engine.
To start the engine immediately, push
and release the ignition switch while
depressing the brake pedal with the
ignition switch in any position.
.If the engine is very hard to start inextremely cold weather or when
restarting, depress the accelerator
pedal a little (approximately 1/3 to
the floor) and while holding, crank
the engine. Release the accelerator
pedal when the engine starts.
.If the engine is very hard to startbecause it is flooded, depress the
accelerator pedal all the way to the
floor and hold it. Push the ignition
switch to the ON position to start
cranking the engine. After 5 or 6
seconds, stop cranking by pushing
the ignition switch to OFF. After
cranking the engine, release the
accelerator pedal. Crank the engine
with your foot off the accelerator pedal
by depressing the brake
pedal and pushing the push-button
ignition switch to start the engine.
If the engine starts, but fails to run,
repeat the above procedure.
CAUTION
Do not operate the starter for more
than 15 seconds at a time. If the
engine does not start, push the
ignition switch to OFF and wait 10
seconds before cranking again,
otherwise the starter could be da-
maged.
4. Warm-up
Allow the engine to idle for at least 30
seconds after starting. Do not race the
engine while warming it up. Drive at
moderate speed for a short distance
first, especially in cold weather. In cold
weather, keep the engine running for
a minimum of 2 - 3 minutes before
shutting it off. Starting and stopping
the engine over a short period of time
may make the vehicle more difficult to
start.
When racing the engine up to 4,000
rpm or more under the no load
condition, the engine will enter the
BEFORE STARTING THE ENGINE STARTING THE ENGINE
Page 353 of 604
.The radar sensors may not be
able to detect and activate BSW
when certain objects are present
such as:
— Pedestrians, bicycles, animals.
— Vehicles such as motorcycles,
low height vehicles, or high
ground clearance vehicles.
— Oncoming vehicles.
— Vehicles remaining in the de- tection zone when you accel-
erate from a stop.
— A vehicle merging into an adjacent lane at a speed ap-
proximately the same as your
vehicle.
— A vehicle approaching rapidly from behind.
— A vehicle which your vehicle overtakes rapidly.
— A vehicle that passes through the detection zone quickly.
— When overtaking several vehi- cles in a row, the vehicles after
the first vehicle may not be
detected if they are traveling
close together. .
The radar sensor’s detection zone
is designed based on a standard
lane width. When driving in a
wider lane, the radar sensors
may not detect vehicles in an
adjacent lane. When driving in a
narrow lane, the radar sensors
may detect vehicles driving two
lanes away.
. The radar sensors are designed
to ignore most stationary objects,
however objects such as guard-
rails, walls, foliage and parked
vehicles may occasionally be de-
tected. This is a normal operation
condition.
. The following conditions may re-
duce the ability of the radar to
detect other vehicles:
— Severe weather
— Road spray
— Ice/frost/dirt build-up on the
vehicle
. Do not attach stickers (including
transparent material), install ac-
cessories or apply additional
paint near the radar sensors.
These conditions may reduce the
ability of the radar to detect other
vehicles. .
When towing a trailer or other
vehicle, turn the BSW system off
to prevent the occurrence of an
unexpected accident resulting
from sudden system operation.
. Excessive noise (for example,
audio system volume, open vehi-
cle window) will interfere with the
chime sound, and it may not be
heard.
BSW DRIVING SITUATIONS
Indicator on
Indicator off
Indicator flashing
Starting and driving5-41