2022 NISSAN ARMADA navigation
[x] Cancel search: navigationPage 233 of 604

For models with NissanConnect® and
Services, refer to the NissanConnect®
Owner’s Manual regarding the following
information.
.Audio system
. Bluetooth® Hands-Free Phone
. NissanConnect® Services
. SiriusXM Traffic
TM
.SiriusXM® Travel Link
. SiriusXM® Radio
. Navigation system
. Voice Recognition System
. Information and settings viewable on
NissanConnect®
. Android Auto
TM
.Apple CarPlay®
WARNING
.Do not disassemble or modify
this system. If you do, it may
result in accidents, fire, or electric
shock.
. Do not use this system if you
notice any abnormality, such as
a frozen screen or lack of sound.
Continued use of the system may
result in accident, fire or electric
shock.
. In case you notice any foreign
object in the system hardware,
spill liquid on it, or notice smoke
or smell coming from it, stop
using the system immediately. It
is recommended you visit a
NISSAN dealer for servicing.
Ignoring such conditions may
lead to accidents, fire, or electric
shock.
. Park the vehicle in a safe location
and apply the parking brake to
view the images on the touch
screen display.
CAUTION
Do not use the system when the
engine is not running for extended
periods of time to prevent battery
discharge.
Do not attempt to operate the system in
extreme temperature conditions [below
−4°F (−20°C) and above 158°F (70°C)].
Operating this system under these con-
ditions may result in system malfunc-
tions.
Monitor, heater, air conditioner, audio, phone and voice recognition systems4-3
NISSANCONNECT® OWNER’S MANUALSAFETY NOTE
Page 280 of 604
4-50Monitor, heater, air conditioner, audio, phone and voice recognition systems
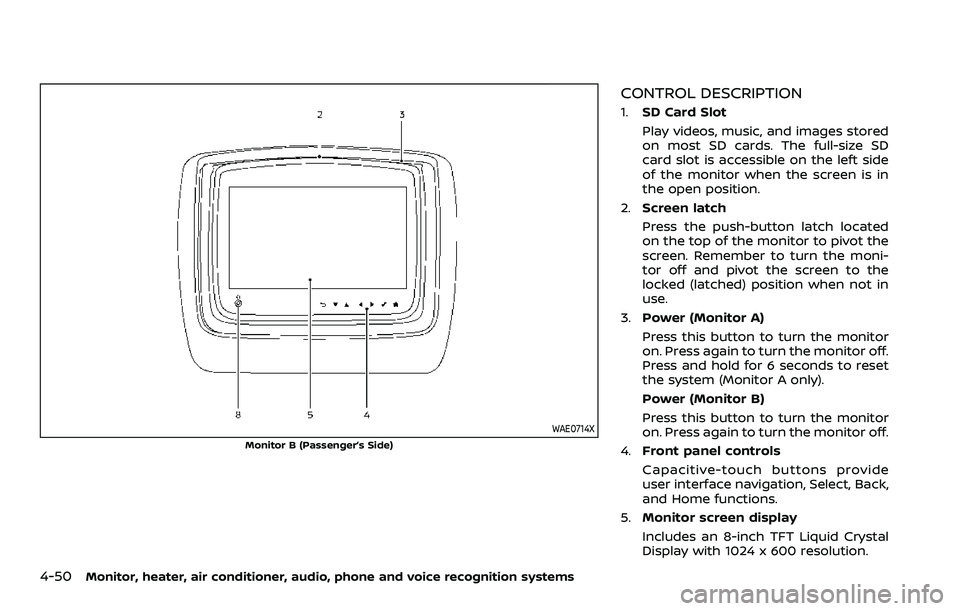
WAE0714X
Monitor B (Passenger’s Side)
CONTROL DESCRIPTION
1.SD Card Slot
Play videos, music, and images stored
on most SD cards. The full-size SD
card slot is accessible on the left side
of the monitor when the screen is in
the open position.
2. Screen latch
Press the push-button latch located
on the top of the monitor to pivot the
screen. Remember to turn the moni-
tor off and pivot the screen to the
locked (latched) position when not in
use.
3. Power (Monitor A)
Press this button to turn the monitor
on. Press again to turn the monitor off.
Press and hold for 6 seconds to reset
the system (Monitor A only).
Power (Monitor B)
Press this button to turn the monitor
on. Press again to turn the monitor off.
4. Front panel controls
Capacitive-touch buttons provide
user interface navigation, Select, Back,
and Home functions.
5. Monitor screen display
Includes an 8-inch TFT Liquid Crystal
Display with 1024 x 600 resolution.
Page 286 of 604
4-56Monitor, heater, air conditioner, audio, phone and voice recognition systems
Play videos, music, and images stored on
most SD cards.
Slingplayer®
Stream content wirelessly from a Sling-
box® (sold separately) to the RSI system.
*Requires external internet connection.
Miracast®
Stream content wirelessly from a Mira-
cast-enabled device to the RSI system.
NOTE: Miracast® works with Android OS
mobile devices only. This feature is not
supported on iOS devices.
SmartStream
Stream content wirelessly between mo-
bile devices and to the RSI system.
*Requires compatible UPnP application
to be installed on the mobile device. For
additional information, see “SmartStream”
(P.4-67).
NOTE: SmartStream works on both An-
droid and iOS devices using mobile app
(VOXX-RSI).
NOTE:
The top left corner of the screen in-
cludes a graphic representation that
shows the navigational path of the
current menu. For example: Home >
Source > HDMI.
WAE0721X
VIDEO OPERATION
Volume control
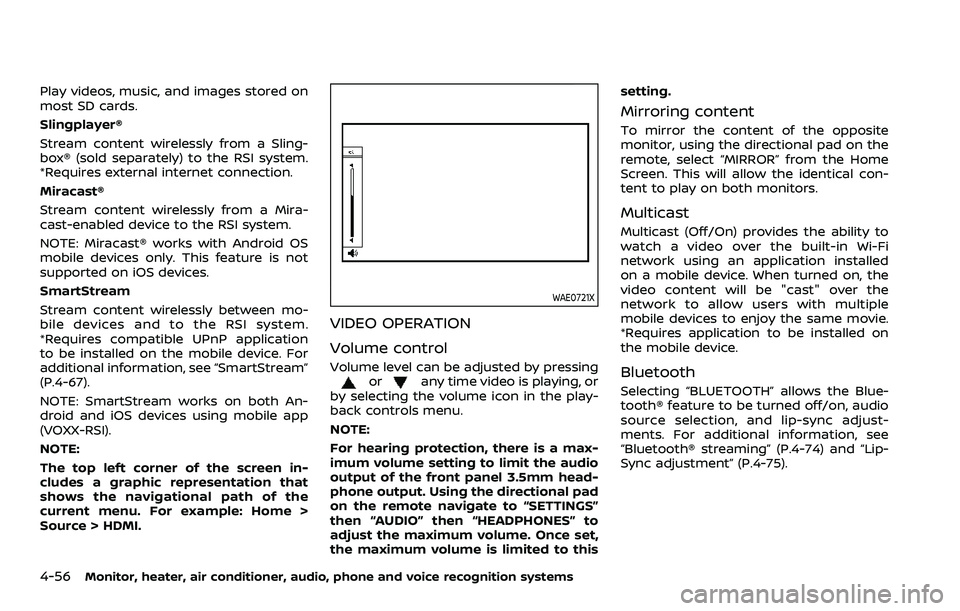
Volume level can be adjusted by pressingorany time video is playing, or
by selecting the volume icon in the play-
back controls menu.
NOTE:
For hearing protection, there is a max-
imum volume setting to limit the audio
output of the front panel 3.5mm head-
phone output. Using the directional pad
on the remote navigate to “SETTINGS”
then “AUDIO” then “HEADPHONES” to
adjust the maximum volume. Once set,
the maximum volume is limited to this setting.
Mirroring content
To mirror the content of the opposite
monitor, using the directional pad on the
remote, select “MIRROR” from the Home
Screen. This will allow the identical con-
tent to play on both monitors.
Multicast
Multicast (Off/On) provides the ability to
watch a video over the built-in Wi-Fi
network using an application installed
on a mobile device. When turned on, the
video content will be "cast" over the
network to allow users with multiple
mobile devices to enjoy the same movie.
*Requires application to be installed on
the mobile device.
Bluetooth
Selecting “BLUETOOTH” allows the Blue-
tooth® feature to be turned off/on, audio
source selection, and lip-sync adjust-
ments. For additional information, see
“Bluetooth® streaming” (P.4-74) and “Lip-
Sync adjustment” (P.4-75).
Page 289 of 604

Basic navigation
USB and SD card are characterized by
three different categories which are vi-
deos, music, and photos. Each media type
will show a preview of the available
content. After selecting a media type,
navigate the content, and select the
desired file or photo. When a media item
is highlighted, the preview image is en-
larged and surrounded by a white border.
If available, the item’s metadata (video
title, filename, or photo name) will be
displayed in the information bar at the
bottom of the screen.
Context menu
Presson the remote while navigating
content to open the context menu. The
context menu provides options to adjust
the page view, sorting, and searching. The
options will vary, depending on the con-
tent. Press
to select or toggle the
highlighted item on the menu. Press
to exit the context menu.
WAE0726X
Page view — music and videos
Using the directional pad on the remote,
select “PAGE VIEW” to change between
List or Grid. List provides an alphanumeric
text listing of all content, whereas Grid
provides an alphanumeric thumbnail gra-
phic view of the content.
Page view — photos
Using the directional pad on the remote,
select “PAGE VIEW” to change between
Grid, Overview, Slideshow, or Full Screen.
Grid provides a large thumbnail graphic
view, whereas Overview provides a small
thumbnail graphic view of the content.
Slideshow will play photos in sequence
and Full Screen fills the entire screen.
Monitor, heater, air conditioner, audio, phone and voice recognition systems4-59
Page 295 of 604
WAE0733X
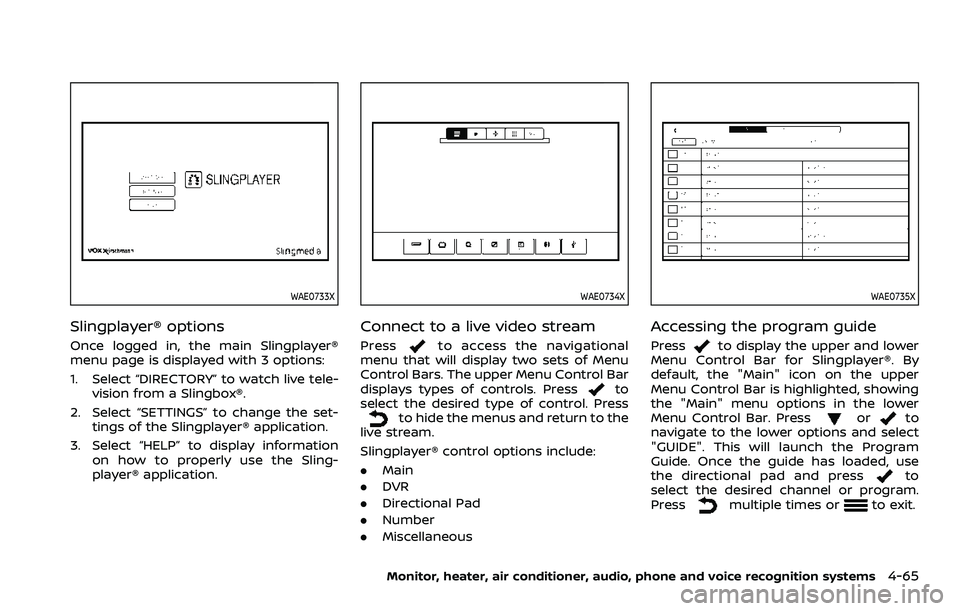
Slingplayer® options
Once logged in, the main Slingplayer®
menu page is displayed with 3 options:
1. Select “DIRECTORY” to watch live tele-vision from a Slingbox®.
2. Select “SETTINGS” to change the set- tings of the Slingplayer® application.
3. Select “HELP” to display information on how to properly use the Sling-
player® application.
WAE0734X
Connect to a live video stream
Pressto access the navigational
menu that will display two sets of Menu
Control Bars. The upper Menu Control Bar
displays types of controls. Press
to
select the desired type of control. Press
to hide the menus and return to the
live stream.
Slingplayer® control options include:
. Main
. DVR
. Directional Pad
. Number
. Miscellaneous
WAE0735X
Accessing the program guide
Pressto display the upper and lower
Menu Control Bar for Slingplayer®. By
default, the "Main" icon on the upper
Menu Control Bar is highlighted, showing
the "Main" menu options in the lower
Menu Control Bar. Press
orto
navigate to the lower options and select
"GUIDE". This will launch the Program
Guide. Once the guide has loaded, use
the directional pad and press
to
select the desired channel or program.
Press
multiple times orto exit.
Monitor, heater, air conditioner, audio, phone and voice recognition systems4-65
Page 335 of 604
SPA2331
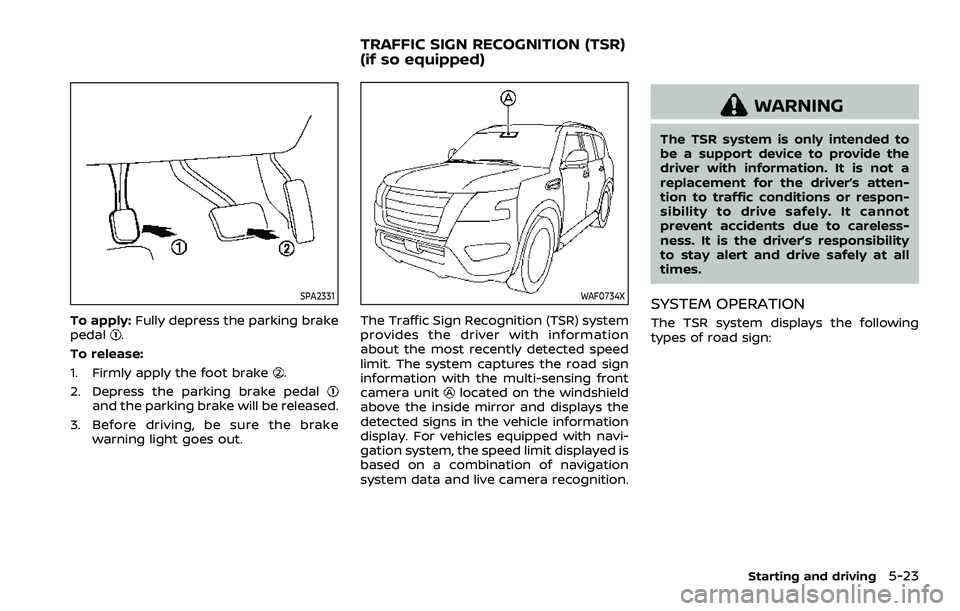
To apply:Fully depress the parking brake
pedal.
To release:
1. Firmly apply the foot brake
.
2. Depress the parking brake pedal
and the parking brake will be released.
3. Before driving, be sure the brake warning light goes out.
WAF0734X
The Traffic Sign Recognition (TSR) system
provides the driver with information
about the most recently detected speed
limit. The system captures the road sign
information with the multi-sensing front
camera unit
located on the windshield
above the inside mirror and displays the
detected signs in the vehicle information
display. For vehicles equipped with navi-
gation system, the speed limit displayed is
based on a combination of navigation
system data and live camera recognition.
WARNING
The TSR system is only intended to
be a support device to provide the
driver with information. It is not a
replacement for the driver’s atten-
tion to traffic conditions or respon-
sibility to drive safely. It cannot
prevent accidents due to careless-
ness. It is the driver’s responsibility
to stay alert and drive safely at all
times.
SYSTEM OPERATION
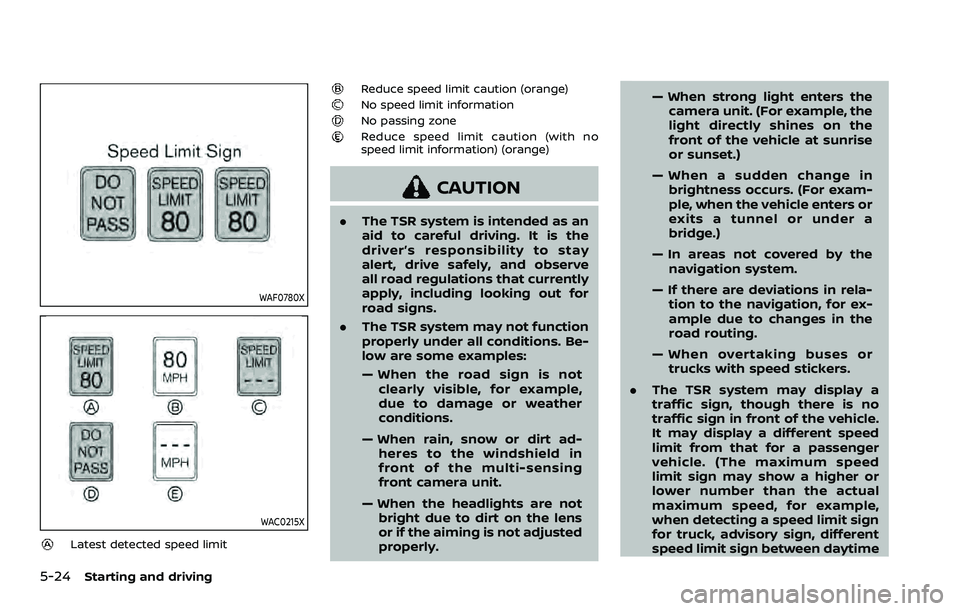
The TSR system displays the following
types of road sign:
Starting and driving5-23
TRAFFIC SIGN RECOGNITION (TSR)
(if so equipped)
Page 336 of 604
5-24Starting and driving
WAF0780X
WAC0215X
Latest detected speed limit
Reduce speed limit caution (orange)No speed limit informationNo passing zoneReduce speed limit caution (with no
speed limit information) (orange)
CAUTION
.The TSR system is intended as an
aid to careful driving. It is the
driver’s responsibility to stay
alert, drive safely, and observe
all road regulations that currently
apply, including looking out for
road signs.
. The TSR system may not function
properly under all conditions. Be-
low are some examples:
— When the road sign is not
clearly visible, for example,
due to damage or weather
conditions.
— When rain, snow or dirt ad- heres to the windshield in
front of the multi-sensing
front camera unit.
— When the headlights are not bright due to dirt on the lens
or if the aiming is not adjusted
properly. — When strong light enters the
camera unit. (For example, the
light directly shines on the
front of the vehicle at sunrise
or sunset.)
— When a sudden change in brightness occurs. (For exam-
ple, when the vehicle enters or
exits a tunnel or under a
bridge.)
— In areas not covered by the navigation system.
— If there are deviations in rela- tion to the navigation, for ex-
ample due to changes in the
road routing.
— When overtaking buses or trucks with speed stickers.
. The TSR system may display a
traffic sign, though there is no
traffic sign in front of the vehicle.
It may display a different speed
limit from that for a passenger
vehicle. (The maximum speed
limit sign may show a higher or
lower number than the actual
maximum speed, for example,
when detecting a speed limit sign
for truck, advisory sign, different
speed limit sign between daytime
Page 435 of 604
Follow these easy-to-use Fuel Efficient
Driving Tips to help you achieve the most
fuel economy from your vehicle.
1. Use smooth accelerator and brakepedal application.
.Avoid rapid starts and stops..Use smooth, gentle accelerator andbrake application whenever possi-
ble.
.Maintain constant speed whilecommuting and coast whenever
possible.
2. Maintain constant speed.
.Look ahead to try and anticipate and minimize stops.
.Synchronizing your speed with traf-fic lights allows you to reduce your
number of stops.
.Maintaining a steady speed canminimize red light stops and im-
prove fuel efficiency.
3. Use air conditioning (A/C) at higher vehicle speeds.
.Below 40 MPH (64 km/h), it is moreefficient to open windows to cool
the vehicle due to reduced engine
load.
.Above 40 MPH (64 km/h), it is more
efficient to use A/C to cool the
vehicle due to increased aerody-
namic drag.
.Recirculating the cool air in thecabin when the A/C is on reduces
cooling load.
4. Drive at economical speeds and dis- tances.
.Observing the speed limit and notexceeding 60 MPH (97 km/h)
(where legally allowed) can improve
fuel efficiency due to reduced aero-
dynamic drag.
.Maintaining a safe following dis-tance behind other vehicles re-
duces unnecessary braking.
.Safely monitoring traffic to antici- pate changes in speed permits
reduced braking and smooth accel-
eration changes.
.Select a gear range suitable to roadconditions.
5. Use cruise control.
.Using cruise control during highway driving helps maintain a steady
speed.
.Cruise control is particularly effec-tive in providing fuel savings when
driving on flat terrains.
6. Plan for the shortest route.
.Utilize a map or navigation system to determine the best route to save
time. 7. Avoid idling.
.Shutting off your engine when safe
for stops exceeding 30-60 seconds
saves fuel and reduces emissions.
8. Buy an automated pass for toll roads.
.Automated passes permit drivers to use special lanes to maintain cruis-
ing speed through the toll and
avoid stopping and starting.
9. Winter warm up.
.Limit idling time to minimize impact to fuel economy.
.Vehicles typically need no morethan 30 seconds of idling at start-
up to effectively circulate the en-
gine oil before driving.
.Your vehicle will reach its ideal
operating temperature more
quickly while driving versus idling.
10. Keeping your vehicle cool.
.Park your vehicle in a covered parking area or in the shade when-
ever possible.
.When entering a hot vehicle, open- ing the windows will help to reduce
the inside temperature faster, re-
sulting in reduced demand on your
A/C system.
Starting and driving5-123
FUEL EFFICIENT DRIVING TIPS