2022 NISSAN ARMADA engine
[x] Cancel search: enginePage 441 of 604
.If it is difficult to free the vehicle,
repeat forward and backward move-
ment to increase the movement.
. If the vehicle is stuck deep in mud, tire
chains may be effective.
CAUTION
.Do not spin the tires excessively.
Tires will sink deep into the mud,
making it difficult to free the
vehicle.
. Avoid shifting gears with the en-
gine running at high speeds as
this may cause malfunction.
SSD1048
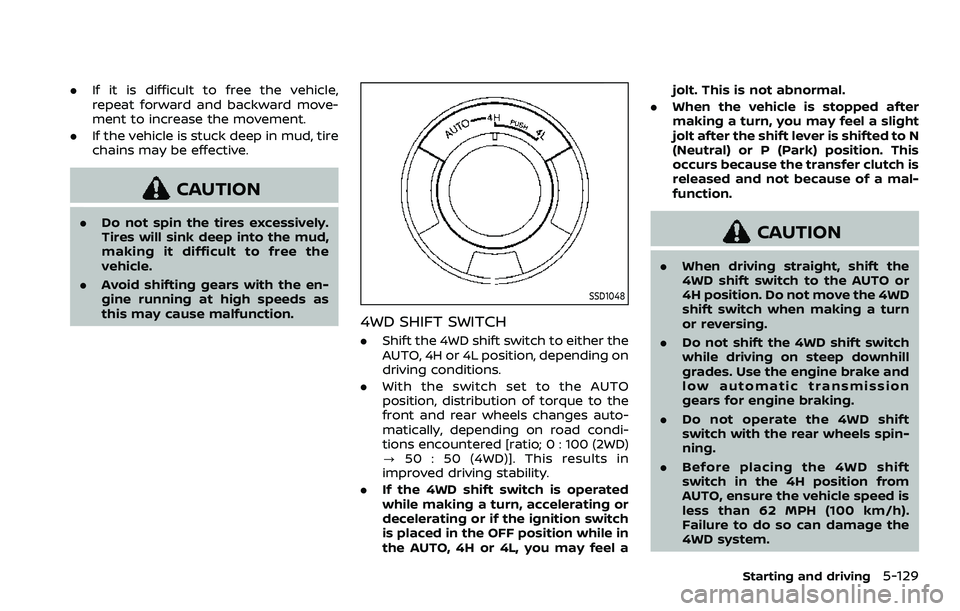
4WD SHIFT SWITCH
.Shift the 4WD shift switch to either the
AUTO, 4H or 4L position, depending on
driving conditions.
. With the switch set to the AUTO
position, distribution of torque to the
front and rear wheels changes auto-
matically, depending on road condi-
tions encountered [ratio; 0 : 100 (2WD)
? 50 : 50 (4WD)]. This results in
improved driving stability.
. If the 4WD shift switch is operated
while making a turn, accelerating or
decelerating or if the ignition switch
is placed in the OFF position while in
the AUTO, 4H or 4L, you may feel a jolt. This is not abnormal.
. When the vehicle is stopped after
making a turn, you may feel a slight
jolt after the shift lever is shifted to N
(Neutral) or P (Park) position. This
occurs because the transfer clutch is
released and not because of a mal-
function.
CAUTION
.When driving straight, shift the
4WD shift switch to the AUTO or
4H position. Do not move the 4WD
shift switch when making a turn
or reversing.
. Do not shift the 4WD shift switch
while driving on steep downhill
grades. Use the engine brake and
low automatic transmission
gears for engine braking.
. Do not operate the 4WD shift
switch with the rear wheels spin-
ning.
. Before placing the 4WD shift
switch in the 4H position from
AUTO, ensure the vehicle speed is
less than 62 MPH (100 km/h).
Failure to do so can damage the
4WD system.
Starting and driving5-129
Page 442 of 604
5-130Starting and driving
.Never shift the 4WD shift switch
between 4L and 4H while driving.
. Engine idling speed is high while
warming up the engine. Be espe-
cially careful when starting or
driving on slippery surfaces with
the 4WD shift switch in AUTO.
SSD1058
4WD shift indicator
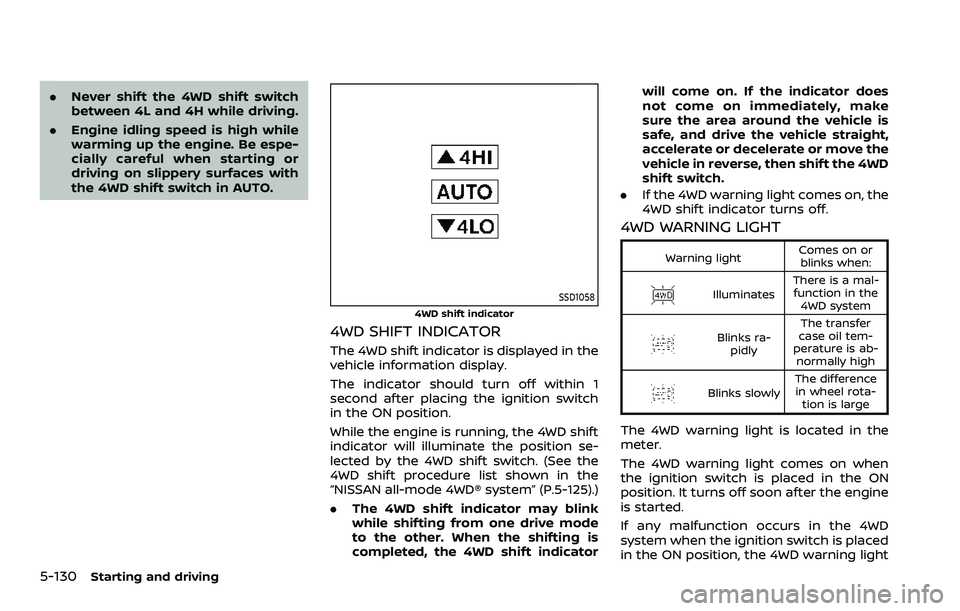
4WD SHIFT INDICATOR
The 4WD shift indicator is displayed in the
vehicle information display.
The indicator should turn off within 1
second after placing the ignition switch
in the ON position.
While the engine is running, the 4WD shift
indicator will illuminate the position se-
lected by the 4WD shift switch. (See the
4WD shift procedure list shown in the
“NISSAN all-mode 4WD® system” (P.5-125).)
.The 4WD shift indicator may blink
while shifting from one drive mode
to the other. When the shifting is
completed, the 4WD shift indicator will come on. If the indicator does
not come on immediately, make
sure the area around the vehicle is
safe, and drive the vehicle straight,
accelerate or decelerate or move the
vehicle in reverse, then shift the 4WD
shift switch.
. If the 4WD warning light comes on, the
4WD shift indicator turns off.
4WD WARNING LIGHT
Warning light Comes on or
blinks when:
Illuminates There is a mal-
function in the 4WD system
Blinks ra- pidly The transfer
case oil tem-
perature is ab- normally high
Blinks slowly The difference
in wheel rota- tion is large
The 4WD warning light is located in the
meter.
The 4WD warning light comes on when
the ignition switch is placed in the ON
position. It turns off soon after the engine
is started.
If any malfunction occurs in the 4WD
system when the ignition switch is placed
in the ON position, the 4WD warning light
Page 445 of 604

SD1006MA
WARNING
.Do not stop or park the vehicle
over flammable materials such as
dry grass, waste paper or rags.
They may ignite and cause a fire.
. Never leave the engine running
while the vehicle is unattended.
. Do not leave children unattended
inside the vehicle. They could
unknowingly activate switches
or controls. Unattended children
could become involved in serious
accidents. .
To help avoid risk of injury or
death through unintended opera-
tion of the vehicle and/or its
systems, do not leave children,
people who require the assis-
tance of others or pets unat-
tended in your vehicle.
Additionally, the temperature in-
side a closed vehicle on a warm
day can quickly become high
enough to cause a significant risk
of injury or death to people and
pets.
. Safe parking procedures require
that both the parking brake be
applied and the transmission be placed in the P (Park) position.
Failure to do so could cause the
vehicle to move unexpectedly or
roll away and result in an acci-
dent.
. Make sure the automatic trans-
mission shift lever has been
pushed as far forward as it can
go and cannot be moved without
depressing the foot brake pedal.
1. Firmly apply the parking brake.
2. Move the shift lever to the P (Park) position.
3. To help prevent the vehicle from roll- ing into the street when parked on a
sloping drive way, it is a good practice
to turn the wheels as illustrated..HEADED DOWNHILL WITH CURB:
Turn the wheels into the curb and
move the vehicle forward until the
curb side wheel gently touches the
curb.
.HEADED UPHILL WITH CURB:
Turn the wheels away from the curb
and move the vehicle back until the
curb side wheel gently touches the
curb.
.HEADED UPHILL OR DOWNHILL, NOCURB:
Starting and driving5-133
PARKING/PARKING ON HILLS
Page 446 of 604
5-134Starting and driving
Turn the wheels toward the side of
the road so the vehicle will move away
from the center of the road if it moves.
4. Push the ignition switch to the OFF position.
SIC4474
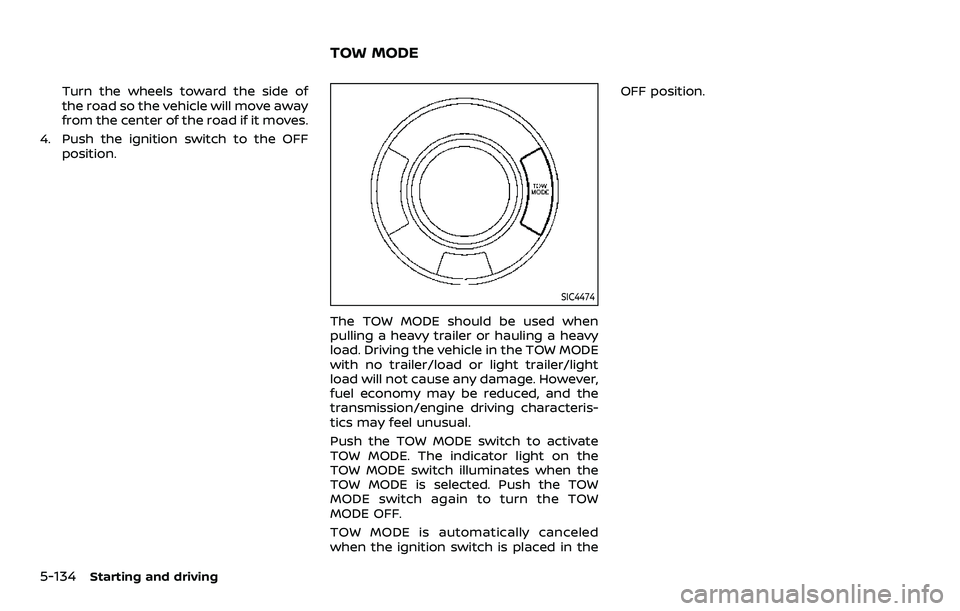
The TOW MODE should be used when
pulling a heavy trailer or hauling a heavy
load. Driving the vehicle in the TOW MODE
with no trailer/load or light trailer/light
load will not cause any damage. However,
fuel economy may be reduced, and the
transmission/engine driving characteris-
tics may feel unusual.
Push the TOW MODE switch to activate
TOW MODE. The indicator light on the
TOW MODE switch illuminates when the
TOW MODE is selected. Push the TOW
MODE switch again to turn the TOW
MODE OFF.
TOW MODE is automatically canceled
when the ignition switch is placed in the OFF position.
TOW MODE
Page 447 of 604
SIC4454
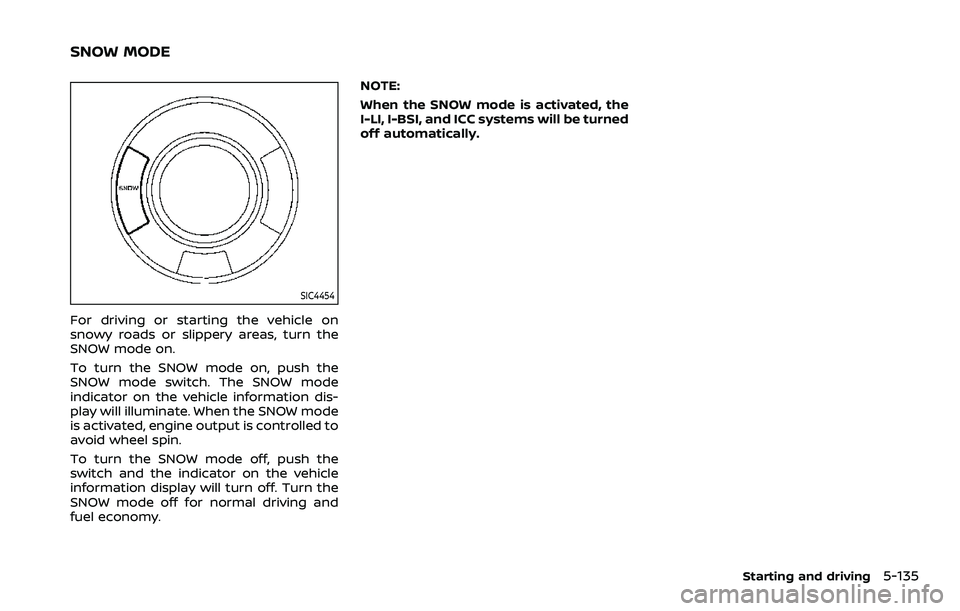
For driving or starting the vehicle on
snowy roads or slippery areas, turn the
SNOW mode on.
To turn the SNOW mode on, push the
SNOW mode switch. The SNOW mode
indicator on the vehicle information dis-
play will illuminate. When the SNOW mode
is activated, engine output is controlled to
avoid wheel spin.
To turn the SNOW mode off, push the
switch and the indicator on the vehicle
information display will turn off. Turn the
SNOW mode off for normal driving and
fuel economy.NOTE:
When the SNOW mode is activated, the
I-LI, I-BSI, and ICC systems will be turned
off automatically.
Starting and driving5-135
SNOW MODE
Page 453 of 604
— When driving on a steep hill.
SYSTEM TEMPORARILY UNAVAIL-
ABLE
When sonar blockage is detected, the
system will be deactivated automatically.
The system is not available until the
conditions no longer exist.
The sonar sensors may be blocked by
temporary ambient conditions such as
splashing water, mist or fog. The blocked
condition may also be caused by objects
such as ice, frost or dirt obstructing the
sonar sensors.
Action to take:
When the above conditions no longer
exist, the system will resume automati-
cally.
SYSTEM MAINTENANCE
The sonar sensors are located on the
front and rear bumpers. (See “Exterior
front” (P.0-3) and “Exterior rear” (P.0-4).)
.Always keep the area near the sonar
sensors clean.
. If the sonar sensors are dirty, wipe
them off with a soft cloth while being
careful to not damage them.
. The sonar sensors may be blocked by
temporary ambient conditions such as splashing water, mist or fog. The
blocked condition may also be caused
by objects such as ice, frost or dirt
obstructing the sonar sensors. Check
for and remove objects obstructing
the area around the sonar sensors.
. Do not subject the area around the
sonar sensors to strong impact. Also,
do not remove or disassemble the
sonar sensors. If the sonar sensors
and peripheral areas are deformed in
an accident, etc., have the sonar
sensors checked by a NISSAN dealer.
. Do not attach stickers (including
transparent material), install acces-
sories or apply additional paint on
the sonar sensors and their surround-
ing areas. This may cause a malfunc-
tion or improper operation.
. When washing the vehicle using a
high-pressure washer, do not apply
direct washer pressure on the sonar
sensors. This may cause a malfunction
of the sonar sensors.
WARNING
If the engine is not running or is
turned off while driving, the power
assist for the steering will not work.
Steering will be harder to operate.
The power assisted steering uses a hy-
draulic pump, driven by the engine, to
assist steering.
If the engine stops or the drive belt
breaks, you will still have control of the
vehicle. However, much greater steering
effort is needed, especially in sharp turns
and at low speeds.
Starting and driving5-141
POWER STEERING
Page 454 of 604
5-142Starting and driving
BRAKING PRECAUTIONS
The brake system has two separate
hydraulic circuits. If one circuit malfunc-
tions, you will still have braking ability at
two wheels.
You may feel a small click and hear a
sound when the brake pedal is fully
depressed slowly. This is not a malfunc-
tion and indicates that the brake assist
mechanism is operating properly.
Hydraulically-assisted brakes
The hydraulically-assisted brake system is
designed to use a hydraulic pump driven
electrically, to assist braking. If the engine
stops, you can stop the vehicle by de-
pressing the foot brake pedal. However,
greater foot pressure on the foot brake
pedal will be required to stop the vehicle.
The stopping distance will be longer.
Wet brakes
When the vehicle is washed or driven
through water, the brakes may get wet.
As a result, your braking distance will be
longer and the vehicle may pull to one
side during braking.
To dry brakes, drive the vehicle at a safe
speed while lightly tapping the brake
pedal to heat-up the brakes. Do this until
the brakes return to normal. Avoid driving
the vehicle at high speeds until the brakesfunction correctly.
PARKING BRAKE BREAK-IN
Break in the parking brake shoes when-
ever the stopping effect of the parking
brake is weakened or whenever the
parking brake shoes and/or drums/ro-
tors are replaced, in order to assure the
best braking performance.
This procedure is described in the vehicle
service manual. It is recommended you
visit a NISSAN dealer for this service.
Using the brakes
Avoid resting your foot on the brake
pedal while driving. This will cause over-
heating of the brakes, wearing out the
brake and pads faster and reduce gas
mileage.
To help save the brakes and to prevent
the brakes from overheating, reduce
speed and downshift to a lower gear
before going down a slope or long grade.
Overheated brakes may reduce braking
performance and could result in loss of
vehicle control.
WARNING
.
While driving on a slippery sur-
face, be careful when braking,
accelerating or downshifting. Abrupt braking or accelerating
could cause the wheels to skid
and result in an accident.
. If the engine is not running or is
turned off while driving, the
power assist for the brakes will
not work. Braking will be harder.
BRAKE SYSTEM
Page 455 of 604

BRAKE ASSIST
When the force applied to the brake pedal
exceeds a certain level, the Brake Assist is
activated generating greater braking
force than a conventional brake booster
even with light pedal force.
WARNING
The Brake Assist is only an aid to
assist braking operation and is not a
collision warning or avoidance de-
vice. It is the driver’s responsibility to
stay alert, drive safely and be in
control of the vehicle at all times.
ANTI-LOCK BRAKING SYSTEM (ABS)
WARNING
.The Anti-lock Braking System
(ABS) is a sophisticated device,
but it cannot prevent accidents
resulting from careless or dan-
gerous driving techniques. It can
help maintain vehicle control dur-
ing braking on slippery surfaces.
Remember that stopping dis-
tances on slippery surfaces will
be longer than on normal sur- faces even with ABS. Stopping
distances may also be longer on
rough, gravel or snow covered
roads, or if you are using tire
chains. Always maintain a safe
distance from the vehicle in front
of you. Ultimately, the driver is
responsible for safety.
. Tire type and condition may also
affect braking effectiveness.
— When replacing tires, install
the specified size of tires on
all four wheels.
— When installing a spare tire, make sure that it is the proper
size and type as specified on
the Tire and Loading Informa-
tion label. See “Tire and load-
ing information label” (P.10-
13).
— For detailed information, see “Wheels and tires” (P.8-28).
The Anti-lock Braking System (ABS) con-
trols the brakes so the wheels do not lock
during hard braking or when braking on
slippery surfaces. The system detects the
rotation speed at each wheel and varies
the brake fluid pressure to prevent each
wheel from locking and sliding. By pre-
venting each wheel from locking, the system helps the driver maintain steering
control and helps to minimize swerving
and spinning on slippery surfaces.
Using the system
Depress the brake pedal and hold it down.
Depress the brake pedal with firm steady
pressure, but do not pump the brakes.
The ABS will operate to prevent the
wheels from locking up. Steer the vehicle
to avoid obstacles.
WARNING
Do not pump the brake pedal. Doing
so may result in increased stopping
distances.
Self-test feature
The ABS includes electronic sensors, elec-
tric pumps, hydraulic solenoids and a
computer. The computer has a built-in
diagnostic feature that tests the system
each time you start the engine and move
the vehicle at a low speed in forward or
reverse. When the self-test occurs, you
may hear a “clunk” noise and/or feel a
pulsation in the brake pedal. This is
normal and does not indicate a malfunc-
tion. If the computer senses a malfunc-
tion, it switches the ABS off and
Starting and driving5-143
BRAKE ASSIST