2022 NISSAN ARMADA seats
[x] Cancel search: seatsPage 110 of 604
2-16Instruments and controls
For front passenger air bag status light
operation, see “NISSAN Advanced Air Bag
System (front seats)” (P.1-61).
Four-Wheel Drive (4WD) warn-
ing light (4WD models)
Thewarning light comes on when the
ignition switch is placed in the ON posi-
tion. It turns off soon after the engine is
started.
If the 4WD system malfunctions, or the
diameter of the front and the rear wheels
are different, the warning light will either
remain illuminated or blink. (See “NISSAN
all-mode 4WD®” (P.5-124).)
CAUTION
. If the warning light comes on
while driving there may be a
malfunction in the 4WD system.
Reduce the vehicle speed and
have your vehicle checked as
soon as possible. It is recom-
mended you visit a NISSAN dealer
for this service.
. If the 4WD warning light turns on
when driving on dry or hard
surfaced roads: — in the 4H(I) position, shift the
4WD shift switch to AUTO
— in the 4L(O) position, stop the vehicle and shift the transmis-
sion shift lever to the N (Neu-
tral) position and shift the
4WD shift switch to AUTO
. If the warning light is still on after
the above operations, have your
vehicle checked as soon as pos-
sible. It is recommended you visit
a NISSAN dealer for this service.
Low tire pressure warning
light
Your vehicle is equipped with a Tire
Pressure Monitoring System (TPMS) that
monitors the tire pressure of all tires
except the spare.
The low tire pressure warning light warns
of low tire pressure or indicates that the
TPMS is not functioning properly.
After the ignition switch is placed in the
ON position, this light illuminates for
about 1 second and turns off.
Low tire pressure warning:
If the vehicle is being driven with low tire
pressure, the warning light will illuminate.
The “Tire Pressure Low Add Air” warning also appears in the vehicle information
display. If you select the tire pressure
information in the vehicle information
display, the Low Pressure information will
be displayed. The tire pressure for each
tire will also be displayed.
When the low tire pressure warning light
illuminates, you should stop and adjust
the tire pressure to the recommended
COLD tire pressure shown on the Tire and
Loading Information label. The low tire
pressure warning light does not automa-
tically turn off when the tire pressure is
adjusted. After the tire is inflated to the
recommended pressure, the vehicle must
be driven at speeds above 16 MPH (25
km/h) to activate the TPMS and turn off
the low tire pressure warning light. Use a
tire pressure gauge to check the tire
pressure.
The “Tire Pressure Low Add Air” warning
appears each time the ignition switch is
placed in the ON position as long as the
low tire pressure warning light remains
illuminated.
For additional information, see “Vehicle
information display” (P.2-20), “Tire Pres-
sure Monitoring System (TPMS)” (P.5-5)
and “Tire Pressure Monitoring System
(TPMS) ” (P.6-3).
Page 129 of 604
WARNING
Selecting “Dismiss Message” during a
stop within a trip temporarily dis-
misses the message for that stop
without turning the system off.
Alerts can be provided for other
stops during the trip. Selecting “Dis-
able Alert” turns off the Rear Door
Alert system for the remainder of a
trip and no audible alert will be
provided.
NOTE:
This system is disabled until the driver
enables it using the settings menu. See
“Vehicle settings” (P.2-24).
43. Check Rear Seat for all articles
When the rear door alert system is
enabled, this message appears when the
vehicle comes to a complete stop, the
shift lever is moved from the D (Drive) or R
(Reverse) position to P (Park) position, and
the driver exits the vehicle. This message
alerts the driver, after a period of time, to
check for items in the rear seat after the
audible alert has been provided. NOTE:
This rear door alert system is disabled
until a driver enables it using the rear
door alert switch.
For more details, see “Rear door alert”
(P.2-61).
44. Rear Seat Belt warning
This rear seat belt warning appears after
the ignition switch is pushed to the ON
position. If any of the rear passenger’s
seat belts is not fastened, the seat icon
illuminates in red to show which seat belt
is not fastened. The seat icon illuminates
in red until the corresponding rear pas-
senger’s seat belt is fastened. The warn-
ing will automatically turn off after
approximately 65 seconds. If so equipped,
the seat icon will turn gray (or green,
depending on the models) if the seat is
occupied and the passenger is buckled. If
a rear passenger seat belt is fastened
then unfastened at a vehicle speed less
than approximately 10 MPH (15 km/h), the
seat icon will illuminate. When the vehicle
speed exceeds approximately 10 MPH (15
km/h), the seat icon will blink and the
chime will sound. The warning will turn off
when a rear passenger seat belt is
fastened or automatically turn off ap-
proximately 65 seconds after the seat
belt is unfastened. For precautions on
seat belt usage, see “Seat belts” (P.1-20).The display of the rear seat belt warning
varies depending on the number of seats.
45. Malfunction See Owner’s Man-
ual (if so equipped)
This warning appears when the Traffic
Sign Recognition (TSR) system malfunc-
tions. (See “Traffic Sign Recognition (TSR)”
(P.5-23).)
46. System fault See Owner’s Man-
ual
This warning appears when the Rear
Automatic Braking (RAB) system malfunc-
tions. (See “Rear Automatic Braking (RAB)”
(P.5-116).)
47. Take a Break? indicator
This indicator appears when the Intelli-
gent Driver Alertness (I-DA) system detect
that the driver attention is decreasing.
(See “Intelligent Driver Alertness (I-DA)”
(P.5-114).)
48. Intelligent Driver Alertness (I-DA)
malfunction
This warning appears when the Intelli-
gent Driver Alertness (I-DA) system mal-
functions. (See “Intelligent Driver Alertness
(I-DA)” (P.5-114).)
Instruments and controls2-35
Page 149 of 604
indicator light will turn off.
NOTE:
If the surface temperature of the steer-
ing wheel is above 68°F (20°C) when the
switch is turned on, the system will not
heat the steering wheel. This is not a
malfunction.
SIC4444
To sound the horn, push the center pad
area of the steering wheel.
WARNING
Do not disassemble the horn. Doing
so could affect proper operation of
the supplemental front air bag sys-
tem. Tampering with the supple-
mental front air bag system may
result in serious personal injury.
WARNING
Do not use or allow occupants to use
the seat heater if you or the occu-
pants cannot monitor elevated seat
temperatures or have an inability to
feel pain in body parts that contact
the seat. Use of the seat heater by
such people could result in serious
injury.
CAUTION
.The battery could run down if the
seat heater is operated while the
engine is not running.
. Do not use the seat heater for
extended periods or when no one
is using the seat.
. Do not put anything on the seat
which insulates heat, such as a
blanket, cushion, seat cover, etc.
Otherwise, the seat may become
overheated.
. Do not place anything hard or
heavy on the seat or pierce it with
a pin or similar object. This may
result in damage to the heater.
Instruments and controls2-55
HORN HEATED SEATS (if so equipped)
Page 150 of 604
2-56Instruments and controls
.Any liquid spilled on the heated
seat should be removed immedi-
ately with a dry cloth.
. When cleaning the seat, never use
gasoline, thinner, or any similar
materials.
. If any malfunctions are found or
the heated seat does not operate,
turn the switch off and have the
system checked. It is recom-
mended you visit a NISSAN dealer
for this service.
WAC0524X
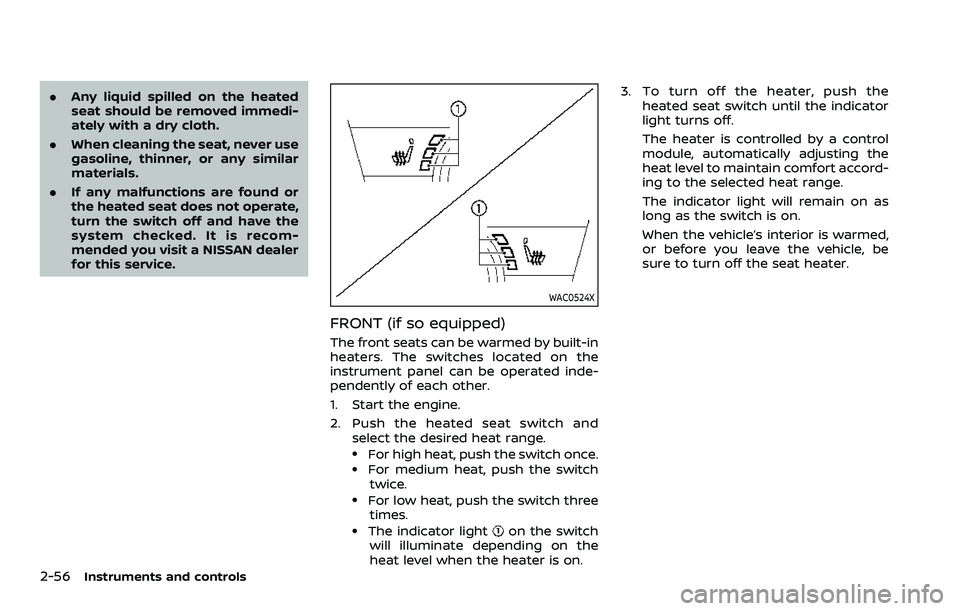
FRONT (if so equipped)
The front seats can be warmed by built-in
heaters. The switches located on the
instrument panel can be operated inde-
pendently of each other.
1. Start the engine.
2. Push the heated seat switch and
select the desired heat range.
.For high heat, push the switch once..For medium heat, push the switch
twice.
.For low heat, push the switch threetimes.
.The indicator lighton the switch
will illuminate depending on the
heat level when the heater is on. 3. To turn off the heater, push the
heated seat switch until the indicator
light turns off.
The heater is controlled by a control
module, automatically adjusting the
heat level to maintain comfort accord-
ing to the selected heat range.
The indicator light will remain on as
long as the switch is on.
When the vehicle’s interior is warmed,
or before you leave the vehicle, be
sure to turn off the seat heater.
Page 151 of 604

SIC2770
REAR (if so equipped)
The 2nd row outboard seats are warmed
by built-in heaters. The switches located
on the back side of the center console
can be operated independently of each
other.
1. Start the engine.
2. Select heat range.
For high heat, push the HI (High)
side of the switch.
For low heat, push the LO (Low) side
of the switch.
The indicator light in the switch
will
illuminate when the heater is on. 3. To turn off the heater, return the
switch to the level position. Make sure
the indicator light turns off.
The heater is controlled by a thermo-
stat, automatically turning the heater
on and off. The indicator light will
remain on as long as the switch is on.
When the vehicle’s interior is warmed,
or before you leave the vehicle, be
sure to turn off the switch.
WAC0640X
The climate controlled seat cools down
the front seats by blowing cool air from
the surface of the seat. The switches
located on the instrument panel can be
operated independently of each other.
1. Start the engine.
2. Push the climate controlled seatswitch to cool the seat. The indicator
light
on the corresponding switch
will illuminate depending on the cool
level.
3. Adjust the desired amount of air by pushing the switch again. The climate
controlled seat blower remains on low
speed for approximately 60 seconds
after pushing the switch on.
Instruments and controls2-57
CLIMATE CONTROLLED SEATS (if
so equipped)
Page 152 of 604
2-58Instruments and controls
4. When the vehicle’s interior is warmedor cooled, or before you leave the
vehicle, be sure to turn off the climate
controlled seats. To turn off the cli-
mate controlled seats, push the
switch until the indicator light turns
off.
To check the air filters for the climate
controlled seat, it is recommended
you visit a NISSAN dealer.
WARNING
Do not use or allow occupants to use
the climate controlled seats if you or
the occupants cannot monitor seat
temperatures or have an inability to
feel pain in those body parts in
contact with the seat. Use of the
climate controlled seats by such
people could result in serious injury.
CAUTION
.The battery could run down if the
climate controlled seat is oper-
ated while the engine is not run-
ning. .
Do not use the climate controlled
seat for extended periods or
when no one is using the seat.
. Do not put anything on the seat
which insulates heat, such as a
blanket, cushion, seat cover, etc.
Otherwise, the seat may become
overheated.
. Do not place anything hard or
heavy on the seat or pierce it with
a pin or similar object. This may
result in damage to the climate
controlled seat.
. Any liquid spilled on the seat
should be removed immediately
with a dry cloth.
. The climate controlled seat has
an air filter. Do not operate cli-
mate controlled seat without an
air filter. This may result in da-
mage to the system.
. When cleaning the seat, never use
gasoline, thinner, or any similar
materials.
. If any malfunctions are found or
the climate controlled seat does
not operate, turn the switch off
and have the system checked. It
is recommended you visit a
NISSAN dealer for this service.
SSD0956
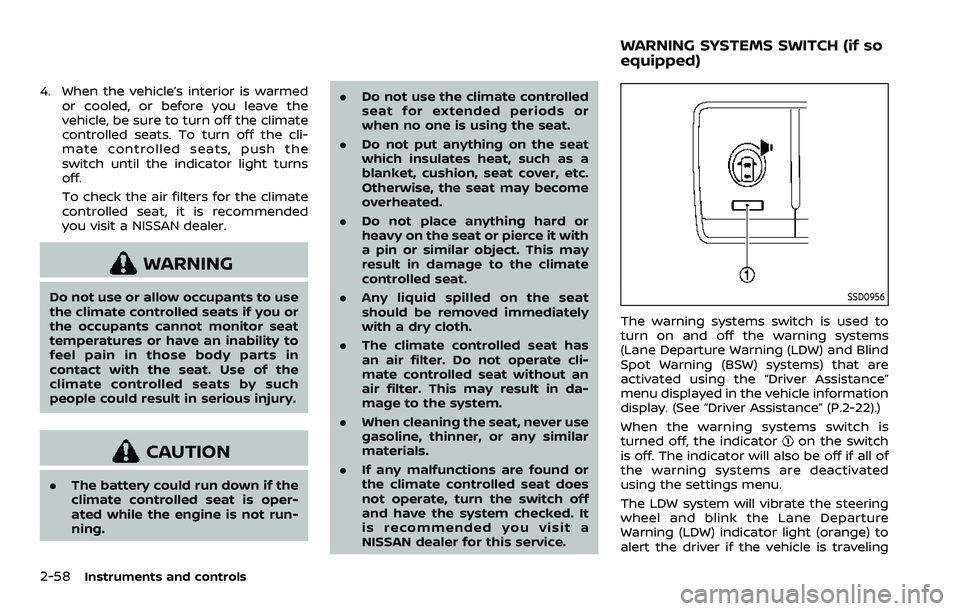
The warning systems switch is used to
turn on and off the warning systems
(Lane Departure Warning (LDW) and Blind
Spot Warning (BSW) systems) that are
activated using the “Driver Assistance”
menu displayed in the vehicle information
display. (See “Driver Assistance” (P.2-22).)
When the warning systems switch is
turned off, the indicator
on the switch
is off. The indicator will also be off if all of
the warning systems are deactivated
using the settings menu.
The LDW system will vibrate the steering
wheel and blink the Lane Departure
Warning (LDW) indicator light (orange) to
alert the driver if the vehicle is traveling
WARNING SYSTEMS SWITCH (if so
equipped)
Page 168 of 604
2-74Instruments and controls
more likely to be seriously injured
or killed.
. Do not allow people to ride in any
area of your vehicle that is not
equipped with seats and seat
belts.
. The child restraint top tether
strap may be damaged by con-
tact with items in the cargo area.
Secure any items in the cargo
area. Your child could be seriously
injured or killed in a collision if the
top tether strap is damaged.
. Be sure everyone in your vehicle
is in a seat and using a seat belt
properly.
CAUTION
Do not apply a total load of more
than 22 lb (10 kg)or 7 lb (3 kg)to
the hook.
JVI1204X
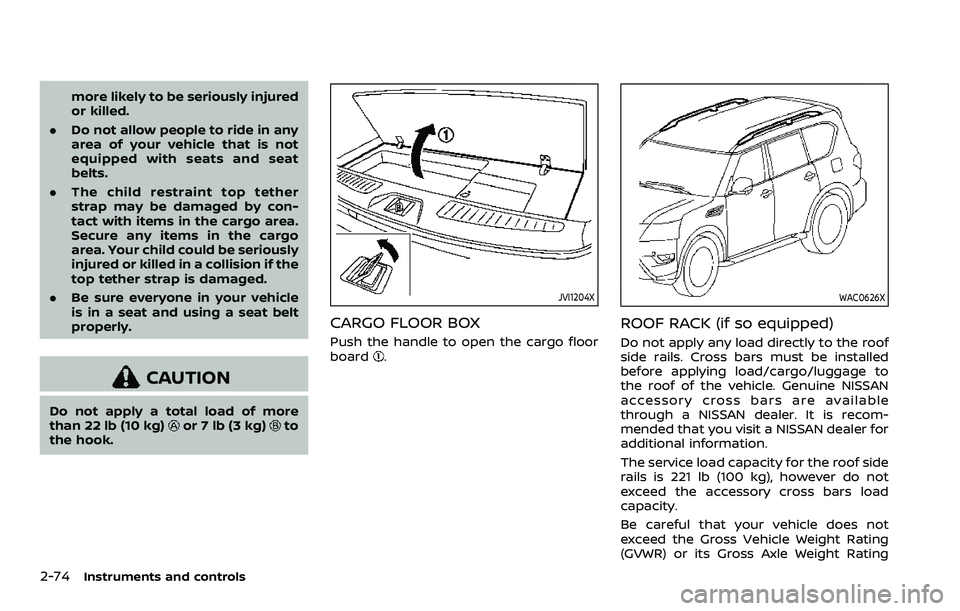
CARGO FLOOR BOX
Push the handle to open the cargo floor
board.
WAC0626X
ROOF RACK (if so equipped)
Do not apply any load directly to the roof
side rails. Cross bars must be installed
before applying load/cargo/luggage to
the roof of the vehicle. Genuine NISSAN
accessory cross bars are available
through a NISSAN dealer. It is recom-
mended that you visit a NISSAN dealer for
additional information.
The service load capacity for the roof side
rails is 221 lb (100 kg), however do not
exceed the accessory cross bars load
capacity.
Be careful that your vehicle does not
exceed the Gross Vehicle Weight Rating
(GVWR) or its Gross Axle Weight Rating
Page 229 of 604

Initialize entry/exit function
If the battery cable is disconnected, or if
the fuse opens, the entry/exit function
will not work though this function was set
on before. In such a case, after connect-
ing the battery or replacing with a new
fuse, open and close the driver’s door
more than two times after the ignition
switch is turned from the ON position to
the LOCK position. The entry/exit func-
tion will be activated.
MEMORY STORAGE
Two positions for the driver’s seat, steer-
ing column and outside mirrors can be
stored in the memory switch. Follow
these procedures to use the memory
system.
1. Move the shift lever to the P (Park)position.
2. Adjust the driver’s seat, steering col- umn and outside mirrors to the de-
sired positions by manually operating
each adjusting switch. For additional
information, see “Seats” (P.1-3) and
“Tilt/telescopic steering” (P.3-29) and
“Outside mirrors” (P.3-38).
3. Push the SET switch and, within 5 seconds, push the memory switch (1
or 2) fully for at least 1 second.
The indicator light for the pushed
memory switch will stay on for ap- proximately 5 seconds after pushing
the switch.
When the memory is stored in the
memory switch (1 or 2), a buzzer will
sound.
If memory is stored in the same
memory switch, the previous memory
will be deleted.
Linking Intelligent Key to a stored
memory position
The Intelligent Key can be linked to a
stored memory position with the follow-
ing procedure.
1. Follow the steps for storing a memory
position.
2. While the indicator light for the mem- ory switch being set is illuminated for
5 seconds, push the
button on the
Intelligent Key. If the indicator light
blinks, the Intelligent Key is linked to
that memory setting.
Push the ignition switch to the OFF
position, and then push the
button
on the Intelligent Key. The driver’s seat,
steering wheel and outside mirrors will
move to the memorized position.
Confirming memory storage
. Push the ignition switch to the ON
position and push the SET switch. If
the main memory has not been
stored, the indicator light will come
on for approximately 0.5 second.
When the memory has stored in posi-
tion, the indicator light will stay on for
approximately 5 seconds.
. If the battery cable is disconnected, or
if the fuse opens, the memory will be
canceled. In this case, reset the de-
sired position using the previous pro-
cedure.
. If optional Intelligent Keys are added
to your vehicle, the memory storage
procedure to switch 1 or 2 and linking
Intelligent Key procedure to a stored
memory position should be per-
formed again for each Intelligent Key.
For additional Intelligent Key informa-
tion, see “Keys” (P.3-2).
Selecting the memorized position
1. Move the shift lever to the P (Park)
position.
2. Use one of the following methods to move the driver’s seat, the outside
mirrors and the steering wheel.
.Push the memory switch (1 or 2)fully for at least 1 second.
Pre-driving checks and adjustments3-41