Page 52 of 241

belts in use to make sure they are correctly
latched. Remove any heavy objects (such as
a briefcase) from any unoccupied seats. If the
indicator remains on, contact a Lucid Service
Center .
In addition to the seat belt reminder, a graphic
of the seat layout displays on the left side of
the Cockpit Panel. The seat layout displays the detected occupied seats and the seat beltuse status.
When the seat location displays a green
indicator, it indicates that the seat
position is occupied and the seat belt
is fastened.
When a seat location displays a red seat
belt indicator, it indicates that the seat
position is occupied but the seat belt is
not fastened.
Using Seat Belts When PregnantWARNING: Pregnant women must
wear seat belts to protect themselves
and their unborn child.WARNING: Do not place anything
between you and the seat belt to
cushion the impact in the event of a
collision.
Wear the lap portion of the seat belt as low
as possible across the hips, not the waist.
Position the shoulder part of the belt between
the breasts and to the side of the abdomen.
Make sure that the seat belt has no slack and
is not twisted.
For any concerns about wearing seat belts,
consult with your physician.
Seat Belt Pre-tensionersWARNING: If a seat belt pre-tensioner
activates, it must be replaced. After
an impact or collision, even if there is
no obvious damage, always have the
seat belts checked and (if necessary)
replaced by a Lucid Service Center.
The seat belts for the front and outboard
rear seating positions are equipped with pre �)tensioners that work either independently
or in conjunction with the airbags in a severe
front or side-impact collision, depending upon
the severity of a crash.
Note: A pre-tensioner activates if the seat belt
is already buckled at the time of the collision.
The pre-tensioners automatically retract the
seat belts, reducing any slack in both the lap
and shoulder portions of the belts, thereby
reducing the forward movement of the seat
belt wearer.
The seat belt pre-tensioners can only activate
once before a Lucid Service Center must
replace them.
If a pre-tensioner activates, the
airbag warning indicator displays on
the Cockpit Panel.
Note: Even if the pre-tensioners activate, the
seat belts still function as restraints. Continue
to wear the seat belts if the vehicle remains in
a drivable condition.
Seating & Safety Restraints39
Page 68 of 241
Driver Information
Vehicle Information and Alerts
To access information about your vehicle,
select
> About Vehicle on the
Pilot Panel. This screen provides information
including:
1. Vehicle model
2. Vehicle Identification Number (VIN)
3. Vehicle software version
4. Alerts that were recently displayed on the Cockpit Panel
Note: If new alerts are available, a notification
badge appears on the
About Vehicle icon.
Trip Information
Trip information is displayed on the left
vehicle widget of the Cockpit Panel. To
reset or change the display, select
>
Vehicle on the Pilot Panel.
To change the trip displayed on the Cockpit Panel, select either "since last charge," "TRIPA," or "TRIP B".
There are two trip range memories available,
TRIP A and TRIP B. To reset either trip
memory, press the RESET button next to the
TRIP listing.
Driving & Operating55
Page 70 of 241
Center Cockpit Panel
Center Cockpit Panel - Overview
Note: The illustration below is for demonstration purposes. The information in your vehicle display
may have differences depending upon the current software version and market region.
1. Trip information area
2. Charge meter, see Charge and Power Meter on page 64
3. Power meter, see Charge and Power Meter on page 64
4. Turn signal indicators, see Turn Signals on page 74
5. Navigation widget
6. Odometer
7. Speedometer
8. Battery State of Charge indicator, see Battery State of Charge Indicator on page 64
9. Gear selection indicator, see Using the Drive Selector on page 69
10. Warning indicator
Driving & Operating57
Page 71 of 241
Warning Indicators
The following icons may be displayed on the Center Cockpit Panel to alert you to which features are
operating or if there are any systems with faults.
For further information, refer to the relevant section in this manual.Anti-lock Braking System (ABS) disabled or system fault detectedTire Pressure Management System (TPMS) low tire pressure (solid) or system fault
detected (
Page 77 of 241

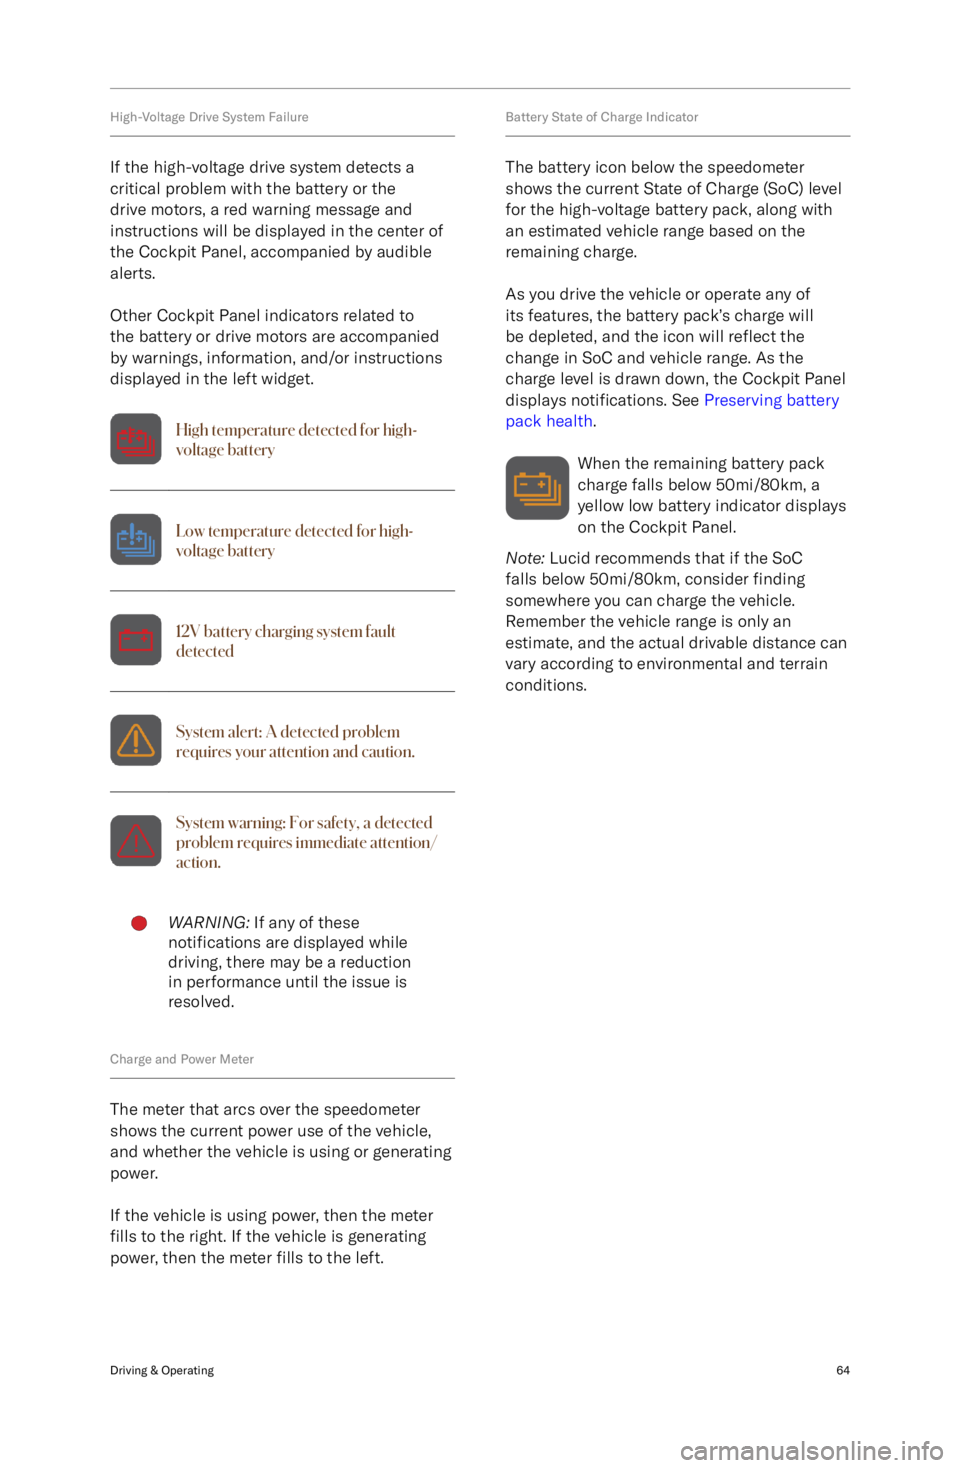
High-Voltage Drive System Failure
If the high-voltage drive system detects a
critical problem with the battery or the drive motors, a red warning message andinstructions will be displayed in the center of
the Cockpit Panel, accompanied by audible
alerts.
Other Cockpit Panel indicators related to
the battery or drive motors are accompanied
by warnings, information, and/or instructions
displayed in the left widget.High temperature detected for high-
voltage batteryLow temperature detected for high-
voltage battery12V battery charging system fault
detectedSystem alert: A detected problem
requires your attention and caution.System warning: For safety, a detected
problem requires immediate attention/
action.WARNING: If any of these
notifications are displayed while
driving, there may be a reduction
in performance until the issue is
resolved.
Charge and Power Meter
The meter that arcs over the speedometer
shows the current power use of the vehicle,
and whether the vehicle is using or generating
power.
If the vehicle is using power, then the meter
fills to the right. If the vehicle is generating
power, then the meter fills to the left.
Battery State of Charge Indicator
The battery icon below the speedometer
shows the current State of Charge (SoC) level
for the high-voltage battery pack, along with an estimated vehicle range based on the
remaining charge.
As you drive the vehicle or operate any of
its features, the battery pack
Page 82 of 241

Drive Selector
Using the Drive Selector
With the vehicle in P Park or N Neutral , move
the right steering column lever up or down to
select Reverse or Drive. The Center Cockpit
Panel shows the current selection. When in
Park, you must also press the brake pedal
before selecting D Drive or R Reverse.
Note: If you try to make a selection that is
prohibited due to the current vehicle speed,
a chime will sound and a message will be displayed on the Cockpit Panel.
R (Reverse)
Push the lever up and release to select R.
Reverse can only be selected when the vehicle
is stationary or its forward speed is less than
5 mph (8 km/h).
N (Neutral)
Allows the vehicle to roll freely unless the
brakes are applied. Push the lever up or down
from the currently selected gear and release
to select N.
D (Drive)
Push the lever down and release to select D.
You can only select Drive when the vehicle
is stationary or its speed is less than 5 mph
(8 km/h) in reverse.
P (Park)
When P is selected, the parking brake is automatically applied. With the vehicle
stationary, press the end of the gear selector
to select Park.
Note: P is automatically engaged when you
connect a charging cable to the charging port.
This is to prevent the vehicle frm moving while
still connected.
Note: If the vehicle is in D or R, P will
automatically be selected if you open the
driver
Page 86 of 241

Exterior Lights
Exterior Lights Control
The exterior vehicle lights are controlled using
the left lever on the steering column and the
left cockpit panel.
Touch the corresponding icon to operate the exterior lights as follows:
AUTO lightsPosition lightsLow beam headlights
AUTO lights
The low beam headlights will automatically switch On when the ambient light falls below
a pre-defined level. The front and rear position
lights, as well as the license plate lights, are
always on.
The headlights will switch Off when the
ambient light rises above that level.
Note: The lights will switch On whenever the
windshield wipers are operating.
Position lights The position (side marker) lights
indicator is displayed on the Cockpit
Panel whenever the position lights
are On.
Low beams
The low beam indicator is displayed
on the Cockpit Panel whenever the
low beams are On.
Daytime running lights
Note: The functionality and operation of
daytime running lights will vary according to
market requirements.
In regions that require the vehicle
Page 87 of 241

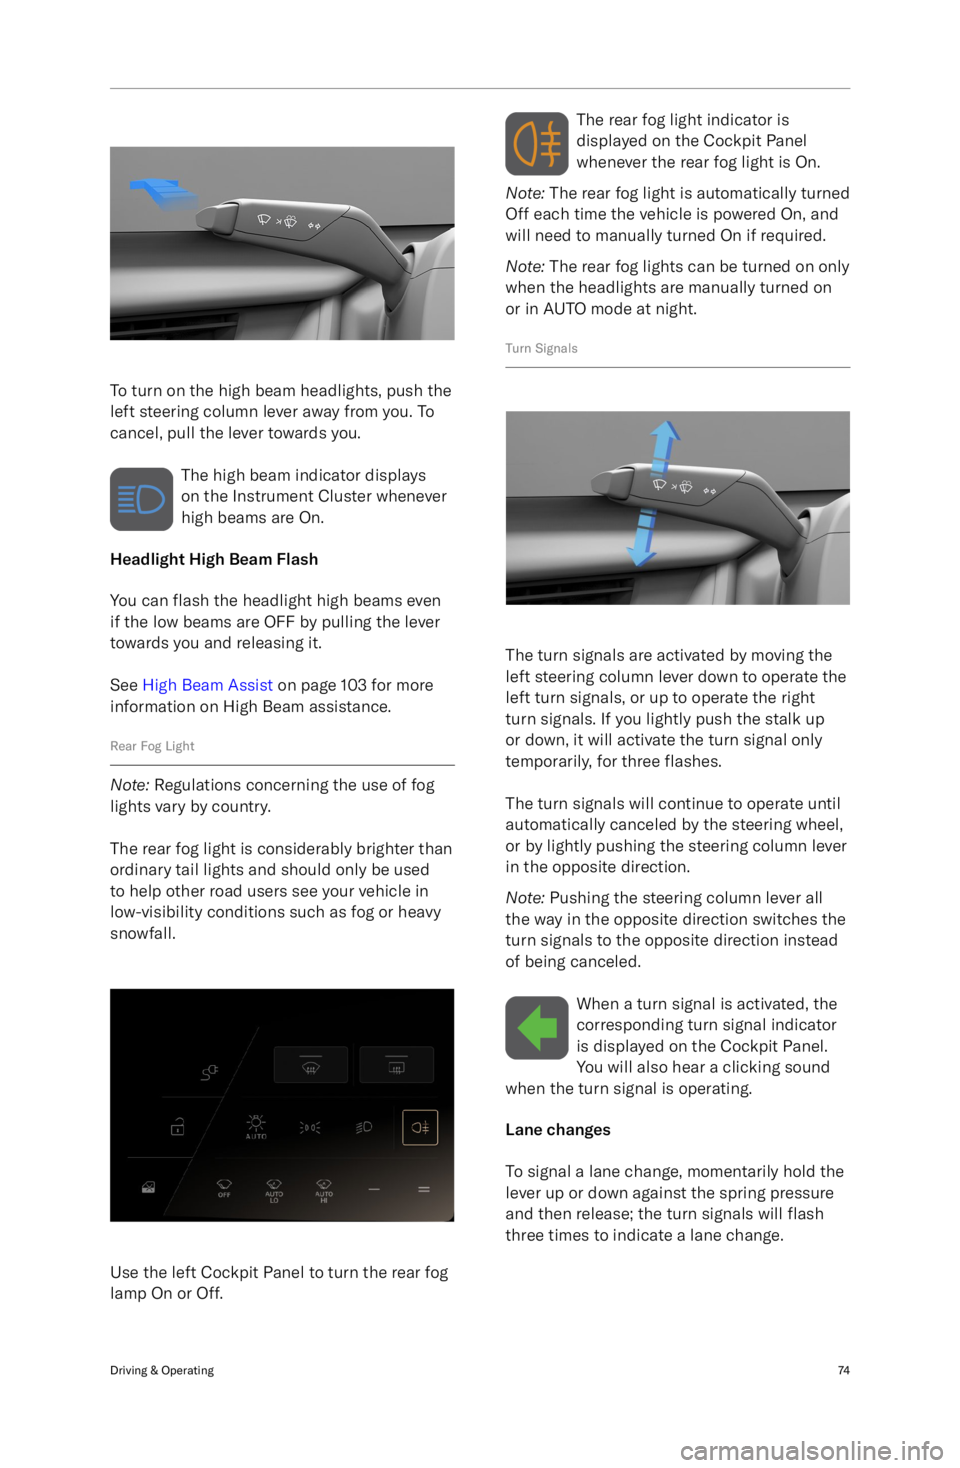
To turn on the high beam headlights, push the
left steering column lever away from you. To
cancel, pull the lever towards you.
The high beam indicator displays
on the Instrument Cluster whenever
high beams are On.
Headlight High Beam Flash
You can flash the headlight high beams even
if the low beams are OFF by pulling the lever
towards you and releasing it.
See High Beam Assist on page 103 for more
information on High Beam assistance.
Rear Fog Light
Note: Regulations concerning the use of fog
lights vary by country.
The rear fog light is considerably brighter than
ordinary tail lights and should only be used to help other road users see your vehicle in
low-visibility conditions such as fog or heavy
snowfall.
Use the left Cockpit Panel to turn the rear fog
lamp On or Off.
The rear fog light indicator is
displayed on the Cockpit Panel
whenever the rear fog light is On.
Note: The rear fog light is automatically turned
Off each time the vehicle is powered On, and
will need to manually turned On if required.
Note: The rear fog lights can be turned on only
when the headlights are manually turned on
or in AUTO mode at night.
Turn Signals
The turn signals are activated by moving the
left steering column lever down to operate the
left turn signals, or up to operate the right
turn signals. If you lightly push the stalk up
or down, it will activate the turn signal only
temporarily, for three flashes.
The turn signals will continue to operate until
automatically canceled by the steering wheel,
or by lightly pushing the steering column lever
in the opposite direction.
Note: Pushing the steering column lever all
the way in the opposite direction switches the
turn signals to the opposite direction instead
of being canceled.
When a turn signal is activated, thecorresponding turn signal indicator
is displayed on the Cockpit Panel.
You will also hear a clicking sound
when the turn signal is operating.
Lane changes
To signal a lane change, momentarily hold the
lever up or down against the spring pressure
and then release; the turn signals will flash
three times to indicate a lane change.
Driving & Operating74