2022 KIA SPORTAGE flat tire
[x] Cancel search: flat tirePage 471 of 630
What to do in an emergency
12
6
Changing a tire with TPMS
If you have a flat tire, the Low Tire
Pressure telltale will come on. Have
the flat tire repaired by an authorized
Kia dealer as soon as possible or
replace the flat tire with the spare
tire.
Each wheel is equipped with a tire
pressure sensor mounted inside the
tire behind the valve stem. You must
use TPMS specific wheels. It is rec-
ommended that you always have
your tires serviced by an authorized
Kia dealer. Even if you replace the low pressure
tire with the spare tire, the Low Tire
Pressure telltale will remain on until
the low pressure tire is repaired and
placed on the vehicle.
After you replace the low pressure
tire with the spare tire, the TPMS
malfunction indicator may illuminate
after a few minutes because the
TPMS sensor mounted on the spare
wheel is not initiated.
Once the low pressure tire is inflated
again to the recommended pressure
and installed on the vehicle or the
TPMS sensor mounted on the
replaced spare wheel is initiated by
an authorized Kia dealer, the TPMS
malfunction indicator and the low tire
pressure telltale will turn off within a
few minutes of driving.
If the indicator has not disappeared
after a few minutes of driving, please
visit an authorized Kia dealer.
If an original mounted tire is replaced
with the spare tire, the TPMS sensor
on the replaced spare wheel should
be initiated and the TPMS sensor on
the original mounted wheel should be
deactivated. If the TPMS sensor on
the original mounted wheel located in
the spare tire carrier still activates,
the tire pressure monitoring system
may not operate properly. Have the
tire with TPMS serviced or replaced
by an authorized Kia dealer.
CAUTION- Repair Agents
Never use a puncture-repairing
agent not approved by Kia torepair and/or inflate a low pres-sure tire. The sealant notapproved by Kia may damagethe tire pressure sensor.
Page 472 of 630
613
What to do in an emergency
You may not be able to identify a low
tire by simply looking at it. Always
use a good quality tire pressure
gauge to measure the tire's inflation
pressure. Please note that a tire that
is hot (from being driven) will have a
higher pressure measurement than a
tire that is cold (from sitting station-
ary for at least 3 hours and driven
less than 1 mile (1.6 km) during that
3 hour period).
Allow the tire to cool before measur-
ing the inflation pressure. Always be
sure the tire is cold before inflating to
the recommended pressure.
A cold tire means the vehicle has
been sitting for 3 hours and driven for
less than 1 mile (1.6 km) in that 3
hour period.
Never use tire sealant if your vehicle
is equipped with a Tire Pressure
Monitoring System. The liquid
sealant can damage the tire pres-
sure sensors. The TPMS cannot alert you to
severe and sudden tire damage
caused by external factors such as
nails or road debris.
If you feel any vehicle instability, immediately take your foot off the
accelerator, apply the brakes grad-
ually and with light force, and slow-
ly move to a safe position off the
road.✽ ✽ NOTICE - Protecting TPMS
Tampering with, modifying, or dis-
abling the Tire Pressure Monitoring
System (TPMS) components may
interfere with the system's ability to
warn the driver of low tire pressure
conditions and/or TPMS malfunc-
tions. Tampering with, modifying,
or disabling the Tire Pressure
Monitoring System (TPMS) compo-
nents may void the warranty for
that portion of the vehicle.
Page 474 of 630
615
What to do in an emergency
IF YOU HAVE A FLAT TIRE (WITH SPARE TIRE, IF EQUIPPED)
Jack and tools
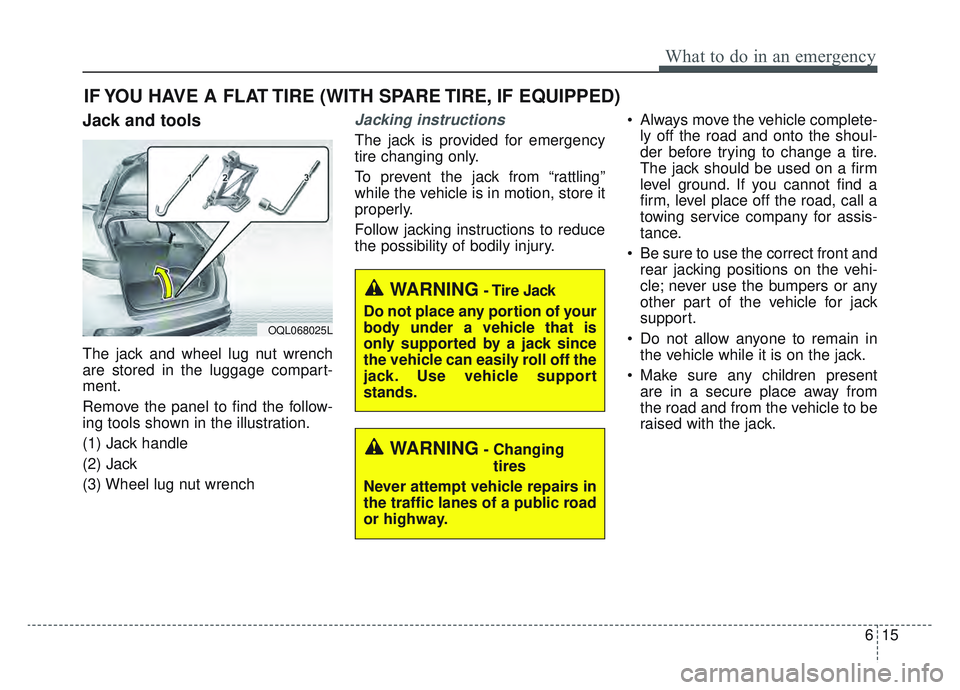
The jack and wheel lug nut wrench
are stored in the luggage compart-
ment.
Remove the panel to find the follow-
ing tools shown in the illustration.
(1) Jack handle
(2) Jack
(3) Wheel lug nut wrench
Jacking instructions
The jack is provided for emergency
tire changing only.
To prevent the jack from “rattling”
while the vehicle is in motion, store it
properly.
Follow jacking instructions to reduce
the possibility of bodily injury. Always move the vehicle complete-
ly off the road and onto the shoul-
der before trying to change a tire.
The jack should be used on a firm
level ground. If you cannot find a
firm, level place off the road, call a
towing service company for assis-
tance.
Be sure to use the correct front and rear jacking positions on the vehi-
cle; never use the bumpers or any
other part of the vehicle for jack
support.
Do not allow anyone to remain in the vehicle while it is on the jack.
Make sure any children present are in a secure place away from
the road and from the vehicle to be
raised with the jack.
WARNING- Changing
tires
Never attempt vehicle repairs in
the traffic lanes of a public road
or highway.
OQL068025L
WARNING- Tire Jack
Do not place any portion of your
body under a vehicle that is
only supported by a jack since
the vehicle can easily roll off the
jack. Use vehicle support
stands.
Page 478 of 630
619
What to do in an emergency
9. Loosen the wheel nuts andremove them with your fingers.
Slide the wheel off the studs and
lay it flat so it cannot roll away. To
put the wheel on the hub, pick up
the spare tire, line up the holes
with the studs and slide the wheel
onto them. If this is difficult, tip the
wheel slightly and get the top hole
in the wheel lined up with the top
stud. Jiggle the wheel back and
forth until the wheel can slide over
the other studs. Wheels may have sharp edges.
Handle them carefully to avoid possi-
ble severe injury. Before putting the
wheel into place, be sure that there
is nothing on the hub or wheel (such
as mud, tar, gravel, etc.) that pre-
vents the wheel from fitting solidly
against the hub.
10. To install the wheel, hold it on the
studs, put the wheel nuts on the
studs and tighten them finger
tight. Jiggle the tire to be sure it is
completely seated, then tighten
the nuts as much as possible
with your fingers again.
11. Insert the wrench into the jack and lower the vehicle to the
ground by turning the wheel nut
wrench counterclockwise.
WARNING- Installing a
wheel
Make sure the wheel makes
good contact with the hub when
installed. If the contact of the
mounting surface between the
wheel and hub is not good, the
wheel nuts could come loose
and cause the loss of a wheel.
Loss of a wheel may result in
loss of control of the vehicle.
Page 479 of 630
What to do in an emergency
20
6
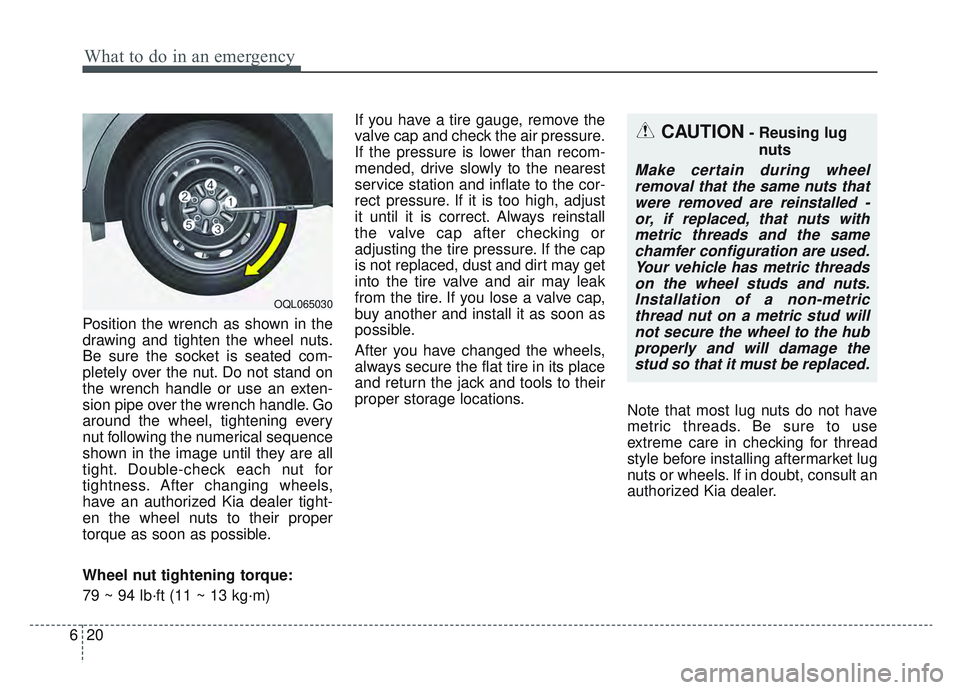
Position the wrench as shown in the
drawing and tighten the wheel nuts.
Be sure the socket is seated com-
pletely over the nut. Do not stand on
the wrench handle or use an exten-
sion pipe over the wrench handle. Go
around the wheel, tightening every
nut following the numerical sequence
shown in the image until they are all
tight. Double-check each nut for
tightness. After changing wheels,
have an authorized Kia dealer tight-
en the wheel nuts to their proper
torque as soon as possible.
Wheel nut tightening torque:
79 ~ 94 lb·ft (11 ~ 13 kg·m) If you have a tire gauge, remove the
valve cap and check the air pressure.
If the pressure is lower than recom-
mended, drive slowly to the nearest
service station and inflate to the cor-
rect pressure. If it is too high, adjust
it until it is correct. Always reinstall
the valve cap after checking or
adjusting the tire pressure. If the cap
is not replaced, dust and dirt may get
into the tire valve and air may leak
from the tire. If you lose a valve cap,
buy another and install it as soon as
possible.
After you have changed the wheels,
always secure the flat tire in its place
and return the jack and tools to their
proper storage locations.
Note that most lug nuts do not have
metric threads. Be sure to use
extreme care in checking for thread
style before installing aftermarket lug
nuts or wheels. If in doubt, consult an
authorized Kia dealer.
CAUTION- Reusing lug
nuts
Make certain during wheelremoval that the same nuts thatwere removed are reinstalled -or, if replaced, that nuts withmetric threads and the samechamfer configuration are used.Your vehicle has metric threadson the wheel studs and nuts.Installation of a non-metricthread nut on a metric stud willnot secure the wheel to the hubproperly and will damage thestud so that it must be replaced.
OQL065030
Page 480 of 630
621
What to do in an emergency
To prevent the jack, wheel lug nut
wrench and spare tire from rattling
while the vehicle is in motion, store
them properly.
Check the inflation pressures as
soon as possible after installing the
spare tire. Adjust it to the specified
pressure, if necessary. Refer to
“Tires and wheels” in section 8.
Important - use of compact sparetire
Your vehicle is equipped with a com-
pact spare tire. This compact spare
tire takes up less space than a regu-
lar-size tire. This tire is smaller than a
conventional tire and is designed for
temporary use only.
You should drive carefully when the compact spare is in use. The
compact spare should be replaced
by the proper conventional tire and
rim at the first opportunity.
The operation of this vehicle is not recommended with more than one
compact spare tire in use at the
same time. The compact spare should be inflat-
ed to 60 psi (420 kPa).
✽ ✽
NOTICE
Check the inflation pressure after
installing the spare tire. Adjust it to
the specified pressure, as necessary.
WARNING- Spare tire
The compact spare tire is for
emergency use only. Do not
operate your vehicle on this
compact spare at speeds over
50 mph (80 km/h). The original
tire should be repaired or
replaced as soon as possible to
avoid failure of the spare possi-
bly leading to bodily injury or
death.WARNING- Wheel studs
If the studs are damaged, they
may lose their ability to retain
the wheel. This could lead to the
loss of the wheel and a collision
resulting in serious injuries.
Page 483 of 630
What to do in an emergency
24
6
IF YOU HAVE A FLAT TIRE (WITH TIRE MOBILITY KIT) (IF EQUIPPED)
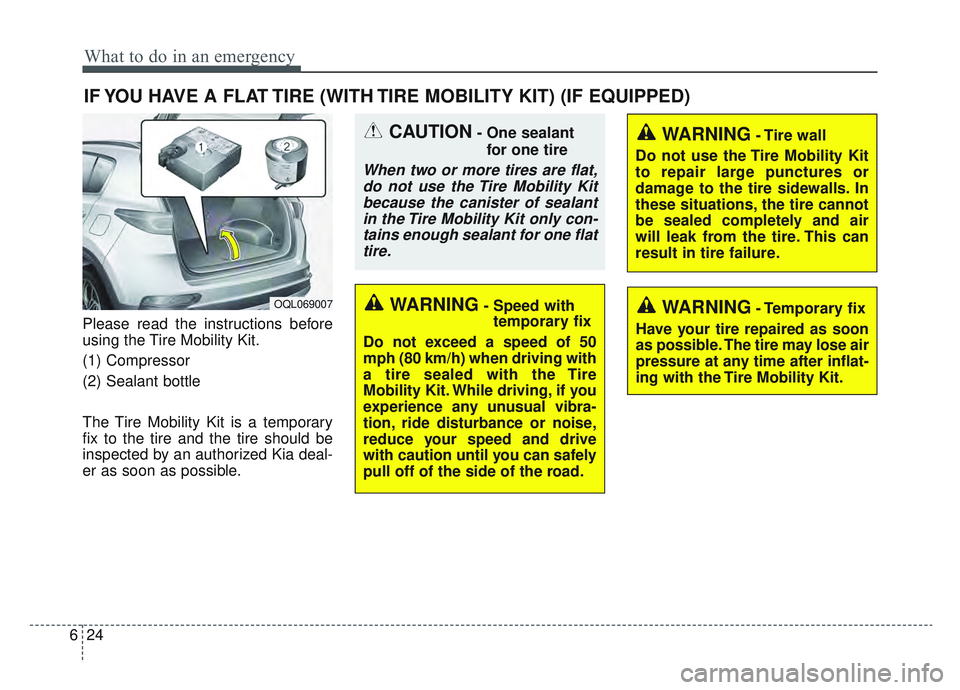
Please read the instructions before
using the Tire Mobility Kit.
(1) Compressor
(2) Sealant bottle
The Tire Mobility Kit is a temporary
fix to the tire and the tire should be
inspected by an authorized Kia deal-
er as soon as possible.
OQL069007
CAUTION- One sealant
for one tire
When two or more tires are flat,do not use the Tire Mobility Kitbecause the canister of sealantin the Tire Mobility Kit only con-tains enough sealant for one flattire.
WARNING- Tire wall
Do not use the Tire Mobility Kit
to repair large punctures or
damage to the tire sidewalls. In
these situations, the tire cannot
be sealed completely and air
will leak from the tire. This can
result in tire failure.
WARNING- Temporary fix
Have your tire repaired as soon
as possible. The tire may lose air
pressure at any time after inflat-
ing with the Tire Mobility Kit.WARNING- Speed with temporary fix
Do not exceed a speed of 50
mph (80 km/h) when driving with
a tire sealed with the Tire
Mobility Kit. While driving, if you
experience any unusual vibra-
tion, ride disturbance or noise,
reduce your speed and drive
with caution until you can safely
pull off of the side of the road.
Page 484 of 630
625
What to do in an emergency
Introduction
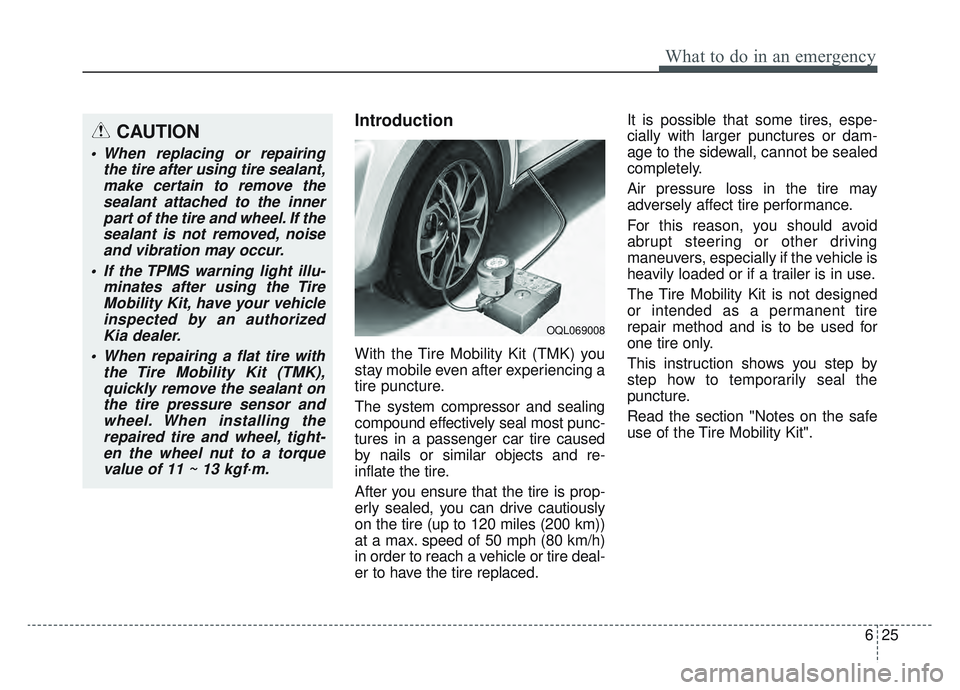
With the Tire Mobility Kit (TMK) you
stay mobile even after experiencing a
tire puncture.
The system compressor and sealing
compound effectively seal most punc-
tures in a passenger car tire caused
by nails or similar objects and re-
inflate the tire.
After you ensure that the tire is prop-
erly sealed, you can drive cautiously
on the tire (up to 120 miles (200 km))
at a max. speed of 50 mph (80 km/h)
in order to reach a vehicle or tire deal-
er to have the tire replaced.It is possible that some tires, espe-
cially with larger punctures or dam-
age to the sidewall, cannot be sealed
completely.
Air pressure loss in the tire may
adversely affect tire performance.
For this reason, you should avoid
abrupt steering or other driving
maneuvers, especially if the vehicle is
heavily loaded or if a trailer is in use.
The Tire Mobility Kit is not designed
or intended as a permanent tire
repair method and is to be used for
one tire only.
This instruction shows you step by
step how to temporarily seal the
puncture.
Read the section "Notes on the safe
use of the Tire Mobility Kit".
OQL069008
CAUTION
When replacing or repairing
the tire after using tire sealant,make certain to remove thesealant attached to the innerpart of the tire and wheel. If thesealant is not removed, noiseand vibration may occur.
If the TPMS warning light illu- minates after using the TireMobility Kit, have your vehicleinspected by an authorizedKia dealer.
When repairing a flat tire with the Tire Mobility Kit (TMK),quickly remove the sealant onthe tire pressure sensor andwheel. When installing therepaired tire and wheel, tight-en the wheel nut to a torquevalue of 11 ~ 13 kgf·m.