Page 158 of 324
7-2
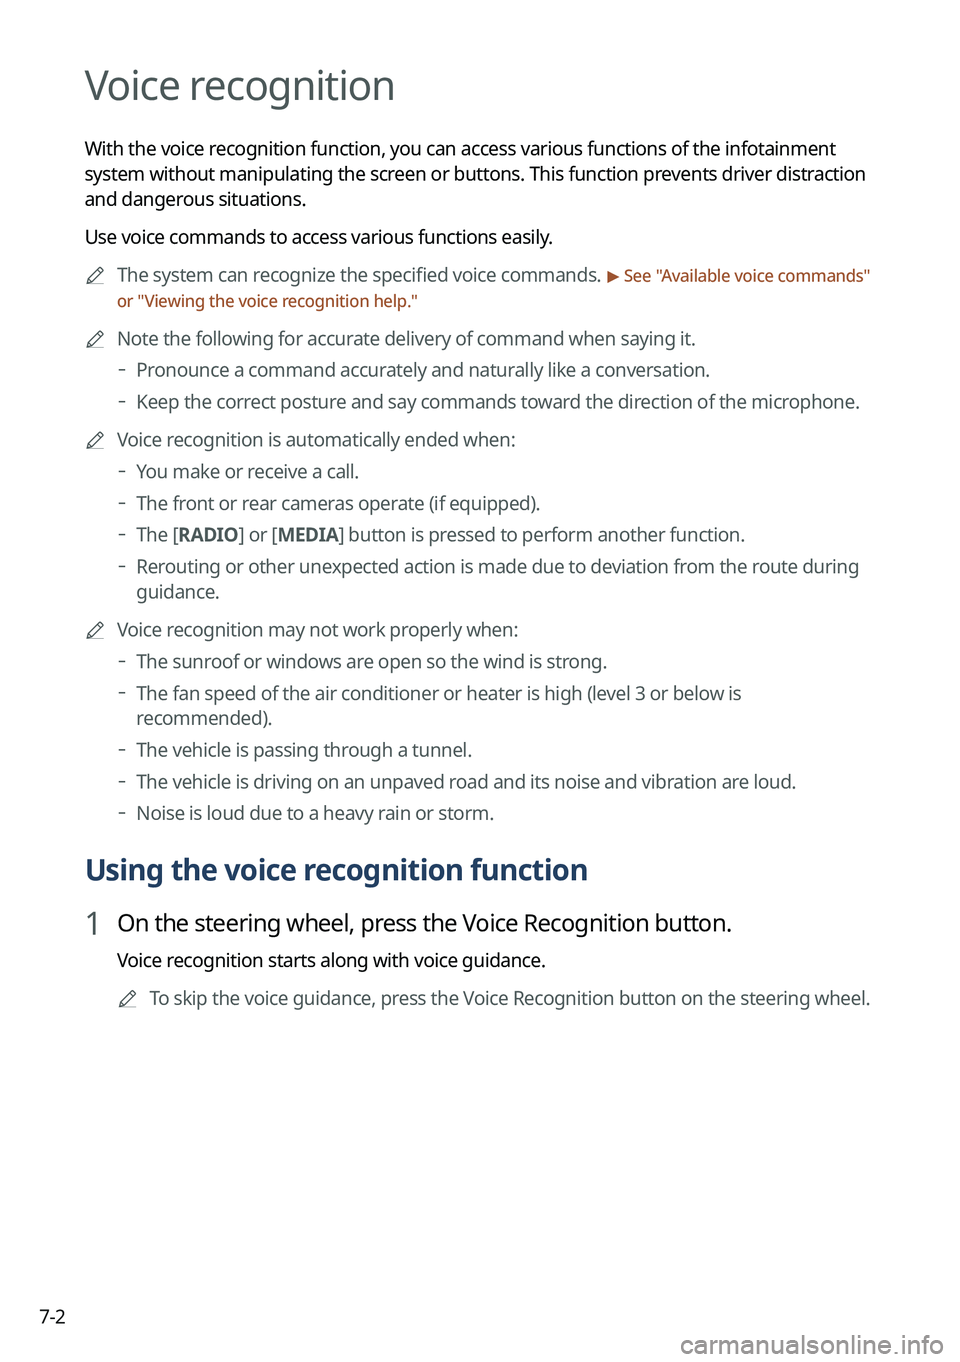
Voice recognition
With the voice recognition function, you can access various functions of the infotainmen\
t
system without manipulating the screen or buttons. This function prevents driver distraction
and dangerous situations.
Use voice commands to access various functions easily.0000
A
The system can recognize the specified voice commands.
> See "Available voice commands"
or " Viewing the voice recognition help."
0000
A
Note the following for accurate delivery of command when saying it.
000DPronounce a command accurately and naturally like a conversation.
000DKeep the correct posture and say commands toward the direction of the microphone.
0000
A
Voice recognition is automatically ended when:
000DYou make or receive a call.
000DThe front or rear cameras operate (if equipped).
000DThe
[RADIO] or [MEDIA] button is pressed to perform another function.
000DRerouting or other unexpected action is made due to deviation from the route during
guidance.
0000
A
Voice recognition may not work properly when:
000DThe sunroof or windows are open so the wind is strong.
000DThe fan speed of the air conditioner or heater is high (level 3 or below is
recommended).
000DThe vehicle is passing through a tunnel.
000DThe vehicle is driving on an unpaved road and its noise and vibration are loud.
000DNoise is loud due to a heavy rain or storm.
Using the voice recognition function
1 On the steering wheel, press the Voice Recognition button.
Voice recognition starts along with voice guidance.
0000
A
To skip the voice guidance, press the Voice Recognition button on the steering wheel.
Page 164 of 324
7-80000
A
When you use a command starting with "Find," the system searches for locations within
the state or province where your vehicle is currently located. To search for locations in
another state or province, say the state or province name first and then say the location
you want.
0000
A
Some commands, such as "Cancel Route " or "Show Route," are available only when a
destination is set.
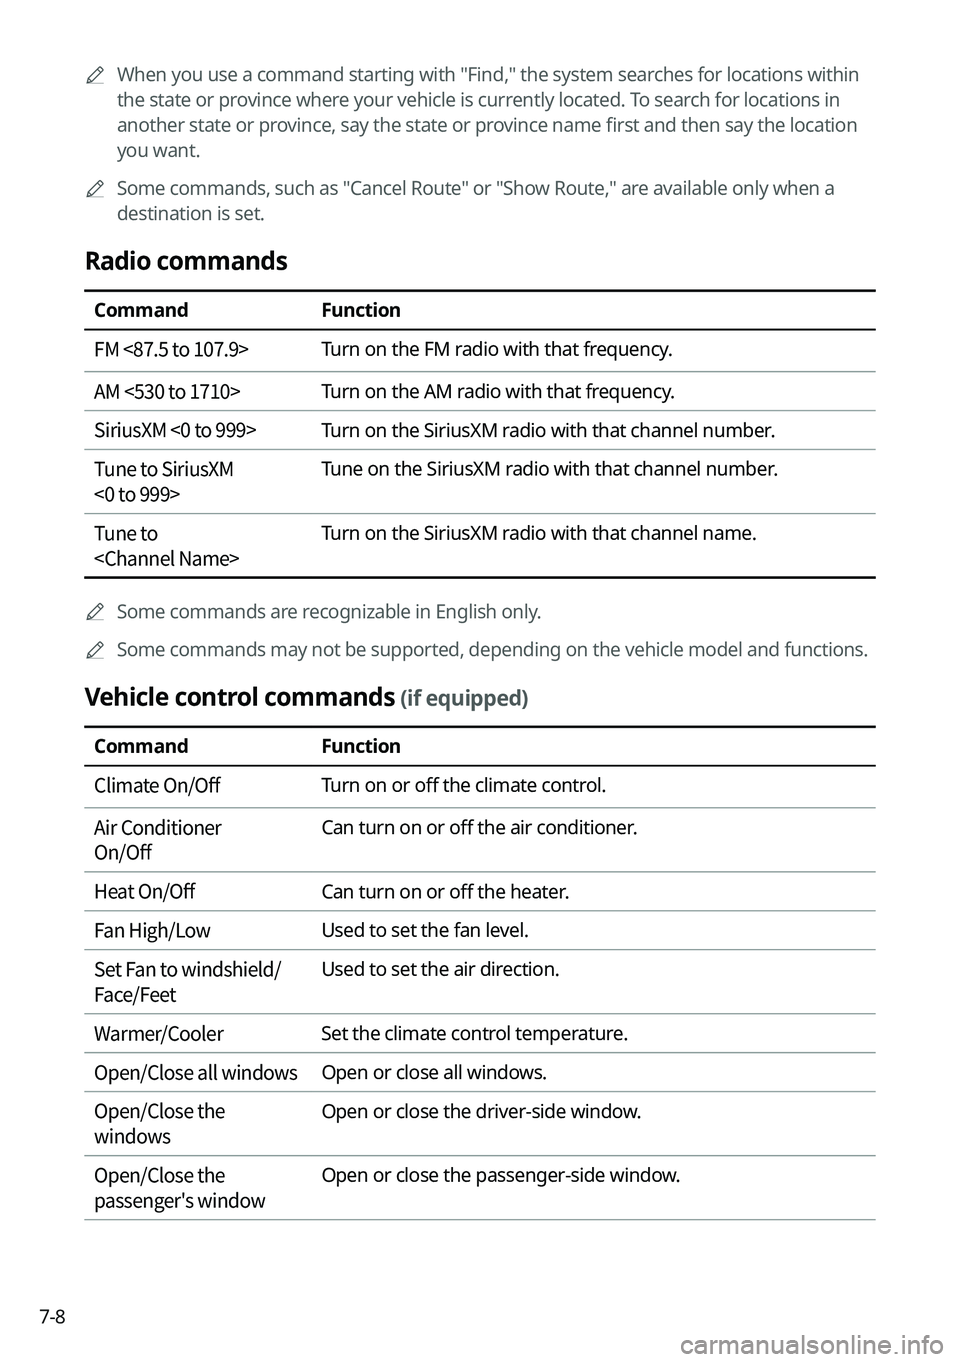
Radio commands
Command Function
FM <87.5 to 107.9> Turn on the FM radio with that frequency.
AM <530 to 1710> Turn on the AM radio with that frequency.
SiriusXM <0 to 999> Turn on the SiriusXM radio with that channel number.
Tune to SiriusXM
<0 to 999> Tune on the SiriusXM radio with that channel number.
Tune to
Turn on the SiriusXM radio with that channel name.
0000
A
Some commands are recognizable in English only.
0000
A
Some commands may not be supported, depending on the vehicle model and f\
unctions.
Vehicle control commands (if equipped)
Command Function
Climate On/Off Turn on or off the climate control.
Air Conditioner
On/Off Can turn on or off the air conditioner.
Heat On/Off Can turn on or off the heater.
Fan High/Low Used to set the fan level.
Set Fan to windshield/
Face/Feet Used to set the air direction.
Warmer/Cooler Set the climate control temperature.
Open/Close all windows Open or close all windows.
Open/Close the
windows Open or close the driver-side window.
Open/Close the
passenger's window Open or close the passenger-side window.
Page 165 of 324
7-9
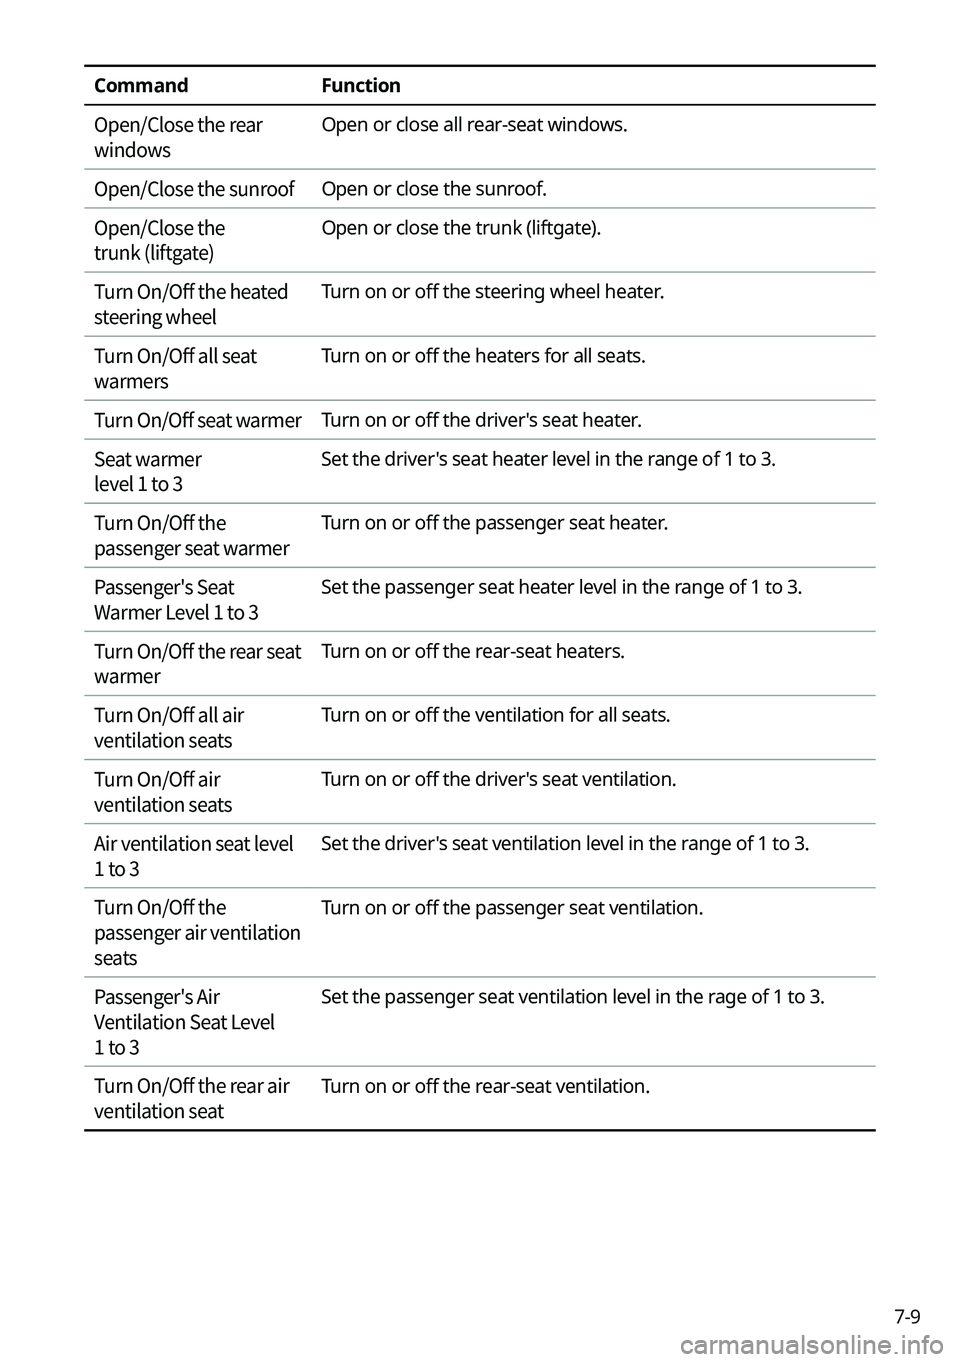
CommandFunction
Open/Close the rear
windows Open or close all rear-seat windows.
Open/Close the sunroof Open or close the sunroof.
Open/Close the
trunk (liftgate) Open or close the trunk (liftgate).
Turn On/Off the heated
steering wheel Turn on or off the steering wheel heater.
Turn On/Off all seat
warmers Turn on or off the heaters for all seats.
Turn On/Off seat warmer Turn on or off the driver's seat heater.
Seat warmer
level 1 to 3 Set the driver's seat heater level in the range of 1 to 3.
Turn On/Off the
passenger seat warmer Turn on or off the passenger seat heater.
Passenger's Seat
Warmer Level 1 to 3 Set the passenger seat heater level in the range of 1 to 3.
Turn On/Off the rear seat
warmer Turn on or off the rear-seat heaters.
Turn On/Off all air
ventilation seats Turn on or off the ventilation for all seats.
Turn On/Off air
ventilation seats Turn on or off the driver's seat ventilation.
Air ventilation seat level
1 to 3 Set the driver's seat ventilation level in the range of 1 to 3.
Turn On/Off the
passenger air ventilation
seats Turn on or off the passenger seat ventilation.
Passenger's Air
Ventilation Seat Level
1 to 3 Set the passenger seat ventilation level in the rage of 1 to 3.
Turn On/Off the rear air
ventilation seat Turn on or off the rear-seat ventilation.
Page 255 of 324
9-63
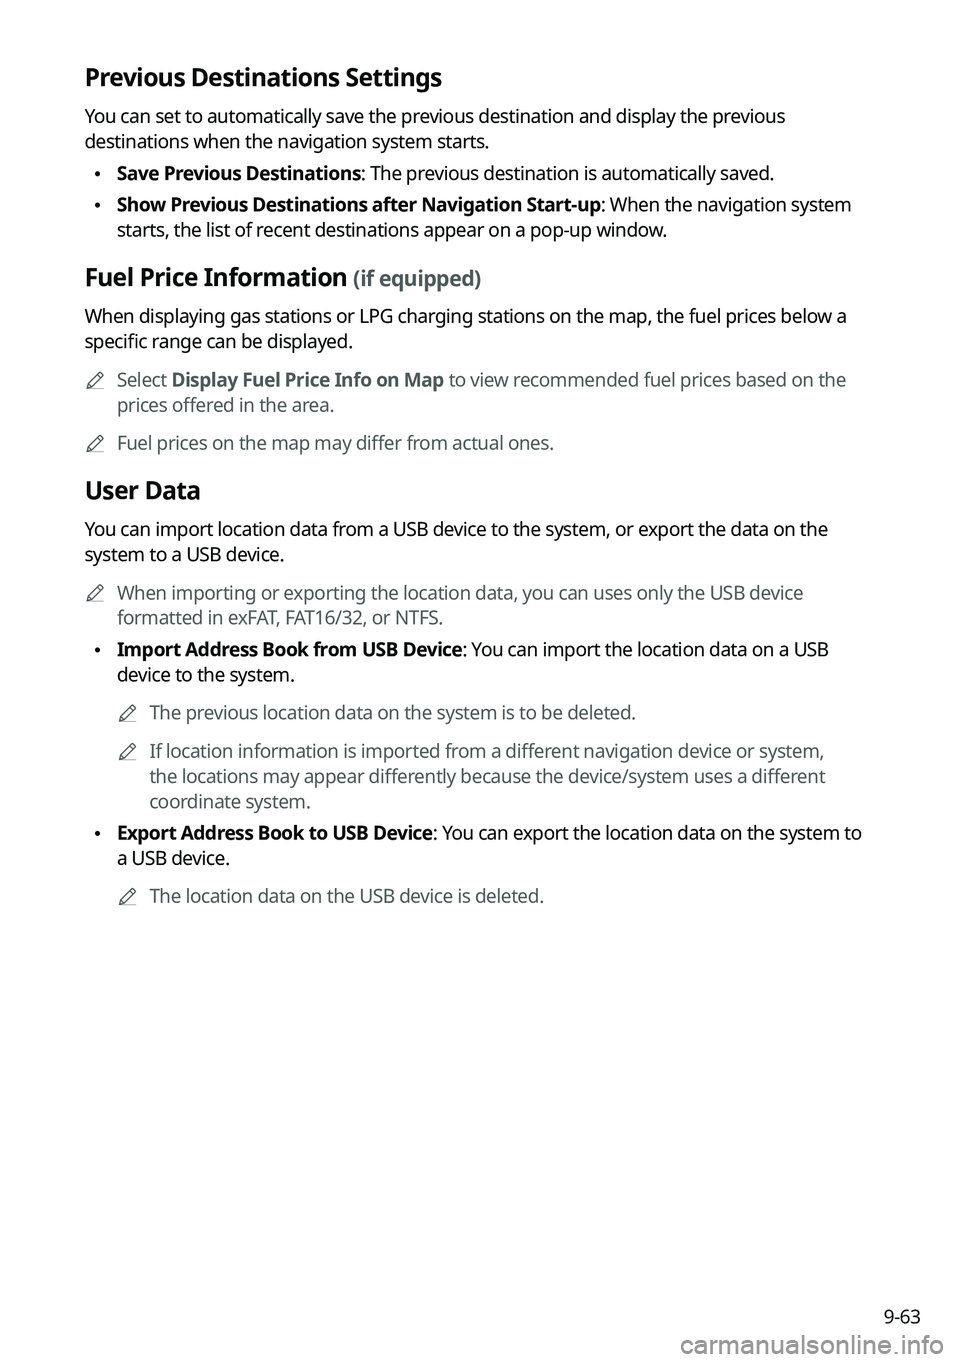
Previous Destinations Settings
You can set to automatically save the previous destination and display the previous
destinations when the navigation system starts.
\225Save Previous Destinations: The previous destination is automatically saved.
\225Show Previous Destinations after Navigation Start-up: When the navigation system
starts, the list of recent destinations appear on a pop-up window.
Fuel Price Information (if equipped)
When displaying gas stations or LPG charging stations on the map, the fuel prices below a
specific range can be displayed.
0000
A
Select Display Fuel Price Info on Map to view recommended fuel prices based on the
prices offered in the area.
0000
A
Fuel prices on the map may differ from actual ones.
User Data
You can import location data from a USB device to the system, or export the data on the
system to a USB device.
0000
A
When importing or exporting the location data, you can uses only the USB device
formatted in exFAT, FAT16/32, or NTFS.
\225Import Address Book from USB Device: You can import the location data on a USB
device to the system.
0000
A
The previous location data on the system is to be deleted.
0000
A
If location information is imported from a different navigation device or system,
the locations may appear differently because the device/system uses a different
coordinate system.
\225Export Address Book to USB Device: You can export the location data on the system to
a USB device.
0000
A
The location data on the USB device is deleted.
Page 261 of 324
9-69
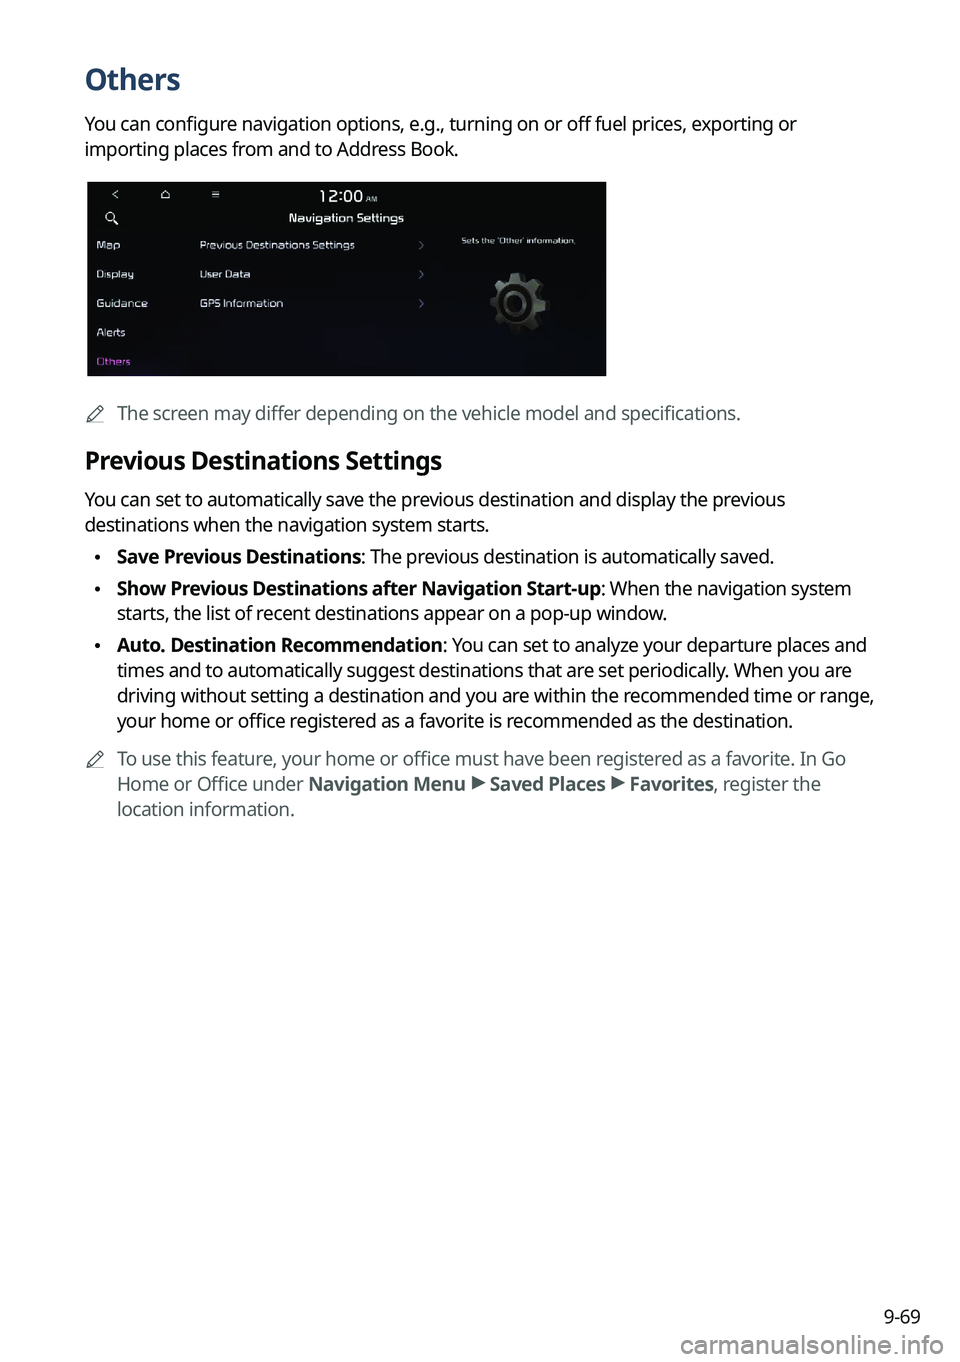
Others
You can configure navigation options, e.g., turning on or off fuel prices, exporting or
importing places from and to Address Book.
0000AThe screen may differ depending on the vehicle model and specifications.
Previous Destinations Settings
You can set to automatically save the previous destination and display the previous
destinations when the navigation system starts.
\225Save Previous Destinations: The previous destination is automatically saved.
\225Show Previous Destinations after Navigation Start-up: When the navigation system
starts, the list of recent destinations appear on a pop-up window.
\225Auto. Destination Recommendation: You can set to analyze your departure places and
times and to automatically suggest destinations that are set periodically. When you are
driving without setting a destination and you are within the recommended time or range,
your home or office registered as a favorite is recommended as the destination.
0000
A
To use this feature, your home or office must have been registered as a favorite. In Go
Home or Office under Navigation Menu >
Saved Places >
Favorites, register the
location information.
Page 272 of 324
9-80
GPS Time
After receiving the time from GPS, it sets the system date and time automatically.0000
A
To manually set the date and time, uncheck GPS Time, press the current date and time
below GPS Time, and then set the date and time.
24 Hours
The system time is displayed in the 24-hour format.
Daylight Saving Time
Displays the system time in the format of Daylight Saving Time.
Language
You can set the system display language.
0000
A
Once the language has been changed, it takes a while to apply the new language to the
system. The notification pop-up window appears as soon as the new language is applied
to the system. When you wait a while or press anywhere outside the pop-up window, the
window automatically disappears.
0000
A
When you change the system language, it does not affect the display of other unique
data such as MP3 music file name.
0000
A
Depending on the system language, the Bluetooth phone message view and voice
recognition may not be supported.
Page 277 of 324
9-85
Language
You can set the system display language.
0000
A
Once the language has been changed, it takes a while to apply the new language to the
system. The notification pop-up window appears as soon as the new language is applied
to the system. When you wait a while or press anywhere outside the pop-up window, the
window automatically disappears.
0000
A
When you change the system language, it does not affect the display of other unique
data such as MP3 music file name.
0000
A
Depending on the system language, the Bluetooth phone message view and voice
recognition may not be supported.
Keyboard
You can change the keyboard type for each language to use when entering the text.
English-Latin Keyboard Type
You can select the keyboard type to use when entering the English text.
Default Keyboard
You can select the default keyboard type.
Page 293 of 324
9-101
Updating the software and map
1 Connect a USB device to the computer and run Navigation Updater for
downloading the update files.
2 Follow the instructions on the screen to download the update files.
3 Remove the USB device from the computer and then connect it to the
USB port in your vehicle.
4 Start the vehicle to turn on the system.
0000
A
You can perform update without starting the vehicle by simply locating the start
switch to "ON".
\334\334Caution
\225Perform update with the start switch "ON" when the battery is sufficiently charged
by driving the vehicle. When the battery is discharged while updating, the system
may get damaged with the update stopped.
-Note that the battery may be discharged easily in winter.
-The battery may also be discharged easily when the vehicle is not used for a long
time. Caution is required.
\225
When you start the vehicle while updating with the start switch "ON", power supply
to the system may be cut off.
5 On the All Menus screen, press Setup >
General >
SW Info/Update.
0000
A
After the system is turned on, press Yes when a pop-up window appears whether
to proceed with update. In this case, the screen changes to allow you to select the
update method.
[ Updating immediately
You can finish the update quickly.
1 On the SW Info/Update screen, press Update.
2 Press Update Now.
3 Press OK.
The update is performed immediately after the system reboots.