Page 475 of 528
Maintenance
88
7
Stop and tail lamp bulb
replacement (for 5 door)
1. Open the trunk lid.
2. Loosen the light assembly retain-
ing screws with a cross-tip screw-
driver. 3. Remove the rear combination
lamp assembly from the body of
the vehicle.
4. Disconnect the rear combination lamp connector. 5. Remove the socket from the
assembly by turning the socket
counterclockwise until the tabs on
the socket align with the slots on
the assembly.
6. Remove the bulb from the socket by pressing it in and rotating it counter-
clockwise until the tabs on the bulb
align with the slots in the socket.
Pull the bulb out of the socket.
7. Insert a new bulb by inserting it into the socket and rotating it until
it locks into place.
OYB076060
OYB076061OYB076062
SC PE USA 7.qxp 9/9/2021 6:30 PM Page 88
Page 480 of 528
793
Maintenance
Rear turn signal lamp bulb
replacement (for 4 door)
1. Open the trunk lid.
2. Remove the service cover bypulling out the service cover. 3. Remove the socket from the
assembly by turning the socket
counterclockwise until the tabs on
the socket align with the slots on
the assembly.
4. Remove the bulb from the socket by pressing it in and rotating it
counterclockwise until the tabs on
the bulb align with the slots in the
socket. Pull the bulb out of the
socket.
5. Insert a new bulb by inserting it into the socket and rotating it until
it locks into place. 6. Install the socket in the assembly
by aligning the tabs on the socket
with the slots in the assembly.
Push the socket into the assembly
and turn the socket clockwise.
7. Install the service cover.
OSC077030N
OSC077031N
SC PE USA 7.qxp 9/9/2021 6:30 PM Page 93
Page 481 of 528
Maintenance
94
7
Back-up lamp bulb replace-
ment (for 4 door)
1. Open the trunk lid.
2. Loosen the retaining screw of the
trunk lid cover and then remove
the cover. 3. Remove the socket from the
assembly by turning the socket
counterclockwise until the tabs on
the socket align with the slots on
the assembly.
4. Remove the bulb from bulb-socket by pulling it out.
5. Insert a new bulb by inserting it into the bulb-socket.
6. Install the socket in the assembly by aligning the tabs on the socket
with the slots in the assembly.
Push the socket into the assembly
and turn the socket clockwise.
7. Install the trunk lid cover.
Stop and tail lamp / Side mark-
er (Bulb type) replacement
(for 4 door)
1. Open the trunk lid.
2. Remove the service cover by pulling out the service cover.
OSC077034N
OSC077035N
OSC077030N
SC PE USA 7.qxp 9/9/2021 6:30 PM Page 94
Page 482 of 528
795
Maintenance
3. Remove the socket from theassembly by turning the socket
counterclockwise until the tabs on
the socket align with the slots on
the assembly.
4. Remove the bulb from the socket by pressing it in and rotating it
counterclockwise until the tabs on
the bulb align with the slots in the
socket. Pull the bulb out of the
socket.
5. Insert a new bulb by inserting it into the socket and rotating it until
it locks into place. 6. Install the socket in the assembly
by aligning the tabs on the socket
with the slots in the assembly.
Push the socket into the assembly
and turn the socket clockwise.
7. Install the service cover.
Tail lamp (Bulb type) bulb
replacement (for 4 door)
1. Open the trunk lid.
2. Loosen the retaining screw of the trunk lid cover and then remove
the cover.
OSC077032N
OSC077034N
SC PE USA 7.qxp 9/9/2021 6:30 PM Page 95
Page 483 of 528

Maintenance
96
7
3. Remove the socket from the
assembly by turning the socket
counterclockwise until the tabs on
the socket align with the slots on
the assembly.
4. Remove the bulb from the socket by pressing it in and rotating it
counterclockwise until the tabs on
the bulb align with the slots in the
socket. Pull the bulb out of the
socket.
5. Insert a new bulb by inserting it into the socket and rotating it until
it locks into place. 6. Install the socket in the assembly
by aligning the tabs on the socket
with the slots in the assembly.
Push the socket into the assembly
and turn the socket clockwise.
7. Install the trunk lid cover.
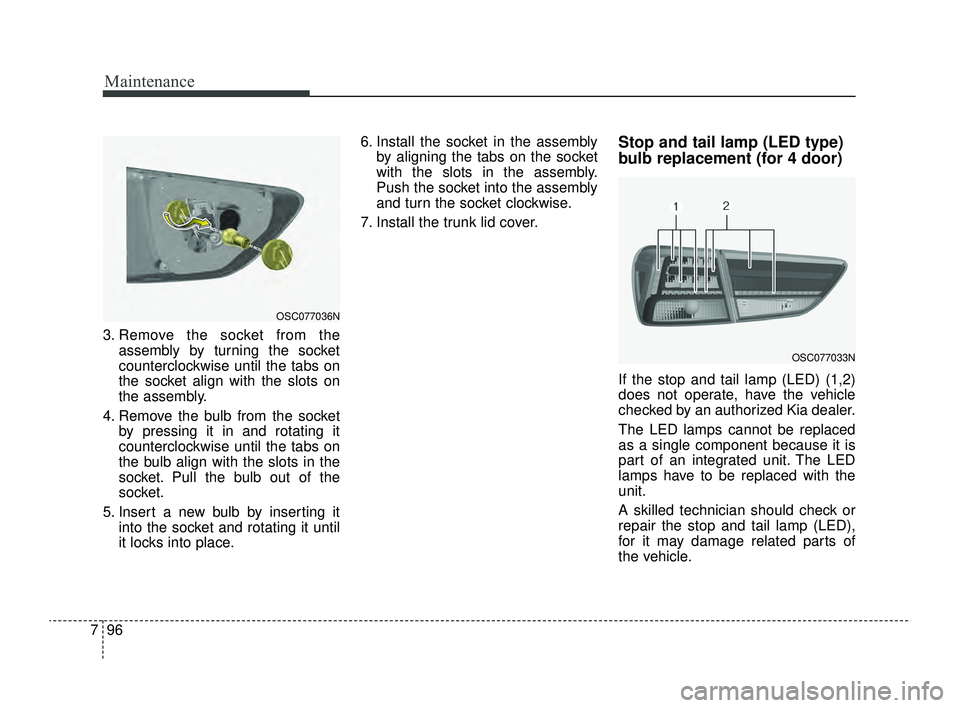
Stop and tail lamp (LED type)
bulb replacement (for 4 door)
If the stop and tail lamp (LED) (1,2)
does not operate, have the vehicle
checked by an authorized Kia dealer.
The LED lamps cannot be replaced
as a single component because it is
part of an integrated unit. The LED
lamps have to be replaced with the
unit.
A skilled technician should check or
repair the stop and tail lamp (LED),
for it may damage related parts of
the vehicle.
OSC077036N
OSC077033N
SC PE USA 7.qxp 9/9/2021 6:30 PM Page 96
Page 484 of 528

797
Maintenance
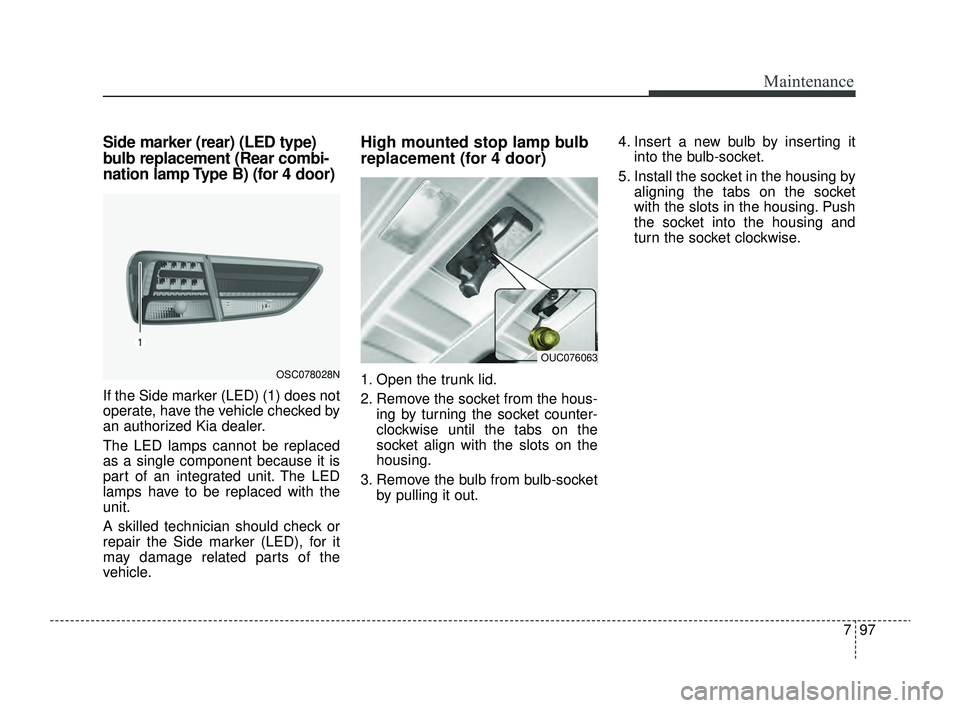
Side marker (rear) (LED type)
bulb replacement (Rear combi-
nation lamp Type B) (for 4 door)
If the Side marker (LED) (1) does not
operate, have the vehicle checked by
an authorized Kia dealer.
The LED lamps cannot be replaced
as a single component because it is
part of an integrated unit. The LED
lamps have to be replaced with the
unit.
A skilled technician should check or
repair the Side marker (LED), for it
may damage related parts of the
vehicle.
High mounted stop lamp bulb
replacement (for 4 door)
1. Open the trunk lid.
2. Remove the socket from the hous-ing by turning the socket counter-
clockwise until the tabs on the
socket align with the slots on the
housing.
3. Remove the bulb from bulb-socket by pulling it out. 4. Insert a new bulb by inserting it
into the bulb-socket.
5. Install the socket in the housing by aligning the tabs on the socket
with the slots in the housing. Push
the socket into the housing and
turn the socket clockwise.OSC078028N
OUC076063
SC PE USA 7.qxp 9/9/2021 6:30 PM Page 97
Page 485 of 528
Maintenance
98
7
Trunk lamp bulb replacement
(for 4 door)
1. Using a flat-blade screwdriver,
gently pry the lens cover from
lamp housing.
2. Remove the bulb by pulling it straight out.
3. Install a new bulb in the socket.
4. Align the lens cover tabs with the lamp housing notches and snap
the lens into place.
Map lamp bulb replacement
OUC076061
CAUTION
Be careful not to dirty or dam-age the lens, lens tab, and plas-tic housings.
OYB076070
WARNING- Interior lamps
Prior to working on the Interior
lamps, ensure that the “OFF”
button is depressed to avoid
burning your fingers or receiv-
ing an electric shock.
SC PE USA 7.qxp 9/9/2021 6:31 PM Page 98
Page 521 of 528

I5
Index
If the engine overheats ....................................................6-7
If the engine will not start ..............................................6-4If engine turns over normally but does not start ..........6-4
If the engine doesn't turn over or turns over slowly ....6-4
If you have a flat tire (with spare tire) ..........................6-19 Changing tires ............................................................6-21
Jack and tools ..............................................................6-19
Jack label ....................................................................6-28\
Removing and storing the spare tire ..........................6-20
Important safety precautions ..........................................3-2 Air bag hazards ............................................................3-2
Always wear your seat belt ..........................................3-2
Control your speed ......................................................3-3
Driver distraction ........................................................3-2
Keep your vehicle in safe condition ............................3-3
Restrain all children ....................................................3-2
In case of an emergency while driving............................6-3 If engine stalls while driving ........................................6-3
If the engine stalls at a crossroad or crossing ..............6-3
If you have a flat tire while driving ..............................6-3
Infotainment system ....................................................4-149 Antenna ....................................................................4-14\
9
How vehicle audio works ........................................4-150
USB port ..................................................................4-150
Instrument cluster ..........................................................4-51 Gauges ........................................................................\
4-53 Instrument Cluster Control ........................................4-52
LCD Display Control ..................................................4-52
Transmission Shift Indicator ......................................4-57
Instrument panel overview ..............................................2-6
Intelligent Variable Transmission (IVT) ......................5-17 Good driving practices ................................................5-22
Intelligent Variable Transmission (IVT) operation ....5-17
Interior features............................................................4-143 Clothes hanger ..........................................................4-146
Covering shelf (for 5 door) ......................................4-147
Cup holder ................................................................4-143
Floor mat anchor(s) ..................................................4-146
Power outlet ..............................................................4-144
Shopping bag holder ................................................4-147
Sunvisor ....................................................................4-14\
3
USB charger ..............................................................4-145
Interior light ................................................................4-104 Automatic turn off function ......................................4-104
Glove box lamp ........................................................4-107
Map lamp ................................................................4-104
Room lamp................................................................4-105
Trunk/Liftgate room lamp ........................................4-107
Vanity mirror lamp ....................................................4-108
Interior overview ............................................................2-5
I
SC PE USA Index.qxp 8/23/2021 5:25 PM Page 5