2022 KIA RIO Battery
[x] Cancel search: BatteryPage 9 of 528

15
Introduction
Operation in foreign countries
If you are going to drive your vehicle
in another country, be sure to:
Observe all regulations regardingregistration and insurance.
Determine that acceptable fuel is available. This vehicle should not be modified.
Modification of your vehicle could
affect its performance, safety or
durability and may even violate gov-
ernmental safety and emissions reg-
ulations.
In addition, damage or performance
problems resulting from any modifi-
cation may not be covered under
warranty.
If you use unauthorized electronic
devices, it may cause the vehicle to
operate abnormally, wire damage,
battery discharge and fire. For your
safety, do not use unauthorized
electronic devices. By following a few simple precau-
tions for the first 600 miles (1,000
km) you may add to the perform-
ance, economy and life of your vehi-
cle.
Do not race the engine.
While driving, keep your engine
speed (rpm, or revolutions per
minute) between 2,000 rpm and
4,000 rpm.
Do not maintain a single speed for long periods of time, either fast or
slow. Varying engine speed is
needed to properly break-in the
engine.
Avoid hard stops, except in emer- gencies, to allow the brakes to seat
properly.
Fuel economy and engine perform- ance may vary depending on vehi-
cle break-in process and be stabi-
lized after 4,000 miles (6,000 km).
New engines may consume more
oil during the vehicle break-in peri-
od.
VEHICLE BREAK-IN
PROCESS
VEHICLE MODIFICATIONS
SC PE USA 1.QXP 8/23/2021 5:21 PM Page 5
Page 17 of 528

27
Your vehicle at a glance
ENGINE COMPARTMENT
OSC078047N
■ ■Smartstream G1.6❈ The actual engine compartment in the vehicle may differ from the illustration. 1. Engine coolant reservoir ...................7-25
2. Engine oil filler cap ...........................7-22
3. Brake fluid reservoir ..........................7-27
4. Air cleaner.........................................7-31
5. Fuse box ...........................................7-61
6. Negative battery terminal..................7-39
7. Positive battery terminal ...................7-39
8. Engine oil dipstick .............................7-21
9. Radiator cap .....................................7-26
10. Windshield washer fluid reservoir ...7-29
SC PE USA 2.qxp 8/23/2021 5:23 PM Page 7
Page 32 of 528
315
Safety features of your vehicle
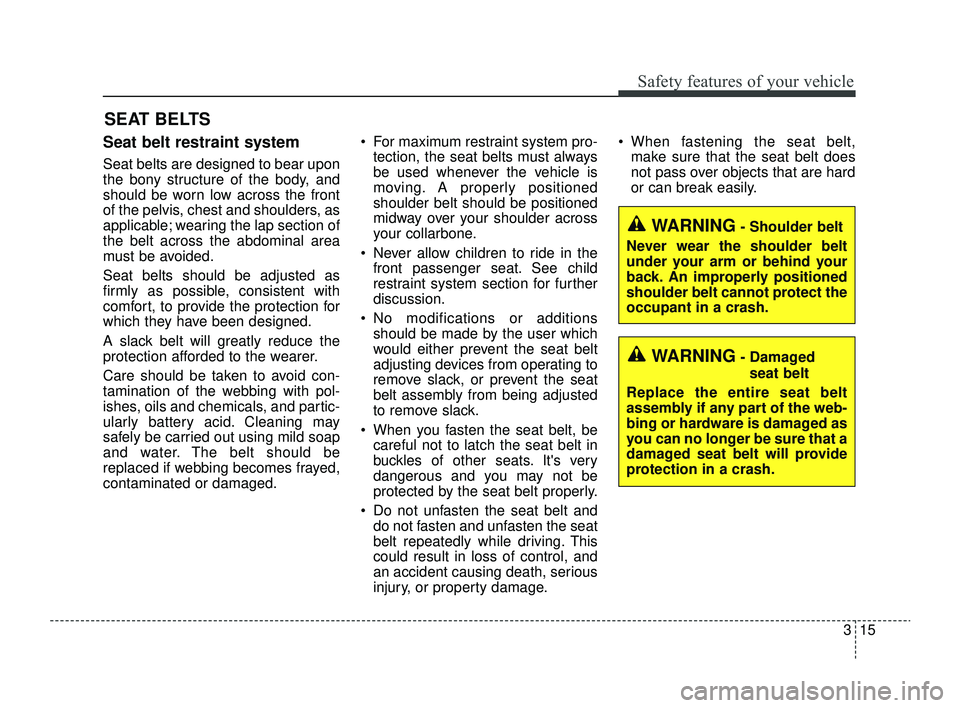
Seat belt restraint system
Seat belts are designed to bear upon
the bony structure of the body, and
should be worn low across the front
of the pelvis, chest and shoulders, as
applicable; wearing the lap section of
the belt across the abdominal area
must be avoided.
Seat belts should be adjusted as
firmly as possible, consistent with
comfort, to provide the protection for
which they have been designed.
A slack belt will greatly reduce the
protection afforded to the wearer.
Care should be taken to avoid con-
tamination of the webbing with pol-
ishes, oils and chemicals, and partic-
ularly battery acid. Cleaning may
safely be carried out using mild soap
and water. The belt should be
replaced if webbing becomes frayed,
contaminated or damaged. For maximum restraint system pro-
tection, the seat belts must always
be used whenever the vehicle is
moving. A properly positioned
shoulder belt should be positioned
midway over your shoulder across
your collarbone.
Never allow children to ride in the front passenger seat. See child
restraint system section for further
discussion.
No modifications or additions should be made by the user which
would either prevent the seat belt
adjusting devices from operating to
remove slack, or prevent the seat
belt assembly from being adjusted
to remove slack.
When you fasten the seat belt, be careful not to latch the seat belt in
buckles of other seats. It's very
dangerous and you may not be
protected by the seat belt properly.
Do not unfasten the seat belt and do not fasten and unfasten the seat
belt repeatedly while driving. This
could result in loss of control, and
an accident causing death, serious
injury, or property damage. When fastening the seat belt,
make sure that the seat belt does
not pass over objects that are hard
or can break easily.
SEAT BELTS
WARNING- Shoulder belt
Never wear the shoulder belt
under your arm or behind your
back. An improperly positioned
shoulder belt cannot protect the
occupant in a crash.
WARNING- Damaged seat belt
Replace the entire seat belt
assembly if any part of the web-
bing or hardware is damaged as
you can no longer be sure that a
damaged seat belt will provide
protection in a crash.
SC PE USA 3.QXP 8/23/2021 5:37 PM Page 15
Page 58 of 528
341
Safety features of your vehicle
If an air bag deploys, there may bea loud noise followed by a fine dust
released in the vehicle. These con-
ditions are normal and are not haz-
ardous - the air bags are packed in
this fine powder. The dust generat-
ed during air bag deployment may
cause skin or eye irritation as well
as aggravate asthma for some per-
sons. Always wash all exposed
skin areas thoroughly with cold
water and a mild soap after an
accident in which the air bags were
deployed. The SRS can function only when
the ignition switch is in the ON
position. If the SRS air bag warning
light does not illuminate, or contin-
uously remains on after illuminat-
ing for about 6 seconds when the
ignition switch is turned to the ON
position, or after the engine is
started, comes on while driving,
the SRS is not working properly. If
this occurs, have your vehicle
immediately inspected by an
authorized Kia dealer.
✽ ✽ NOTICE
Before you replace a fuse or discon-
nect a battery terminal, turn the igni-
tion switch to the LOCK position
and remove the ignition key. Never
remove or replace the air bag related
fuse(s) when the ignition switch is in
the ON position. Failure to heed this
warning will cause the SRS air bag
warning light to illuminate.
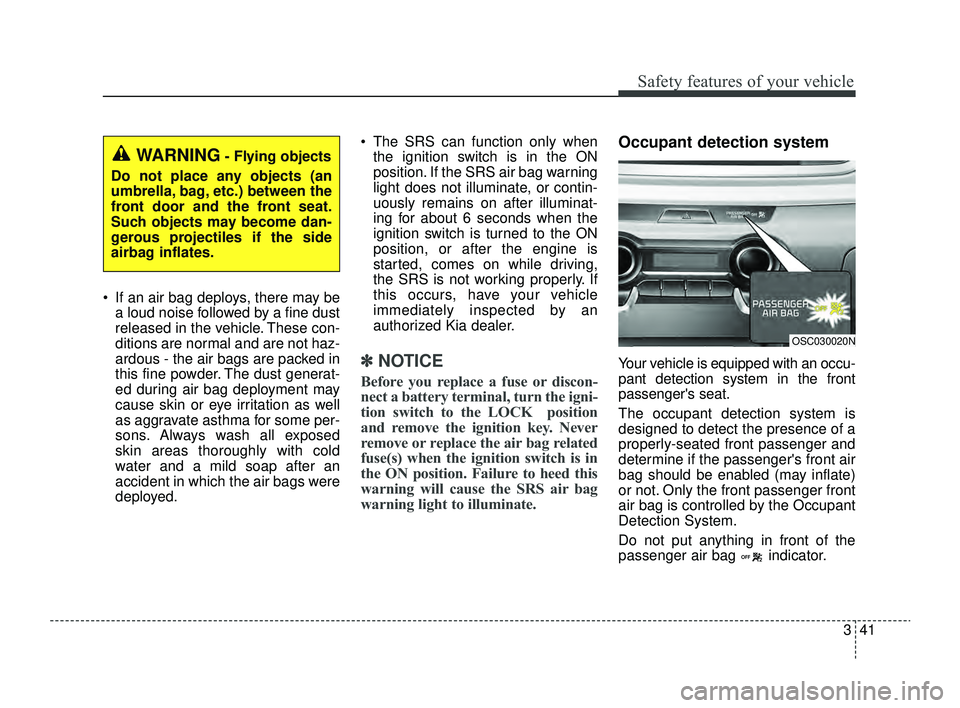
Occupant detection system
Your vehicle is equipped with an occu-
pant detection system in the front
passenger's seat.
The occupant detection system is
designed to detect the presence of a
properly-seated front passenger and
determine if the passenger's front air
bag should be enabled (may inflate)
or not. Only the front passenger front
air bag is controlled by the Occupant
Detection System.
Do not put anything in front of the
passenger air bag indicator.
WARNING- Flying objects
Do not place any objects (an
umbrella, bag, etc.) between the
front door and the front seat.
Such objects may become dan-
gerous projectiles if the side
airbag inflates.
OSC030020N
SC PE USA 3.QXP 8/23/2021 5:38 PM Page 41
Page 80 of 528
Features of your vehicle
Keys . . . . . . . . . . . . . . . . . . . . . . . . . . . . . . . . . . . . \
. . 4-4
• Record your key number . . . . . . . . . . . . . . . . . . . . . . . 4-4
• Key operations . . . . . . . . . . . . . . . . . . . . . . . . . . . . . . . . 4-4
• Remote keyless entry system operations . . . . . . . . . . . 4-5
• Transmitter precautions . . . . . . . . . . . . . . . . . . . . . . . . 4-7
• Battery replacement . . . . . . . . . . . . . . . . . . . . . . . . . . . 4-8
• Immobilizer system . . . . . . . . . . . . . . . . . . . . . . . . . . . . 4-9
Smart key . . . . . . . . . . . . . . . . . . . . . . . . . . . . . . . . 4-11
• Smart key functions. . . . . . . . . . . . . . . . . . . . . . . . . . . 4-11
• Smart key precautions . . . . . . . . . . . . . . . . . . . . . . . . 4-13
• Smart key immobilizer system . . . . . . . . . . . . . . . . . . 4-14
Theft-alarm system . . . . . . . . . . . . . . . . . . . . . . . . 4-15
• Armed stage . . . . . . . . . . . . . . . . . . . . . . . . . . . . . . . . . 4-15
• Theft-alarm stage . . . . . . . . . . . . . . . . . . . . . . . . . . . . 4-16
• Disarmed stage. . . . . . . . . . . . . . . . . . . . . . . . . . . . . . . 4-17
Door locks . . . . . . . . . . . . . . . . . . . . . . . . . . . . . . . . 4-18
• Operating door locks from outside the vehicle . . . . 4-18
• Operating door locks from inside the vehicle . . . . . . 4-19
• Impact sensing door unlock system . . . . . . . . . . . . . . 4-21
• Auto door lock/unlock feature . . . . . . . . . . . . . . . . . . 4-21
• Speed sensing door lock system . . . . . . . . . . . . . . . . 4-21
• Child-protector rear door lock. . . . . . . . . . . . . . . . . . 4-22
• Rear Occupant Alert (ROA) system . . . . . . . . . . . . . 4-22
Trunk (For 4 door) . . . . . . . . . . . . . . . . . . . . . . . . . 4-24
• Opening the trunk . . . . . . . . . . . . . . . . . . . . . . . . . . . . 4-24
• Closing the trunk . . . . . . . . . . . . . . . . . . . . . . . . . . . . . 4-24
• Emergency trunk safety release . . . . . . . . . . . . . . . . . 4-25
Smart Trunk Release (4 door). . . . . . . . . . . . . . . . 4-26
Liftgate (For 5 door) . . . . . . . . . . . . . . . . . . . . . . . 4-30
• Opening the liftgate . . . . . . . . . . . . . . . . . . . . . . . . . . . 4-30
• Closing the liftgate. . . . . . . . . . . . . . . . . . . . . . . . . . . . 4-30
• Emergency liftgate safety release. . . . . . . . . . . . . . . . 4-31
Windows . . . . . . . . . . . . . . . . . . . . . . . . . . . . . . . . . 4-33
• Power windows . . . . . . . . . . . . . . . . . . . . . . . . . . . . . . 4-34
Hood. . . . . . . . . . . . . . . . . . . . . . . . . . . . . . . . . . . . \
. 4-39
• Opening the hood . . . . . . . . . . . . . . . . . . . . . . . . . . . . 4-39
• Closing the hood . . . . . . . . . . . . . . . . . . . . . . . . . . . . . 4-40
• Hood open warning . . . . . . . . . . . . . . . . . . . . . . . . . . . 4-40
Fuel filler door . . . . . . . . . . . . . . . . . . . . . . . . . . . . 4-42
• Opening the fuel filler door . . . . . . . . . . . . . . . . . . . . 4-42
• Closing the fuel filler door . . . . . . . . . . . . . . . . . . . . . 4-43
Steering wheel . . . . . . . . . . . . . . . . . . . . . . . . . . . . . 4-45
• Electric Power Steering (EPS) . . . . . . . . . . . . . . . . . . 4-45
• Tilt steering . . . . . . . . . . . . . . . . . . . . . . . . . . . . . . . . . 4-46
• Horn . . . . . . . . . . . . . . . . . . . . . . . . . . . . . . . . . . . . \
. . . 4-47
Mirrors . . . . . . . . . . . . . . . . . . . . . . . . . . . . . . . . . . 4-48\
• Inside rearview mirror . . . . . . . . . . . . . . . . . . . . . . . . 4-48
• Outside rearview mirror. . . . . . . . . . . . . . . . . . . . . . . 4-49
4
SC PE USA 4.QXP 9/9/2021 6:01 PM Page 1
Page 81 of 528
Instrument cluster . . . . . . . . . . . . . . . . . . . . . . . . . 4-51
• Instrument Cluster Control . . . . . . . . . . . . . . . . . . . . 4-52
• LCD Display Control . . . . . . . . . . . . . . . . . . . . . . . . . 4-52
• Gauges . . . . . . . . . . . . . . . . . . . . . . . . . . . . . . . . . . . . \
. 4-53
• Transmission Shift Indicator . . . . . . . . . . . . . . . . . . . 4-57
Trip computer . . . . . . . . . . . . . . . . . . . . . . . . . . . . . 4-58
• Trip information (Trip computer) . . . . . . . . . . . . . . . 4-58
• Service Mode (For type A cluster) . . . . . . . . . . . . . . . 4-63
LCD display (For Type B cluster) . . . . . . . . . . . . 4-64
• LCD Display Mode . . . . . . . . . . . . . . . . . . . . . . . . . . . 4-64
• Driving Assist mode. . . . . . . . . . . . . . . . . . . . . . . . . . . 4-65
• User Settings Mode (For type B cluster) . . . . . . . . . 4-66
• Warning messages (For type B cluster) . . . . . . . . . . 4-74
Warning and indicator lights . . . . . . . . . . . . . . . . 4-78
• Warning lights . . . . . . . . . . . . . . . . . . . . . . . . . . . . . . . 4-78
• Indicator Lights . . . . . . . . . . . . . . . . . . . . . . . . . . . . . . 4-86
Rear View Monitor (RVM) . . . . . . . . . . . . . . . . . . 4-90
• Rear View Monitor malfunction and limitations . . . 4-90
Lighting . . . . . . . . . . . . . . . . . . . . . . . . . . . . . . . . . . 4-92\
• Battery saver function. . . . . . . . . . . . . . . . . . . . . . . . . 4-92
• Headlight escort function . . . . . . . . . . . . . . . . . . . . . . 4-92
• Headlight welcome function . . . . . . . . . . . . . . . . . . . . 4-92
• Lighting control . . . . . . . . . . . . . . . . . . . . . . . . . . . . . . 4-93
• High beam operation. . . . . . . . . . . . . . . . . . . . . . . . . . 4-95
• High Beam Assist (HBA) . . . . . . . . . . . . . . . . . . . . . . 4-96• Turn signals and lane change signals . . . . . . . . . . . . 4-97
• Front fog light . . . . . . . . . . . . . . . . . . . . . . . . . . . . . . . 4-98
Wipers and washers . . . . . . . . . . . . . . . . . . . . . . . . 4-99
• Windshield wipers . . . . . . . . . . . . . . . . . . . . . . . . . . . 4-100
• Windshield washers (front) . . . . . . . . . . . . . . . . . . . 4-101
• Rear window wiper and washer switch (for 5 door) .
4-103
Interior light . . . . . . . . . . . . . . . . . . . . . . . . . . . . . 4-104
• Automatic turn off function . . . . . . . . . . . . . . . . . . . 4-104
• Map lamp . . . . . . . . . . . . . . . . . . . . . . . . . . . . . . . . . 4-104
• Room lamp . . . . . . . . . . . . . . . . . . . . . . . . . . . . . . . . . 4-105
• Trunk/Liftgate room lamp . . . . . . . . . . . . . . . . . . . . 4-107
• Glove box lamp . . . . . . . . . . . . . . . . . . . . . . . . . . . . . 4-107
• Vanity mirror lamp . . . . . . . . . . . . . . . . . . . . . . . . . . 4-108
Defroster . . . . . . . . . . . . . . . . . . . . . . . . . . . . . . . . 4-109
• Rear window defroster . . . . . . . . . . . . . . . . . . . . . . . 4-109
Manual climate control system . . . . . . . . . . . . . . 4-110
• Heating and air conditioning . . . . . . . . . . . . . . . . . . 4-111
• System operation . . . . . . . . . . . . . . . . . . . . . . . . . . . . 4-116
• Climate control air filter . . . . . . . . . . . . . . . . . . . . . . 4-118
• Checking the amount of air conditioner refrigerant
and compressor lubricant . . . . . . . . . . . . . . . . . . . . 4-119
• Air Conditioning refrigerant label . . . . . . . . . . . . . 4-120
• Activate upon Washer Fluid Use . . . . . . . . . . . . . . 4-121
4
SC PE USA 4.QXP 9/9/2021 6:01 PM Page 2
Page 86 of 528
47
Features of your vehicle
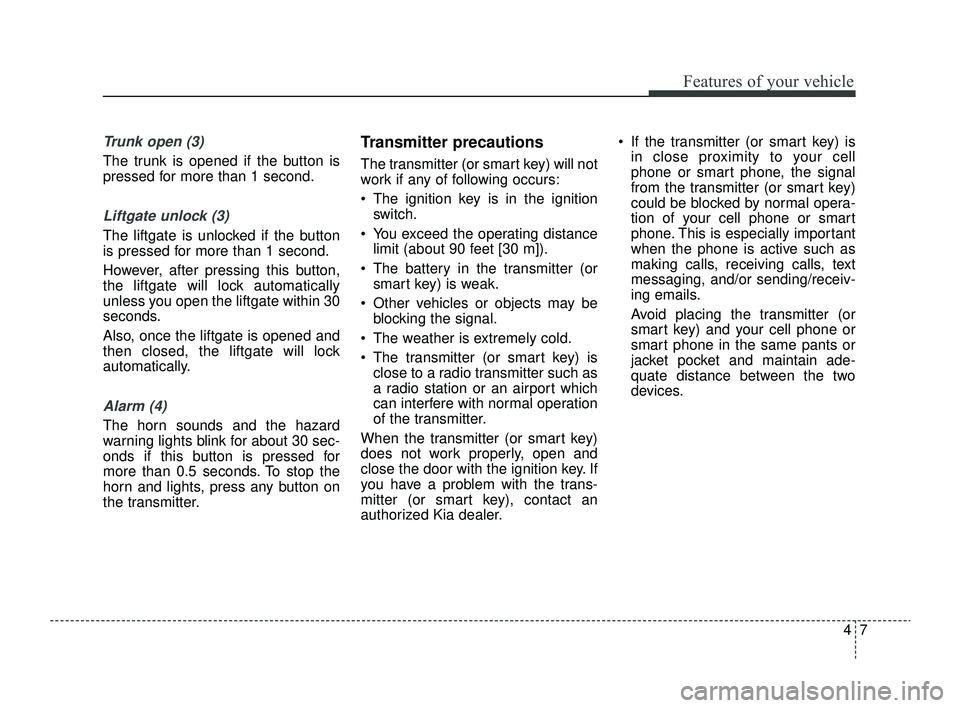
Trunk open (3)
The trunk is opened if the button is
pressed for more than 1 second.
Liftgate unlock (3)
The liftgate is unlocked if the button
is pressed for more than 1 second.
However, after pressing this button,
the liftgate will lock automatically
unless you open the liftgate within 30
seconds.
Also, once the liftgate is opened and
then closed, the liftgate will lock
automatically.
Alarm (4)
The horn sounds and the hazard
warning lights blink for about 30 sec-
onds if this button is pressed for
more than 0.5 seconds. To stop the
horn and lights, press any button on
the transmitter.
Transmitter precautions
The transmitter (or smart key) will not
work if any of following occurs:
The ignition key is in the ignitionswitch.
You exceed the operating distance limit (about 90 feet [30 m]).
The battery in the transmitter (or smart key) is weak.
Other vehicles or objects may be blocking the signal.
The weather is extremely cold.
The transmitter (or smart key) is close to a radio transmitter such as
a radio station or an airport which
can interfere with normal operation
of the transmitter.
When the transmitter (or smart key)
does not work properly, open and
close the door with the ignition key. If
you have a problem with the trans-
mitter (or smart key), contact an
authorized Kia dealer. If the transmitter (or smart key) is
in close proximity to your cell
phone or smart phone, the signal
from the transmitter (or smart key)
could be blocked by normal opera-
tion of your cell phone or smart
phone. This is especially important
when the phone is active such as
making calls, receiving calls, text
messaging, and/or sending/receiv-
ing emails.
Avoid placing the transmitter (or
smart key) and your cell phone or
smart phone in the same pants or
jacket pocket and maintain ade-
quate distance between the two
devices.
SC PE USA 4.QXP 9/9/2021 6:01 PM Page 7
Page 87 of 528
Features of your vehicle
84
This device complies with Part 15
of the FCC rules.
Operation is subject to the following
two conditions:
1. This device may not cause harm-ful interference, and
2. This device must accept any inter- ference received, including inter-
ference that may cause undesired
operation.
✽ ✽NOTICE
Changes or modifications not
expressly approved by the party
responsible for compliance could void
the user’s authority to operate the
equipment. If the keyless entry sys-
tem is inoperative due to changes or
modifications not expressly approved
by the party responsible for compli-
ance, it will not be covered by your
manufacturer’s vehicle warranty.
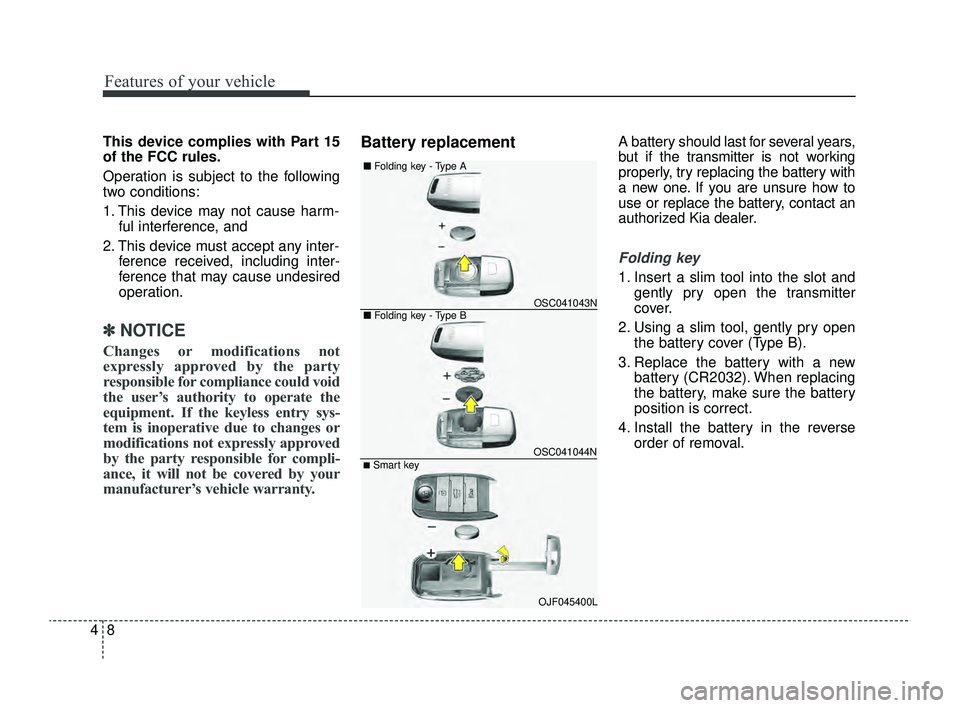
Battery replacementA battery should last for several years,
but if the transmitter is not working
properly, try replacing the battery with
a new one. If you are unsure how to
use or replace the battery, contact an
authorized Kia dealer.
Folding key
1. Insert a slim tool into the slot and
gently pry open the transmitter
cover.
2. Using a slim tool, gently pry open the battery cover (Type B).
3. Replace the battery with a new battery (CR2032). When replacing
the battery, make sure the battery
position is correct.
4. Install the battery in the reverse order of removal.
■Folding key - Type B
■
Folding key - Type AOSC041043N
OSC041044N■Smart key
OJF045400L
SC PE USA 4.QXP 9/9/2021 6:01 PM Page 8