2022 HYUNDAI VELOSTER N wheel torque
[x] Cancel search: wheel torquePage 134 of 446

3-56
Convenient features of your vehicle
Sport mode
Gauges
This mode displays information relat-
ed to your engine such as engine oil
temperature (1), current torque (2)
and turbo boost pressure (3).
Lap timer
(1) Total time
(2) Best lap
(3) Current lap
To start (A):
Press the OK button shortly on the
steering wheel. The lap timer will
start counting the current lap (3).
To stop (B):
Press and hold the OK button for
more than 1 second on the steering
wheel while the lap timer is counting
the current lap (3).
To reset (C):
Press and hold the OK button for
more than 1 second on the steering
wheel when the lap timer has
stopped counting the current lap (3).
If the OK button is pressed shortly,
the lap timer will continue counting
from the time it has been stopped.
To save laps:
Press the OK button shortly on the
steering wheel while the lap timer is
counting the current lap (3).
The timer can save L1~ L3 (4).
The best lap (2) will be displayed
automatically.
OIK047167N
OIK047170LOIK047168L/OIK047169L
Page 233 of 446

5-39
Driving your vehicle
5
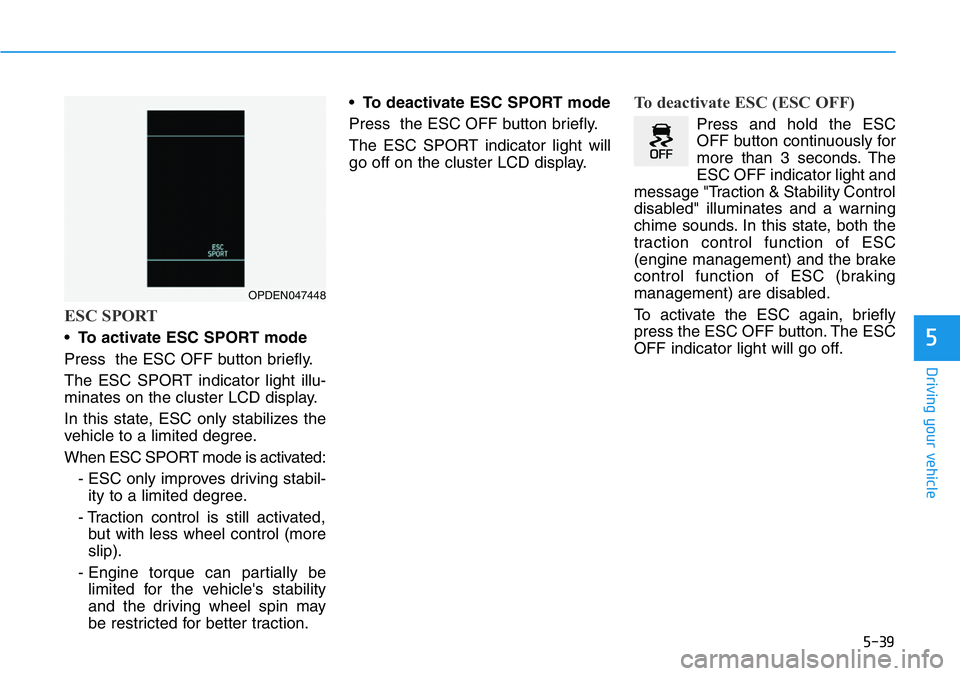
ESC SPORT
•To activate ESC SPORT mode
Press the ESC OFF button briefly.
The ESC SPORT indicator light illu-
minates on the cluster LCD display.
In this state, ESC only stabilizes the
vehicle to a limited degree.
When ESC SPORT mode is activated:
- ESC only improves driving stabil-
ity to a limited degree.
- Traction control is still activated,
but with less wheel control (more
slip).
- Engine torque can partially be
limited for the vehicle's stability
and the driving wheel spin may
be restricted for better traction.•To deactivate ESC SPORT mode
Press the ESC OFF button briefly.
The ESC SPORT indicator light will
go off on the cluster LCD display.
To deactivate ESC (ESC OFF)
Press and hold the ESC
OFF button continuously for
more than 3 seconds. The
ESC OFF indicator light and
message "Traction & Stability Control
disabled" illuminates and a warning
chime sounds. In this state, both the
traction control function of ESC
(engine management) and the brake
control function of ESC (braking
management) are disabled.
To activate the ESC again, briefly
press the ESC OFF button. The ESC
OFF indicator light will go off.
OPDEN047448
Page 235 of 446

5-41
Driving your vehicle
5
ESC OFF usage
When Driving
The ESC OFF mode should only be
used briefly to help free the vehicle if
stuck in snow or mud, by temporarily
stopping operation of the ESC, to
maintain wheel torque.
To turn ESC off while driving, press
the ESC OFF button while driving on
a flat road surface.To prevent damage to the trans-
mission:
• Do not allow wheel(s) of one
axle to spin excessively while
the ESC, ABS, and parking brake
warning lights are displayed.
The repairs would not be cov-
ered by the vehicle warranty.
Reduce engine power and do
not spin the wheel(s) excessive-
ly while these lights are dis-
played.
• When operating the vehicle on a
dynamometer, make sure the
ESC is turned off (ESC OFF light
illuminated).
Information
Turning the ESC off does not affect
ABS or standard brake system opera-
tion.
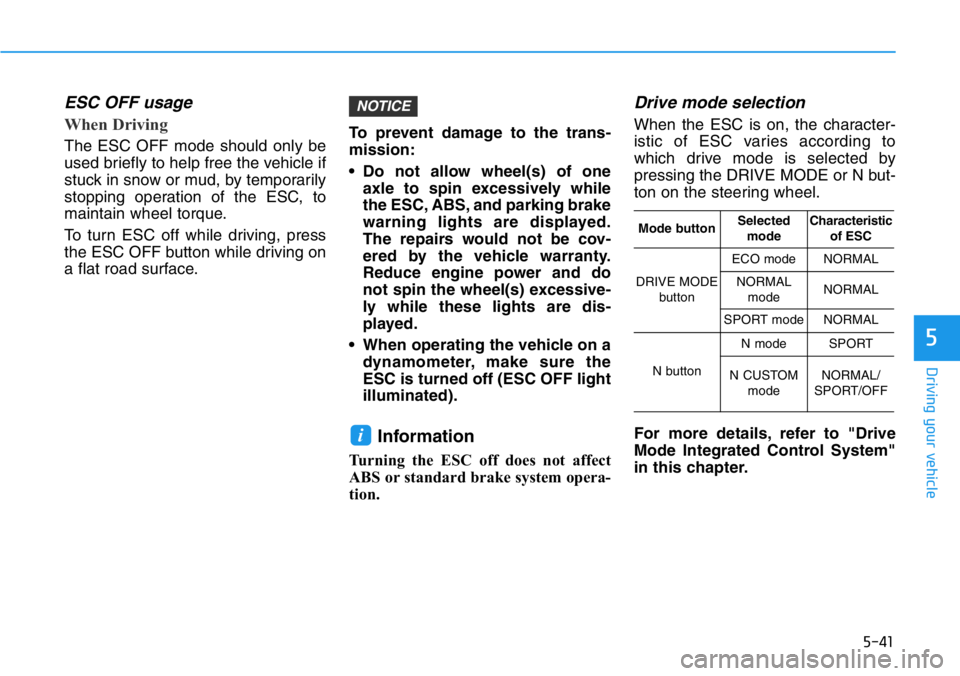
Drive mode selection
When the ESC is on, the character-
istic of ESC varies according to
which drive mode is selected by
pressing the DRIVE MODE or N but-
ton on the steering wheel.
For more details, refer to "Drive
Mode Integrated Control System"
in this chapter.
i
NOTICE
Mode buttonSelected
modeCharacteristic
of ESC
DRIVE MODE
button
ECO modeNORMAL
NORMAL
modeNORMAL
SPORT modeNORMAL
N button
N modeSPORT
N CUSTOM
modeNORMAL/
SPORT/OFF
Page 367 of 446

7-15
7
Maintenance
Manual Transmission Fluid
Inspect the manual transmission
fluid according to the maintenance
schedule.
Brake Hoses and Lines
Visually check for proper installation,
chafing, cracks, deterioration and
any leakage. Replace any deteriorat-
ed or damaged parts immediately.
Brake/Clutch Fluid
Check the brake/clutch fluid level in
the brake/clutch fluid reservoir. The
level should be between the MIN and
the MAX marks on the side of the
reservoir. Use only hydraulic
brake/clutch fluid conforming to DOT
3 or DOT 4 specification.
Parking Brake
Inspect the parking brake system
including the parking brake pedal
and cables.
Brake Discs, Pads, Calipers
and Rotors
Check the pads for excessive wear,
discs for run out and wear, and
calipers for fluid leakage.
Exhaust Pipe and Muffler
Visually inspect the exhaust pipes,
muffler and hangers for cracks, dete-
rioration, or damage. Start the engine
and listen carefully for any exhaust
gas leakage. Tighten connections or
replace parts as necessary.
Suspension Mounting Bolts
Check the suspension connections
for looseness or damage. Retighten
to the specified torque.
Steering Gear Box, Linkage &
Boots/Lower Arm Ball Joint
With the vehicle stopped and the
engine off, check for excessive free-
play in the steering wheel. Check the
linkage for bends or damage. Check
the dust boots and ball joints for
deterioration, cracks, or damage.
Replace any damaged parts.
Drive Shafts and Boots
Check the drive shafts, boots and
clamps for cracks, deterioration, or
damage. Replace any damaged
parts and, if necessary, repack the
grease.
Air Conditioning Refrigerant
Check the air conditioning lines and
connections for leakage and dam-
age.
Page 384 of 446

7-32
Maintenance
TIRES AND WHEELS
Information - Power Hop
When fully accelerating the vehicle
from standstill, a front tire oscillation
called “Power Hop“ of Veloster N may
occur due to the high torque of engine
and the characteristics of high per-
formance tire. This may be affected by
road condition and temperatures.
Additionally it is a normal phenome
non in powerful front-wheel drive
vehicles. Veloster N will act on this
phenomenon with the traction control
in all ESC modes with the main focus
on high performance character.i•Replace tires that are worn,
show uneven wear, or are
damaged. Worn tires can
cause loss of braking effec-
tiveness, steering control, or
traction.
•ALWAYS replace tires with the
same size as each tire that
was originally supplied with
this vehicle. Using tires and
wheels other than the recom-
mended sizes could cause
unusual handling characteris-
tics, poor vehicle control, or
negatively affect your vehi-
cle's Anti-Lock Brake System
(ABS) resulting in a serious
accident.
Tire failure may cause loss of
vehicle control resulting in an
accident. To reduce risk of
SERIOUS INJURY or DEATH,
take the following precautions:
•Inspect your tires monthly for
proper inflation as well as
wear and damage.
•The recommended cold tire
pressure for your vehicle can
be found in this manual and
on the tire label located on the
driver's side center pillar.
Always use a tire pressure
gauge to measure tire pres-
sure. Tires with too much or
too little pressure wear
unevenly causing poor han-
dling.
•Check the pressure of the
spare every time you check
the pressure of the other tires
on your vehicle.
WARNING
Page 387 of 446

7-35
7
Maintenance
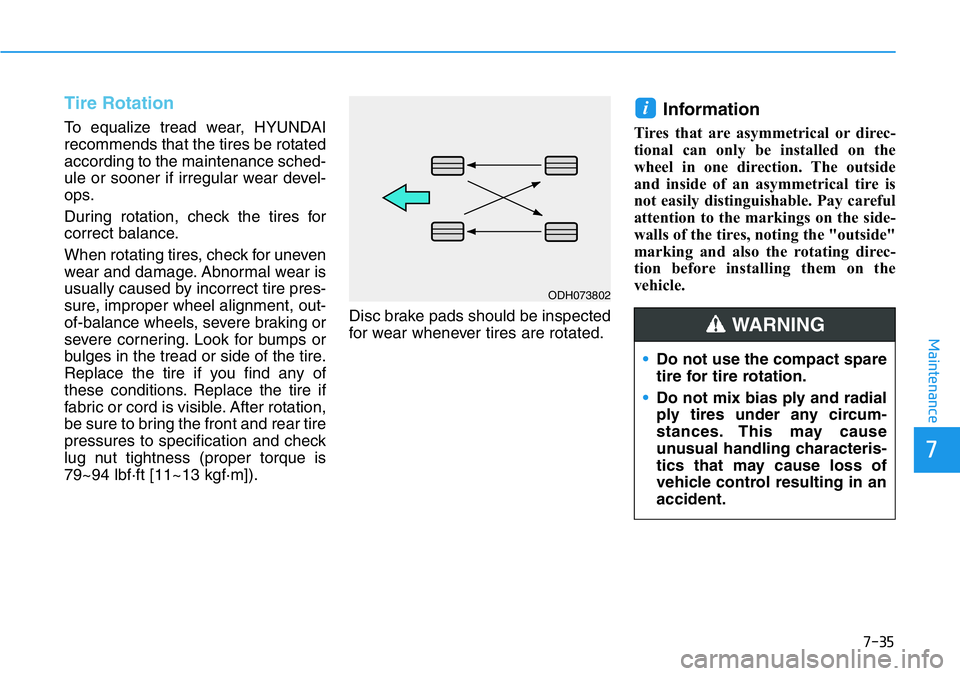
Tire Rotation
To equalize tread wear, HYUNDAI
recommends that the tires be rotated
according to the maintenance sched-
ule or sooner if irregular wear devel-
ops.
During rotation, check the tires for
correct balance.
When rotating tires, check for uneven
wear and damage. Abnormal wear is
usually caused by incorrect tire pres-
sure, improper wheel alignment, out-
of-balance wheels, severe braking or
severe cornering. Look for bumps or
bulges in the tread or side of the tire.
Replace the tire if you find any of
these conditions. Replace the tire if
fabric or cord is visible. After rotation,
be sure to bring the front and rear tire
pressures to specification and check
lug nut tightness (proper torque is
79~94 lbf·ft [11~13 kgf·m]).Disc brake pads should be inspected
for wear whenever tires are rotated.
Information
Tires that are asymmetrical or direc-
tional can only be installed on the
wheel in one direction. The outside
and inside of an asymmetrical tire is
not easily distinguishable. Pay careful
attention to the markings on the side-
walls of the tires, noting the "outside"
marking and also the rotating direc-
tion before installing them on the
vehicle.
i
•Do not use the compact spare
tire for tire rotation.
•Do not mix bias ply and radial
ply tires under any circum-
stances. This may cause
unusual handling characteris-
tics that may cause loss of
vehicle control resulting in an
accident.
WARNING
ODH073802
Page 438 of 446
![HYUNDAI VELOSTER N 2022 Owners Manual TIRES AND WHEELS
8-4
Specifications, Consumer information and Reporting safety defects
Tire SizeWheel
SizeTrans-
missionInflation pressure [bar (kPa, psi)]
Wheel lug
nut torque
[kgf•m
(lbf•ft,
N� HYUNDAI VELOSTER N 2022 Owners Manual TIRES AND WHEELS
8-4
Specifications, Consumer information and Reporting safety defects
Tire SizeWheel
SizeTrans-
missionInflation pressure [bar (kPa, psi)]
Wheel lug
nut torque
[kgf•m
(lbf•ft,
N�](/manual-img/35/41174/w960_41174-437.png)
TIRES AND WHEELS
8-4
Specifications, Consumer information and Reporting safety defects
Tire SizeWheel
SizeTrans-
missionInflation pressure [bar (kPa, psi)]
Wheel lug
nut torque
[kgf•m
(lbf•ft,
N•m)] Normal Load
(less than 100mph
or 160km/h)Maximum Load
(less than 100mph
or 160km/h)High-speed driving
(over 100mph or
160km/h) *1Track driving *2
Front Rear Front Rear Front Rear Front Rear
225/40ZR18 7.5J X 18 M/T2.5
(250, 36)2.3
(230, 33)2.8
(280, 41)2.8
(280, 41)2.8
(280, 41)2.8
(280, 41)2.5
(250, 36)2.5
(250, 36)
11~13
(79~94,
107~127)
235/35R19 8.0J X 19M/T2.6
(260, 38)2.4
(240, 35)2.9
(290, 42)2.9
(290, 42)2.9
(290, 42)2.9
(290, 42)2.6
(260, 38)2.6
(260, 38)
DCT2.55
(255,37)2.4
(240,35)2.9
(290,42)2.9
(290,42)2.9
(290,42)2.9
(290,42)2.9
(290,42)2.9
(290,42)
Full size tire
M/T : Manual Transmission
DCT : Dual Clutch Transmission
*
1: Must drive only where the speed is legal
*2: Refers to the recommended inflation pressure for the hot tire condition (state when the tire temperature is increased). Limited
number of passengers is 2 with no luggage. After the track driving is complete, change to the appropriate tire inflation recom-
mended for the normal road driving condition.
Tires specified to this vehicle will have "HN" logo molded on the tire.