2022 HYUNDAI TUCSON HYBRID flat tire
[x] Cancel search: flat tirePage 541 of 630
08
8-21
13. After driving approximately 4~6 miles
(7~10 km or about 10 minutes), stop at
a safe location.
ONX4080011
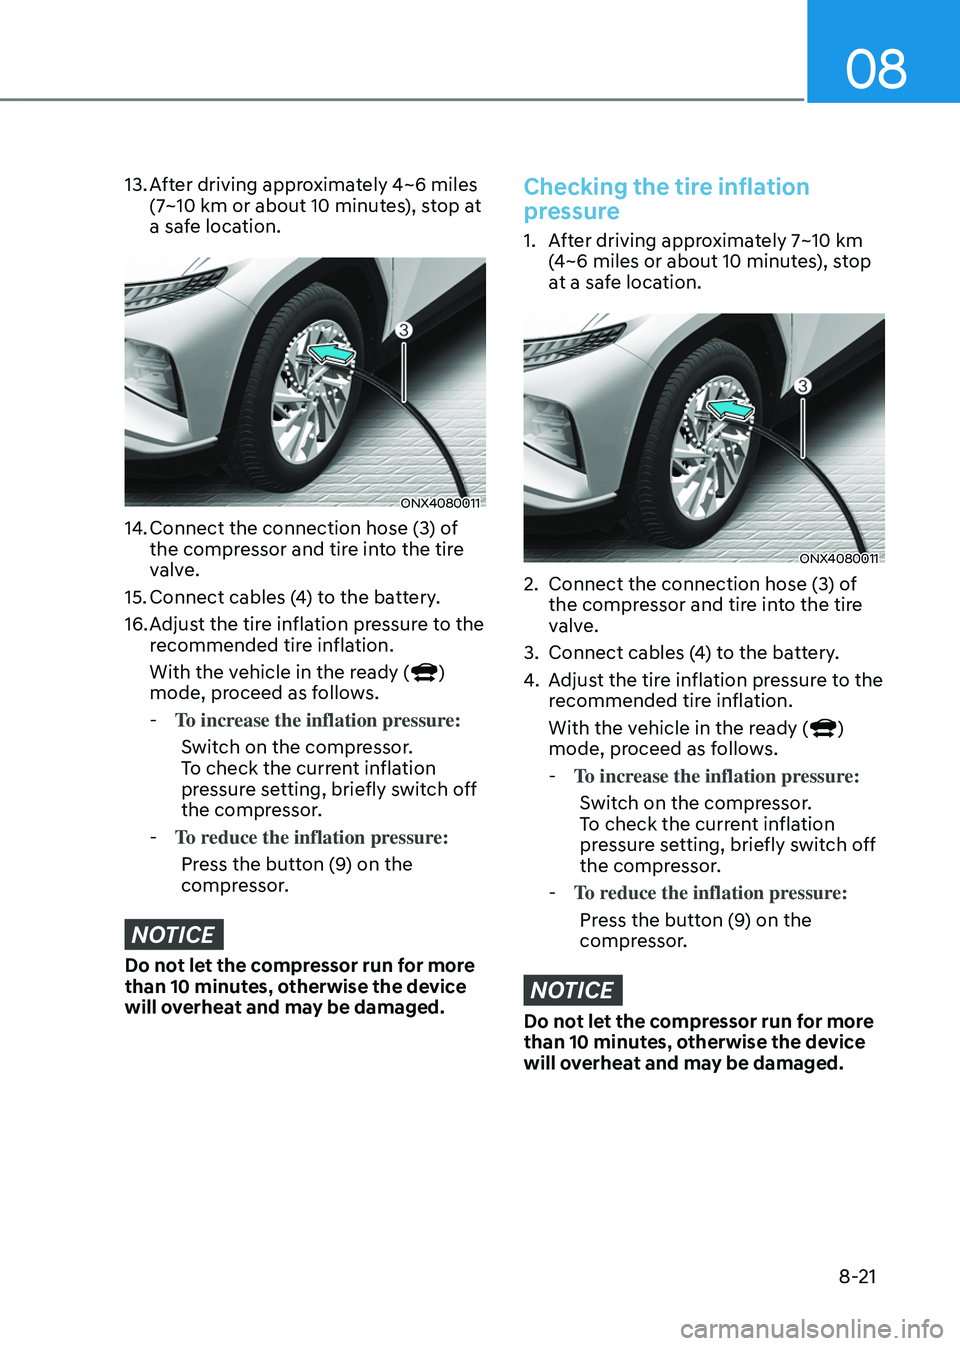
14. Connect the connection hose (3) o f
the compressor and tire into the tire
valve.
15.
Connect cables (4
) to the battery.
16.
Adjus
t the tire inflation pressure to the
recommended tire inflation.
With the vehicle in the ready (
)
mode, proceed as follows.
- To incr
ease the inflation pressure:
Switch on the compressor.
To check the current inflation
pressure setting, briefly switch off
the compressor.
- To r
educe the inflation pressure:
Press the button (9) on the
compressor.
NOTICE
Do not let the compressor run for more
than 10 minutes, otherwise the device
will overheat and may be damaged.
Checking the tire inflation
pressure
1. After driving approximately 7~10 km
( 4~6 miles or about 10 minutes), stop
at a safe location.
ONX4080011
2. Connect the connection hose (3) o f
the compressor and tire into the tire
valve.
3.
Connect cables (4
) to the battery.
4.
Adjus
t the tire inflation pressure to the
recommended tire inflation.
With the vehicle in the ready (
)
mode, proceed as follows.
- To incr
ease the inflation pressure:
Switch on the compressor.
To check the current inflation
pressure setting, briefly switch off
the compressor.
- To r
educe the inflation pressure:
Press the button (9) on the
compressor.
NOTICE
Do not let the compressor run for more
than 10 minutes, otherwise the device
will overheat and may be damaged.
Page 542 of 630
Emergency situations
8-22
Information
The pressure gauge may show higher than
actual reading when the compressor is
running. To get an accurate tire pressure,
the compressor needs to be turned off.
CAUTION
If the inflation pressure is not
maintained, drive the vehicle a second
time, refer to Distributing the sealant.
Then repeat steps 1 to 4.
Use of the TMK may be ineffectual for
tire damage larger than approximately
0.16 in (4 mm).
We recommend that you contact an
authorized HYUNDAI dealer if the tire
cannot be made roadworthy with the
Tire Mobility Kit.
WARNING
The tire inflation pressure must be
inflated to the proper pressure (Refer to
“Tire and Wheels” section in chapter 2).
If it is not, do not continue driving.
Call for road side service or towing.
CAUTION
Tire pressure sensor
The sealant on the tire pressure sensor
and wheel should be removed when
you replace the tire with a new one and
inspect the tire pressure sensors. We
recommend that you get this done at an
authorized dealer.
Information
When reinstalling the repaired or replaced
tire and wheel on the vehicle, tighten the
wheel bolt to 11~13 kgf·m (79~94 lbf·ft).
Page 547 of 630
08
8-27
Your HYUNDAI vehicle may come
equipped with certain additional
emergency or roadside assistance
accessories that may be useful if a
problem occurs.
Fire extinguisher
If there is small fire and you know how
to use the fire extinguisher, follow these
steps carefully.
1.
Pull out the saf
ety pin at the top of the
extinguisher that keeps the handle
from being accidentally pressed.
2.
Aim the nozzle t
owards the base of
the fire.
3.
Stand appr
oximately 8 ft (2.5 m) away
from the fire and squeeze the handle
to discharge the extinguisher. If you
release the handle, the discharge will
stop.
4.
Sw
eep the nozzle back and forth
at the base of the fire. After the fire
appears to be out, watch carefully
since it may re-ignite.
First aid kit
Supplies for use in giving first aid such as
scissors, bandages and adhesive tape,
etc. are provided.
Triangle reflector
Place the triangle reflector on the road
to warn oncoming vehicles during
emergencies, such as when the vehicle is
parked by the roadside due to problems.
Tire pressure gauge
Tires normally lose some air in day-to-
day use, and you may have to add a air
periodically and usually it is not a sign of
a leaking tire, but of normal wear. Always
check tire pressure when the tires are
cold because tire pressure increases with
temperature.
To check the tire pressure, take the
following steps:
1.
Unscre
w the inflation valve cap that is
located on the rim of the tire.
2.
Press and hold the gauge agains
t the
tire valve. Some air will leak as you
begin and more will leak if you don’t
press the gauge in firmly.
3.
A firm non-leaking push will activa
te
the gauge.
4.
Read the tir
e pressure on the gauge
to see whether the tire pressure is low
or high.
5.
Adjus
t the tire pressure to the
specified pressure. Refer to “Tires and
Wheels” section in chapter 2.
6.
Reins
tall the inflation valve cap.
emergency / roadside assistance accessories
Page 549 of 630
Tires and wheels ........................................................................\
......................9-31Tire care ........................................................................\
.............................................. 9-31
R ecommended cold tire inflation pressures ............................................................ 9-
31
Check tire inflation pressure
........................................................................\
............. 9-
32
Tire rotation
........................................................................\
........................................ 9-
33
Wheel alignment and tire balance
........................................................................\
.... 9-34
Tir
e replacement
........................................................................\
................................ 9-
34
Wheel replacement
........................................................................\
............................ 9-
35
Tire traction
........................................................................\
.....................................
...9-35
Tire maintenance
........................................................................\
............................... 9-
35
Tire sidewall labeling
........................................................................\
.......................... 9-
36
Low aspect ratio tires
........................................................................\
......................... 9-
39
Fuses ........................................................................\
........................................9-40Instrument panel fuse replacement ........................................................................\
.9-41
E ngine compartment panel fuse replacement ....................................................... 9-42
F
use/relay panel description
........................................................................\
............ 9-43
Light bulbs ........................................................................\
................................ 9-51Headlamp, position lamp, turn signal lamp, Daytime Running Light (DRL)
replacement ........................................................................\
.....................................
..9-52
Side repeater lamp replacement
........................................................................\
...... 9-52
Rear combina
tion lamp replacement
....................................................................... 9-53
High moun
ted stop lamp replacement
................................................................... 9-56
License pla
te lamp replacement
........................................................................\
....... 9-57
Int
erior light replacement
........................................................................\
.................. 9-57
Appearance care ........................................................................\
..................... 9-59Exterior care ........................................................................\
...................................... 9-59
Int erior care ........................................................................\
....................................... 9-63
Emission control system........................................................................\
.........9-66
California perchlorate notice
........................................................................\
. 9-70
9
Page 552 of 630
09
9-5
WARNING
Performing maintenance work on a
vehicle can be dangerous. If you lack
sufficient knowledge and experience or
the proper tools and equipment to do
the work, we recommend that having it
done by an authorized HYUNDAI dealer.
ALWAYS follow these precautions for
performing maintenance work:
• Park your vehicle on level ground,
move the shift button into the P
(Park) position, apply the parking
brake, and place the ignition switch
in the LOCK/OFF position.
• Block the tires (front and back) to
prevent the vehicle from moving.
Remove loose clothing or jewelry
that can become entangled in
moving parts.
• If you must run the engine during
maintenance, do so out doors or in
an area with plenty of ventilation.
• Keep flames, sparks, or smoking
materials away from the battery and
fuel-related parts. The following lists are vehicle checks and
inspections that should be performed
by the owner or an authorized HYUNDAI
dealer at the frequencies indicated to
help ensure safe, dependable operation
of your vehicle.
Any adverse conditions should be
brought to the attention of your dealer as
soon as possible.
These Owner Maintenance vehicle
checks are generally not covered by
warranties and you may be charged for
labor, parts and lubricants used.
Owner maintenance schedule
When you stop for fuel:
•
Check the coolant level in the engine
coolant reservoir.
• Check the windshield washer fluid
level.
• Check for low or under-inflated tires.
WARNING
Be careful when checking your engine
coolant/inverter coolant level when the
engine is hot. This may result in coolant
being blown out of the opening and
cause serious burns and other injuries.
ownEr maintEnancE
Page 553 of 630
Maintenance
9-6
While operating your vehicle:
• Note any changes in the sound of the
exhaust or any smell of exhaust fumes
in the vehicle.
• Check for vibrations in the steering
wheel. Notice if there is any increased
steering effort or looseness in the
steering wheel, or change in its
straight-ahead position.
• Notice if your vehicle constantly turns
slightly or “pulls” to one side when
traveling on smooth, level road.
• When stopping, listen and check for
unusual sounds, pulling to one side,
increased brake pedal travel or “hard-
to-push” brake pedal.
• If any slipping or changes in the
operation of your transmission occurs,
check the transmission fluid level.
• Check the automatic transmission P
(Park) function.
• Check the parking brake.
• Check for fluid leaks under your
vehicle (water dripping from the air
conditioning system during or after
use is normal).
At least monthly:
• Check coolant level in the engine
coolant reservoir.
• Check the operation of all exterior
lights, including the stoplights, turn
signals and hazard warning flashers.
• Check the inflation pressures of all
tires including the spare for tires that
are worn, show uneven wear, or are
damaged.
• Check for loose wheel lug nuts.
At least twice a year:
• Check radiator, heater and air
conditioning hoses for leaks or
damage.
• Check windshield washer spray and
wiper operation. Clean wiper blades
with a clean cloth dampened with
washer fluid.
• Check headlamp alignment.
• Check muffler, exhaust pipes, shields
and clamps.
• Check the seat belts for wear and
function.
At least once a year:
• Clean body and door drain holes.
• Lubricate door hinges and hood
hinges.
• Lubricate door and hood locks and
latches.
• Lubricate door rubber weather strips.
• Check the air conditioning system.
• Inspect and lubricate automatic
transmission linkage and controls.
• Clean the battery and terminals.
• Check the brake fluid level.
Page 578 of 630
09
9-31
tirEs and whEEls
WARNING
Tire failure may cause loss of
vehicle control resulting in an
accident. To reduce risk of SERIOUS
INJURY or DEATH, take the
following precautions:
• Inspect your tires monthly for
proper inflation as well as wear
and damage.
• The recommended cold tire
pressure for your vehicle can be
found in this manual and on the
tire label located on the driver’s
side center pillar. Always use a
tire pressure gauge to measure
tire pressure. Tires with too
much or too little pressure wear
unevenly causing poor handling.
• Check the pressure of the spare
tire every time you check the
pressure of the other tires on
your vehicle.
• Replace tires that are worn, show
uneven wear, or are damaged.
Worn tires can cause loss of
braking effectiveness, steering
control, or traction.
• ALWAYS replace tires with the
same size, type, construction and
tread pattern as each tire that
was originally supplied with this
vehicle. Using tires and wheels
other than the recommended
sizes could cause unusual
handling characteristics, poor
vehicle control, or negatively
affect your vehicle’s Anti-Lock
Brake System (ABS) resulting in a
serious accident.
Tire care
For proper maintenance, safety, and
maximum fuel economy, you must
always maintain recommended
tire inflation pressures and stay
within the load limits and weight
distribution recommended for your
vehicle.
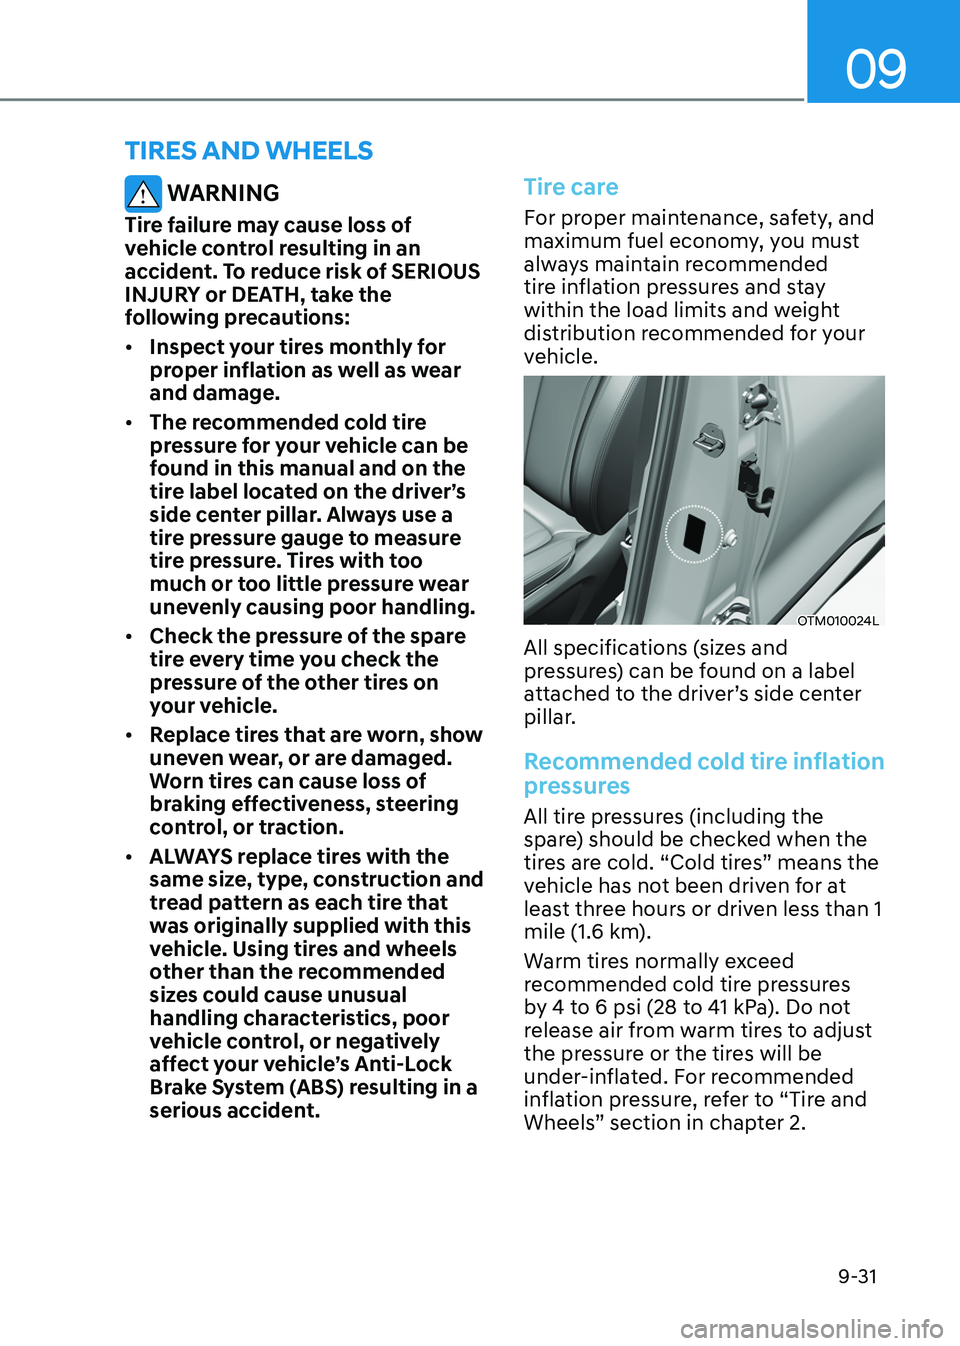
OTM010024L
All specifications (sizes and
pressures) can be found on a label
attached to the driver’s side center
pillar.
Recommended cold tire inflation
pressures
All tire pressures (including the
spare) should be checked when the
tires are cold. “Cold tires” means the
vehicle has not been driven for at
least three hours or driven less than 1
mile (1.6 km).
Warm tires normally exceed
recommended cold tire pressures
by 4 to 6 psi (28 to 41 kPa). Do not
release air from warm tires to adjust
the pressure or the tires will be
under-inflated. For recommended
inflation pressure, refer to “Tire and
Wheels” section in chapter 2.
Page 579 of 630
Maintenance
9-32
WARNING
Recommended pressures must be
maintained for the best ride, vehicle
handling, and minimum tire wear.
Over-inflation or under-inflation
can reduce tire life, adversely
affect vehicle handling, and lead to
sudden tire failure that could result
in loss of vehicle control resulting in
an accident.
Severe under-inflation can lead
to severe heat build-up, causing
blowouts, tread separation and
other tire failures that can result in
the loss of vehicle control resulting
in an accident. This risk is much
higher on hot days and when
driving for long periods at high
speeds.
CAUTION
• Under-inflation results in
excessive wear, poor handling
and reduced fuel economy.
Wheel deformation is also
possible. Keep your tire pressures
at the proper levels. If a tire
frequently needs refilling, we
recommend it be checked by an
authorized HYUNDAI dealer.
• Over-inflation produces a harsh
ride, excessive wear at the center
of the tire tread, and a greater
possibility of damage from road
hazards.
Check tire inflation pressure
Check your tires, including the spare
tire, once a month or more.
How to check
Use a good quality tire pressure
gauge to check tire pressure. You
can not tell if your tires are properly
inflated simply by looking at them.
Radial tires may look properly
inflated when they are under-
inflated.
Remove the valve cap from the tire
valve stem. Press the tire gauge
firmly onto the valve to get a
pressure measurement. If the cold
tire inflation pressure matches the
recommended pressure on the tire
and loading information label, no
further adjustment is necessary. If
the pressure is low, add air until you
reach the recommended pressure.
Make sure to put the valve caps
back on the valve stems. Without
the valve cap, dirt or moisture could
get into the valve core and cause
air leakage. If a valve cap is missing,
install a new one as soon as possible.
If you overfill the tire, release air by
pushing on the metal stem in the
center of the tire valve. Recheck the
tire pressure with the tire gauge. Be
sure to put the valve caps back on
the valve stems. Without the valve
cap, dirt or moisture could get into
the valve core and cause air leakage.
If a valve cap is missing, install a new
one as soon as possible.