2022 HYUNDAI TUCSON HYBRID instrument panel
[x] Cancel search: instrument panelPage 99 of 630
03
3-53
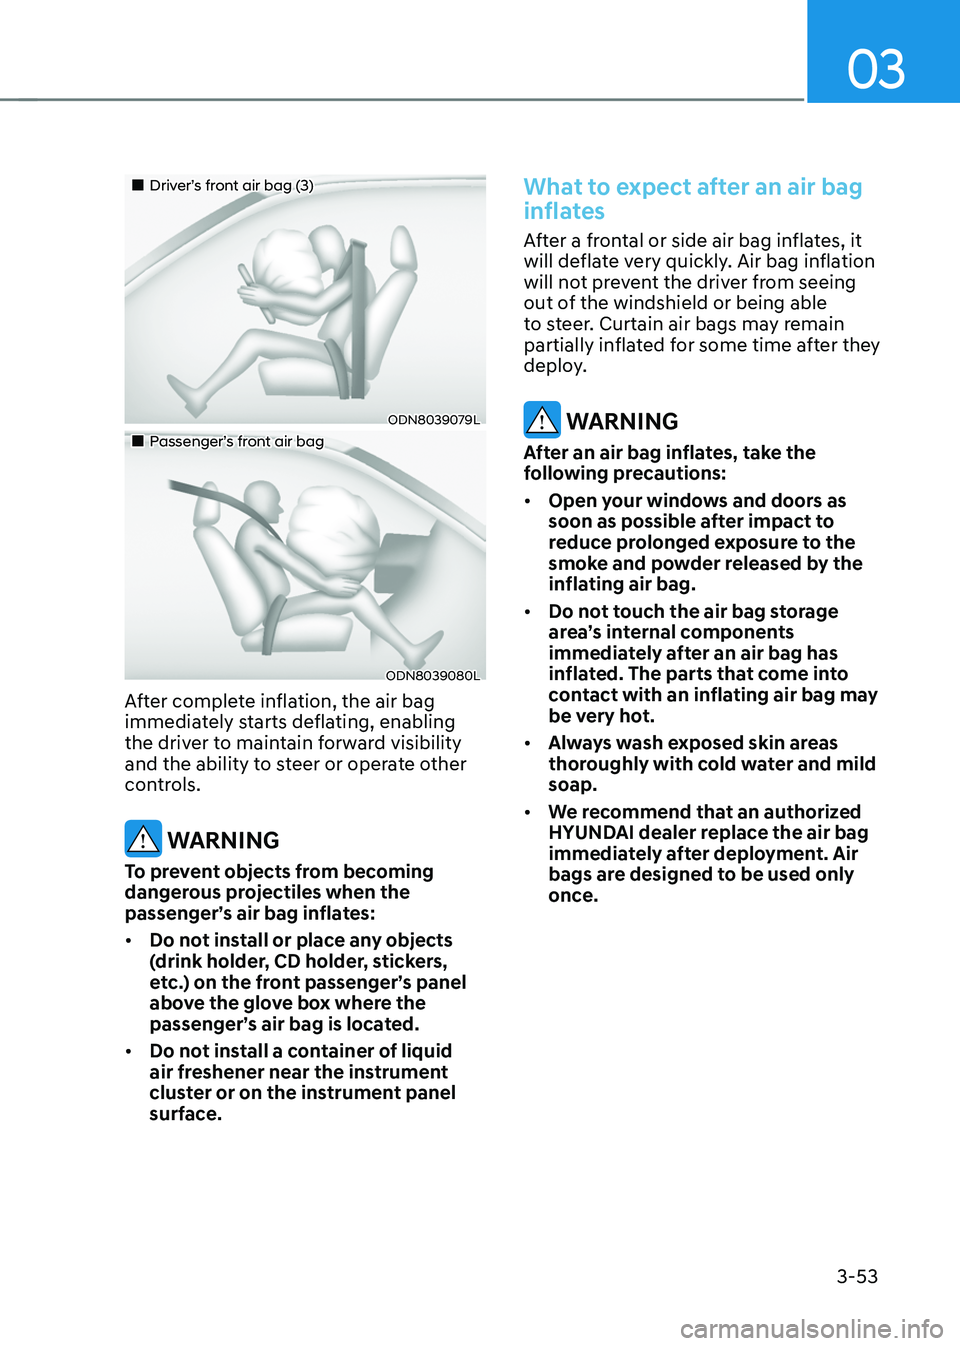
„„Driver’s front air bag (3)
ODN8039079L
„„Passenger’s front air bag
ODN8039080L
After complete inflation, the air bag
immediately starts deflating, enabling
the driver to maintain forward visibility
and the ability to steer or operate other
controls.
WARNING
To prevent objects from becoming
dangerous projectiles when the
passenger’s air bag inflates:
• Do not install or place any objects
(drink holder, CD holder, stickers,
etc.) on the front passenger’s panel
above the glove box where the
passenger’s air bag is located.
• Do not install a container of liquid
air freshener near the instrument
cluster or on the instrument panel
surface.
What to expect after an air bag
inflates
After a frontal or side air bag inflates, it
will deflate very quickly. Air bag inflation
will not prevent the driver from seeing
out of the windshield or being able
to steer. Curtain air bags may remain
partially inflated for some time after they
deploy.
WARNING
After an air bag inflates, take the
following precautions:
• Open your windows and doors as
soon as possible after impact to
reduce prolonged exposure to the
smoke and powder released by the
inflating air bag.
• Do not touch the air bag storage
area’s internal components
immediately after an air bag has
inflated. The parts that come into
contact with an inflating air bag may
be very hot.
• Always wash exposed skin areas
thoroughly with cold water and mild
soap.
• We recommend that an authorized
HYUNDAI dealer replace the air bag
immediately after deployment. Air
bags are designed to be used only
once.
Page 101 of 630
03
3-55
Main components of the Occupant
Classification System
• A detection device located within the
front passenger seat cushion.
• Electronic system to determine
whether the passenger air bag
systems should be activated or
deactivated.
• An indicator light located on the
instrument panel which illuminates
the words “PASSENGER AIR BAG OFF”
indicating the front passenger air bag
system is deactivated.
• The instrument panel air bag indicator
light is interconnected with the OCS.
The OCS is designed to help detect
the presence of a properly-seated
front passenger and determine if the
passenger’s front air bag should be
enabled (may inflate) or not.
The purpose is to help reduce the risk
of injury or death from an inflating air
bag to certain front passenger seat
occupants, such as children, by requiring
the air bag to be automatically turned
OFF.
For example, if a child restraint of the
type specified in the regulations is on the
seat, the occupant classification sensor
can detect it and cause the air bag to
turn OFF.
Front passenger seat adult occupants
who are properly seated and wearing the
seat belt properly, should not cause the
passenger air bag to be automatically
turned OFF. For smaller adults it may turn
OFF, however, if the occupant does not
sit in the seat properly (for example, by
not sitting upright, by sitting on the edge
of the seat, or by otherwise being out of
position), this could cause the sensor to
turn the air bag OFF. You will find the “PASSENGER AIR BAG
OFF” indicator on the overhead console
panel. This system detects the conditions
1-4 in the following table and activates or
deactivates the front passenger air bag
based on these conditions.
Always be sure that you and all vehicle
occupants are seated properly and
wearing the seat belt properly for the
most effective protection by the air bag
and the seat belt.
The OCS may not function properly if the
passenger takes actions which can affect
the classification system. These include:
•
Failing to sit in an upright position.
• Leaning against the door or center
console.
• Sitting towards the sides of the front
of the seat.
• Putting their legs on the dashboard or
resting them on other locations which
reduce the passenger weight on the
front seat.
• Wearing the seat belt improperly.
• Reclining the seatback.
• Wearing thick clothes like ski wear or
hip protection wear.
• Putting an additional thick cushion on
the seat.
• Putting electrical devices (e.g.
notebook, satellite radio) on the seat
with inverter charging.
Page 111 of 630
03
3-65
SRS care
The SRS is virtually maintenance-free
and there are no parts you can safely
service by yourself. If the SRS air bag
warning light does not illuminate when
the Engine Start/Stop button is in the
ON position, or continuously remains
on, we recommend that the system be
immediately inspected by an authorized
HYUNDAI dealer.
We recommend any work on the SRS
system, such as removing, installing,
repairing, or any work on the steering
wheel, the front passenger’s panel, front
seats and roof rails be performed by an
authorized HYUNDAI dealer. Improper
handling of the SRS system may result in
serious personal injury. WARNING
To reduce the risk of serious injury or
death take the following precautions:
• Do not attempt to modify or
disconnect the SRS components or
wiring, including the addition of any
kind of badges to the pad covers or
modifications to the body structure.
• Do not place objects over or near
the air bag modules on the steering
wheel, instrument panel, and the
front passenger’s panel above the
glove box.
• Clean the air bag pad covers with
a soft cloth moistened with plain
water. Solvents or cleaners could
adversely affect the air bag covers
and proper deployment of the
system.
• We recommend that inflated air
bags be replaced by an authorized
HYUNDAI dealer.
• If components of the air bag system
must be discarded, or if the vehicle
must be scrapped, certain safety
precautions must be observed.
We recommend that you consult
an authorized HYUNDAI dealer for
the necessary information. Failure
to follow these precautions could
increase the risk of personal injury.
Page 113 of 630

4. Instrument cluster
Instrument cluster
Instrument cluster ........................................................................\
....................4-4Instrument cluster control ........................................................................\
...................4-5
Instrument panel illumination ........................................................................\
...........4-5
Gauges and meters ........................................................................\
..............................4-5
Speedometer ........................................................................\
.....................................4-5
Power gauge ........................................................................\
.....................................4-6
Fuel gauge ........................................................................\
.........................................4-6
Hybrid battery SOC (State of Charge) gauge ...........................................................4 -7
Outside temperature gauge ........................................................................\
..............4 -7
Odometer ........................................................................\
..........................................4-8
Distance to empty ........................................................................\
............................4-8
Fuel economy (for 10.25-inch cluster) ....................................................................4-9
Transmission shift indicator ........................................................................\
................4-9
Automatic transmission shift indicator ...................................................................4-9
Warning and indicator lights ........................................................................\
.............4-10
Seat belt warning light ........................................................................\
....................4-10
Air bag warning light ........................................................................\
.......................4-10
Parking brake & Brake fluid warning light ..............................................................4-10
Regenerative brake warning light ........................................................................\
....4-11
Anti-lock Brake System (ABS) warning light ...........................................................4-11
Electronic Brake Force Distribution (EBD) system warning light .........................4-12
Electric Power Steering (EPS) warning light ..........................................................4-12
Malfunction Indicator Lamp (MIL) ........................................................................\
..4-13
Electronic Parking Brake (EPB) warning light ........................................................4-13
AUTO HOLD indicator light ........................................................................\
.............4-13
Charging system warning light ........................................................................\
.......4-14
Engine oil pressure warning light ........................................................................\
...4-14
Low fuel level warning light ........................................................................\
............4-15
Service warning light ........................................................................\
.......................4-15
Exhaust system (GPF) warning light .......................................................................4-15
Master warning light ........................................................................\
........................4-16
Low tire pressure warning light ........................................................................\
......4-16
Forward Safety warning light ........................................................................\
...........4-17
Lane Safety indicator light ........................................................................\
...............4-17
4 Wheel Drive (4WD) warning light ........................................................................\
.4-17
4 Wheel Drive (4WD) LOCK indicator light ..............................................................4-17
LED headlight warning light ........................................................................\
............4-18
Icy road warning light ........................................................................\
......................4-18
Ready indicator ........................................................................\
................................4-19
EV mode indicator ........................................................................\
...........................4-19
Electronic Stability Control (ESC) indicator light ...................................................4-19
Electronic Stability Control (ESC) OFF indicator light ..........................................4-19
4
Page 117 of 630
04
4-5
Instrument cluster control
Instrument panel illumination
OCN7040019L
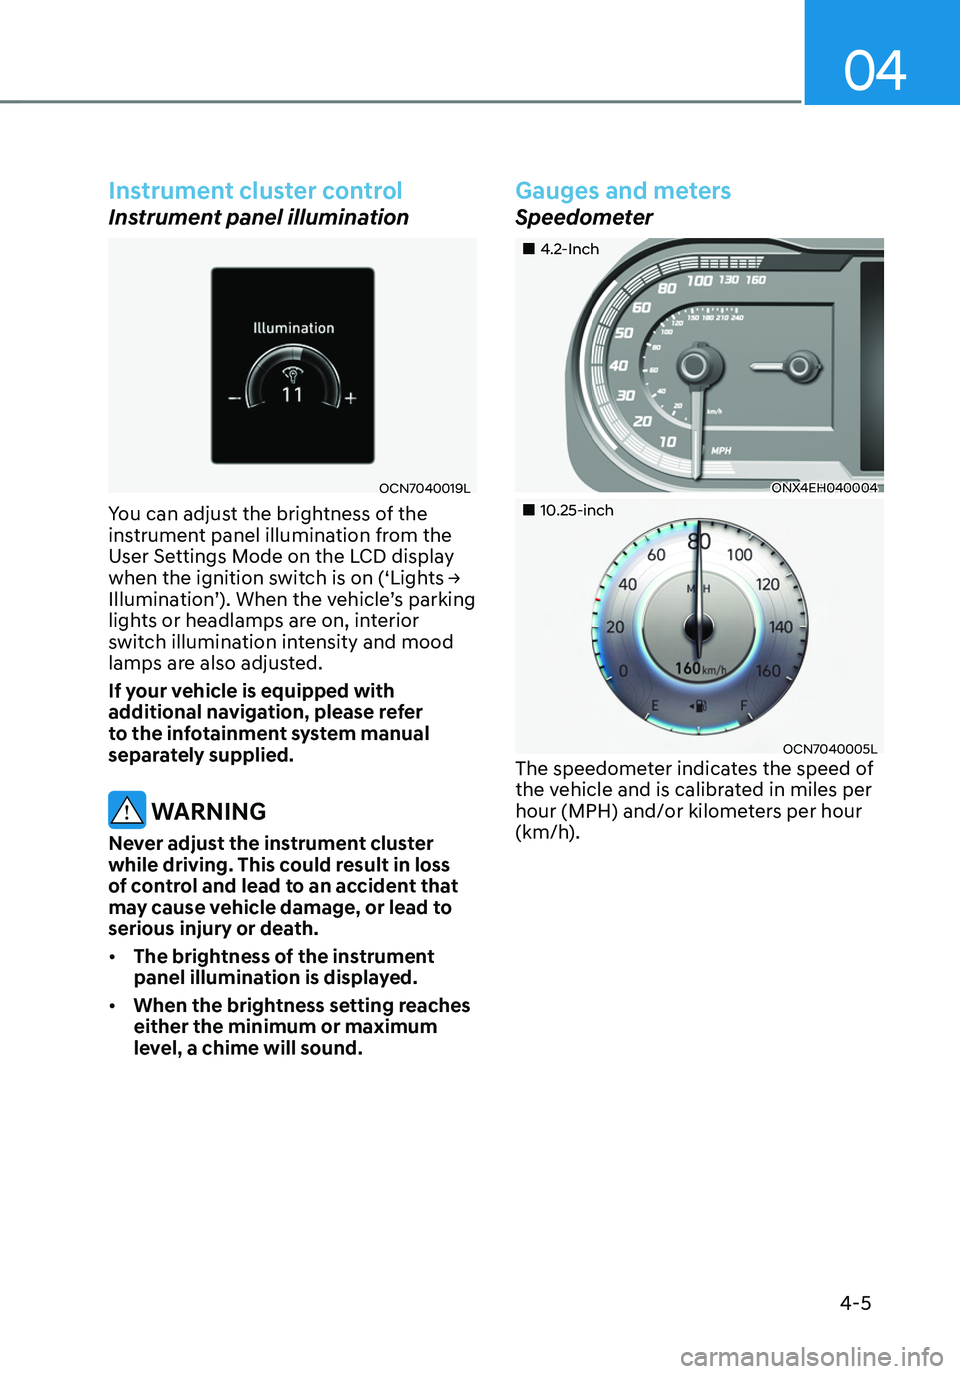
You can adjust the brightness of the
instrument panel illumination from the
User Settings Mode on the LCD display
when the ignition switch is on (‘Lights →
Illumination’). When the vehicle’s parking
lights or headlamps are on, interior
switch illumination intensity and mood
lamps are also adjusted.
If your vehicle is equipped with
additional navigation, please refer
to the infotainment system manual
separately supplied.
WARNING
Never adjust the instrument cluster
while driving. This could result in loss
of control and lead to an accident that
may cause vehicle damage, or lead to
serious injury or death.
• The brightness of the instrument
panel illumination is displayed.
• When the brightness setting reaches
either the minimum or maximum
level, a chime will sound.
Gauges and meters
Speedometer
„„4.2-Inch
ONX4EH040004
„„10.25-inch
OCN7040005LThe speedometer indicates the speed of
the vehicle and is calibrated in miles per
hour (MPH) and/or kilometers per hour
(km/h).
Page 239 of 630
Convenient features
5-82
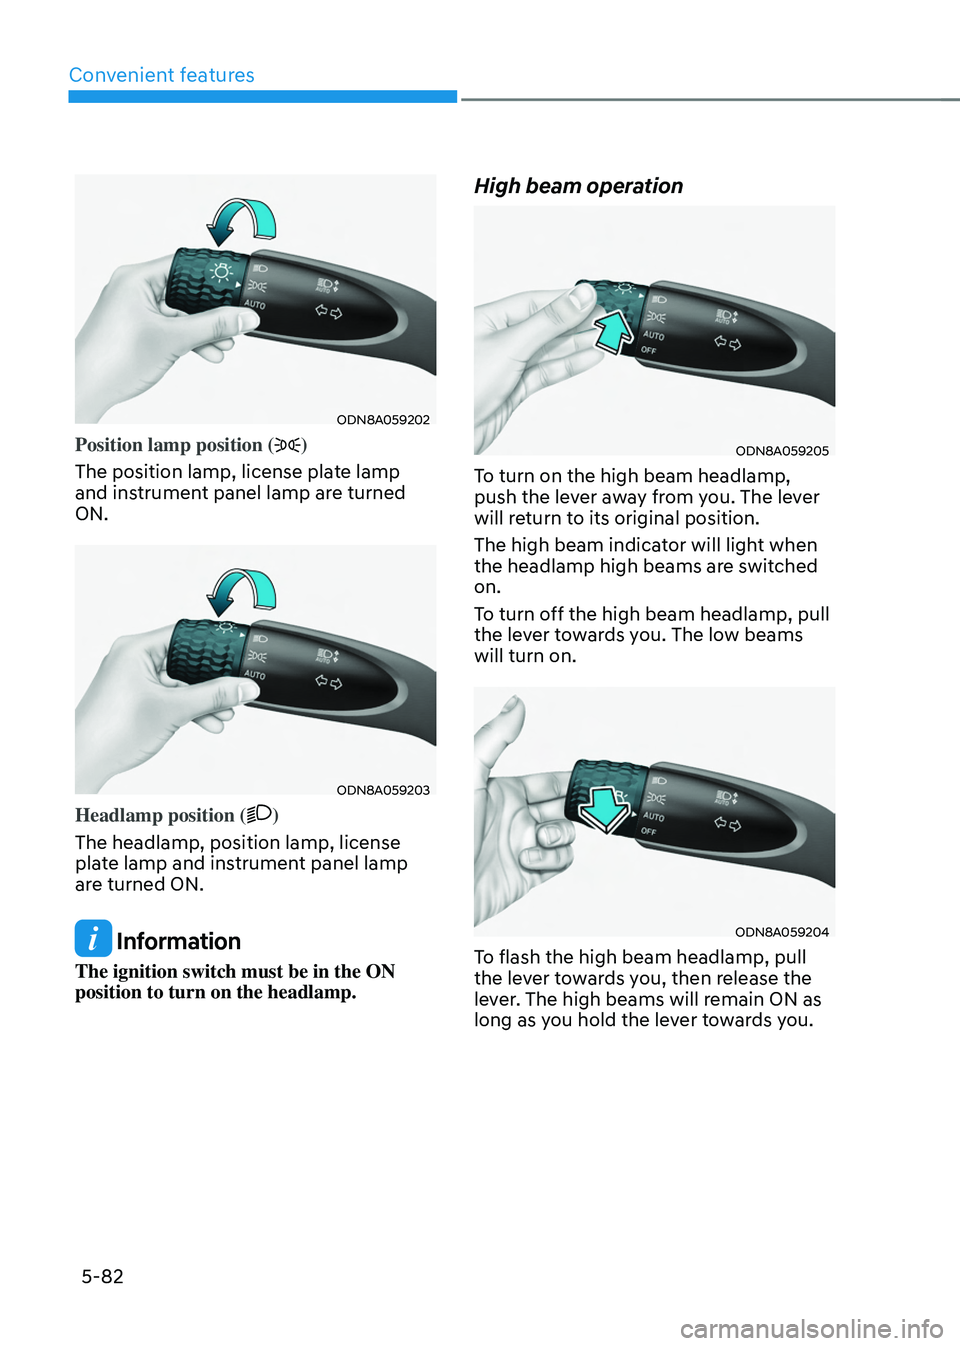
ODN8A059202
Position lamp position ()
The position lamp, license plate lamp
and instrument panel lamp are turned
ON.
ODN8A059203
Headlamp position ()
The headlamp, position lamp, license
plate lamp and instrument panel lamp
are turned ON.
Information
The ignition switch must be in the ON
position to turn on the headlamp.
High beam operation
ODN8A059205
To turn on the high beam headlamp,
push the lever away from you. The lever
will return to its original position.
The high beam indicator will light when
the headlamp high beams are switched
on.
To turn off the high beam headlamp, pull
the lever towards you. The low beams
will turn on.
ODN8A059204
To flash the high beam headlamp, pull
the lever towards you, then release the
lever. The high beams will remain ON as
long as you hold the lever towards you.
Page 258 of 630
05
5-101
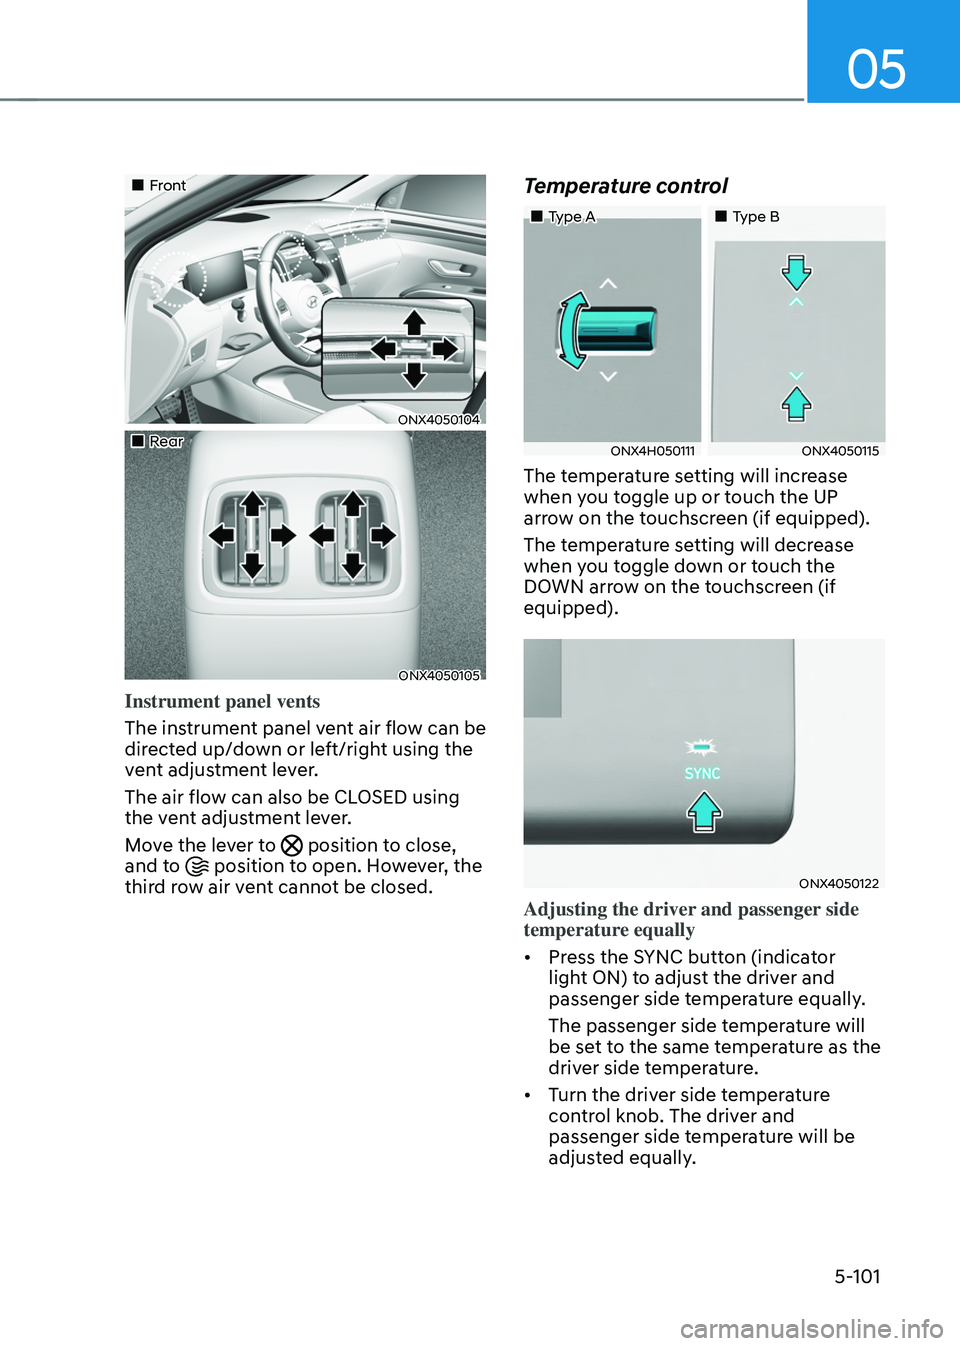
„„Front
ONX4050104
„„Rear
ONX4050105
Instrument panel vents
The instrument panel vent air flow can be
directed up/down or left/right using the
vent adjustment lever.
The air flow can also be CLOSED using
the vent adjustment lever.
Move the lever to
position to close,
and to position to open. However, the
third row air vent cannot be closed.
Temperature control
„„Type A „„Type B
ONX4H050111ONX4050115
The temperature setting will increase
when you toggle up or touch the UP
arrow on the touchscreen (if equipped).
The temperature setting will decrease
when you toggle down or touch the
DOWN arrow on the touchscreen (if
equipped).
ONX4050122
Adjusting the driver and passenger side
temperature equally
• Press the SYNC button (indicator
light ON) to adjust the driver and
passenger side temperature equally.
The passenger side temperature will
be set to the same temperature as the
driver side temperature.
• Turn the driver side temperature
control knob. The driver and
passenger side temperature will be
adjusted equally.
Page 263 of 630
Convenient features
5-106
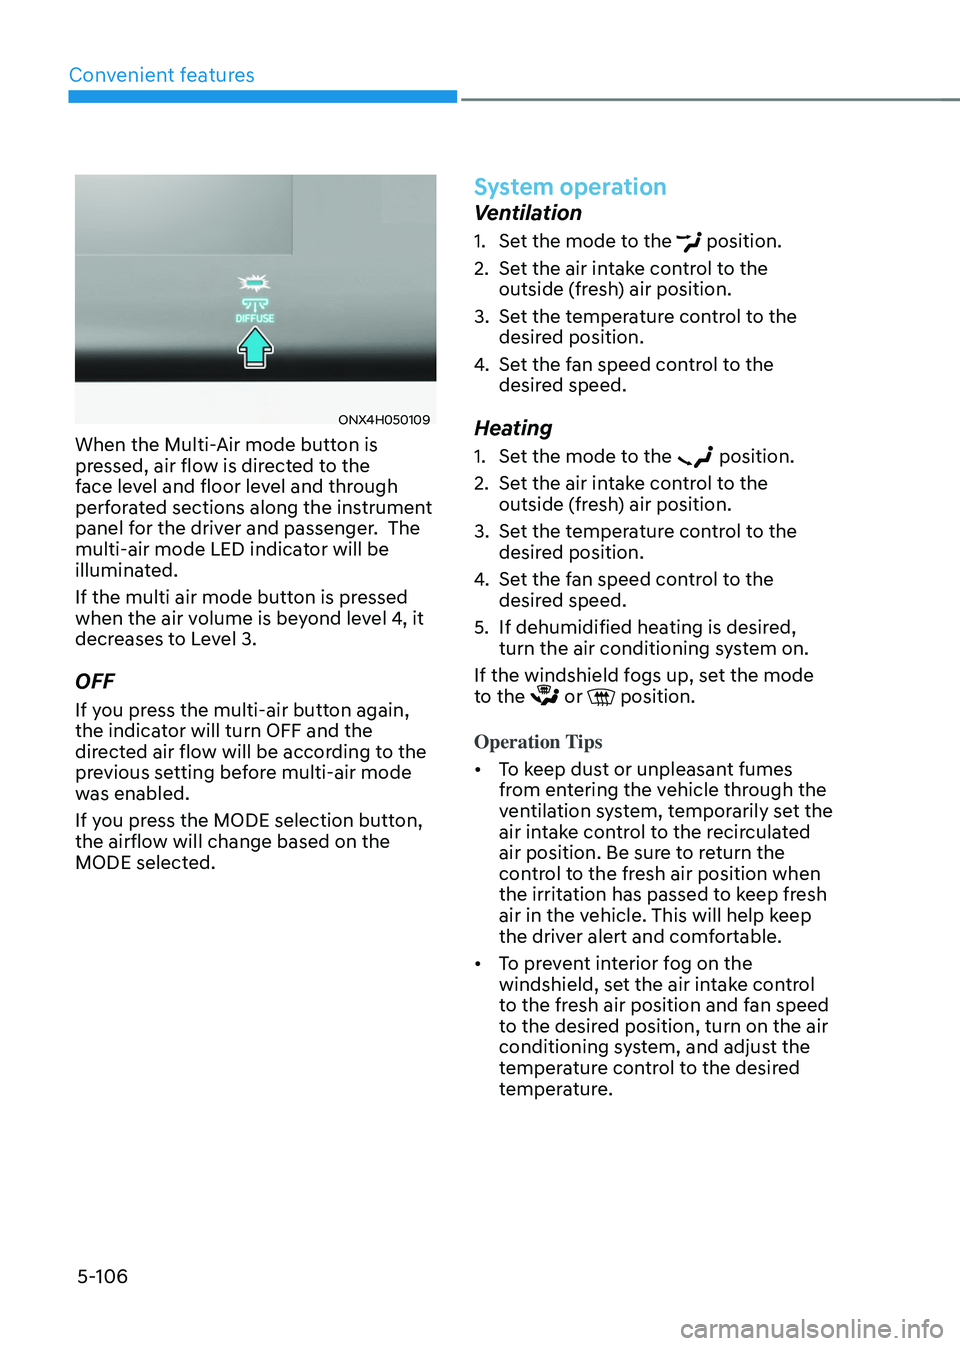
ONX4H050109
When the Multi-Air mode button is
pressed, air flow is directed to the
face level and floor level and through
perforated sections along the instrument
panel for the driver and passenger. The
multi-air mode LED indicator will be
illuminated.
If the multi air mode button is pressed
when the air volume is beyond level 4, it
decreases to Level 3.
OFF
If you press the multi-air button again,
the indicator will turn OFF and the
directed air flow will be according to the
previous setting before multi-air mode
was enabled.
If you press the MODE selection button,
the airflow will change based on the
MODE selected.
System operation
Ventilation
1. Set the mode to the position.
2.
Set the air in
take control to the
outside (fresh) air position.
3.
Set the t
emperature control to the
desired position.
4.
Set the f
an speed control to the
desired speed.
Heating
1. Set the mode to the position.
2.
Set the air in
take control to the
outside (fresh) air position.
3.
Set the t
emperature control to the
desired position.
4.
Set the f
an speed control to the
desired speed.
5.
If dehumidified heating is desir
ed,
turn the air conditioning system on.
If the windshield fogs up, set the mode
to the
or position.
Operation Tips
• To keep dust or unpleasant fumes
from entering the vehicle through the
ventilation system, temporarily set the
air intake control to the recirculated
air position. Be sure to return the
control to the fresh air position when
the irritation has passed to keep fresh
air in the vehicle. This will help keep
the driver alert and comfortable.
• To prevent interior fog on the
windshield, set the air intake control
to the fresh air position and fan speed
to the desired position, turn on the air
conditioning system, and adjust the
temperature control to the desired
temperature.