2022 HYUNDAI SONATA door lock
[x] Cancel search: door lockPage 197 of 546
05
5-67
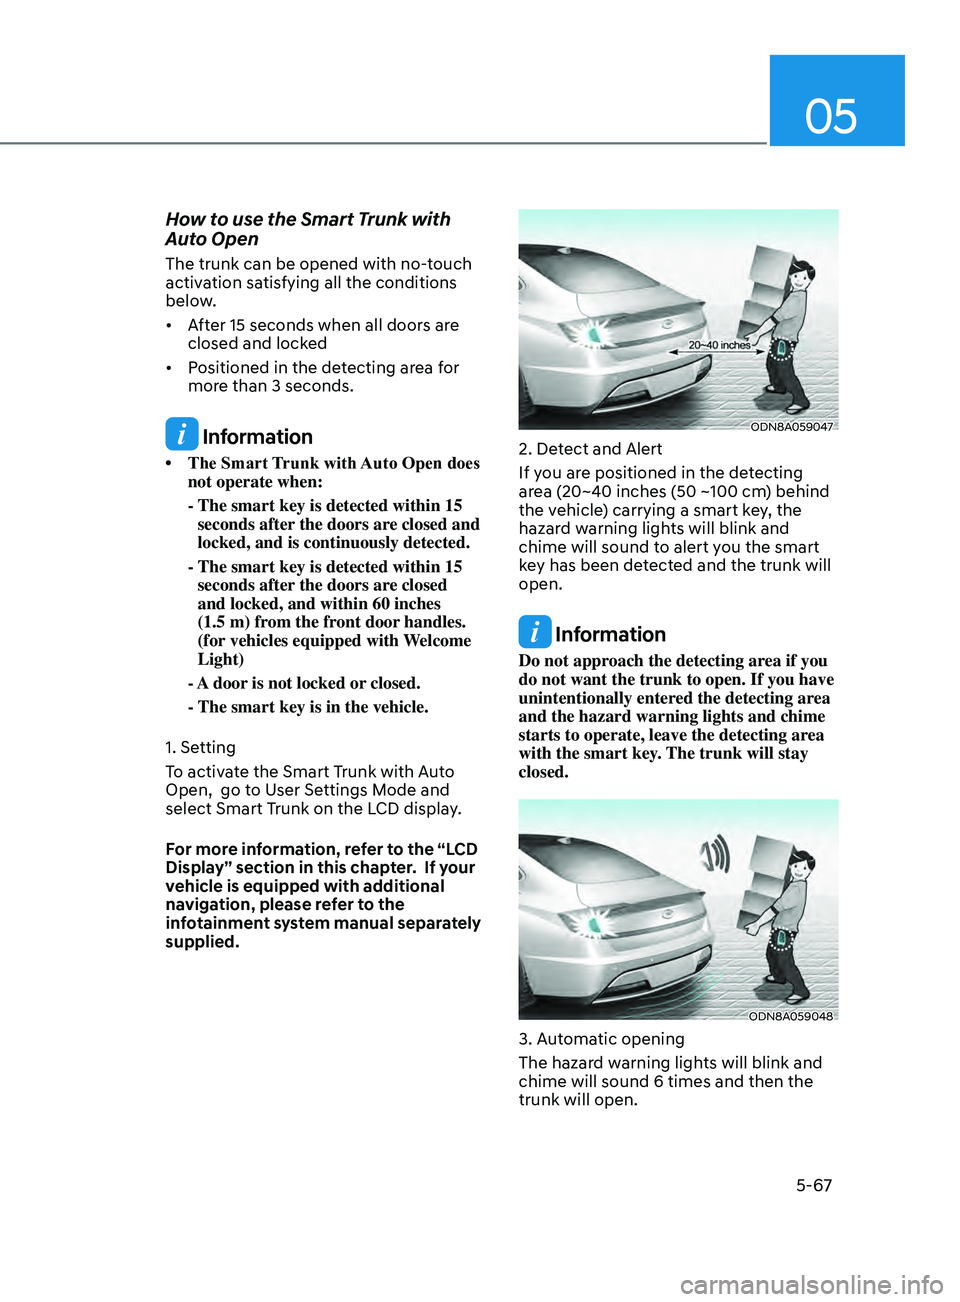
How to use the Smart Trunk with
Auto Open
The trunk can be opened with no-touch
activation satisfying all the conditions
below.
• After 15 seconds when all doors are
closed and lock
ed
• Positioned
in the detecting area for
mor
e than 3 seconds.
Information
• The Smart T runk with Auto Open does not operate when:
- The smart key is detected within 15
seconds after
the doors are closed and
locked, and is continuously detected.
- The smart key is detected within 15
seconds after
the doors are closed
and locked, and within 60 inches
(1.5 m) from the front door handles.
(for vehicles equipped with Welcome
Light)
- A
door is not locked or closed.
- The smart key is in the vehicl
e.
1. Setting
To activate the Smart Trunk with Auto
Open, go to User Settings Mode and
select Smart Trunk on the LCD display.
For more information, refer to the “LCD
Display” section in this chapter. If your
vehicle is equipped with additional
navigation, please refer to the
infotainment system manual separately
supplied.
ODN8A059047
2. Detect and Alert
If you are positioned in the detecting
area (20~40 inches (50 ~100 cm) behind
the vehicle) carrying a smart key, the
hazard warning lights will blink and
chime will sound to alert you the smart
key has been detected and the trunk will
open.
Information
Do not approach the detecting area if you
do not want the trunk to open. If you have
unintentionally entered the detecting area
and the hazard warning lights and chime
starts to operate, leave the detecting area
with the smart key. The trunk will stay
closed.
ODN8A059048
3. Automatic opening
The hazard warning lights will blink and
chime will sound 6 times and then the
trunk will open.
Page 198 of 546
Convenient Features
5-68
WARNING
•Make sure you close the trunk before
driving your vehicle.
•
Mak
e sure there are no people or
objects around the trunk before
opening or closing the trunk.
•
Mak
e sure objects in the trunk do not
come out when opening the trunk on
a slope. It may cause serious injury.
•
Mak
e sure to deactivate the Smart
Trunk when washing your vehicle.
Otherwise, the trunk may open
inadvertently.
•
The ke
y should be kept out of
reach of children. Children may
inadvertently open the Smart Trunk
while playing around the rear area of
the vehicle.
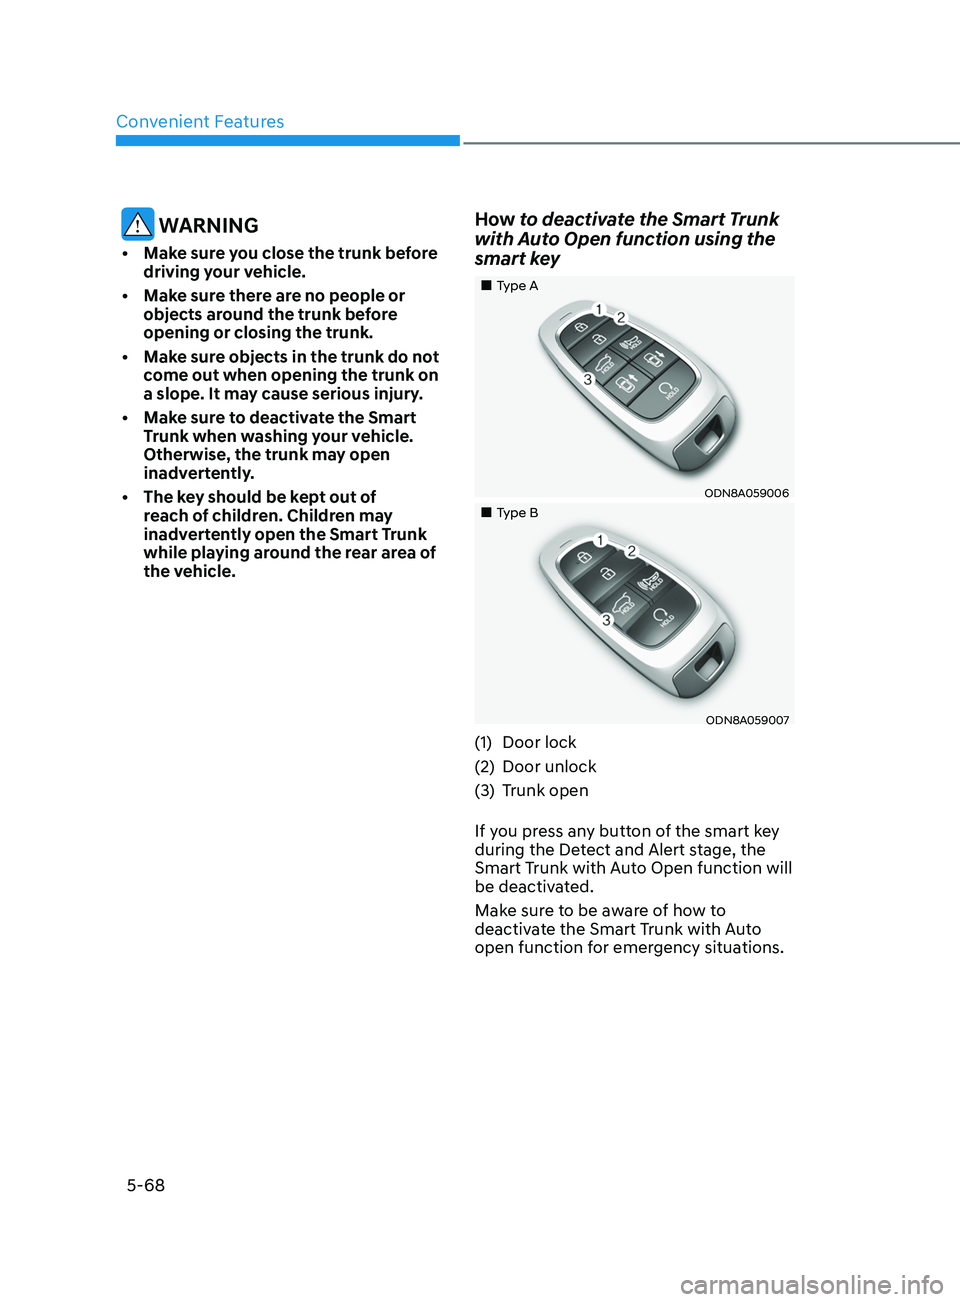
How to deactivate the Smart Trunk
with Auto Open function using the
smart key
„„Type A
ODN8A059006
„„Type B
ODN8A059007
(1)Door lock
(2)
Door unlock
(3)
Trunk open
If y
ou press any button of the smart key
during the Detect and Alert stage, the
Smart Trunk with Auto Open function will
be deactivated.
Make sure to be aware of how to
deactivate the Smart Trunk with Auto
open function for emergency situations.
Page 199 of 546
05
5-69
Information
• If you press the door unlock button (2), the Smart
Trunk with Auto
Open function will be deactivated
temporarily. But, if you do not open
any door for 30 seconds, the Smart
Trunk with Auto Open function will be
activated again.
• If
you press the trunk open button
(3) for
more than 1 second, the trunk
opens.
• If
you press the door
lock button (1) or
trunk open button (3) when the Smart
T
runk with Auto Open in the Detect
and Alert stage, the Smart Trunk
with Auto Open function will not be
deactivated.
• In
case you have deactivated the Smart
T
runk with Auto Open function by
pressing the smart key button and
opened a door, the Smart Trunk with
Auto Open function can be activated
again by closing and locking all doors.
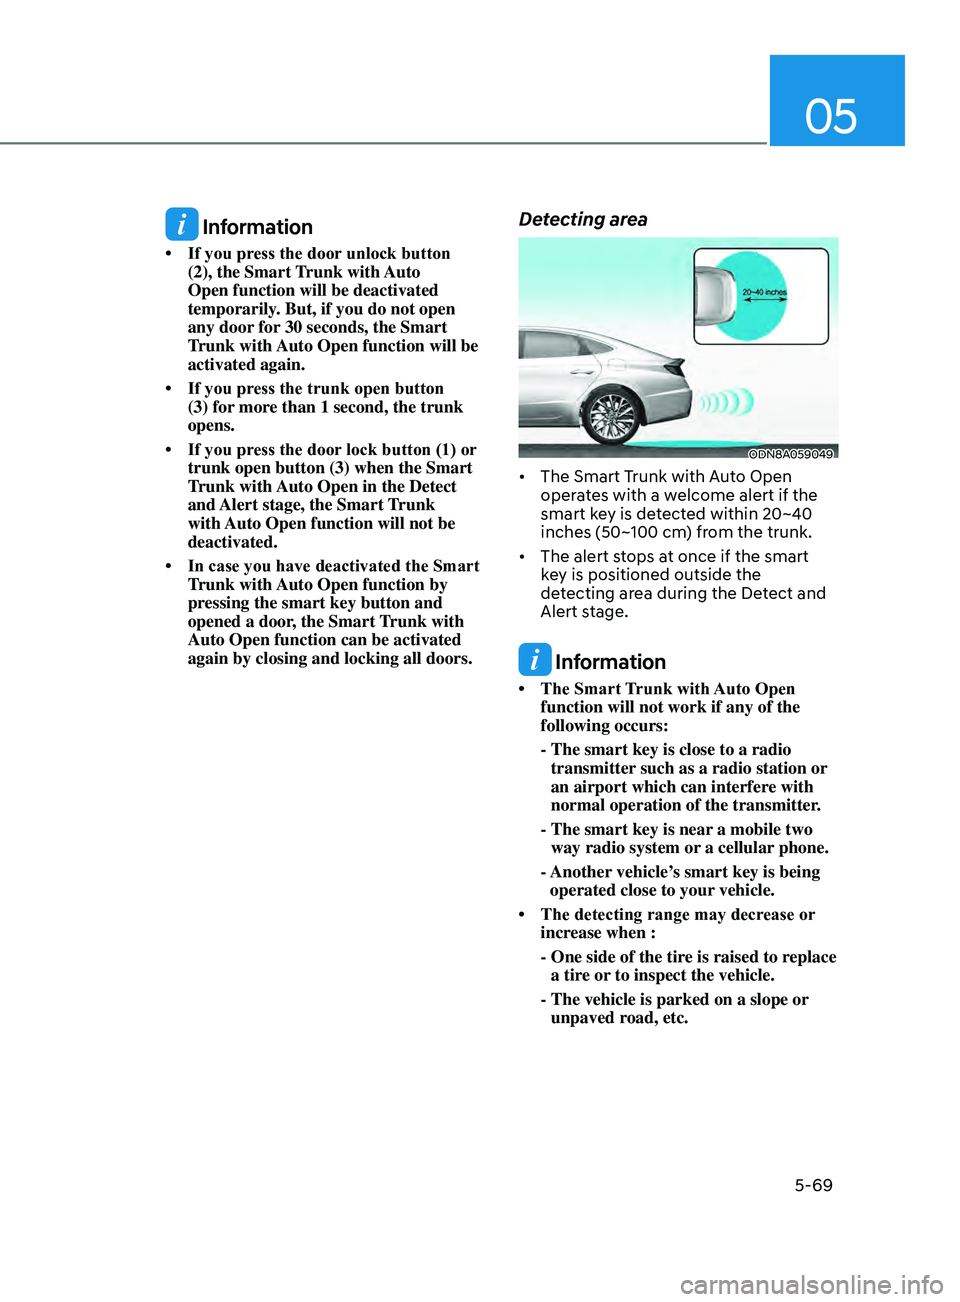
Detecting area
ODN8A059049
• The Smart Trunk with Auto Open oper ates with a welcome alert if the
smart key is detected within 20~40
inches (50~100 cm) from the trunk.
• The
alert stops at once if the smart
k
ey is positioned outside the
detecting area during the Detect and
Alert stage.
Information
• The Smart T runk with Auto Open function will not work if any of the
following occurs:
- The smart key is close to a radio
transmitter
such as a radio station or
an airport which can interfere with
normal operation of the transmitter.
- The smart key is near
a mobile two
way radio system or a cellular phone.
- Another
vehicle’s smart key is being
operated close to your vehicle.
• The
detecting
range
may decrease or
incr
ease when :
-
One side of the tir
e is raised to replace
a tire or to inspect the vehicle.
- The vehicle i
s parked on a slope or
unpaved road, etc.
Page 200 of 546
Convenient Features
5-70
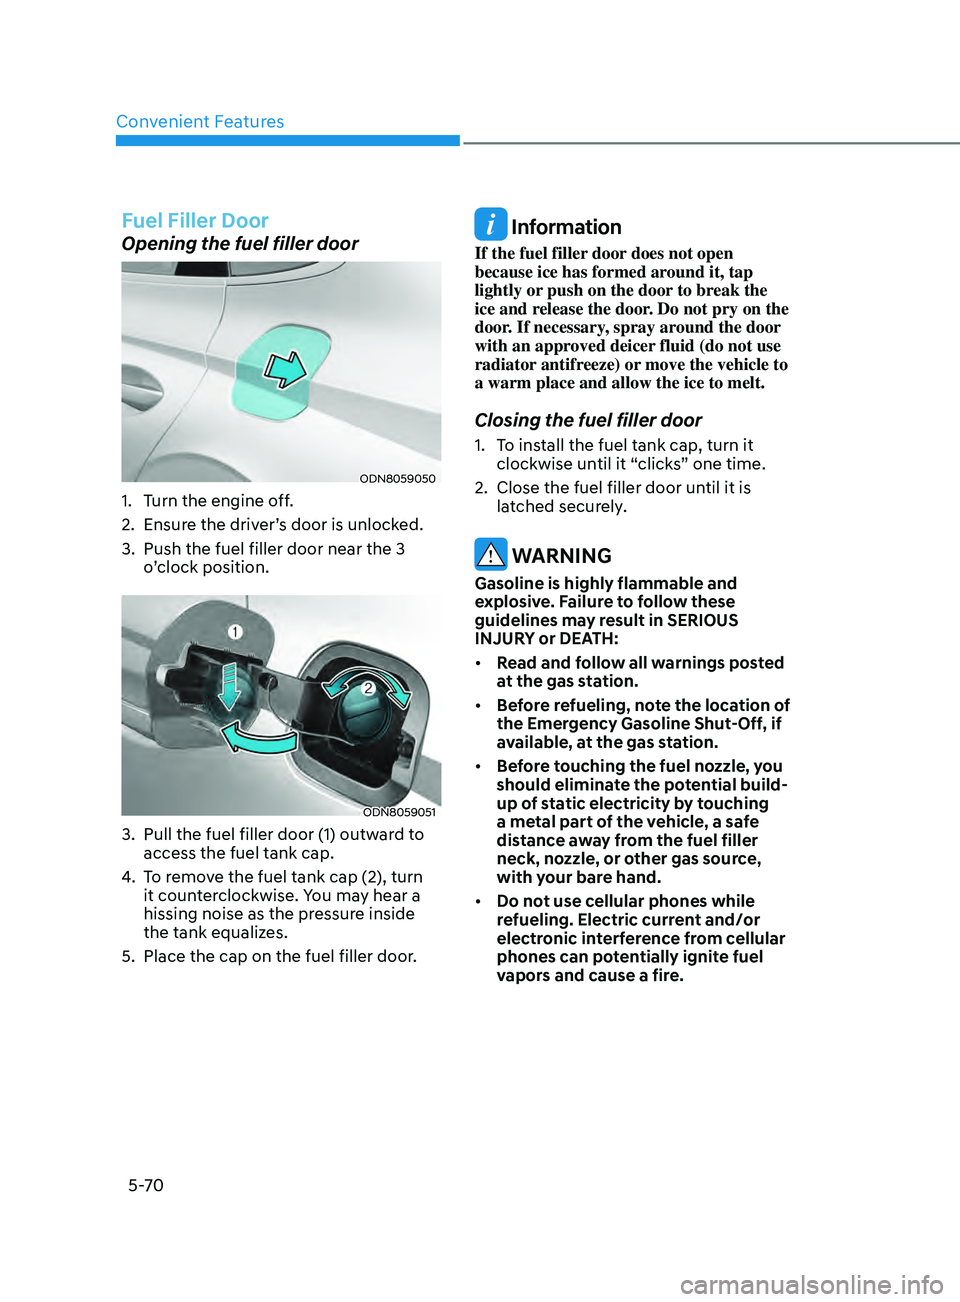
Fuel Filler Door
Opening the fuel filler door
ODN8059050
1. Turn the engine off.
2.
E
nsure the driver’s door is unlocked.
3.
Push the fuel filler door near the 3
o
’clock position.
ODN8059051
3. Pull the fuel filler door (1) outw ard to
access the fuel tank cap.
4.
T
o remove the fuel tank cap (2), turn
it counterclockwise. You may hear a
hissing noise as the pressure inside
the tank equalizes.
5.
Place the cap on the fuel filler door
.
Information
If the fuel filler door does not open
because ice has formed around it, tap
lightly or push on the door to break the
ice and release the door. Do not pry on the
door. If necessary, spray around the door
with an approved deicer fluid (do not use
radiator antifreeze) or move the vehicle to
a warm place and allow the ice to melt.
Closing the fuel filler door
1. To install the fuel tank cap, turn it clockwise until it “clicks” one time.
2.
Close the fuel filler door un
til it is
latched securely.
WARNING
Gasoline is highly flammable and
explosive. Failure to follow these
guidelines may result in SERIOUS
INJURY or DEATH:
• Read and follow all warnings posted
at the gas station.
• Before refueling, note the location of
the Emergency Gasoline Shut-Off, if
available, at the gas station.
• Before touching the fuel nozzle, you
should eliminate the potential build-
up of static electricity by touching
a metal part of the vehicle, a safe
distance away from the fuel filler
neck, nozzle, or other gas source,
with your bare hand.
• Do not use cellular phones while
refueling. Electric current and/or
electronic interference from cellular
phones can potentially ignite fuel
vapors and cause a fire.
Page 209 of 546
05
5-79
Turn signals and lane change signals
ODN8A059207
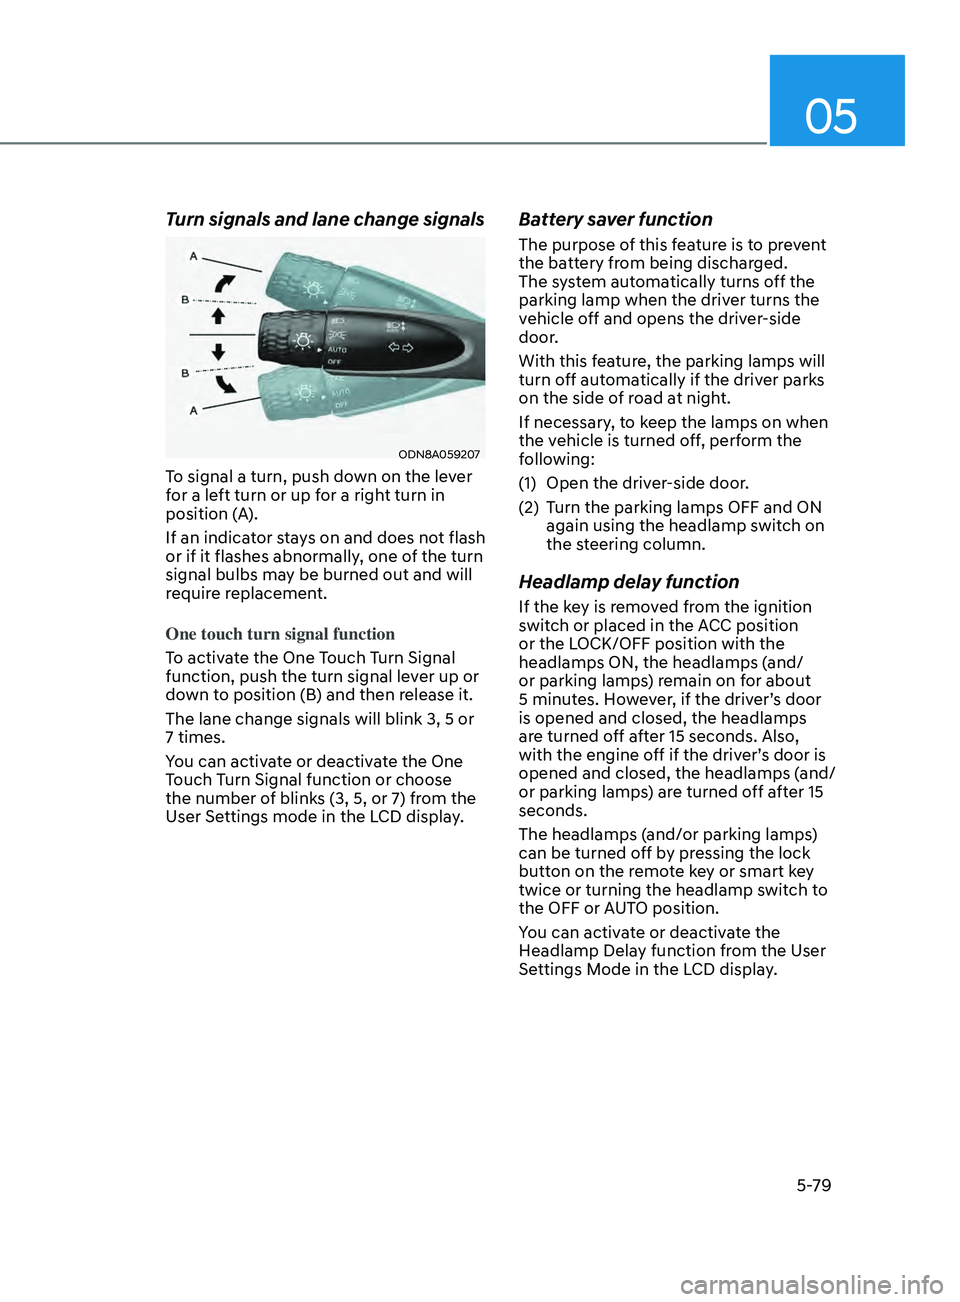
To signal a turn, push down on the lever
for a left turn or up for a right turn in
position (A).
If an indicator stays on and does not flash
or if it flashes abnormally, one of the turn
signal bulbs may be burned out and will
require replacement.
One touch turn signal function
To activate the One Touch Turn Signal
function, push the turn signal lever up or
down to position (B) and then release it.
The lane change signals will blink 3, 5 or
7 times.
You can activate or deactivate the One
Touch Turn Signal function or choose
the number of blinks (3, 5, or 7) from the
User Settings mode in the LCD display.
Battery saver function
The purpose of this feature is to prevent
the battery from being discharged.
The system automatically turns off the
parking lamp when the driver turns the
vehicle off and opens the driver-side
door.
With this feature, the parking lamps will
turn off automatically if the driver parks
on the side of road at night.
If necessary, to keep the lamps on when
the vehicle is turned off, perform the
following:
(1)
Open the driv
er-side door.
(2)
T
urn the parking lamps OFF and ON
again using the headlamp switch on
the steering column.
Headlamp delay function
If the key is removed from the ignition
switch or placed in the ACC position
or the LOCK/OFF position with the
headlamps ON, the headlamps (and/
or parking lamps) remain on for about
5 minutes. However, if the driver’s door
is opened and closed, the headlamps
are turned off after 15 seconds. Also,
with the engine off if the driver’s door is
opened and closed, the headlamps (and/
or parking lamps) are turned off after 15
seconds.
The headlamps (and/or parking lamps)
can be turned off by pressing the lock
button on the remote key or smart key
twice or turning the headlamp switch to
the OFF or AUTO position.
You can activate or deactivate the
Headlamp Delay function from the User
Settings Mode in the LCD display.
Page 210 of 546
Convenient Features
5-80
NOTICE
If the driver exits the vehicle through
another door besides the driver
door, the battery saver function
does not operate and the headlamp
delay function does not turn OFF
automatically.
This may cause the battery to
discharge. To avoid battery discharge,
turn OFF the headlamps manually from
the headlamp switch before exiting the
vehicle.
Headlamp leveling device
It automatically adjusts the headlamp
beam level according to the number of
passengers and loading weight in the
luggage area.
And it offers proper headlamp beam
under various conditions.
WARNING
If the function does not work properly,
have the vehicle inspected by an
authorized HYUNDAI dealer. Do not
attempt to inspect or replace the wiring
yourself.
Interior Lights
WARNING
Do not use the interior lights when
driving in the dark. The interior lights
may obscure your view and cause an
accident.
NOTICE
Do not use the interior lights for
extended periods when the vehicle is
turned off or the battery will discharge.
Interior lamp AUTO cut
The interior lamps will automatically go
off approximately 20 minutes after the
engine is turned off and the doors are
closed. If a door is opened, the lamp
will go off 40 minutes after the engine is
turned off. If the doors are locked by the
remote key or smart key and the vehicle
enters the armed stage of the theft
alarm system, the lamps will go off five
seconds later.
Page 211 of 546
05
5-81
Front lamps
ODN8A059210
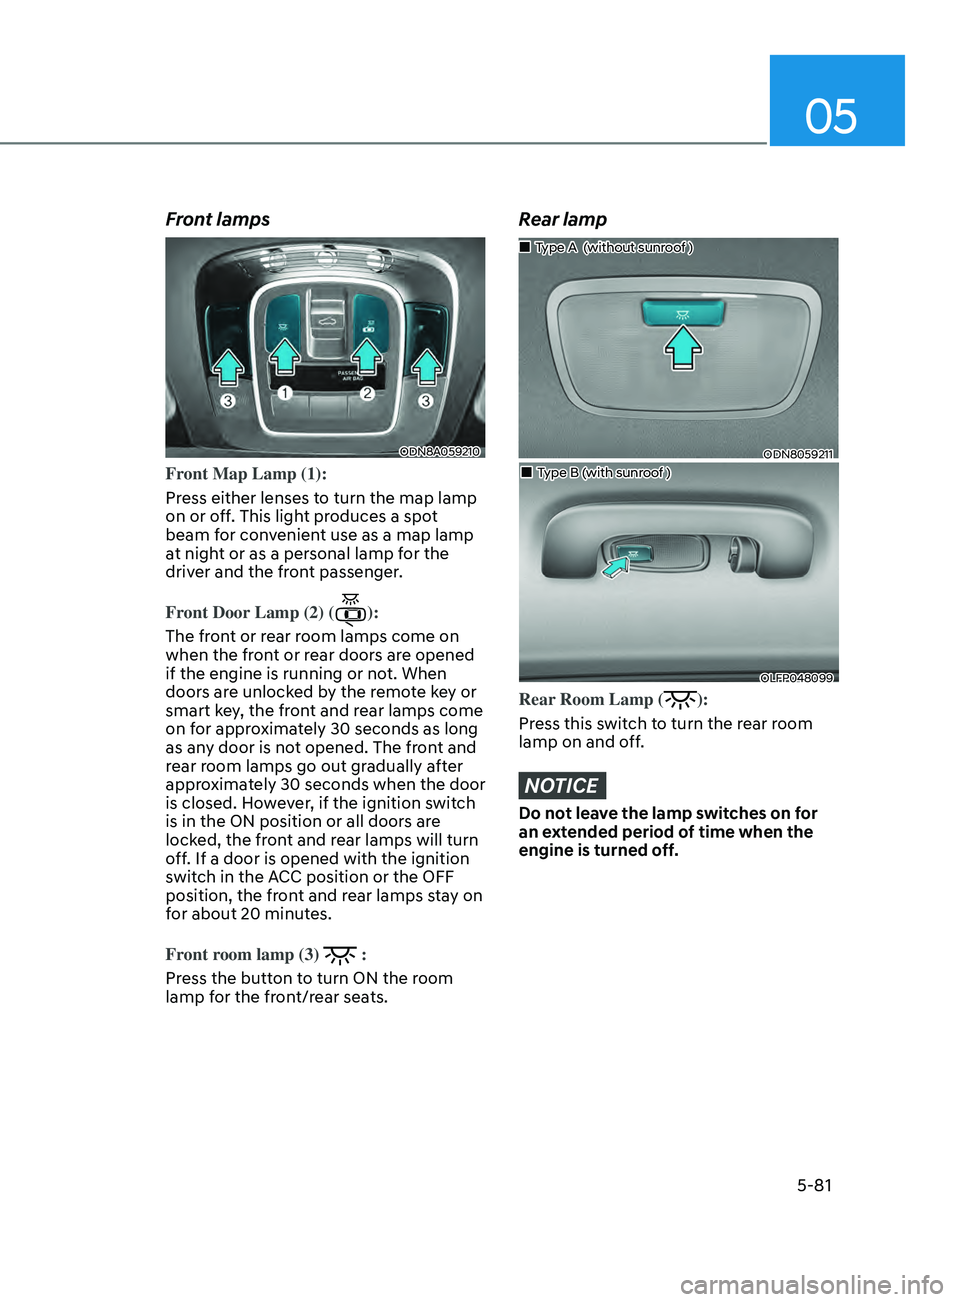
Front Map Lamp (1):
Press either lenses to turn the map lamp
on or off. This light produces a spot
beam for convenient use as a map lamp
at night or as a personal lamp for the
driver and the front passenger.
Front Door Lamp (2) (
):
The front or rear room lamps come on
when the front or rear doors are opened
if the engine is running or not. When
doors are unlocked by the remote key or
smart key, the front and rear lamps come
on for approximately 30 seconds as long
as any door is not opened. The front and
rear room lamps go out gradually after
approximately 30 seconds when the door
is closed. However, if the ignition switch
is in the ON position or all doors are
locked, the front and rear lamps will turn
off. If a door is opened with the ignition
switch in the ACC position or the OFF
position, the front and rear lamps stay on
for about 20 minutes.
Front room lamp (3)
:
Press the button to turn ON the room
lamp for the front/rear seats.
Rear lamp
ODN8059211
„„Type A (without sunroof )
„„Type B (with sunroof )
OLFP048099
Rear Room Lamp ():
Press this switch to turn the rear room
lamp on and off.
NOTICE
Do not leave the lamp switches on for
an extended period of time when the
engine is turned off.
Page 213 of 546
05
5-83
Welcome System (if equipped)
Welcome light
ODN8A059099
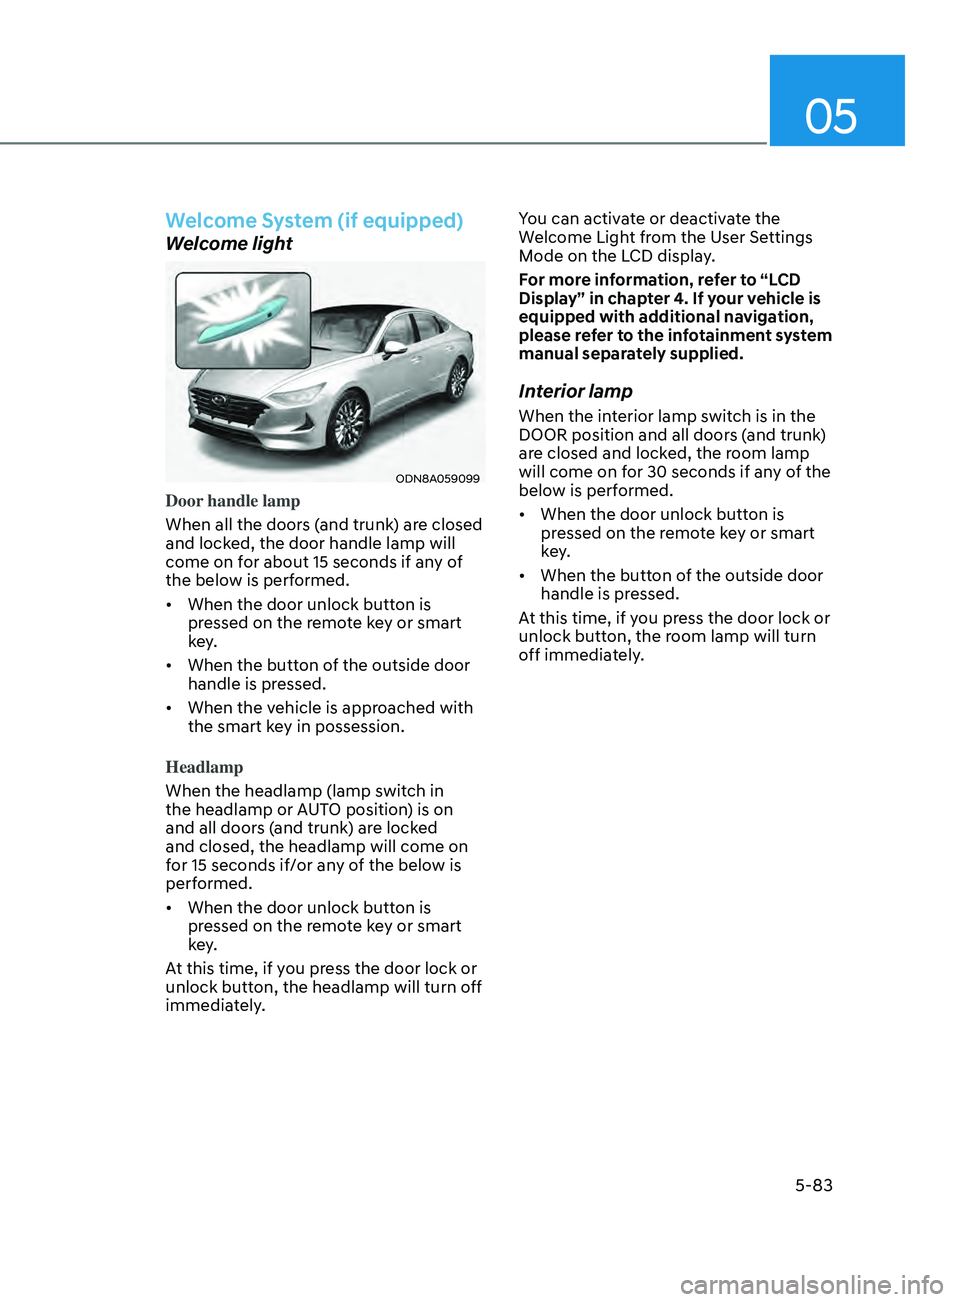
Door handle lamp
When all the doors (and trunk) are closed
and locked, the door handle lamp will
come on for about 15 seconds if any of
the below is performed.
• When the door unlock button is
pr
essed on the remote key or smart
key.
• When
the button of the outside door
handle is pr
essed.
• When
the vehicle is approached with
the smart k
ey in possession.
Headlamp
When the headlamp (lamp switch in
the headlamp or AUTO position) is on
and all doors (and trunk) are locked
and closed, the headlamp will come on
for 15 seconds if/or any of the below is
performed.
• When
the door unlock button is
pr
essed on the remote key or smart
key.
At this time, if you press the door lock or
unlock button, the headlamp will turn off
immediately. You can activate or deactivate the
Welcome Light from the User Settings
Mode on the LCD display.
For more information, refer to “LCD
Display” in chapter 4. If your vehicle is
equipped with additional navigation,
please refer to the infotainment system
manual separately supplied.
Interior lamp
When the interior lamp switch is in the
DOOR position and all doors (and trunk)
are closed and locked, the room lamp
will come on for 30 seconds if any of the
below is performed.
• When
the door unlock button is
pr
essed on the remote key or smart
key.
• When
the button of the outside door
handle is pr
essed.
At this time, if you press the door lock or
unlock button, the room lamp will turn
off immediately.