2022 HYUNDAI SONATA change wheel
[x] Cancel search: change wheelPage 404 of 546
6-120
LFA system will not be in the ENABLED
state and/or the steering wheel will not be
assisted when:
• The turn signal is turned on before
changing a lane. If you change
lanes without the turn signal on, the
steering wheel might be controlled.
• The vehicle is not driven in the middle
of the lane when the system is turned
on or right after changing a lane.
• ESC (Electronic Stability Control) or
VSM (Vehicle Stability Management)
is activated.
• The vehicle is driven on a sharp curve.
• If vehicle speed is over 95 mph (153
km/h)
• The vehicle makes sharp lane
changes.
• The vehicle brakes suddenly.
• Only one lane marker is detected.
• The lane is very wide or narrow.
• There are more than two lane markers
on the road (e.g. construction area).
• Radius of a curve is too small.
• The vehicle is driven on a steep
incline.
• The steering wheel is turned suddenly.
• The system may not operate for 15
seconds after the engine is started or
the camera is initialized.Limitations of the System
LFA system may operate prematurely
even if the vehicle does not depart from
the intended lane, OR, LFA system may
not assist your steering or warn you if the
vehicle leaves the intended lane under
the following circumstances:
When the lane and road conditions are
poor
• It is difficult to distinguish the lane
marking from the road surface or the
lane marking is faded or not clearly
marked.
• It is difficult to distinguish the color of
the lane marker from the road.
• There are markings on the road
surface that look like a lane marker
that is inadvertently being detected
by the camera.
• The lane marker is indistinct or
damaged.
• The lane marker is merged or divided
(e.g. tollgate).
• The lane number increases or
decreases or the lane marker are
crossing complicatedly.
• There are more than two lane markers
on the road in front of you.
• The lane marker is very thick or thin.
• The lane is very wide or narrow.
• The lane marker ahead is not visible
due to rain, snow, water on the road,
damaged or stained road surface, or
other factors.
While Driving
Page 407 of 546
06
6-123
System Setting and Operation
System setting
• With the Engine Start/Stop button in
the ON or START position, Highway
Driving Assist can be activated
by selecting 'Driver Assistance
→
Highway Driving Assist’ from the User
Settings mode on the infotainment
system. For detailed information,
please refer to the infotainment
system manual separately supplied.
• If the engine is turned off then on
again, the system maintains the last
setting.
Operating conditions
Select 'Highway Driving Assist' from
the Settings menu in the infotainment
system screen and satisfy the following
conditions for the system to operate.
• Driving on the highway main line
• Smart Cruise Control is operating
- If Smart Cruise Con
trol is in the
READY state the Highway Driving
Assist will be in the READY state.
The
indicator on the cluster
will illuminate white.
• Vehicle speed is under 95 mph (153
km/h)
If all the mentioned conditions are
satisfied, the system is ENABLED and
the
indicator on the cluster will
illuminate green.
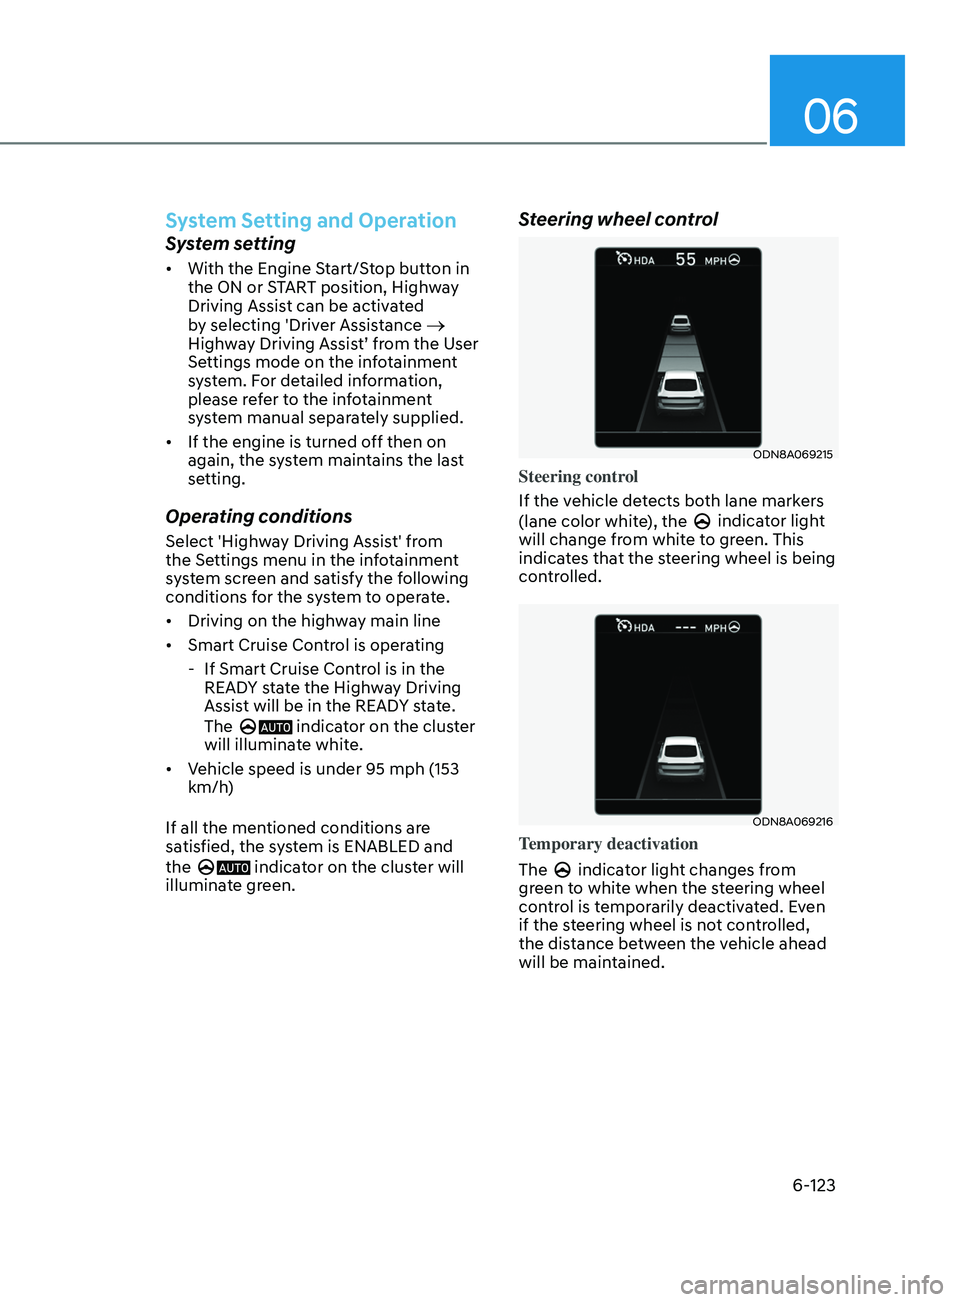
Steering wheel control
ODN8A069215
Steering control
If the vehicle detects both lane markers
(lane color white), the
indicator light
will change from white to green. This
indicates that the steering wheel is being
controlled.
ODN8A069216
Temporary deactivation
The
indicator light changes from
green to white when the steering wheel
control is temporarily deactivated. Even
if the steering wheel is not controlled,
the distance between the vehicle ahead
will be maintained.
Page 408 of 546
6-124
Speed setting
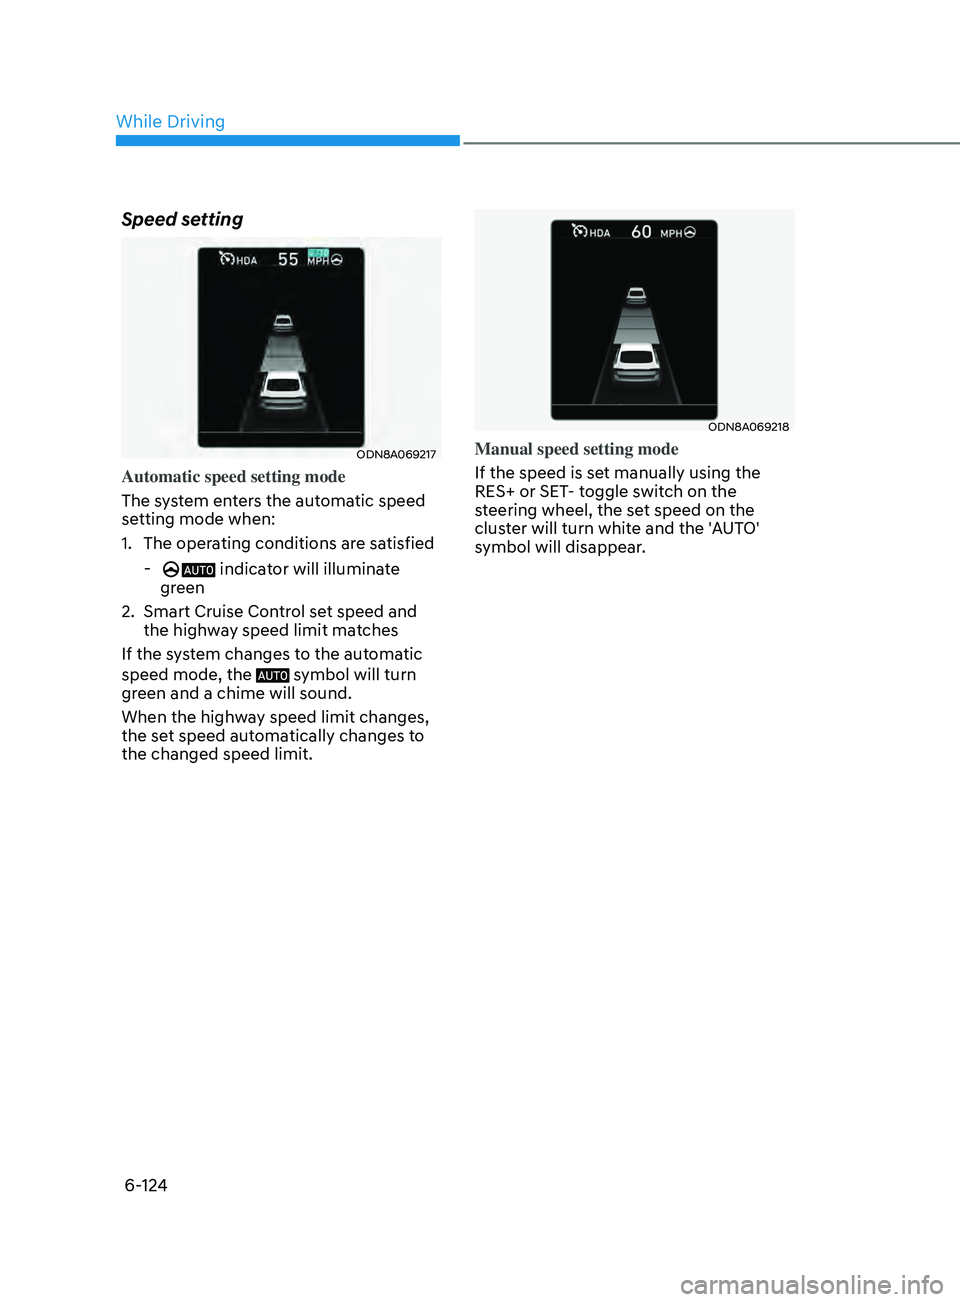
ODN8A069217
Automatic speed setting mode
The system enters the automatic speed
setting mode when:
1.
The oper
ating conditions are satisfied
- indicator will illuminate
green
2.
Smart Cruise Con
trol set speed and
the highway speed limit matches
If the system changes to the automatic
speed mode, the
symbol will turn
green and a chime will sound.
When the highway speed limit changes,
the set speed automatically changes to
the changed speed limit.
ODN8A069218
Manual speed setting mode
If the speed is set manually using the
RES+ or SET- toggle switch on the
steering wheel, the set speed on the
cluster will turn white and the 'AUTO'
symbol will disappear.
While Driving
Page 409 of 546
06
6-125
Warning Message
Hands-off warning
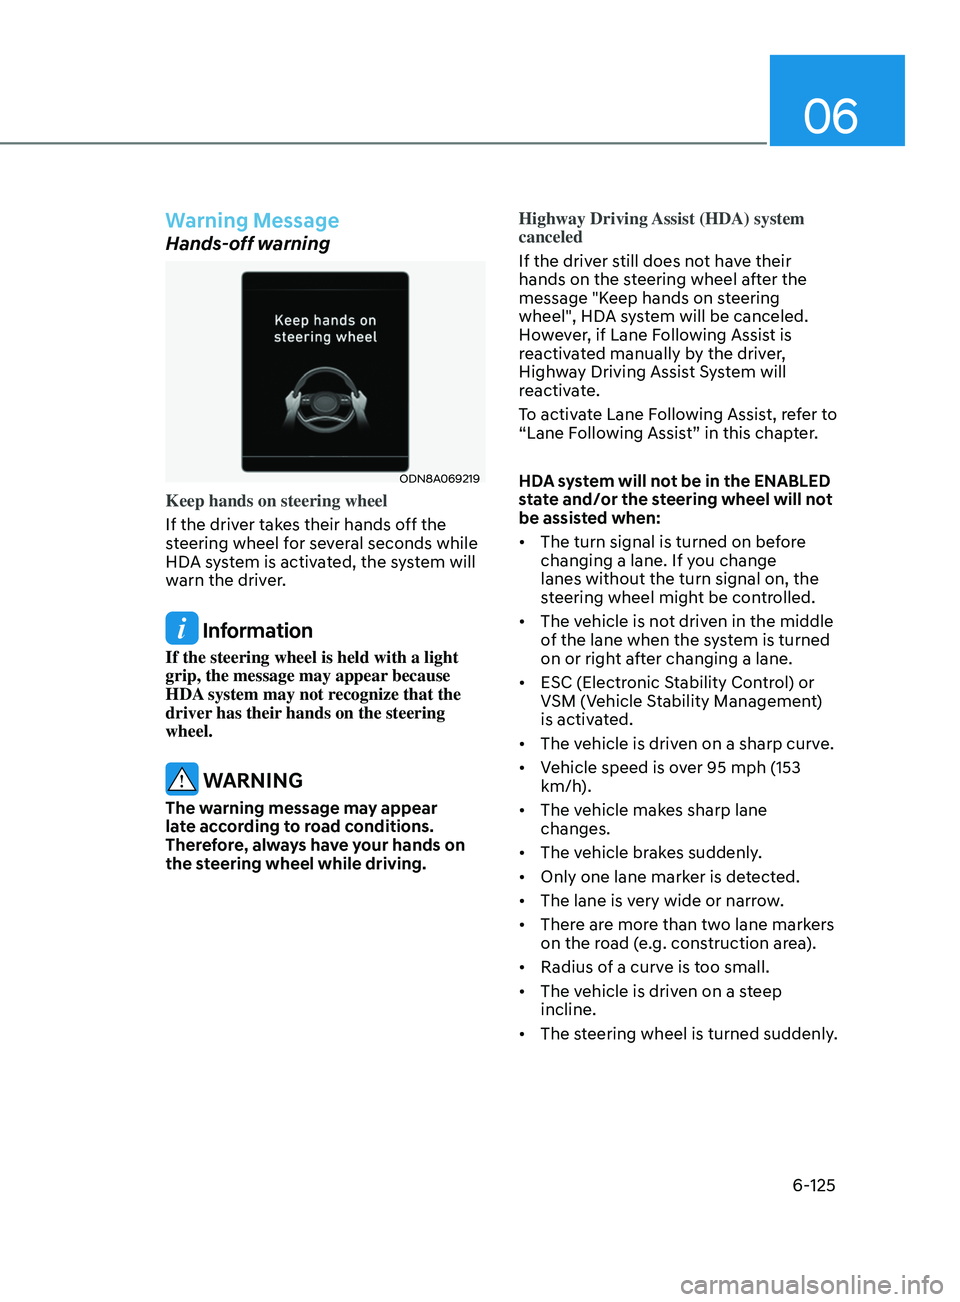
ODN8A069219
Keep hands on steering wheel
If the driver takes their hands off the
steering wheel for several seconds while
HDA system is activated, the system will
warn the driver.
Information
If the steering wheel is held with a light
grip, the message may appear because
HDA system may not recognize that the
driver has their hands on the steering
wheel.
WARNING
The warning message may appear
late according to road conditions.
Therefore, always have your hands on
the steering wheel while driving.Highway Driving Assist (HDA) system
canceled
If the driver still does not have their
hands on the steering wheel after the
message "Keep hands on steering
wheel", HDA system will be canceled.
However, if Lane Following Assist is
reactivated manually by the driver,
Highway Driving Assist System will
reactivate.
To activate Lane Following Assist, refer to
“Lane Following Assist” in this chapter.
HDA system will not be in the ENABLED
state and/or the steering wheel will not
be assisted when:
•
The turn signal is turned on before
changing a lane. If you change
lanes without the turn signal on, the
steering wheel might be controlled.
• The vehicle is not driven in the middle
of the lane when the system is turned
on or right after changing a lane.
• ESC (Electronic Stability Control) or
VSM (Vehicle Stability Management)
is activated.
• The vehicle is driven on a sharp curve.
• Vehicle speed is over 95 mph (153
km/h).
• The vehicle makes sharp lane
changes.
• The vehicle brakes suddenly.
• Only one lane marker is detected.
• The lane is very wide or narrow.
• There are more than two lane markers
on the road (e.g. construction area).
• Radius of a curve is too small.
• The vehicle is driven on a steep
incline.
• The steering wheel is turned suddenly.
Page 424 of 546
6-140
Hazardous Driving Conditions
When hazardous driving elements
are encountered such as water, snow,
ice, mud and sand, take the below
suggestions:
• Drive cautiously and keep a longer
braking distance.
• Avoid abrupt braking or steering.
• When your vehicle is stuck in
snow, mud, or sand, use second
gear. Accelerate slowly to avoid
unnecessary wheel spin.
• Put sand, rock salt, tire chains or other
non-slip materials under the wheels to
provide additional traction while the
vehicle becomes stuck in ice, snow,
or mud.
WARNING
Downshifting with an automatic
transmission while driving on slippery
surfaces can cause an accident. The
sudden change in tire speed could
cause the tires to skid. Be careful when
downshifting on slippery surfaces.
Rocking the Vehicle
If it is necessary to rock the vehicle to
free it from snow, sand, or mud, first turn
the steering wheel right and left to clear
the area around your front wheels. Then,
shift back and forth between R (Reverse)
and a forward gear.
Try to avoid spinning the wheels, and do
not race the engine.
To prevent transmission wear, wait until
the wheels stop spinning before shifting
gears. Release the accelerator pedal
while shifting, and press lightly on the
accelerator pedal while the transmission
is in gear. Slowly spinning the wheels in
forward and reverse directions causes a
rocking motion that may free the vehicle.
WARNING
If the vehicle is stuck and excessive
wheel spin occurs, the temperature
of the tires can increase very quickly.
If the tires become damaged, a tire
blow out or tire explosion can occur.
This condition is dangerous - you and
others may be injured. Do not attempt
this procedure if people or objects are
anywhere near the vehicle.
If you attempt to free the vehicle, the
vehicle can overheat quickly, possibly
causing an engine compartment fire
or other damage. Try to avoid spinning
the wheels as much as possible to
prevent overheating of either the tires
or the engine. DO NOT allow the vehicle
to spin the wheels above 35 mph (56
km/h).
Information
The ESC system must be turned OFF
before rocking the vehicle.
NOTICE
If you are still stuck after rocking the
vehicle a few times, have the vehicle
pulled out by a tow vehicle to avoid
engine overheating, possible damage to
the transmission, and tire damage. See
"Towing" in chapter 7.
SpeCI al d r I v I n G Cond I t I on S
While Driving
Page 429 of 546
06
6-145
Change to "winter weight" oil if
necessary
In some climates it is recommended that
a lower viscosity "winter weight" oil be
used during cold weather. See chapter 8
for recommendations. If you aren't sure
what weight oil you should use, consult
an authorized HYUNDAI dealer.
Check battery and cables
Winter puts additional burdens on the
battery system. Visually inspect the
battery and cables as described in
chapter 8. The level of charge in your
battery can be checked by an authorized
HYUNDAI dealer or a service station.
Check spark plugs and ignition
system
Inspect your spark plugs as described in
chapter 8 and replace them if necessary.
Also check all ignition wiring and
components to be sure they are not
cracked, worn or damaged in any way.
Use approved window washer anti-
freeze in system
To keep the water in the window washer
system from freezing, add an approved
window washer anti-freeze solution in
accordance with instructions on the
container. Window washer anti-freeze is
available from an authorized HYUNDAI
dealer and most auto parts outlets. Do
not use engine coolant or other types
of antifreeze as these may damage the
paint finish.
Do not let your parking brake freeze
Under some conditions your parking
brake can freeze in the engaged position.
This is most likely to happen when
there is an accumulation of snow or
ice around or near the rear brakes or
if the brakes are wet. If there is a risk
the parking brake may freeze, apply
it only temporarily while you put the
gear selector lever in P and block the
rear wheels so the car cannot roll. Then
release the parking brake.
Do not let ice and snow accumulate
underneath
Under some conditions, snow and ice
can build up under the fenders and
interfere with the steering. When driving
in severe winter conditions where this
may happen, you should periodically
check underneath the car to be sure the
movement of the front wheels and the
steering components is not obstructed.
Don't place foreign objects
or materials in the engine
compartment
Placement of foreign object or materials
which prevent cooling of the engine, in
the engine compartment, may cause a
failure or combustion. The manufacturer
is not responsible for the damage caused
by such placement.
To keep locks from freezing
To keep the locks from freezing, squirt
an approved de-icer fluid or glycerine
into the key opening. If a lock is covered
with ice, squirt it with an approved de-
icing fluid to remove the ice. If the lock
is frozen internally, you may be able to
thaw it out by using a heated key. Handle
the heated key with care to avoid injury.
Page 446 of 546
07
7-11
Each wheel is equipped with a tire
pressure sensor mounted inside the tire
behind the valve stem (except for the
spare tire). You must use TPMS specific
wheels. It is recommended that you
always have your tires serviced by an
authorized HYUNDAI dealer.
You may not be able to identify a tire
with low pressure by simply looking at it.
Always use a good quality tire pressure
gauge to measure the tire’s inflation
pressure. Please note that a tire that is
hot (from being driven) will have a higher
pressure measurement than a tire that is
cold.
A cold tire means the vehicle has been
sitting for 3 hours and driven for less
than 1 mile (1.6 km) in that 3 hour period.
Allow the tire to cool before measuring
the inflation pressure. Always be sure
the tire is cold before inflating to the
recommended pressure.
WARNING
• The TPMS cannot alert you to severe
and sudden tire damage caused by
external factors such as nails or road
debris.
• If you feel any vehicle instability,
immediately take your foot off
the accelerator, apply the brakes
gradually with light force, and slowly
move to a safe position off the road.
WARNING
Tampering with, modifying, or disabling
the Tire Pressure Monitoring System
(TPMS) components may interfere
with the system’s ability to warn the
driver of low tire pressure conditions
and/or TPMS malfunctions. Tampering
with, modifying, or disabling the Tire
Pressure Monitoring System (TPMS)
components may void the warranty for
that portion of the vehicle.
Information
This device complies with Part 15 of the
FCC rules.
Operation is subject to the following three
conditions:
1.
This device may not cause harmful
interfer
ence.
2.
This device must accept any
interfer
ence received, including
interference that may cause undesired
operation.
3.
Changes or
modifications not expressly
approved by the party responsible
for compliance could void the user’s
authority to operate the equipment.
Page 448 of 546
07
7-13
Changing Tires
WARNING
A vehicle can slip or roll off of a jack
causing serious injury or death to you or
those nearby. Take the following safety
precautions:
• Never place any portion of your body
under a vehicle that is supported by
a jack.
• NEVER attempt to change a tire in
the lane of traffic. ALWAYS move the
vehicle completely off the road on
level, firm ground away from traffic
before trying to change a tire. If you
cannot find a level, firm place off
the road, call a towing service for
assistance.
• Be sure to use the jack provided with
the vehicle.
• ALWAYS place the jack on the
designated jacking positions on the
vehicle and NEVER on the bumpers
or any other part of the vehicle for
jacking support.
• Do not start or run the engine while
the vehicle is on the jack.
• Do not allow anyone to remain in the
vehicle while it is on the jack.
• Keep children away from the road
and the vehicle. Follow these steps to change your
vehicle’s tire:
1.
P
ark on a level, firm surface.
2. M ove the shift button into P (Park)
or into R (Reverse) if equipped with
a manual transmission, apply the
parking brake, and place the ignition
switch in the LOCK/OFF position.
3.
Pr
ess the hazard warning flasher
button.
4.
R
emove the wheel lug nut wrench,
jack, jack handle, and spare tire from
the vehicle.
ODN8A069089[A] : Block
5. Block bo th the front and rear of the
tire diagonally opposite of the tire you
are changing.
ODN8069090L
6. Loosen the wheel lug nuts counterclockwise one turn each in
the order shown above, but do not
remove any lug nuts until the tire has
been raised off of the ground.