2022 HYUNDAI SONATA instrument panel
[x] Cancel search: instrument panelPage 75 of 546
03
3-47
Occupant Classification System
(OCS)
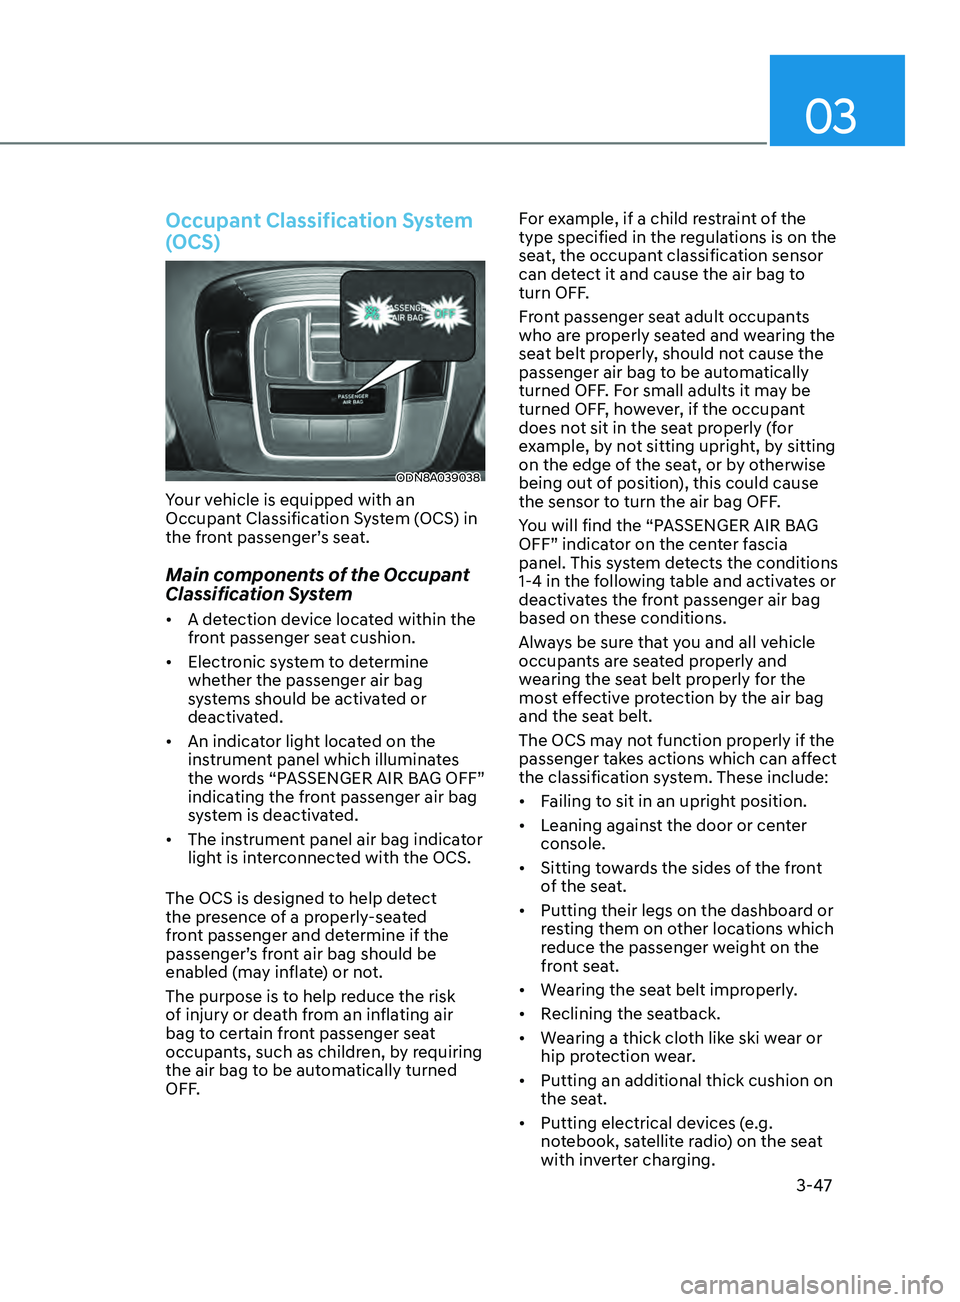
ODN8A039038
Your vehicle is equipped with an
Occupant Classification System (OCS) in
the front passenger’s seat.
Main components of the Occupant
Classification System
• A detection device located within the
front passenger seat cushion.
• Electronic system to determine
whether the passenger air bag
systems should be activated or
deactivated.
• An indicator light located on the
instrument panel which illuminates
the words “PASSENGER AIR BAG OFF”
indicating the front passenger air bag
system is deactivated.
• The instrument panel air bag indicator
light is interconnected with the OCS.
The OCS is designed to help detect
the presence of a properly-seated
front passenger and determine if the
passenger’s front air bag should be
enabled (may inflate) or not.
The purpose is to help reduce the risk
of injury or death from an inflating air
bag to certain front passenger seat
occupants, such as children, by requiring
the air bag to be automatically turned
OFF. For example, if a child restraint of the
type specified in the regulations is on the
seat, the occupant classification sensor
can detect it and cause the air bag to
turn OFF.
Front passenger seat adult occupants
who are properly seated and wearing the
seat belt properly, should not cause the
passenger air bag to be automatically
turned OFF. For small adults it may be
turned OFF, however, if the occupant
does not sit in the seat properly (for
example, by not sitting upright, by sitting
on the edge of the seat, or by otherwise
being out of position), this could cause
the sensor to turn the air bag OFF.
You will find the “PASSENGER AIR BAG
OFF” indicator on the center fascia
panel. This system detects the conditions
1-4 in the following table and activates or
deactivates the front passenger air bag
based on these conditions.
Always be sure that you and all vehicle
occupants are seated properly and
wearing the seat belt properly for the
most effective protection by the air bag
and the seat belt.
The OCS may not function properly if the
passenger takes actions which can affect
the classification system. These include:
•
Failing to sit in an upright position.
• Leaning against the door or center
console.
• Sitting towards the sides of the front
of the seat.
• Putting their legs on the dashboard or
resting them on other locations which
reduce the passenger weight on the
front seat.
• Wearing the seat belt improperly.
• Reclining the seatback.
• Wearing a thick cloth like ski wear or
hip protection wear.
• Putting an additional thick cushion on
the seat.
• Putting electrical devices (e.g.
notebook, satellite radio) on the seat
with inverter charging.
Page 84 of 546
3-56
ODN8A039088
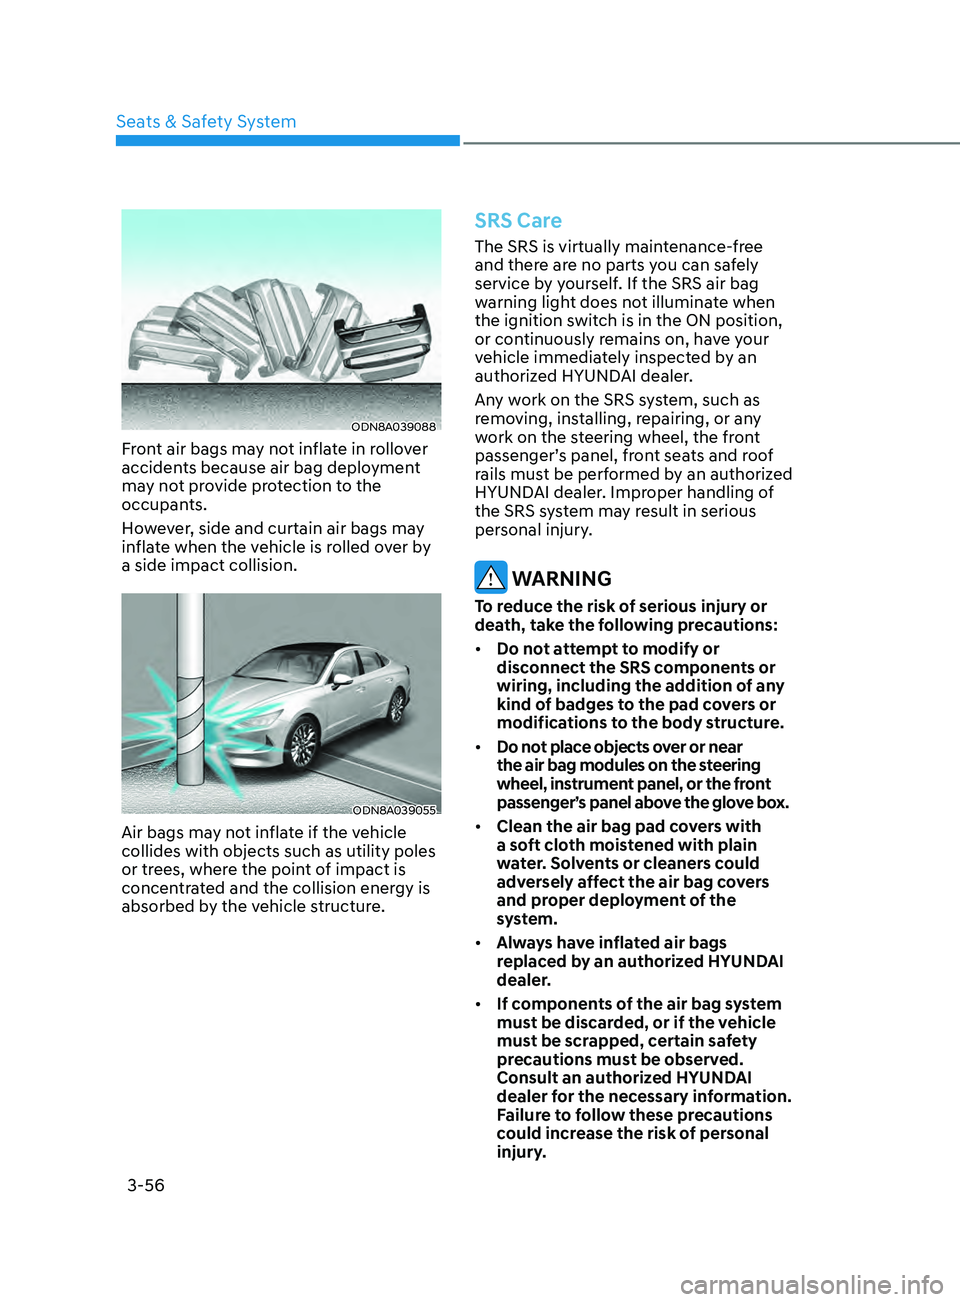
Front air bags may not inflate in rollover
accidents because air bag deployment
may not provide protection to the
occupants.
However, side and curtain air bags may
inflate when the vehicle is rolled over by
a side impact collision.
ODN8A039055
Air bags may not inflate if the vehicle
collides with objects such as utility poles
or trees, where the point of impact is
concentrated and the collision energy is
absorbed by the vehicle structure.
SRS Care
The SRS is virtually maintenance-free
and there are no parts you can safely
service by yourself. If the SRS air bag
warning light does not illuminate when
the ignition switch is in the ON position,
or continuously remains on, have your
vehicle immediately inspected by an
authorized HYUNDAI dealer.
Any work on the SRS system, such as
removing, installing, repairing, or any
work on the steering wheel, the front
passenger’s panel, front seats and roof
rails must be performed by an authorized
HYUNDAI dealer. Improper handling of
the SRS system may result in serious
personal injury.
WARNING
To reduce the risk of serious injury or
death, take the following precautions:
• Do not attempt to modify or
disconnect the SRS components or
wiring, including the addition of any
kind of badges to the pad covers or
modifications to the body structure.
• Do not place objects over or near
the air bag modules on the steering
wheel, instrument panel, or the front
passenger’s panel above the glove box.
• Clean the air bag pad covers with
a soft cloth moistened with plain
water. Solvents or cleaners could
adversely affect the air bag covers
and proper deployment of the
system.
• Always have inflated air bags
replaced by an authorized HYUNDAI
dealer.
• If components of the air bag system
must be discarded, or if the vehicle
must be scrapped, certain safety
precautions must be observed.
Consult an authorized HYUNDAI
dealer for the necessary information.
Failure to follow these precautions
could increase the risk of personal
injury.
Seats & Safety System
Page 88 of 546
04
4-3
Instrument Cluster Control
Adjusting instrument cluster
illumination
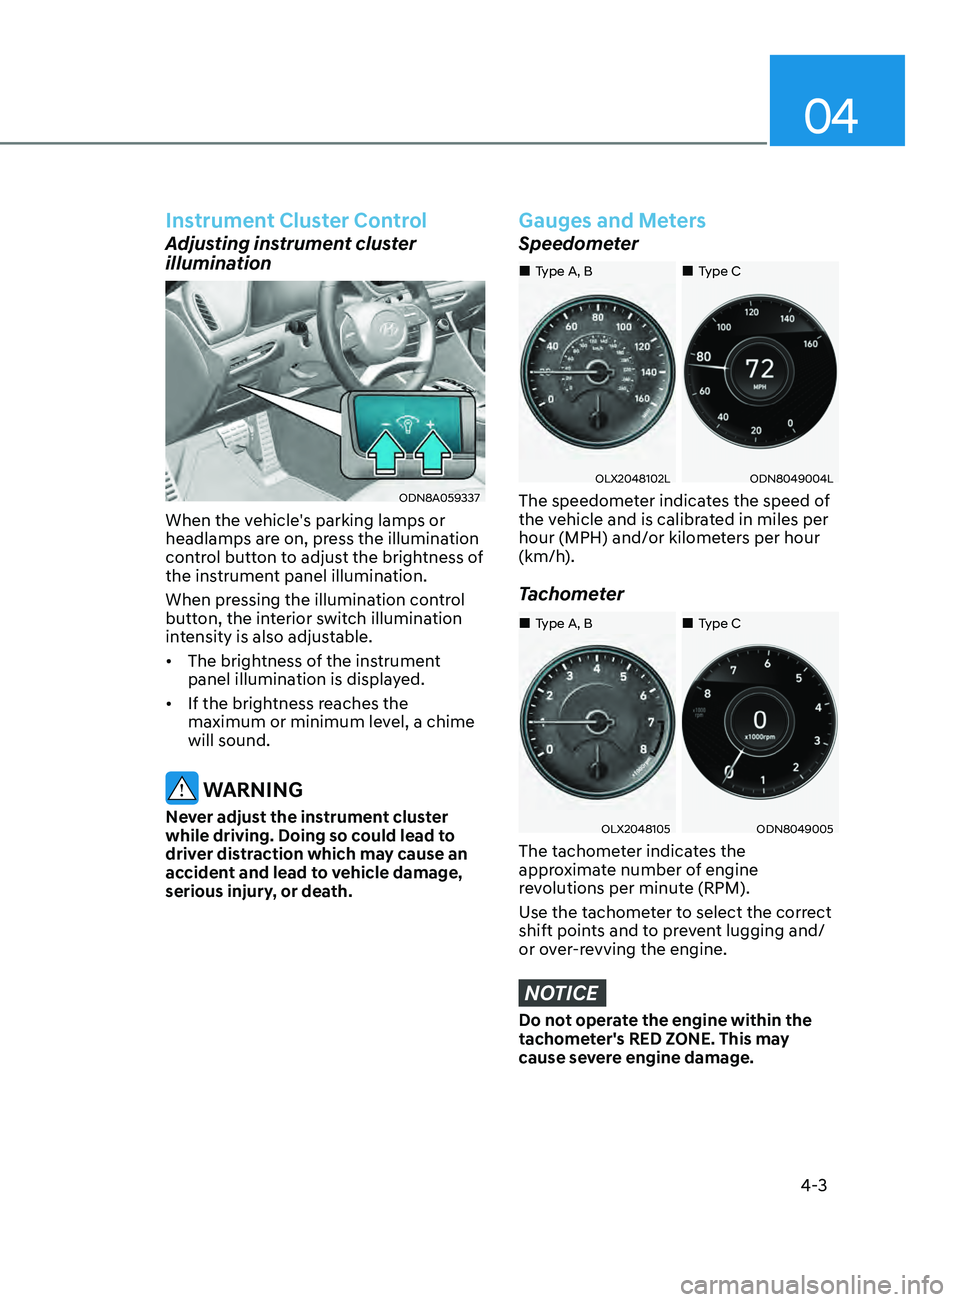
ODN8A059337
When the vehicle's parking lamps or
headlamps are on, press the illumination
control button to adjust the brightness of
the instrument panel illumination.
When pressing the illumination control
button, the interior switch illumination
intensity is also adjustable.
• The brightness of the instrument
panel illumination is displayed.
• If the brightness reaches the
maximum or minimum level, a chime
will sound.
WARNING
Never adjust the instrument cluster
while driving. Doing so could lead to
driver distraction which may cause an
accident and lead to vehicle damage,
serious injury, or death.
Gauges and Meters
Speedometer
OLX2048102LODN8049004L
The speedometer indicates the speed of
the vehicle and is calibrated in miles per
hour (MPH) and/or kilometers per hour
(km/h).
Tachometer
OLX2048105ODN8049005
The tachometer indicates the
approximate number of engine
revolutions per minute (RPM).
Use the tachometer to select the correct
shift points and to prevent lugging and/
or over-revving the engine.
NOTICE
Do not operate the engine within the
tachometer's RED ZONE. This may
cause severe engine damage.
„„Type C
„„Type A, B
„
„Type C
„„Type A, B
Page 169 of 546
05
5-39
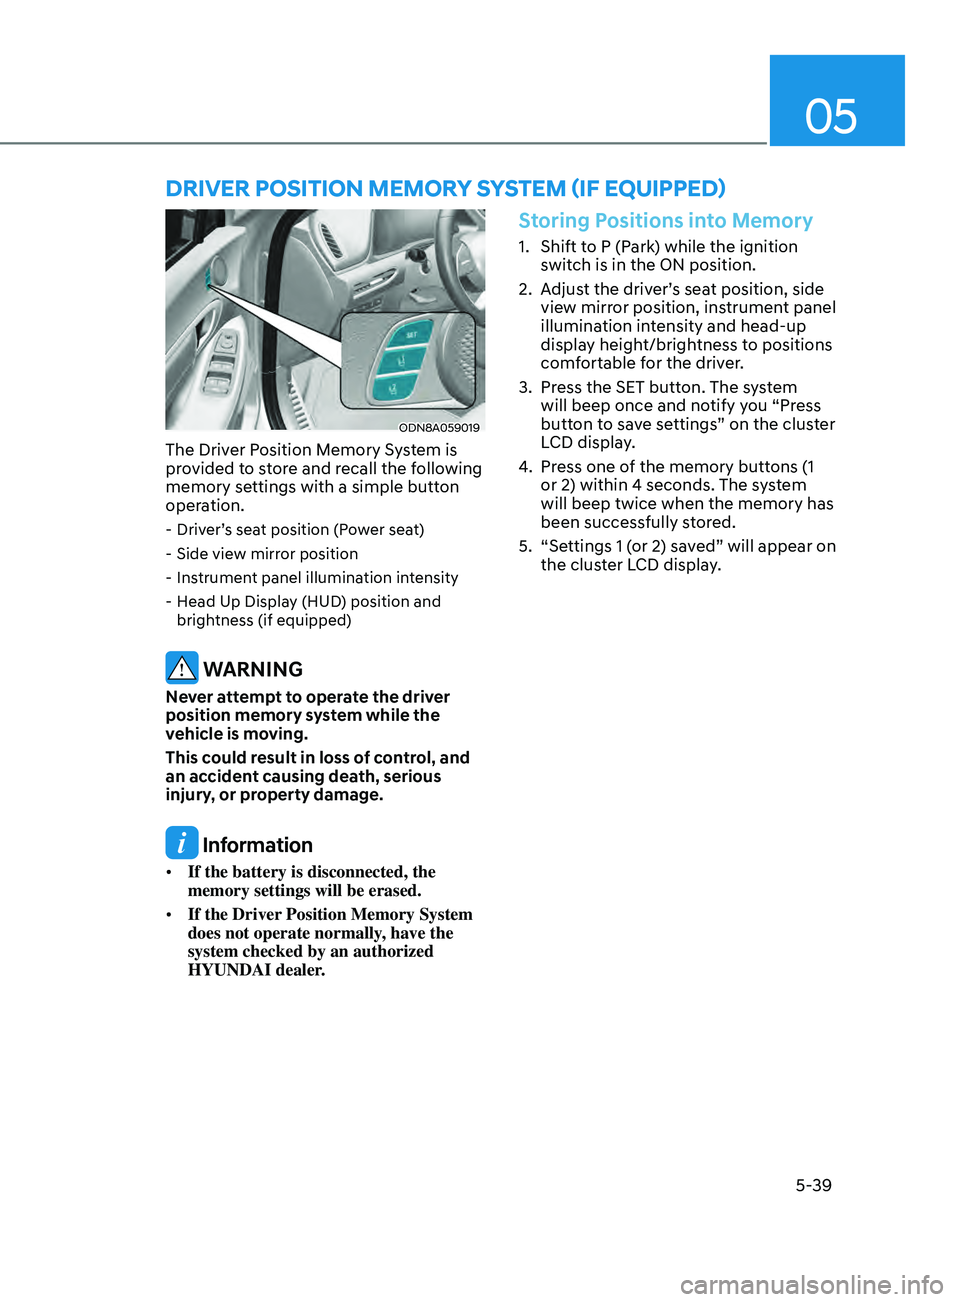
ODN8A059019
The Driver Position Memory System is
provided to store and recall the following
memory settings with a simple button
operation.
- Driver’s seat position (Power seat)
- Side vie
w mirror position
- Ins
trument panel illumination intensity
- H
ead Up Display (HUD) position and
brightness (if equipped)
WARNING
Never attempt to operate the driver
position memory system while the
vehicle is moving.
This could result in loss of control, and
an accident causing death, serious
injury, or property damage.
Information
• If the battery is disconnected, the
memory settings will be erased.
• If the Driver Position Memory System
does not operate normally, have the
system checked by an authorized
HYUNDAI dealer.
Storing Positions into Memory
1. Shift to P (Park) while the ignition
switch is in the ON position.
2.
A
djust the driver’s seat position, side
view mirror position, instrument panel
illumination intensity and head-up
display height/brightness to positions
comfortable for the driver.
3.
Pr
ess the SET button. The system
will beep once and notify you “Press
button to save settings” on the cluster
LCD display.
4.
Pr
ess one of the memory buttons (1
or 2) within 4 seconds. The system
will beep twice when the memory has
been successfully stored.
5.
“Se
ttings 1 (or 2) saved” will appear on
the cluster LCD display.
Driver poS i T ion memory SyS T em ( if eQU ippe D)
Page 170 of 546
Convenient Features
5-40
Recalling Positions from Memory
1. Shift to P (Park) while the ignition switch is in the ON position.
2.
Pr
ess the desired memory button
(1 or 2). The system will beep once,
and then the driver’s seat position,
side view mirror position, instrument
panel illumination intensity and
head-up display height/brightness
will automatically adjust to the stored
positions.
3.
“Se
ttings 1 (or 2) applied” will appear
on the cluster LCD display.
If your vehicle is equipped with
additional navigation, please refer to the
infotainment system manual separately
supplied.
Information
• While recalling the “1” memory
position, pressing the SET or 1 button
temporarily stops the adjustment of
the recalled memory position. Pressing
the 2 button recalls the “2” memory
position.
• While recalling the “2” memory
position, pressing the SET or 2 button
temporarily stops the adjustment of
the recalled memory position. Pressing
the 1 button recalls the “1” memory
position.
• While recalling the stored positions,
pressing one of the control buttons
for the driver’s seat, side view mirror,
instrument panel illumination or head-
up display will cause the movement of
that component to stop and move in
the direction that the control button is
pressed.
Resetting the Driver’s Seat
Memory System
Take the following procedures to reset
the driver’s seat memory system, when it
does not operate properly.
To reset the driver’s seat memory
system
1. Place the ignition s witch to the ON
position, shift to P (Park), and open
the driver’s door.
2.
Oper
ate the control switch to set
the driver’s seat and seatback to the
foremost position.
3.
Simultaneously pr
ess the SET button
and push forward the seat movement
switch over 2 seconds.
While resetting the driver’s seat
memory system
1. It starts with the notification sound.
2.
The driv
er’s seat and seatback is
adjusted to the rearward position with
the notification sound.
3.
The driv
er’s seat and seatback is
re-adjusted to the default position
(central position) with the notification
sound.
However, in the following cases, the
resetting procedure and the notification
sound may stop.
-
The memory butt
on is pressed.
-
The con
trol switch is operated.
-
The gear is shift
ed out of P (Park) .
-
The driving speed e
xceeds 2 mph (3
km/h).
-
The driv
er’s door is closed.
Page 204 of 546
Convenient Features5 -74
lighting
Exterior Lights
Lighting control
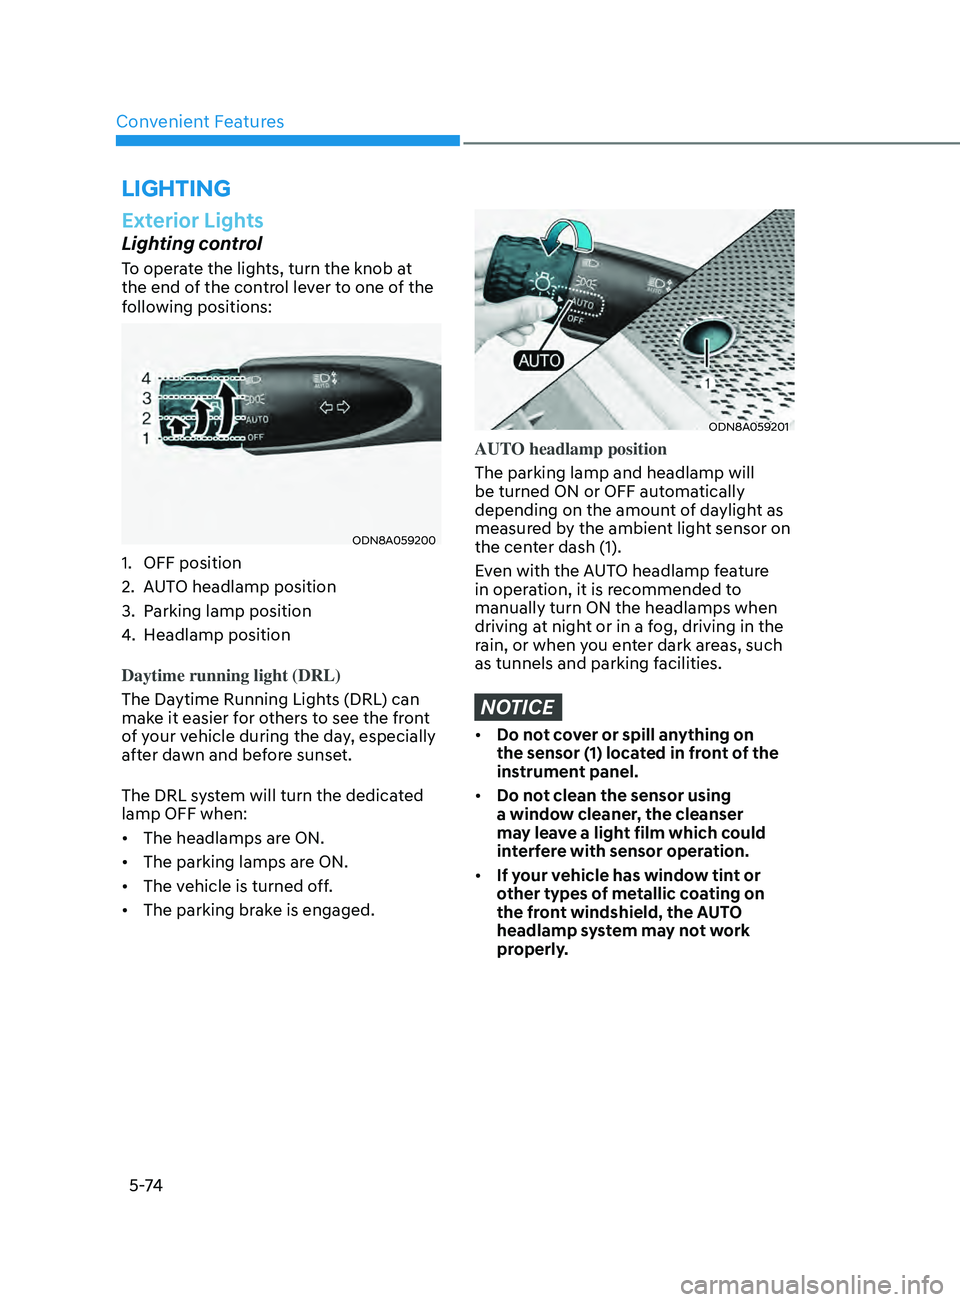
To operate the lights, turn the knob at
the end of the control lever to one of the
following positions:
ODN8A059200
1. OFF position
2.
A
UTO headlamp position
3.
P
arking lamp position
4.
H
eadlamp position
Daytime running light (DRL)
The Daytime Running Lights (DRL) can
make it easier for others to see the front
of your vehicle during the day, especially
after dawn and before sunset.
The DRL system will turn the dedicated
lamp OFF when:
• The headlamps are ON.
• The parking lamps are ON.
• The vehicle is turned off.
• The parking brake is engaged.
ODN8A059201
AUTO headlamp position
The parking lamp and headlamp will
be turned ON or OFF automatically
depending on the amount of daylight as
measured by the ambient light sensor on
the center dash (1).
Even with the AUTO headlamp feature
in operation, it is recommended to
manually turn ON the headlamps when
driving at night or in a fog, driving in the
rain, or when you enter dark areas, such
as tunnels and parking facilities.
NOTICE
• Do not cover or spill anything on
the sensor (1) located in front of the
instrument panel.
• Do not clean the sensor using
a window cleaner, the cleanser
may leave a light film which could
interfere with sensor operation.
• If your vehicle has window tint or
other types of metallic coating on
the front windshield, the AUTO
headlamp system may not work
properly.
Page 205 of 546
05
5-75
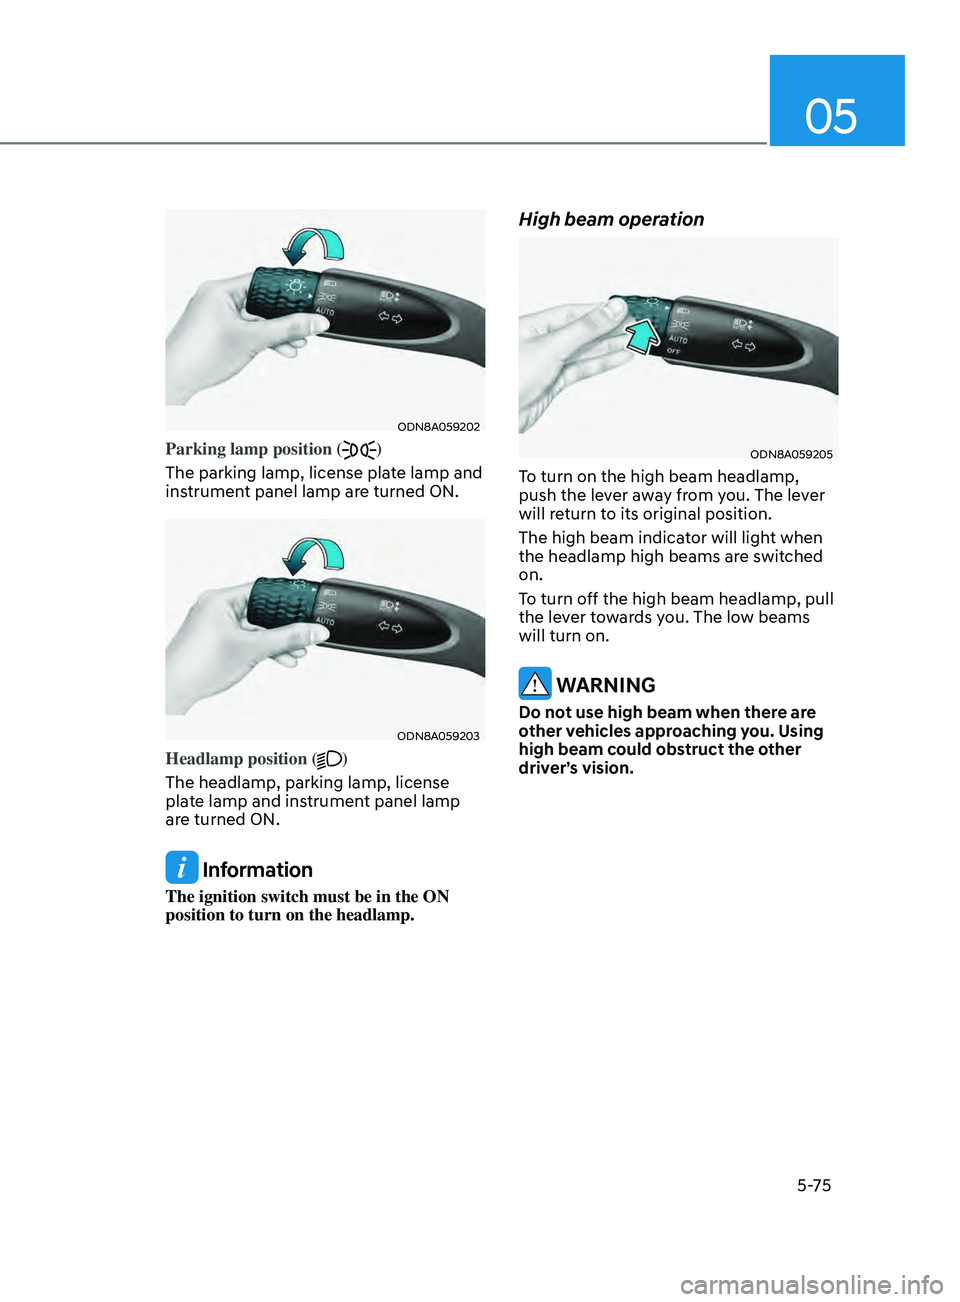
ODN8A059202
Parking lamp position ()
The parking lamp, license plate lamp and
instrument panel lamp are turned ON.
ODN8A059203
Headlamp position ()
The headlamp, parking lamp, license
plate lamp and instrument panel lamp
are turned ON.
Information
The ignition switch must be in the ON
position to turn on the headlamp.
High beam operation
ODN8A059205
To turn on the high beam headlamp,
push the lever away from you. The lever
will return to its original position.
The high beam indicator will light when
the headlamp high beams are switched
on.
To turn off the high beam headlamp, pull
the lever towards you. The low beams
will turn on.
WARNING
Do not use high beam when there are
other vehicles approaching you. Using
high beam could obstruct the other
driver’s vision.
Page 252 of 546
Convenient Features
5-122
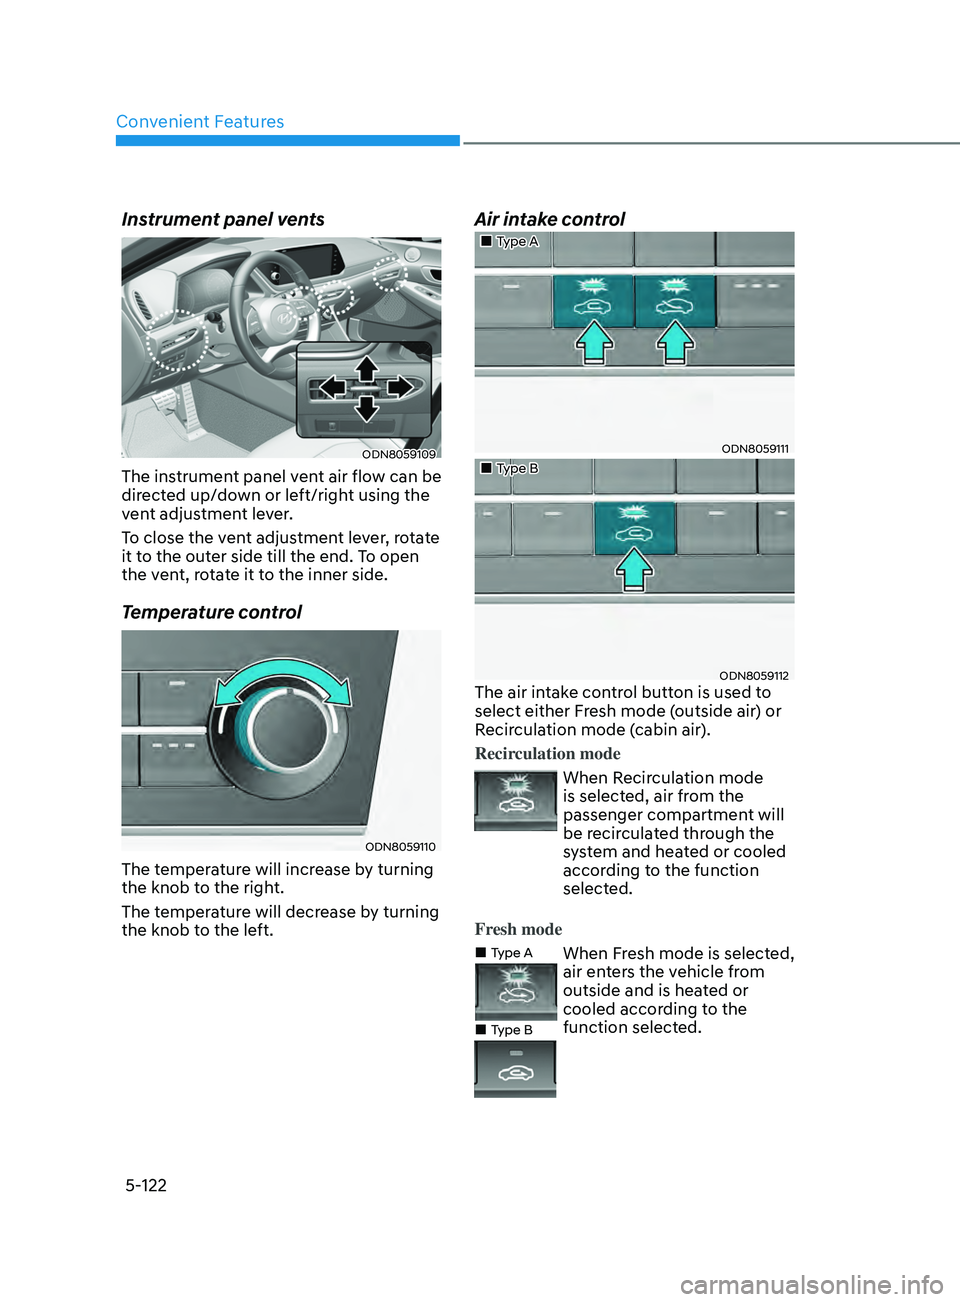
Instrument panel vents
ODN8059109
The instrument panel vent air flow can be
directed up/down or left/right using the
vent adjustment lever.
To close the vent adjustment lever, rotate
it to the outer side till the end. To open
the vent, rotate it to the inner side.
Temperature control
ODN8059110
The temperature will increase by turning
the knob to the right.
The temperature will decrease by turning
the knob to the left.
Air intake control
„„Type A
ODN8059111
„„Type B
ODN8059112The air intake control button is used to
select either Fresh mode (outside air) or
Recirculation mode (cabin air).
Recirculation mode
When Recirculation mode
is selected, air from the
passenger compartment will
be recirculated through the
system and heated or cooled
according to the function
selected.
Fresh mode
„„Type A
„
„Type B
When Fresh mode is selected,
air enters the vehicle from
outside and is heated or
cooled according to the
function selected.