2022 HYUNDAI SONATA HYBRID window
[x] Cancel search: windowPage 202 of 527
Convenient Features
5-54
NOTICE
Do not install any accessories on the
windows. The automatic reverse
feature may not operate.
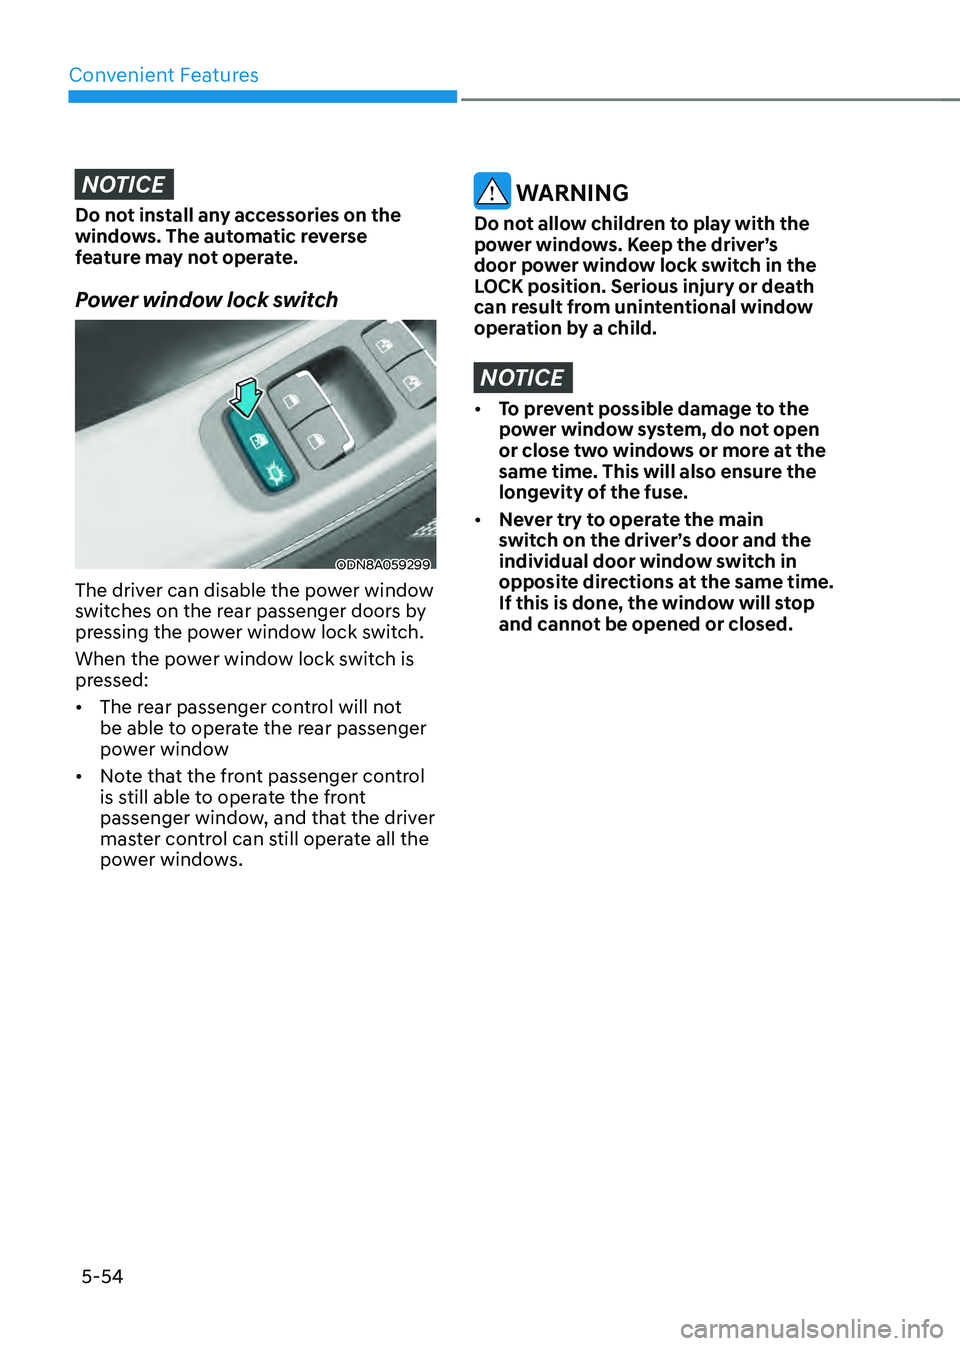
Power window lock switch
ODN8A059299
The driver can disable the power window
switches on the rear passenger doors by
pressing the power window lock switch.
When the power window lock switch is
pressed:
• The rear passenger control will not
be able to operate the rear passenger
power window
• Note that the front passenger control
is still able to operate the front
passenger window, and that the driver
master control can still operate all the
power windows.
WARNING
Do not allow children to play with the
power windows. Keep the driver’s
door power window lock switch in the
LOCK position. Serious injury or death
can result from unintentional window
operation by a child.
NOTICE
• To prevent possible damage to the
power window system, do not open
or close two windows or more at the
same time. This will also ensure the
longevity of the fuse.
• Never try to operate the main
switch on the driver’s door and the
individual door window switch in
opposite directions at the same time.
If this is done, the window will stop
and cannot be opened or closed.
Page 220 of 527
Convenient Features
5-72
LIGHTING
Exterior Lights
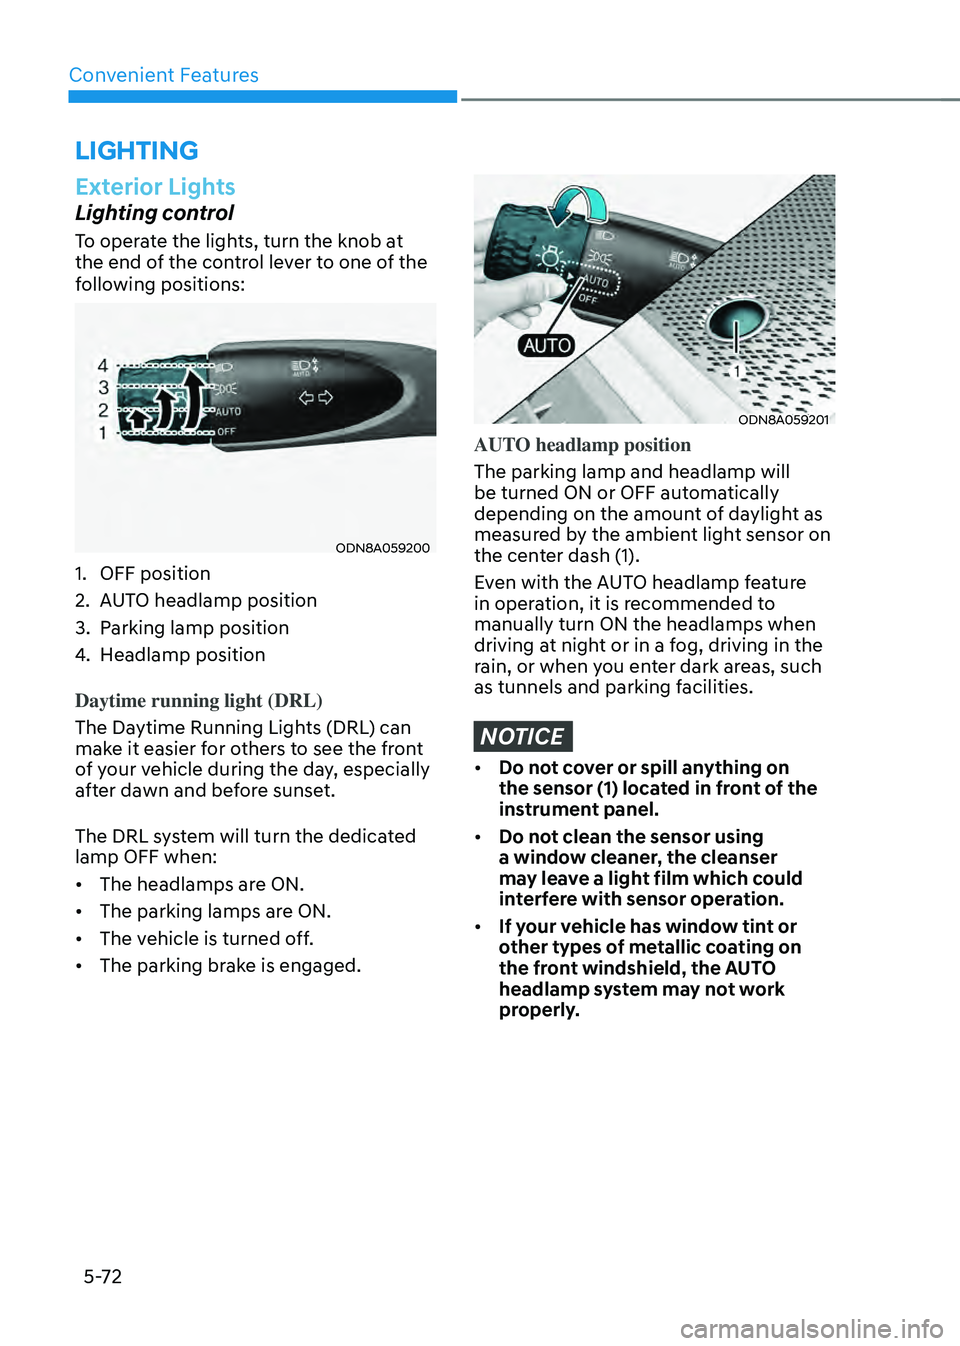
Lighting control
To operate the lights, turn the knob at
the end of the control lever to one of the
following positions:
ODN8A059200
1. OFF position
2. AUTO headlamp position
3. Parking lamp position
4. Headlamp position
Daytime running light (DRL)
The Daytime Running Lights (DRL) can
make it easier for others to see the front
of your vehicle during the day, especially
after dawn and before sunset.
The DRL system will turn the dedicated
lamp OFF when:
• The headlamps are ON.
• The parking lamps are ON.
• The vehicle is turned off.
• The parking brake is engaged.
ODN8A059201
AUTO headlamp position
The parking lamp and headlamp will
be turned ON or OFF automatically
depending on the amount of daylight as
measured by the ambient light sensor on
the center dash (1).
Even with the AUTO headlamp feature
in operation, it is recommended to
manually turn ON the headlamps when
driving at night or in a fog, driving in the
rain, or when you enter dark areas, such
as tunnels and parking facilities.
NOTICE
• Do not cover or spill anything on
the sensor (1) located in front of the
instrument panel.
• Do not clean the sensor using
a window cleaner, the cleanser
may leave a light film which could
interfere with sensor operation.
• If your vehicle has window tint or
other types of metallic coating on
the front windshield, the AUTO
headlamp system may not work
properly.
Page 224 of 527
Convenient Features
5 -76
2. When the High Beam Assist camera
is adversely affected by an external
condition. Such examples may
include:• When the vehicle’s headlamps
have been damaged or not
repaired properly.
• When the vehicle headlamps are
not aimed properly.
• When the vehicle is driven on a
narrow curved road or rough road
• When the vehicle is driven on an
uphill road or downhill road
• When only part of the vehicle in
front is visible on a crossroad or
curved road.
• When there is a traffic light,
reflecting sign, flashing sign or
mirror.
• When the road conditions are bad
such as being wet or covered with
snow.
• When a vehicle suddenly appears
from a curve.
• When the vehicle is tilted from a
flat tire or being towed.
• When Lane Keeping Assist system
warning light illuminates.
• When the light from the on-coming
or front vehicle is not detected
because of exhaust fume, smoke,
fog, snow, etc.
• When the front window is covered
with foreign matters such as ice,
dust, fog, or is damaged.
3. When the forward visibility is poor.
Such examples may include:
• When the headlamps of an on-
coming vehicle or a vehicle in front
is not detected due to poor outside
visibility (smog, smoke, dust, fog,
heavy rain, snow, etc.).
• When the windshield visibility is
poor.
WARNING
• Do not attempt to disassemble
the front view camera without the
assistance of an authorized HYUNDAI
dealer technician. If the front camera
is removed for any reason, the
system may need to be re-calibrated.
Have the system inspected by an
authorized HYUNDAI dealer.
• If the windshield of your vehicle is
replaced, most likely the front view
camera will need to be re-calibrated.
If this occurs, have your vehicle
inspected and have the system re-
calibrated by an authorized HYUNDAI
dealer.
• Be careful that water doesn’t get into
High Beam Assist unit and do not
remove or damage related parts of
High Beam Assist system.
• Do not place objects on the crash
pad that reflect light such as mirrors,
white paper, etc. The system may
malfunction if sunlight is reflected.
• At times, High Beam Assist system
may not work properly. The system
is for your convenience only. It is the
responsibility of the driver for safe
driving practices and always check
the road conditions for your safety.
• When the system does not operate
normally, change the headlamp
position manually between the high
beam and low beam.
Page 249 of 527
5-101
05
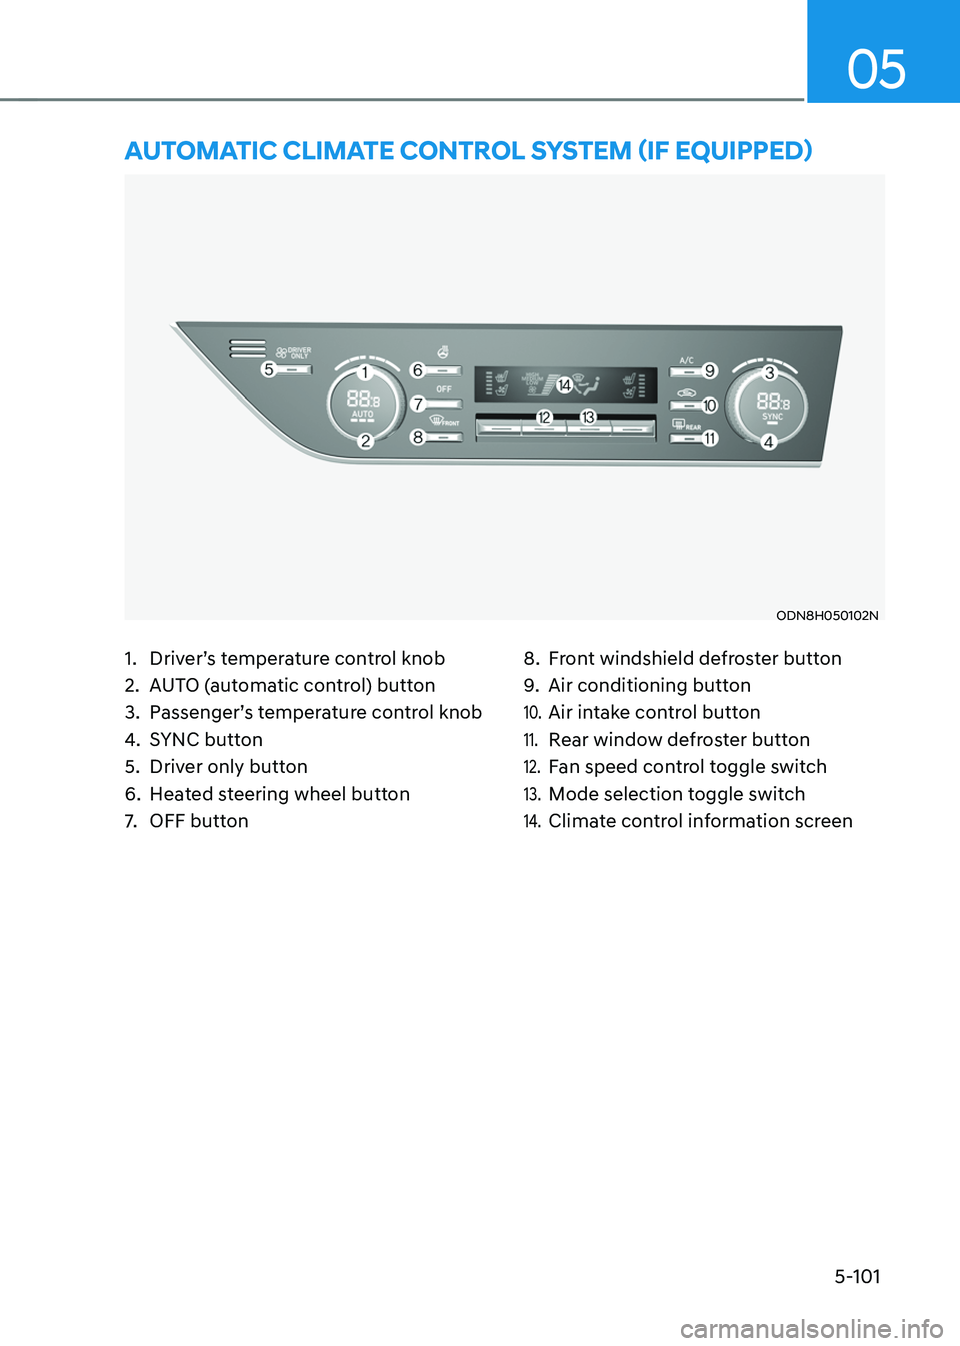
1. Driver’s temperature control knob
2. AUTO (automatic control) button
3. Passenger’s temperature control knob
4. SYNC button
5. Driver only button
6. Heated steering wheel button
7. OFF button
8. Front windshield defroster button
9. Air conditioning button
10. Air intake control button
11. Rear window defroster button
12. Fan speed control toggle switch
13. Mode selection toggle switch
14. Climate control information screen
AUTOMATIC CLIMATE CONTROL SYSTEM (IF EQUIPPED)
ODN8H050102N
Page 253 of 527
05
5-105
ODN8059129L
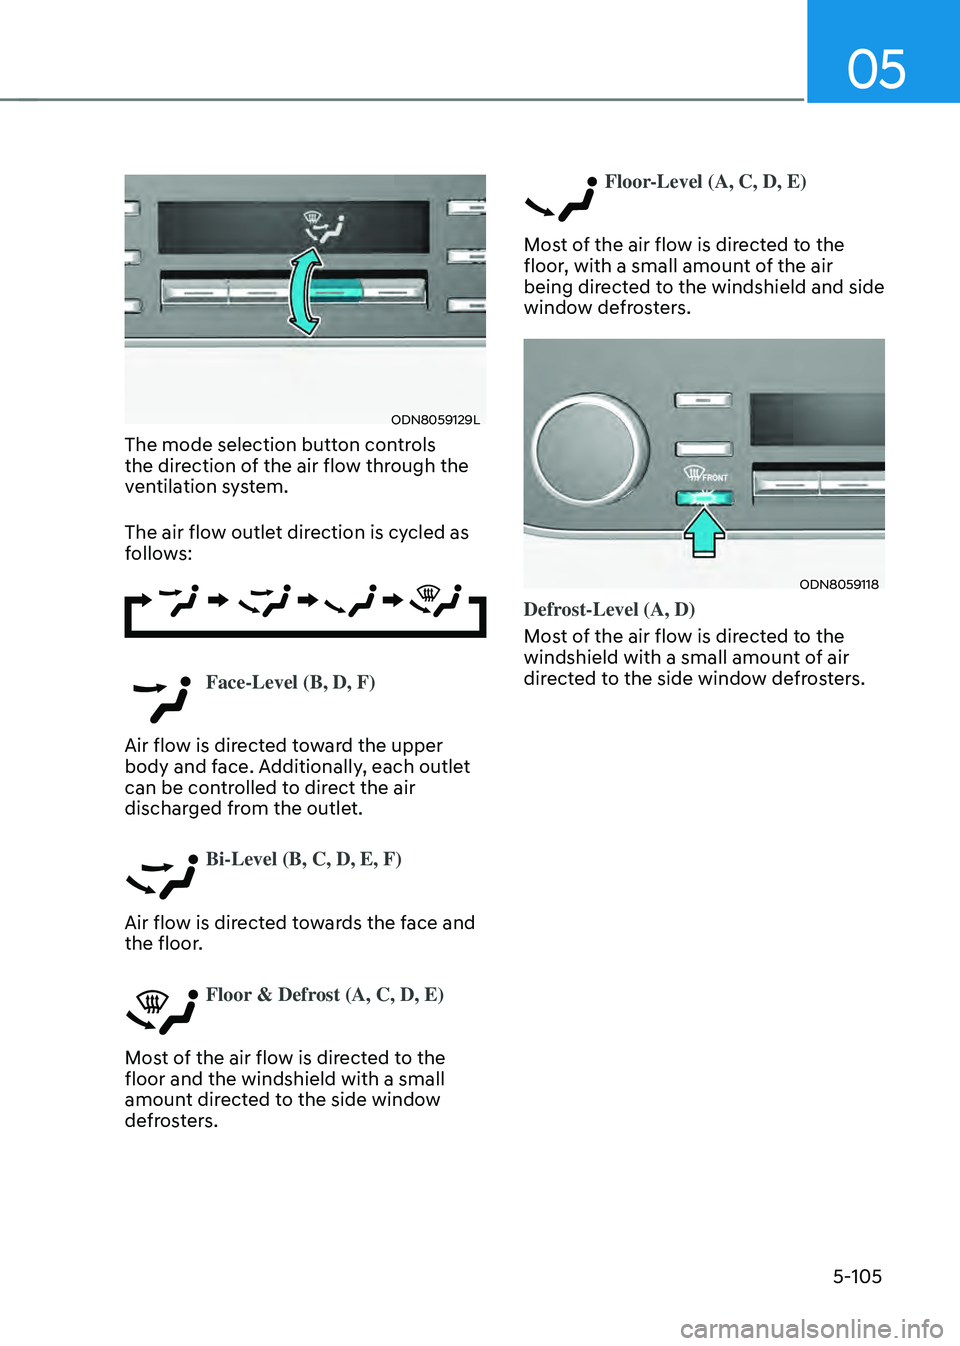
The mode selection button controls
the direction of the air flow through the
ventilation system.
The air flow outlet direction is cycled as
follows:
Face-Level (B, D, F)
Air flow is directed toward the upper
body and face. Additionally, each outlet
can be controlled to direct the air
discharged from the outlet.
Bi-Level (B, C, D, E, F)
Air flow is directed towards the face and
the floor.
Floor & Defrost (A, C, D, E)
Most of the air flow is directed to the
floor and the windshield with a small
amount directed to the side window
defrosters.
Floor-Level (A, C, D, E)
Most of the air flow is directed to the
floor, with a small amount of the air
being directed to the windshield and side
window defrosters.
ODN8059118
Defrost-Level (A, D)
Most of the air flow is directed to the
windshield with a small amount of air
directed to the side window defrosters.
Page 255 of 527
05
5-107
Temperature conversion
If the battery has been discharged or
disconnected, the temperature mode
display will reset to Centigrade.
To change the temperature unit from °C
to °F or °F to °C :
-Automatic climate control system
Press the AUTO button for 3 seconds
while pressing the OFF button.
-Instrument cluster
-Go to User Settings → Other → Temperature Unit.
The temperature unit on both the cluster
LCD display and the climate control
screen will change.
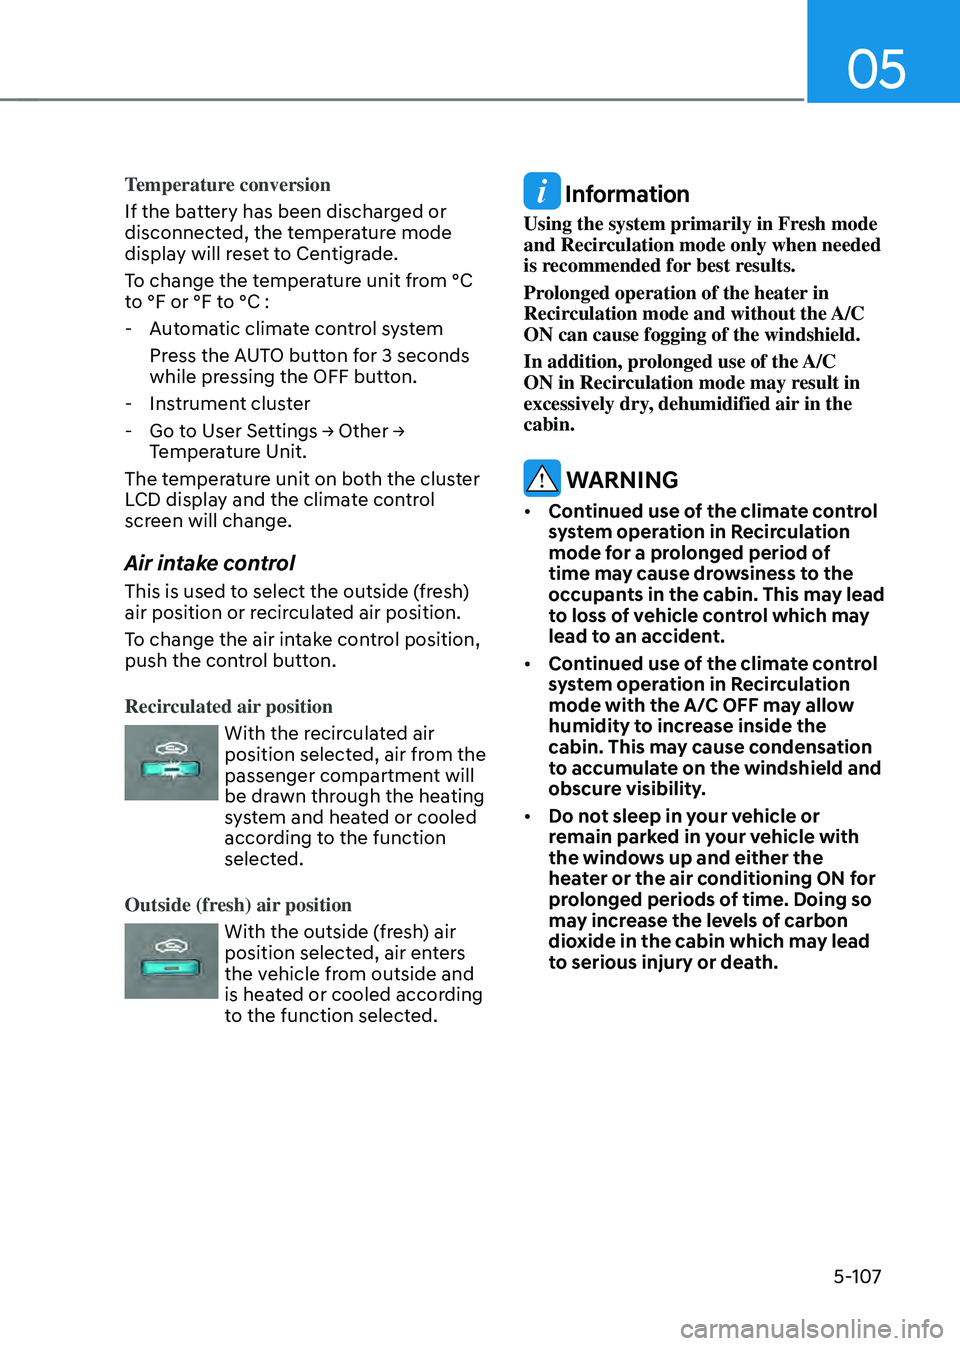
Air intake control
This is used to select the outside (fresh)
air position or recirculated air position.
To change the air intake control position,
push the control button.
Recirculated air position
With the recirculated air position selected, air from the
passenger compartment will
be drawn through the heating
system and heated or cooled
according to the function
selected.
Outside (fresh) air position
With the outside (fresh) air position selected, air enters
the vehicle from outside and
is heated or cooled according
to the function selected.
Information
Using the system primarily in Fresh mode
and Recirculation mode only when needed
is recommended for best results.
Prolonged operation of the heater in
Recirculation mode and without the A/C
ON can cause fogging of the windshield.
In addition, prolonged use of the A/C
ON in Recirculation mode may result in
excessively dry, dehumidified air in the
cabin.
WARNING
• Continued use of the climate control
system operation in Recirculation
mode for a prolonged period of
time may cause drowsiness to the
occupants in the cabin. This may lead
to loss of vehicle control which may
lead to an accident.
• Continued use of the climate control
system operation in Recirculation
mode with the A/C OFF may allow
humidity to increase inside the
cabin. This may cause condensation
to accumulate on the windshield and
obscure visibility.
• Do not sleep in your vehicle or
remain parked in your vehicle with
the windows up and either the
heater or the air conditioning ON for
prolonged periods of time. Doing so
may increase the levels of carbon
dioxide in the cabin which may lead
to serious injury or death.
Page 258 of 527
Convenient Features
5-110
Air conditioning
Your HYUNDAI vehicle air conditioning
system is filled with R-1234yf refrigerant.
1. Start the engine.
2. Press the air conditioning button.
3. Set the mode to the Face Level mode.
4. Set the air intake control to
Recirculation mode temporarily to
allow the cabin to cool quickly. When
the desired temperature in the cabin
is reached, change the air intake
control back to Fresh mode.
5. Adjust the fan speed control and
temperature control to maintain
maximum comfort.
When maximum cooling is desired, set
the temperature control to the MAX A/C
position, then set the fan speed control
to the highest setting.
NOTICE
When using the air conditioning system,
monitor the engine temperature gauge
closely while driving up hills or in heavy
traffic when outside temperatures.
Air conditioning system operation
when climbing a steep grade or in
high outside ambient temperatures
can cause engine overheating.
Continue to use the fan, but turn the air
conditioning system off if the engine
temperature gauge indicates engine
overheating. Air conditioning system operation tips
•
If the vehicle has been parked in
direct sunlight during hot weather,
open the windows for a short time
to let the hot air inside the vehicle
escape.
• After sufficient cooling has been
achieved, switch back from the
recirculated air to the fresh outside air
position.
• To help reduce moisture inside of
the windows on rainy or humid
days, decrease the humidity inside
the vehicle by operating the air
conditioning system with the windows
and sunroof closed.
• Use the air conditioning system
every month only for a few minutes
to ensure maximum system
performance.
• If you operate air conditioner
excessively, the difference between
the temperature of the outside air and
that of the windshield could cause
the outer surface of the windshield
to fog up, causing loss of visibility. In
this case, set the mode selection knob
or button to the
position and fan speed control to the lower speed.
Page 261 of 527
05
5-113
WINDSHIELD DEFROSTING AND DEFOGGING
WARNING
Windshield heating
Do not use the
or position during cooling operation in extremely
humid weather. The difference between
the temperature of the outside air and
that of the windshield could cause the
outer surface of the windshield to fog
up, causing loss of visibility could cause
an accident resulting in serious injury
or death. In this case, set the mode
selection knob or button to the
position and fan speed control knob or
button to a lower speed.
• For maximum defrost performance,
set the temperature control knob
to the highest temperature setting
(rotated all the way to the right) and
the fan speed control to the highest
setting.
• If warm air to the floor is desired while
defrosting or defogging, set the mode
to the floor-defrost position.
• Before driving, clear all snow and ice
from the windshield, rear window,
side view mirrors, and all side
windows.
• Clear all snow and ice from the
hood and air inlet in the cowl grill
to improve heater and defroster
efficiency and to reduce the
probability of fogging up the inside of
the windshield.
NOTICE
If you start the vehicle when the
weather is cold, more adequate way to
heat the cabin is described below.
1. Turn off or lower the blower, right
after engine starting, because engine
temperature is still low and the air
flow is cold.
2. After few minutes of engine warm
up, turn the blower to low to medium
speed and set the temperature
control to Hot.
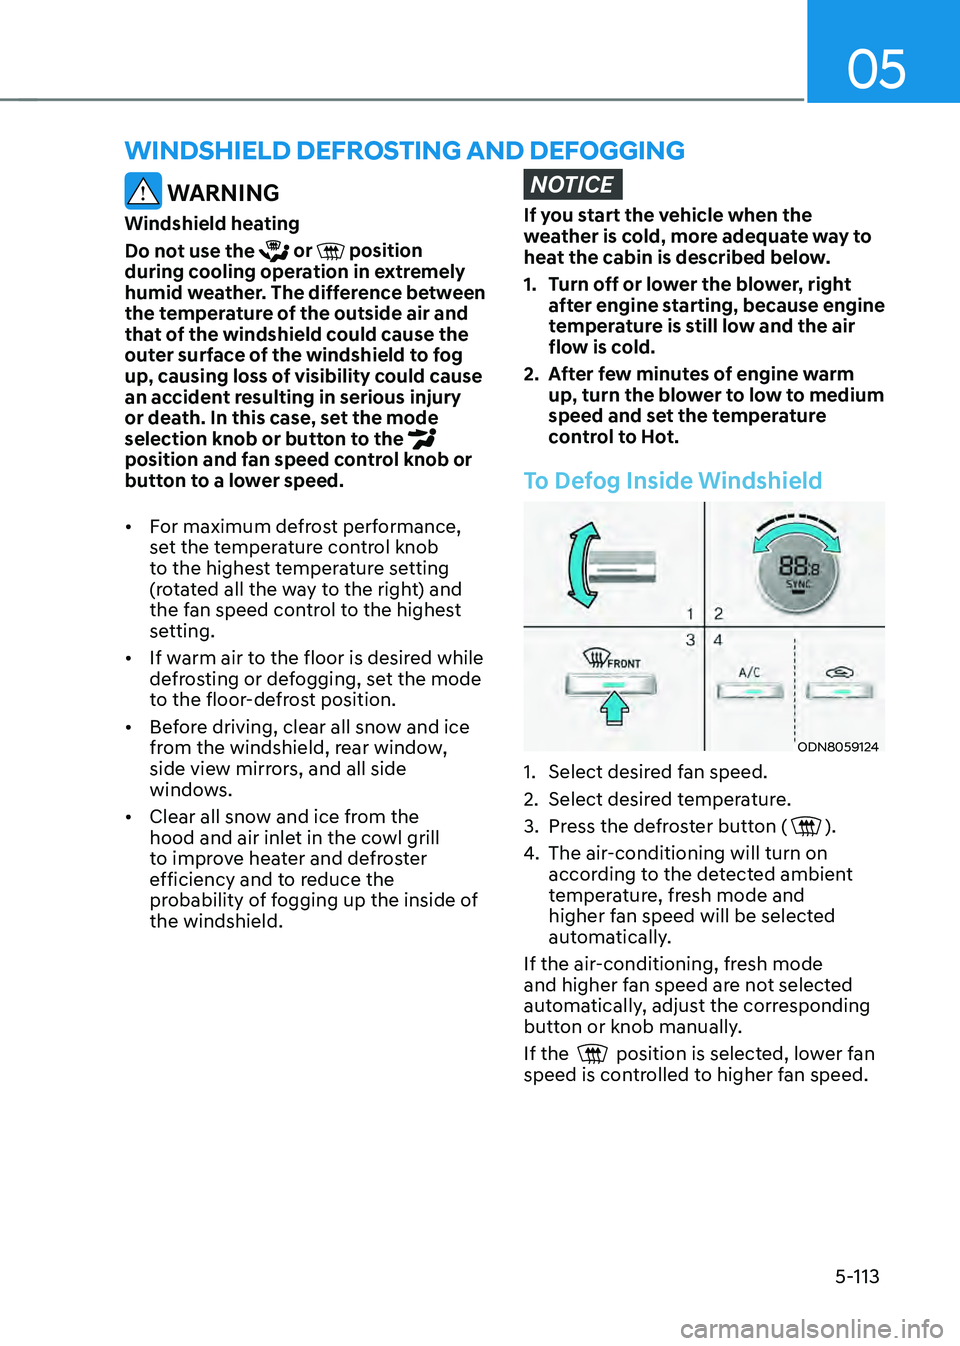
To Defog Inside Windshield
ODN8059124
1. Select desired fan speed.
2. Select desired temperature.
3. Press the defroster button ().
4. The air-conditioning will turn on
according to the detected ambient
temperature, fresh mode and
higher fan speed will be selected
automatically.
If the air-conditioning, fresh mode
and higher fan speed are not selected
automatically, adjust the corresponding
button or knob manually.
If the
position is selected, lower fan speed is controlled to higher fan speed.