2022 HYUNDAI SONATA HYBRID trailer
[x] Cancel search: trailerPage 403 of 527
06
6-127
If any of these conditions occur, the
system will turn off automatically.
When BCW canceled warning message
is displayed in the cluster, check to make
sure that the rear bumper is free from
any dirt or snow in the areas where the
sensor is located. Remove any dirt, snow,
or foreign material that could interfere
with the radar sensors.
After any dirt or debris is removed, the
system should operate normally after
about 10 minutes of driving the vehicle.
If the system still does not operate
normally have your vehicle inspected by
an authorized HYUNDAI dealer.
Information
Turn off BCW, BCA and RCCA system
when a trailer or carrier is installed.
Deactivate BCW and BCA system
by selecting “User Settings → Driver
Assistance → Blind-Spot Safety → Off”
Deactivate RCCW and RCCA system
by deselecting “User Settings → Driver
Assistance → Parking Safety → Rear
Cross-Traffic Safety”.
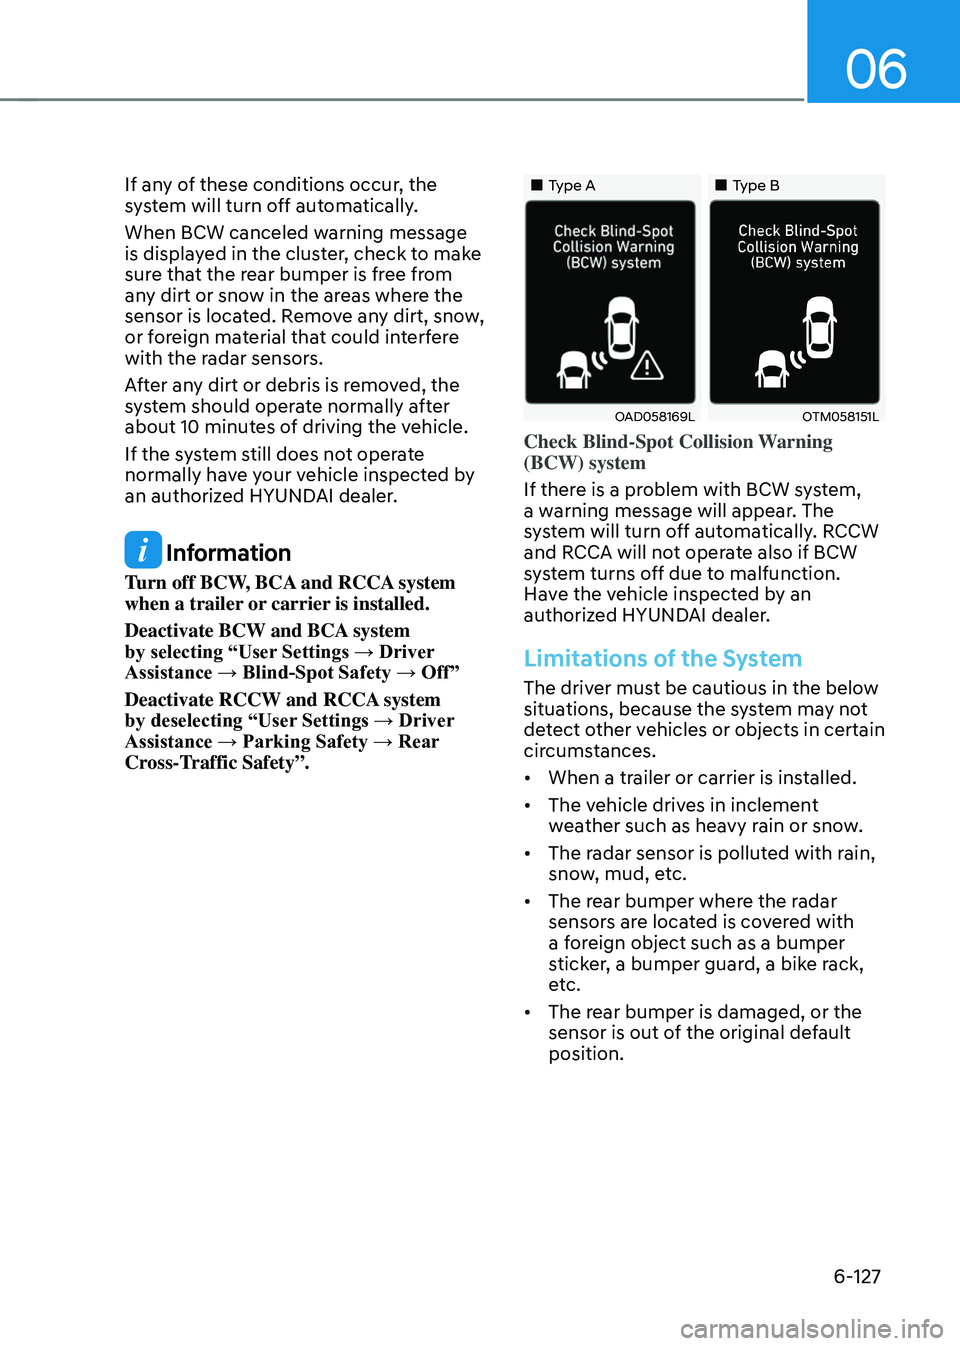
„„Type A„„Type B
OAD058169LOTM058151L
Check Blind-Spot Collision Warning
(BCW) system
If there is a problem with BCW system,
a warning message will appear. The
system will turn off automatically. RCCW
and RCCA will not operate also if BCW
system turns off due to malfunction.
Have the vehicle inspected by an
authorized HYUNDAI dealer.
Limitations of the System
The driver must be cautious in the below
situations, because the system may not
detect other vehicles or objects in certain
circumstances.
• When a trailer or carrier is installed.
• The vehicle drives in inclement
weather such as heavy rain or snow.
• The radar sensor is polluted with rain,
snow, mud, etc.
• The rear bumper where the radar
sensors are located is covered with
a foreign object such as a bumper
sticker, a bumper guard, a bike rack,
etc.
• The rear bumper is damaged, or the
sensor is out of the original default
position.
Page 404 of 527
While Driving
6-128
• The vehicle height gets lower or
higher due to heavy loading in a trunk,
abnormal tire pressure, etc.
• When the temperature of the rear
bumper is high.
• When the sensors are blocked by
other vehicles, walls or parking-lot
pillars.
• The vehicle drives on a curved road.
• The road pavement (or the peripheral
ground) abnormally contains metallic
components (i.e. possibly due to
subway construction).
• There is a fixed object near the
vehicle, such as a guardrail.
• While going down or up a steep
road where the height of the lane is
different.
• Driving on a narrow road where trees
or grass or overgrown.
• Driving in rural areas where the sensor
does not detect another vehicle for an
extended period of time.
• Driving on a wet road.
• Driving on a road where the guardrail
or wall is in double structure.
• A big vehicle is near such as a bus or
truck.
• When the other vehicle approaches
very close.
• When the other vehicle passes at a
very fast speed.
• While changing lanes. •
If the vehicle has started at the same
time as the vehicle next to you and
has accelerated.
• When the vehicle in the next lane
moves two lanes away from you or
when the vehicle two lanes away
moves to the next lane from you.
• A motorcycle or bicycle is near.
• A flat trailer is near.
• If there are small objects in the
detecting area such as a shopping
cart or a baby stroller.
• If there is a low height vehicle such as
a sports car.
• The brake pedal is depressed.
• ESC (Electronic Stability Control) is
activated.
• ESC (Electronic Stability Control)
malfunctions.
• The tire pressure is low or a tire is
damaged.
• The brake is reworked.
• The vehicle sharply stops.
• Temperature is extremely low around
the vehicle.
• The vehicle severely vibrates while
driving over a bumpy road, uneven/
bumpy road, or concrete patch.
• The vehicle drives on a slippery
surface due to snow, water puddle,
or ice.
• If the vehicle moves backward after
the vehicle is parked with a diagonal
line
Page 416 of 527
While Driving
6-140
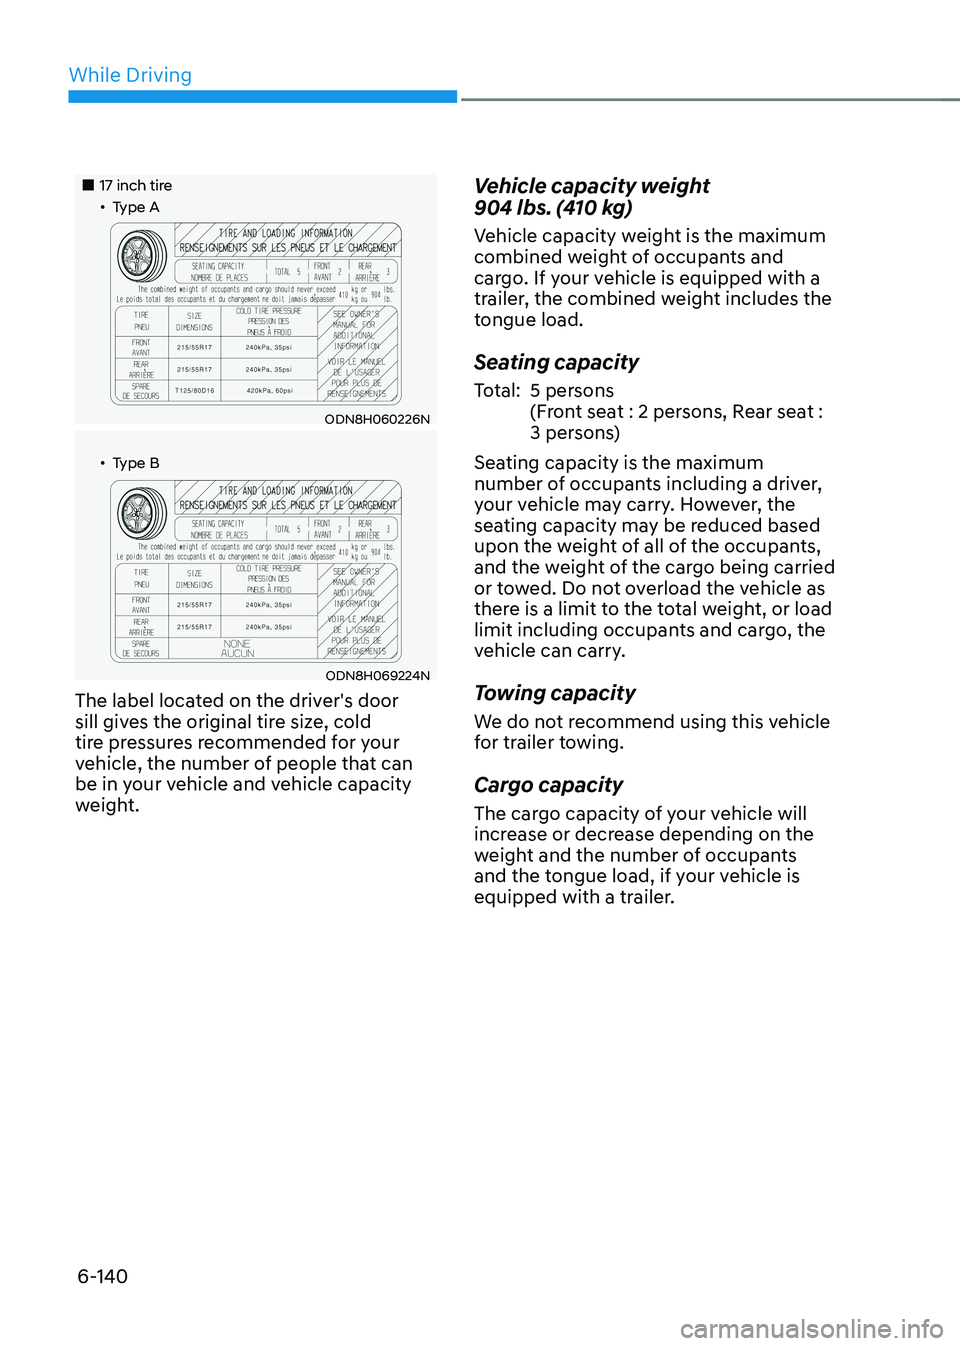
„„17 inch tire„ǴType A
ODN8H060226N
„ǴType B
ODN8H069224N
The label located on the driver's door
sill gives the original tire size, cold
tire pressures recommended for your
vehicle, the number of people that can
be in your vehicle and vehicle capacity
weight.
Vehicle capacity weight
904 lbs. (410 kg)
Vehicle capacity weight is the maximum
combined weight of occupants and
cargo. If your vehicle is equipped with a
trailer, the combined weight includes the
tongue load.
Seating capacity
Total:5 persons
(Front seat : 2 persons, Rear seat :
3 persons)
Seating capacity is the maximum
number of occupants including a driver,
your vehicle may carry. However, the
seating capacity may be reduced based
upon the weight of all of the occupants,
and the weight of the cargo being carried
or towed. Do not overload the vehicle as
there is a limit to the total weight, or load
limit including occupants and cargo, the
vehicle can carry.
Towing capacity
We do not recommend using this vehicle
for trailer towing.
Cargo capacity
The cargo capacity of your vehicle will
increase or decrease depending on the
weight and the number of occupants
and the tongue load, if your vehicle is
equipped with a trailer.
Page 417 of 527
06
6-141
Steps for determining correct load
limit
1. Locate the statement "The combined
weight of occupants and cargo should
never exceed XXX kg or XXX lbs." on
your vehicle's placard.
2. Determine the combined weight of
the driver and passengers that will be
riding in your vehicle.
3. Subtract the combined weight of the
driver and passengers from XXX kg or
XXX lbs.
4. The resulting figure equals the
available amount of cargo and
luggage load capacity. For example,
if the "XXX" amount equals 1400
lbs. and there will be five 150 lb.
passengers in your vehicle, the
amount of available cargo and
luggage load capacity is 650 lbs.
(1400 - 750 (5 x 150) = 650 lbs.)
5. Determine the combined weight of
luggage and cargo being loaded on
the vehicle. That weight may not
safely exceed the available cargo and
luggage load capacity calculated in
Step 4.
6. If your vehicle will be towing a
trailer, load from your trailer will be
transferred to your vehicle. Consult
this manual to determine how this
reduces the available cargo and
luggage load capacity of your vehicle.
WARNING
Do not overload the vehicle as there
is a limit to the total weight, or load
limit, including occupants and cargo,
the vehicle can carry. Overloading can
shorten the life of the vehicle. If the
GVWR or the GAWR is exceeded, parts
on the vehicle can break, and it can
change the handling of your vehicle.
These could cause you to lose control
and result in an accident.
Page 419 of 527
06
6-143
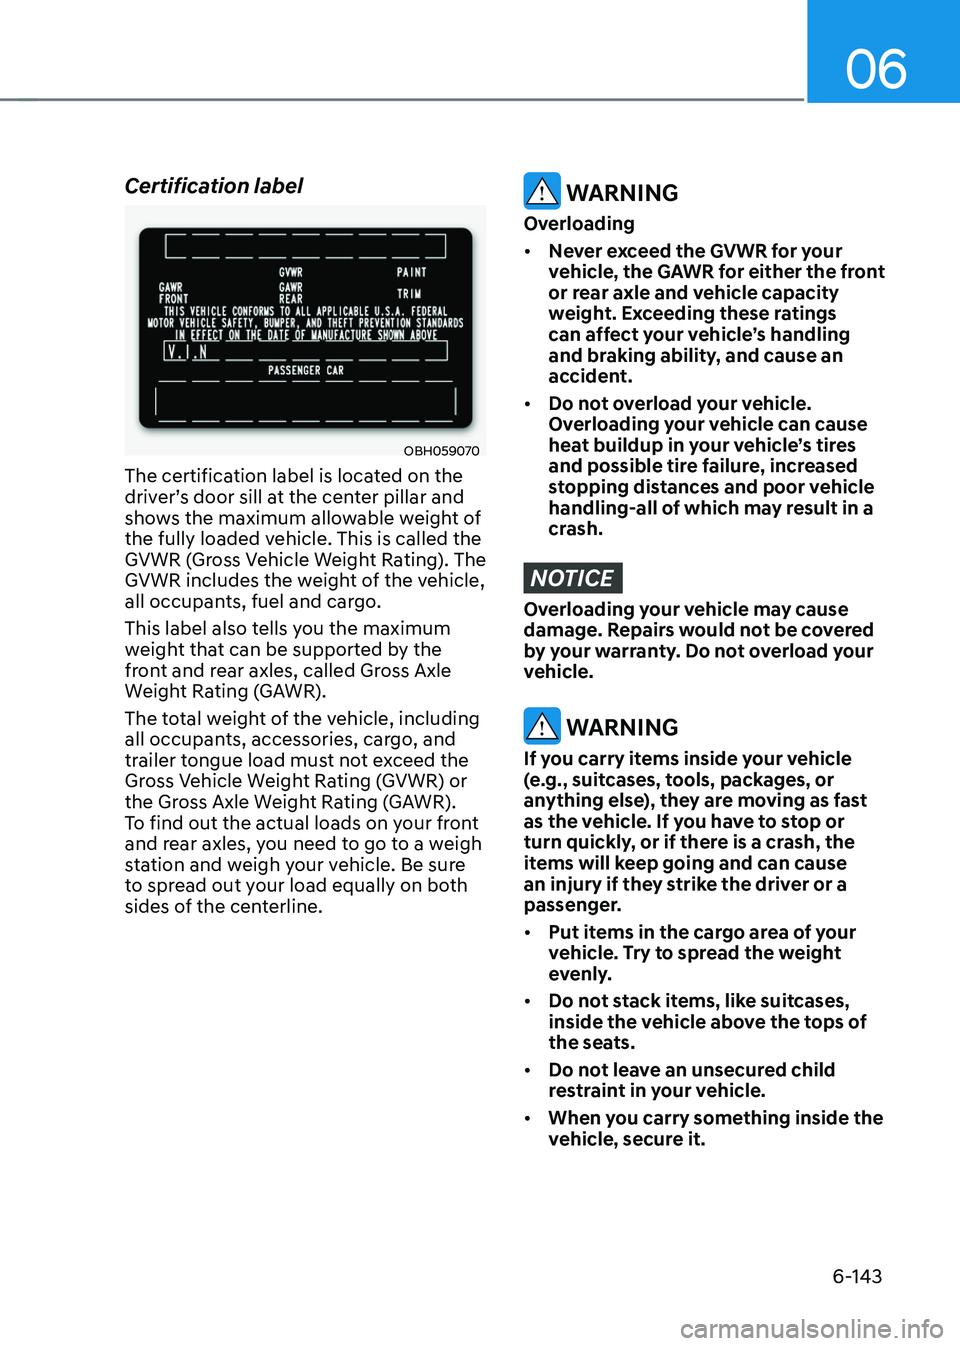
Certification label
OBH059070
The certification label is located on the
driver’s door sill at the center pillar and
shows the maximum allowable weight of
the fully loaded vehicle. This is called the
GVWR (Gross Vehicle Weight Rating). The
GVWR includes the weight of the vehicle,
all occupants, fuel and cargo.
This label also tells you the maximum
weight that can be supported by the
front and rear axles, called Gross Axle
Weight Rating (GAWR).
The total weight of the vehicle, including
all occupants, accessories, cargo, and
trailer tongue load must not exceed the
Gross Vehicle Weight Rating (GVWR) or
the Gross Axle Weight Rating (GAWR).
To find out the actual loads on your front
and rear axles, you need to go to a weigh
station and weigh your vehicle. Be sure
to spread out your load equally on both
sides of the centerline.
WARNING
Overloading
• Never exceed the GVWR for your
vehicle, the GAWR for either the front
or rear axle and vehicle capacity
weight. Exceeding these ratings
can affect your vehicle’s handling
and braking ability, and cause an
accident.
• Do not overload your vehicle.
Overloading your vehicle can cause
heat buildup in your vehicle’s tires
and possible tire failure, increased
stopping distances and poor vehicle
handling-all of which may result in a
crash.
NOTICE
Overloading your vehicle may cause
damage. Repairs would not be covered
by your warranty. Do not overload your
vehicle.
WARNING
If you carry items inside your vehicle
(e.g., suitcases, tools, packages, or
anything else), they are moving as fast
as the vehicle. If you have to stop or
turn quickly, or if there is a crash, the
items will keep going and can cause
an injury if they strike the driver or a
passenger.
• Put items in the cargo area of your
vehicle. Try to spread the weight
evenly.
• Do not stack items, like suitcases,
inside the vehicle above the tops of
the seats.
• Do not leave an unsecured child
restraint in your vehicle.
• When you carry something inside the
vehicle, secure it.
Page 420 of 527
While Driving
6-144
We do not recommend using this vehicle
for trailer towing.
TRAILER TOWING
Page 438 of 527
Emergency situations
7-18
WARNING
To prevent compact spare tire failure
and loss of control possibly resulting in
an accident:
• Use the compact spare tire only in an
emergency.
• NEVER operate your vehicle over
50 mph (80 km/h).
• Do not exceed the vehicle’s
maximum load rating or the load
carrying capacity shown on the
sidewall of the compact spare tire.
• Do not use the compact spare tire
continuously. Repair or replace the
original tire as soon as possible to
avoid failure of the compact spare
tire.
When driving with the compact spare tire
mounted to your vehicle:
• Check the tire pressure after installing
the compact spare tire. The compact
spare tire should be inflated to 60 psi
(420 kPa).
• Do not take this vehicle through
an automatic car wash while the
compact spare tire is installed.
• Do not use the compact spare tire on
any other vehicle because this tire
has been designed especially for your
vehicle.
• The compact spare tire’s tread life is
shorter than a regular tire. Inspect
your compact spare tire regularly and
replace worn compact spare tires with
the same size and design, mounted on
the same wheel.
• Do not use more than one compact
spare tire at a time.
• Do not tow a trailer while the compact
spare tire is installed.
Information
When the original tire and wheel are
repaired and reinstalled on the vehicle,
the lug nut torque must be set correctly.
The correct lug nut tightening torque is
79~94 lbf·ft (11~13 kgf·m).
NOTICE
To prevent damaging the compact
spare tire and your vehicle:
• Drive slowly enough for the road
conditions to avoid all hazards, such
as a potholes or debris.
• Avoid driving over obstacles. The
compact spare tire diameter is
smaller than the diameter of a
conventional tire and reduces the
ground clearance approximately
1 inch (25 mm).
• Do not use tire chains on the
compact spare tire. Because of the
smaller size, a tire chain will not fit
properly.
• Do not use the compact spare tire
on any other wheels, nor should
standard tires, snow tires, wheel
covers or trim rings be used with the
compact spare wheel.
Page 440 of 527
Emergency situations
7-20
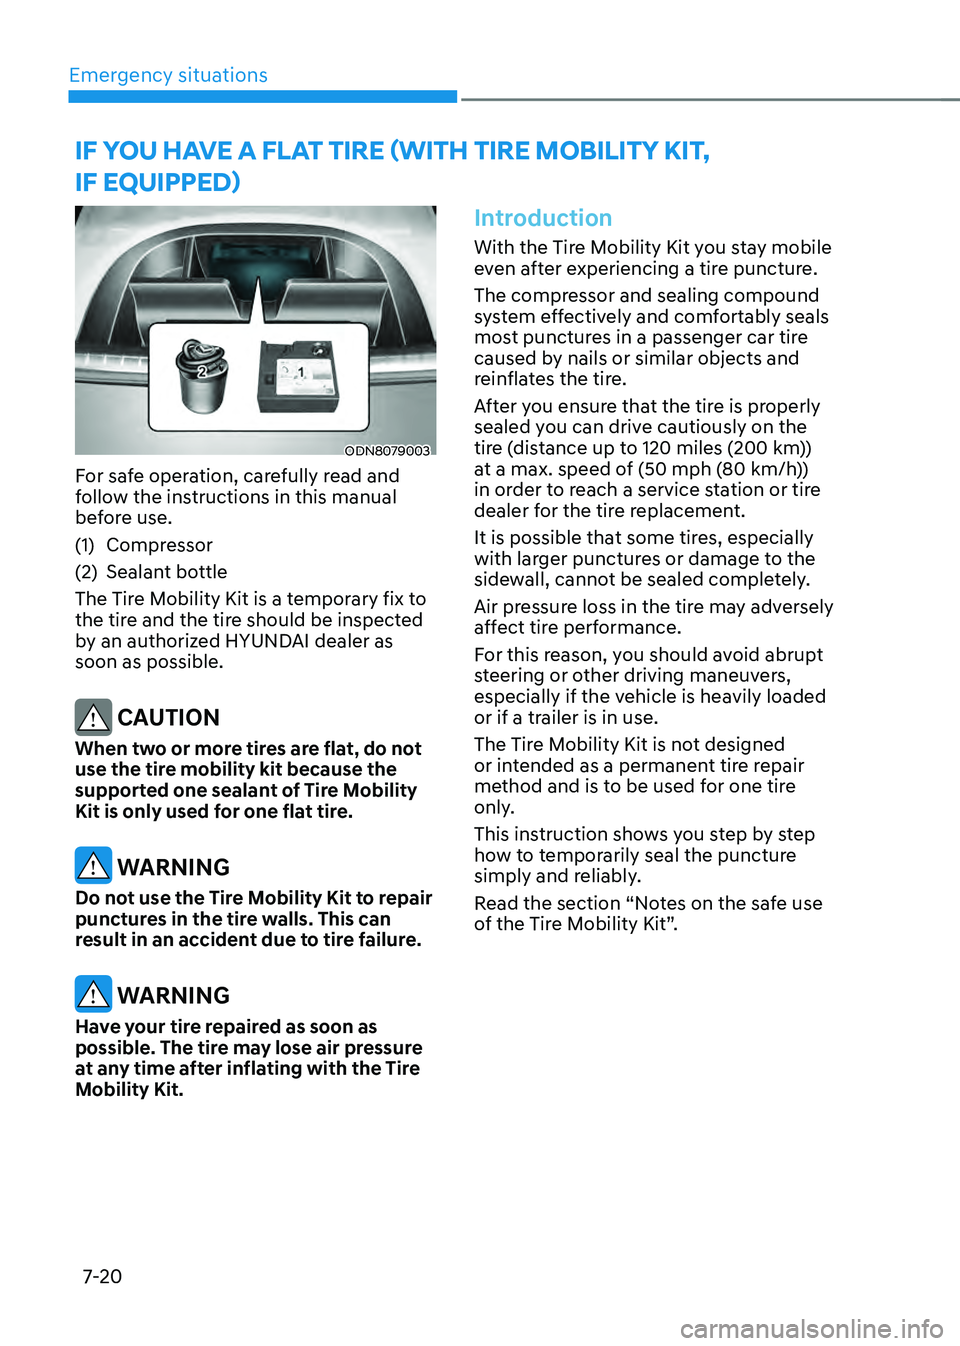
ODN8079003
For safe operation, carefully read and
follow the instructions in this manual
before use.
(1) Compressor
(2) Sealant bottle
The Tire Mobility Kit is a temporary fix to
the tire and the tire should be inspected
by an authorized HYUNDAI dealer as
soon as possible.
CAUTION
When two or more tires are flat, do not
use the tire mobility kit because the
supported one sealant of Tire Mobility
Kit is only used for one flat tire.
WARNING
Do not use the Tire Mobility Kit to repair
punctures in the tire walls. This can
result in an accident due to tire failure.
WARNING
Have your tire repaired as soon as
possible. The tire may lose air pressure
at any time after inflating with the Tire
Mobility Kit.
Introduction
With the Tire Mobility Kit you stay mobile
even after experiencing a tire puncture.
The compressor and sealing compound
system effectively and comfortably seals
most punctures in a passenger car tire
caused by nails or similar objects and
reinflates the tire.
After you ensure that the tire is properly
sealed you can drive cautiously on the
tire (distance up to 120 miles (200 km))
at a max. speed of (50 mph (80 km/h))
in order to reach a service station or tire
dealer for the tire replacement.
It is possible that some tires, especially
with larger punctures or damage to the
sidewall, cannot be sealed completely.
Air pressure loss in the tire may adversely
affect tire performance.
For this reason, you should avoid abrupt
steering or other driving maneuvers,
especially if the vehicle is heavily loaded
or if a trailer is in use.
The Tire Mobility Kit is not designed
or intended as a permanent tire repair
method and is to be used for one tire
only.
This instruction shows you step by step
how to temporarily seal the puncture
simply and reliably.
Read the section “Notes on the safe use
of the Tire Mobility Kit”.
IF YOU HAVE A FLAT TIRE (WITH TIRE MOBILITY KIT,
IF EQUIPPED)