2022 HYUNDAI KONA check engine
[x] Cancel search: check enginePage 325 of 579
Driving your vehicle
6-68
When installing tire chains, follow the
manufacturer’s instructions and mount
them as tightly possible. Drive slowly
(less than 20 mph (30 km/h)) with
chains installed. If you hear the chains
contacting the body or chassis, stop and
tighten them. If they still make contact,
slow down until the noise stops. Remove
the tire chains as soon as you begin
driving on cleared roads.
When mounting snow chains, park the
vehicle on level ground away from traffic.
Turn on the vehicle Hazard Warning
Flasher and place a triangular emergency
warning device behind the vehicle (if
available). Always place the vehicle in P
(Park), apply the parking brake and turn
off the engine before installing snow
chains.
NOTICE
When using tire chains:
Wrong size chains or improperly
installed chains can damage your
vehicle’s brake lines, suspension,
body and wheels.
Use SAE “S” class or wire chains.
If you hear noise caused by chains
contacting the body, retighten the
chain to prevent contact with the
vehicle body.
To prevent body damage, retighten
the chains after driving 0.3~0.6 miles
(0.5~1.0 km).
Do not use tire chains on vehicles
equipped with aluminum wheels. If
unavoidable, use a wire type chain.
Use wire chains less than 0.47 in.
(12mm) thick to prevent damage to
the chain’s connection.
Winter precautions
Use high quality ethylene glycol coolant
Your vehicle is delivered with high
quality ethylene glycol coolant in the
cooling system. It is the only type of
coolant that should be used because it
helps prevent corrosion in the cooling
system, lubricates the water pump and
prevents freezing. Be sure to replace or
replenish your coolant in accordance
with the maintenance schedule in
chapter 9. Before winter, have your
coolant tested to assure that its freezing
point is sufficient for the temperatures
anticipated during the winter.
Check battery and cables
Winter temperatures affect battery
performance. Inspect the battery and
cables, as specified in chapter 9. The
battery charging level can be checked
by an authorized HYUNDAI dealer or in a
service station.
Change to “winter weight” oil if
necessary
In some regions during winter, it is
recommended to use the “winter
weight” oil with lower viscosity In
addition, replace the engine oil and filter
if it is close to the next maintenance
interval. Fresh engine oil ensures
optimum engine operation during the
winter months. For further information,
refer to chapter 2. When you are not sure
about a type of winter weight oil, consult
an authorized HYUNDAI dealer.
Page 326 of 579

06
6-69
Check spark plugs and ignition system
Inspect the spark plugs, as specified in
chapter 9. If necessary, replace them.
Also check all ignition wirings and
components for any cracks, wear-out,
and damage.
To prevent locks from freezing
To prevent the locks from being frozen,
spray approved de-icing fluid or glycerin
into key holes. When a lock opening is
already covered with ice, spray approved
de-icing fluid over the ice to remove it.
When an internal part of a lock freezes,
try to thaw it with a heated key. Carefully
use the heated key to avoid an injury.
Use approved window washer anti-
freeze solution in system
To prevent the window washer from
being frozen, add authorized window
washer anti-freeze solution, as specified
on the window washer container.
Window washer anti-freeze solution is
available from an authorized HYUNDAI
dealer, and most vehicle accessory
outlets. Do not use engine coolant or
other types of anti-freeze solution, to
prevent any damage to the vehicle paint.
Do not let your parking brake freeze
Under some conditions your parking
brake can freeze in the engaged position.
This is most likely to happen when there
is an accumulation of snow or ice around
or near the rear brakes or if the brakes
are wet. When there is the risk that your
parking brake may freeze, temporarily
apply it with the gear in P (Park). Also,
block the rear wheels in advance, so the
vehicle may not roll. Then, release the
parking brake.
Do not let ice and snow accumulate
underneath
Under some conditions, snow and ice
can build up under the fenders and
interfere with the steering. When driving
in such conditions during the severe
winter, you should check underneath
the vehicle on a regular basis, to ensure
that the front wheels and the steering
components is unblocked.
Carry emergency equipment
In accordance with weather conditions,
you should carry appropriate emergency
equipment, while driving. Some of the
items you may want to carry include tire
chains, tow straps or chains, flashlight,
emergency flares, sand, shovel, jumper
cables, window scraper, gloves, ground
cloth, coveralls, blanket, etc.
Do not place objects or materials in the
engine compartment
Putting objects or materials in the engine
compartment may cause an engine
failure or combustion, because they may
block the engine cooling. Such damage
will not be covered by the manufacturer’s
warranty.
Page 376 of 579
Driver assistance system
7-44
Blind- Spot Safety system
malfunction and limitation
Blind- Spot Safety system
malfunction
OTM070099N
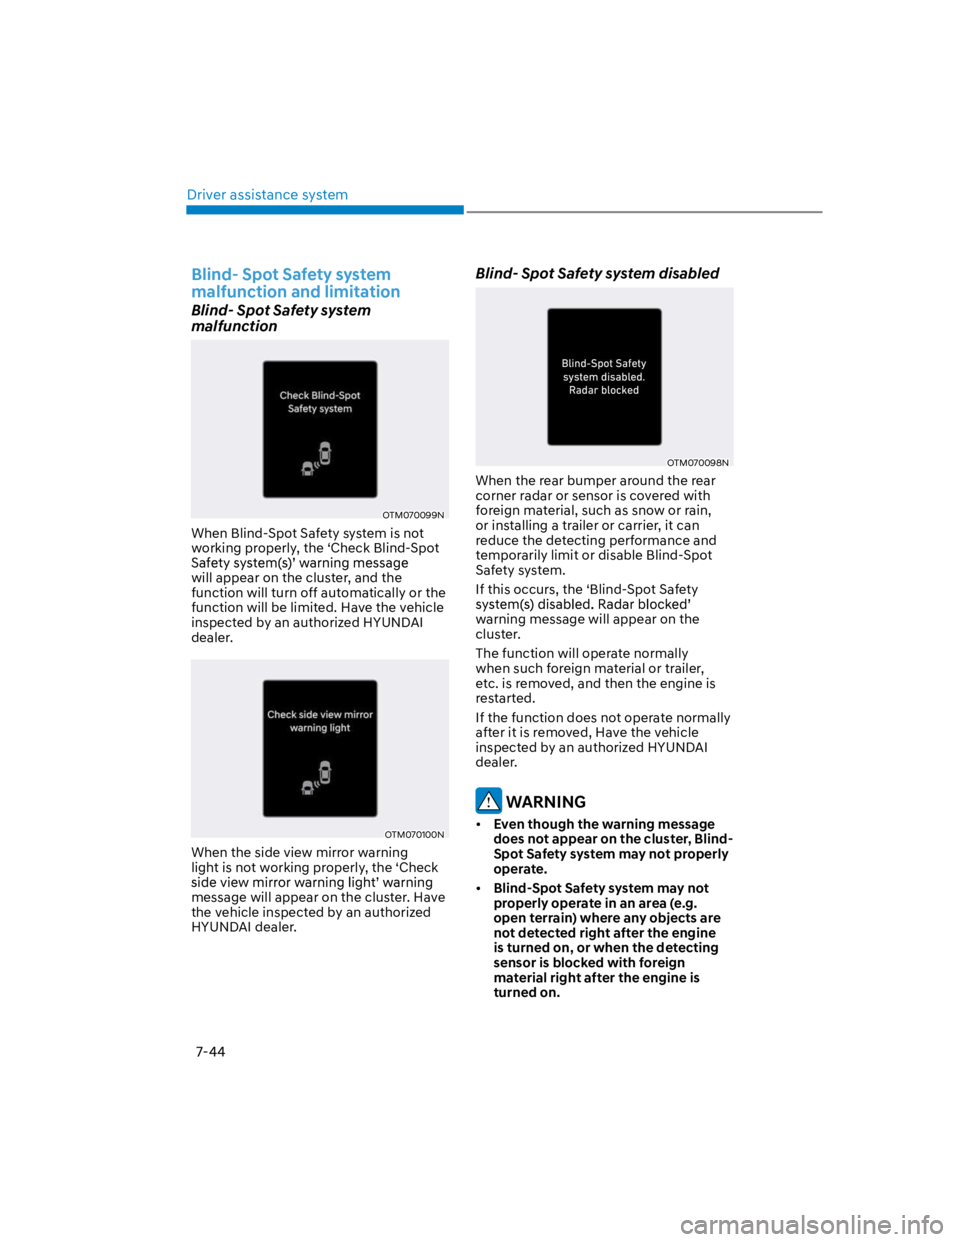
When Blind-Spot Safety system is not
working properly, the ‘Check Blind-Spot
will appear on the cluster, and the
function will turn off automatically or the
function will be limited. Have the vehicle
inspected by an authorized HYUNDAI
dealer.
OTM070100N
When the side view mirror warning
light is not working properly, the ‘Check
message will appear on the cluster. Have
the vehicle inspected by an authorized
HYUNDAI dealer.
Blind- Spot Safety system disabled
OTM070098N
When the rear bumper around the rear
corner radar or sensor is covered with
foreign material, such as snow or rain,
or installing a trailer or carrier, it can
reduce the detecting performance and
temporarily limit or disable Blind-Spot
Safety system.
If this occurs, the ‘Blind-Spot Safety
warning message will appear on the
cluster.
The function will operate normally
when such foreign material or trailer,
etc. is removed, and then the engine is
restarted.
If the function does not operate normally
after it is removed, Have the vehicle
inspected by an authorized HYUNDAI
dealer.
WARNING
Even though the warning message
does not appear on the cluster, Blind-
Spot Safety system may not properly
operate.
Blind-Spot Safety system may not
properly operate in an area (e.g.
open terrain) where any objects are
not detected right after the engine
is turned on, or when the detecting
sensor is blocked with foreign
material right after the engine is
turned on.
Page 441 of 579
07
7-109
WARNING
Even though the warning message
does not appear on the cluster, Rear
Cross-Traffic Safety system may not
operate properly.
Rear Cross-Traffic Safety system may
not operate properly in an area (for
example: open terrain), where any
substance are not detected after
turning ON the engine.
CAUTION
Turn off Rear Cross-Traffic Safety
system to install a trailer, carrier, etc.,
or remove the trailer, carrier, etc. to use
Rear Cross-Traffic Safety system.
Limitations of Rear Cross-Traffic
Safety system
Rear Cross-Traffic Safety system may
not operate normally, or the function
may operate unexpectedly under the
following circumstances:
Departing from where trees or grass
are overgrown
Departing from where roads are wet
Speed of the approaching vehicle is
fast or slow
attention is required in the following
circumstances:
The vehicle severely vibrates while
driving over a bumpy road, uneven
road or concrete patch
Driving on a slippery surface due to
snow, water puddle, ice, etc.
The tire pressure is low or a tire is
damaged
The brake is reworked
Remote Smart Parking Assist is
operating (if equipped)
Information
WARNING
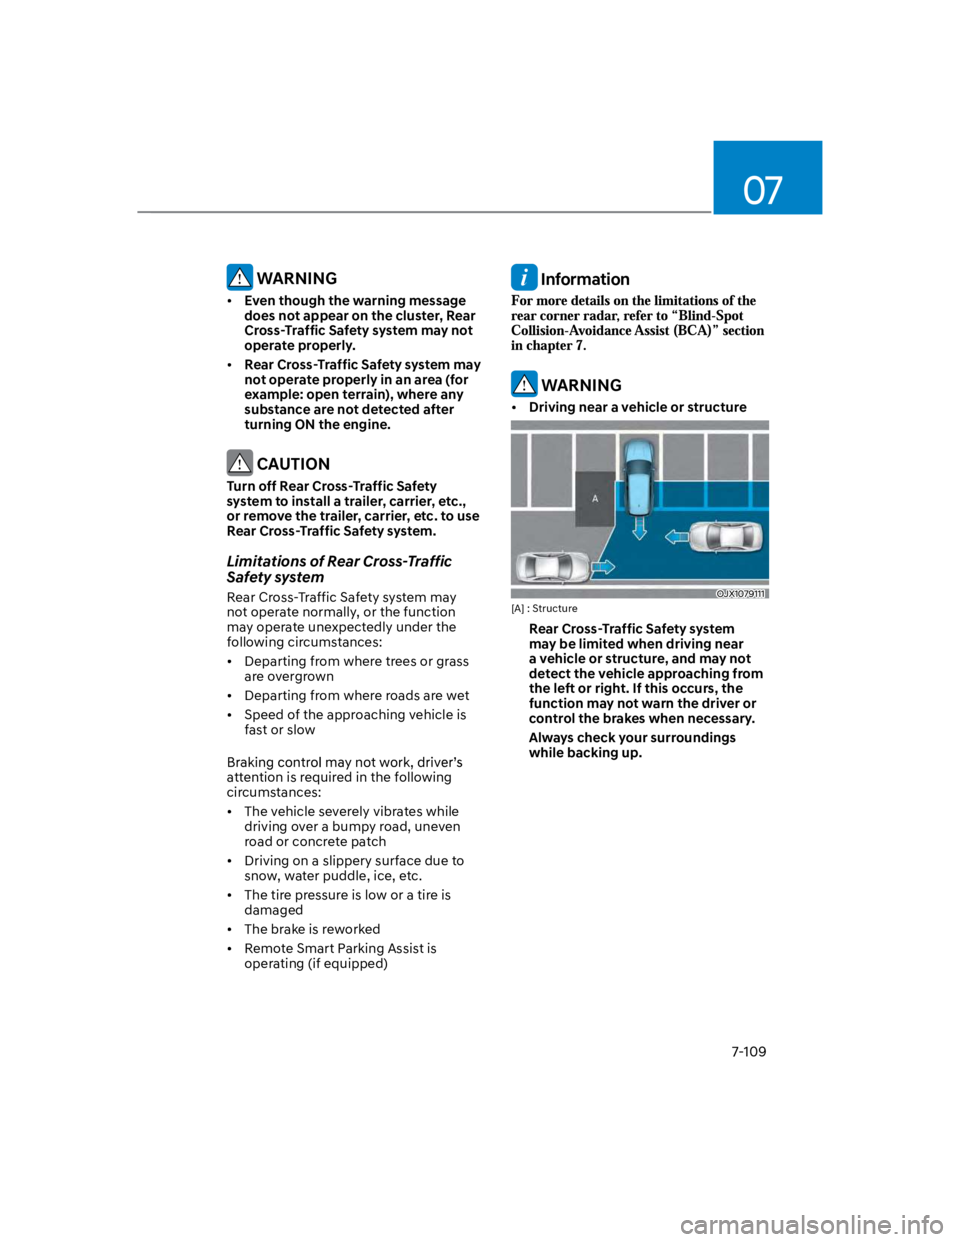
Driving near a vehicle or structure
OJX1079111
[A] : Structure
Rear Cross-Traffic Safety system
may be limited when driving near
a vehicle or structure, and may not
detect the vehicle approaching from
the left or right. If this occurs, the
function may not warn the driver or
control the brakes when necessary.
Always check your surroundings
while backing up.
Page 446 of 579
Driver assistance system
7-114
Reverse Parking Distance Warning
Reverse Parking Distance Warning
will operate when the gear is in R
(Reverse).
Reverse Parking Distance Warning
may be able to detect a person,
animal or object in the rear when the
mph (10 km/h).
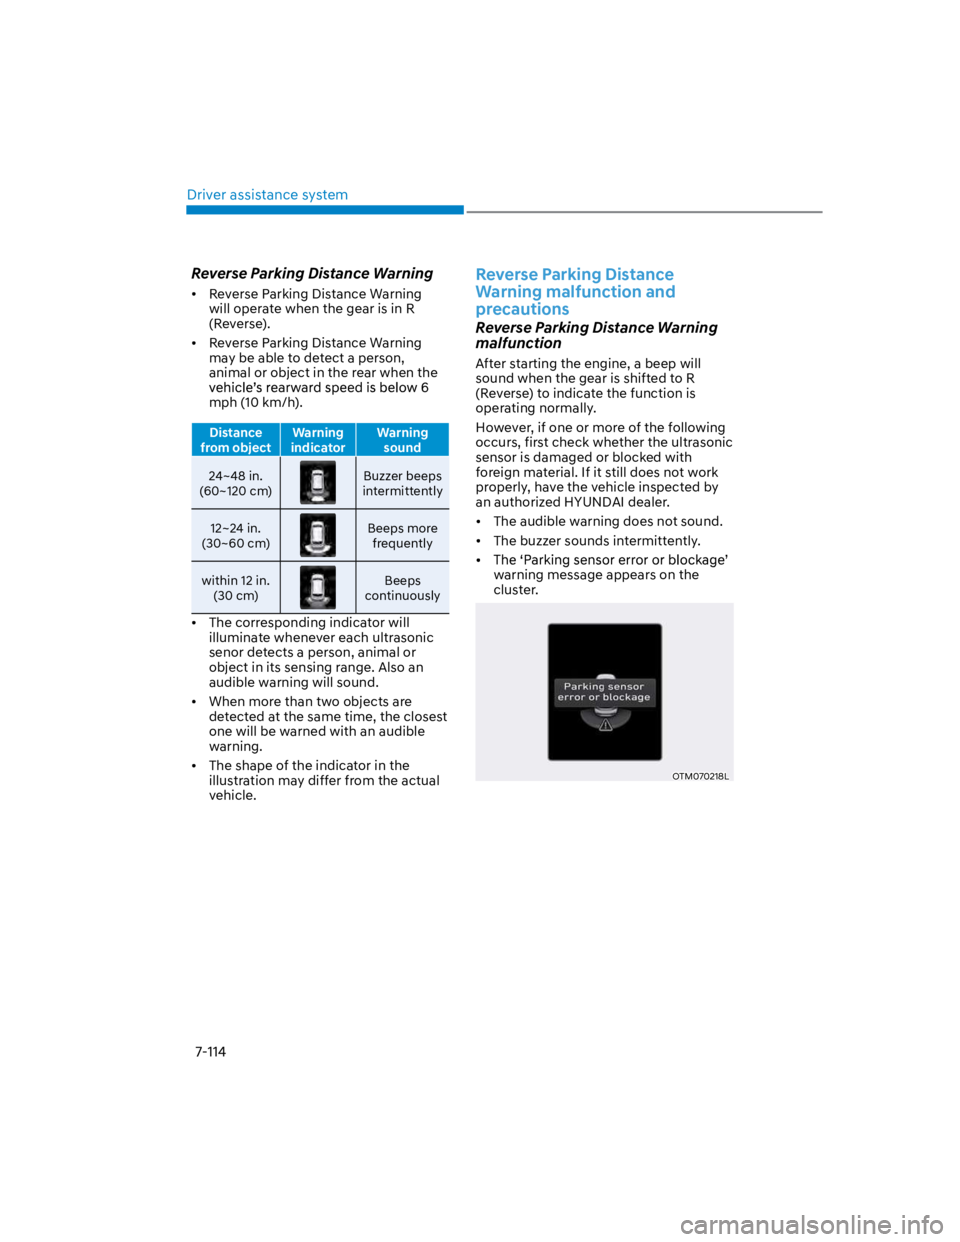
Distance
from object
Warning
indicator
Warning
sound
24~48 in.
(60~120 cm)
Buzzer beeps
intermittently
12~24 in.
(30~60 cm)
Beeps more
frequently
within 12 in.
(30 cm)
Beeps
continuously
The corresponding indicator will
illuminate whenever each ultrasonic
senor detects a person, animal or
object in its sensing range. Also an
audible warning will sound.
When more than two objects are
detected at the same time, the closest
one will be warned with an audible
warning.
The shape of the indicator in the
illustration may differ from the actual
vehicle.
Reverse Parking Distance
Warning malfunction and
precautions
Reverse Parking Distance Warning
malfunction
After starting the engine, a beep will
sound when the gear is shifted to R
(Reverse) to indicate the function is
operating normally.
However, if one or more of the following
occurs, first check whether the ultrasonic
sensor is damaged or blocked with
foreign material. If it still does not work
properly, have the vehicle inspected by
an authorized HYUNDAI dealer.
The audible warning does not sound.
The buzzer sounds intermittently.
warning message appears on the
cluster.
OTM070218L
Page 451 of 579
8
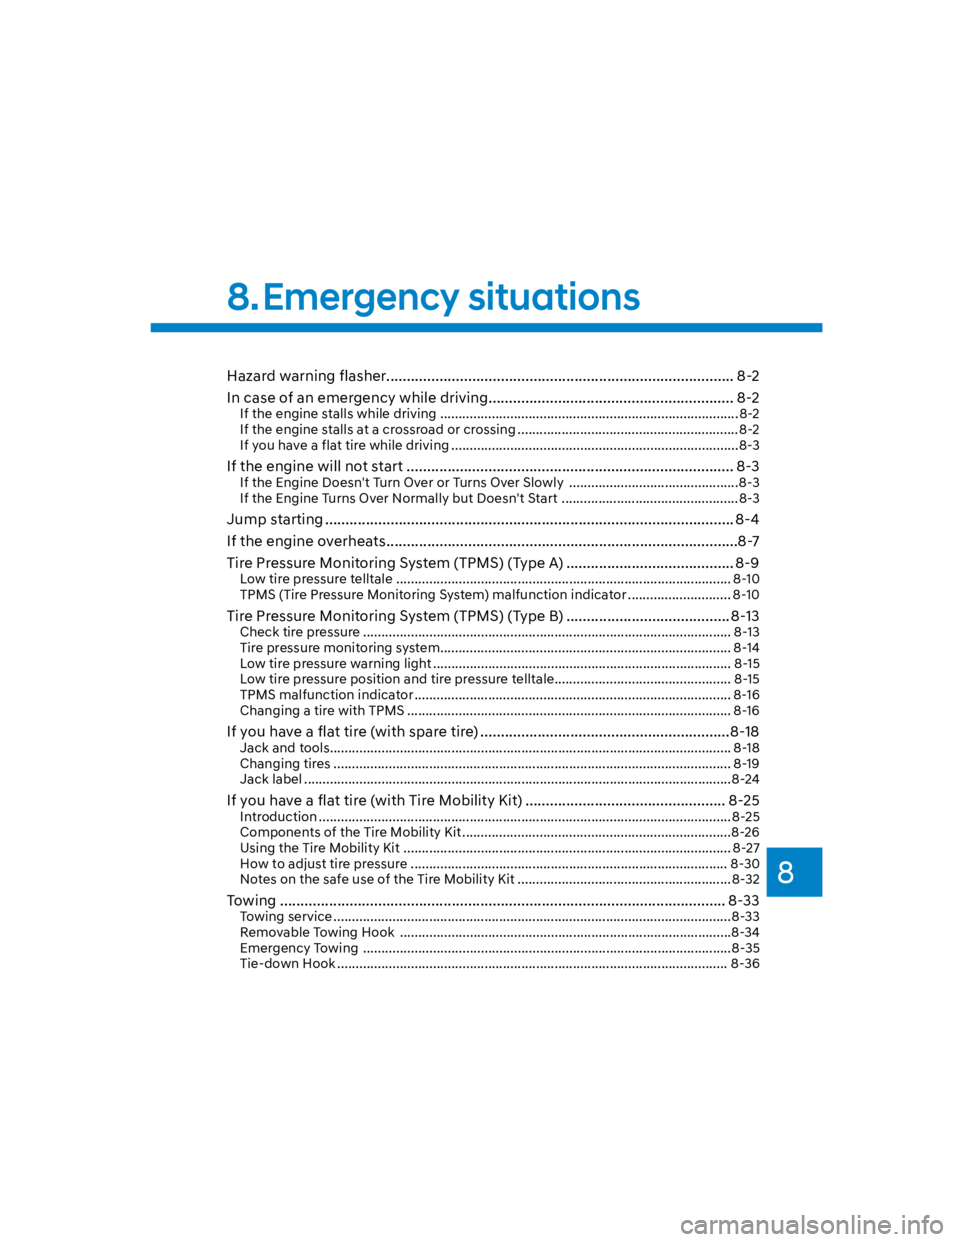
Hazard warning flasher..................................................................................... 8-2
In case of an emergency while driving ............................................................ 8-2
If the engine stalls while driving ................................................................................. 8-2
If the engine stalls at a crossroad or crossing ............................................................ 8-2
If you have a flat tire while driving ..............................................................................8-3
If the engine will not start ................................................................................ 8-3
If the Engine Doesn't Turn Over or Turns Over Slowly ..............................................8-3
If the Engine Turns Over Normally but Doesn't Start ................................................8-3
Jump starting .................................................................................................... 8-4
If the engine overheats ......................................................................................8-7
Tire Pressure Monitoring System (TPMS) (Type A) ......................................... 8-9
Low tire pressure telltale ........................................................................................... 8-10
TPMS (Tire Pressure Monitoring System) malfunction indicator ............................ 8-10
Tire Pressure Monitoring System (TPMS) (Type B) ........................................ 8-13
Check tire pressure .................................................................................................... 8-13
Tire pressure monitoring system ............................................................................... 8-14
Low tire pressure warning light ................................................................................. 8-15
Low tire pressure position and tire pressure telltale ................................................ 8-15
TPMS malfunction indicator ...................................................................................... 8-16
Changing a tire with TPMS ........................................................................................ 8-16
If you have a flat tire (with spare tire) .............................................................8-18
Jack and tools............................................................................................................. 8-18
Changing tires ............................................................................................................ 8-19
Jack label ....................................................................................................................8-24
If you have a flat tire (with Tire Mobility Kit) ................................................. 8-25
Introduction ................................................................................................................ 8-25
Components of the Tire Mobility Kit .........................................................................8-26
Using the Tire Mobility Kit ......................................................................................... 8-27
How to adjust tire pressure ...................................................................................... 8-30
Notes on the safe use of the Tire Mobility Kit ..........................................................8-32
Towing ............................................................................................................. 8-33
Towing service ............................................................................................................8-33
Removable Towing Hook ..........................................................................................8-34
Emergency Towing ....................................................................................................8-35
Tie-down Hook .......................................................................................................... 8-36
8. Emergency situations
Page 453 of 579
08
8-3
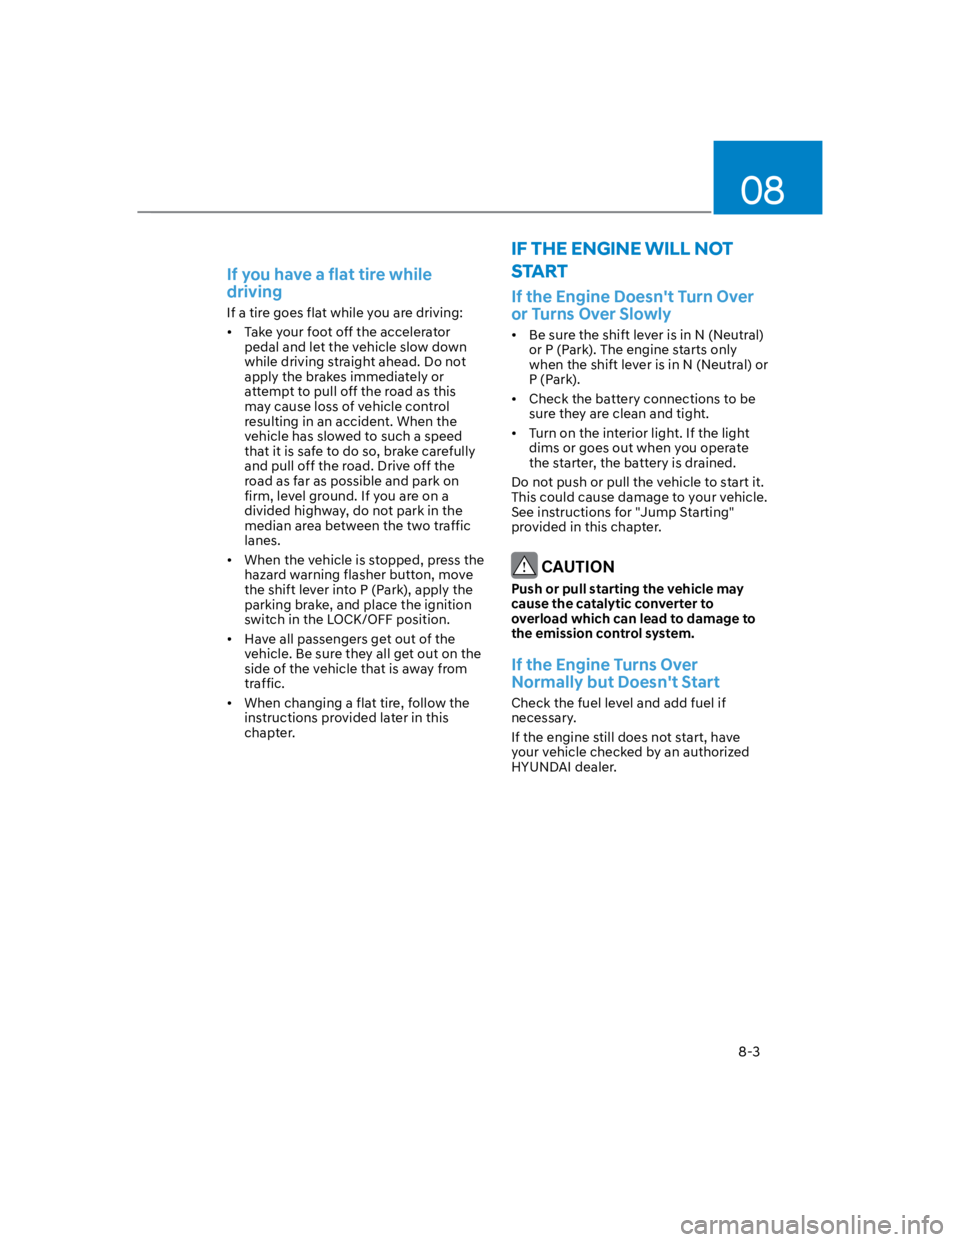
If you have a flat tire while
driving
If a tire goes flat while you are driving:
Take your foot off the accelerator
pedal and let the vehicle slow down
while driving straight ahead. Do not
apply the brakes immediately or
attempt to pull off the road as this
may cause loss of vehicle control
resulting in an accident. When the
vehicle has slowed to such a speed
that it is safe to do so, brake carefully
and pull off the road. Drive off the
road as far as possible and park on
firm, level ground. If you are on a
divided highway, do not park in the
median area between the two traffic
lanes.
When the vehicle is stopped, press the
hazard warning flasher button, move
the shift lever into P (Park), apply the
parking brake, and place the ignition
switch in the LOCK/OFF position.
Have all passengers get out of the
vehicle. Be sure they all get out on the
side of the vehicle that is away from
traffic.
When changing a flat tire, follow the
instructions provided later in this
chapter.
IF THE ENGINE WILL NOT
START
If the Engine Doesn't Turn Over
or Turns Over Slowly
Be sure the shift lever is in N (Neutral)
or P (Park). The engine starts only
when the shift lever is in N (Neutral) or
P (Park).
Check the battery connections to be
sure they are clean and tight.
Turn on the interior light. If the light
dims or goes out when you operate
the starter, the battery is drained.
Do not push or pull the vehicle to start it.
This could cause damage to your vehicle.
See instructions for "Jump Starting"
provided in this chapter.
CAUTION
Push or pull starting the vehicle may
cause the catalytic converter to
overload which can lead to damage to
the emission control system.
If the Engine Turns Over
Normally but Doesn't Start
Check the fuel level and add fuel if
necessary.
If the engine still does not start, have
your vehicle checked by an authorized
HYUNDAI dealer.
Page 456 of 579

Emergency situations
8-6
9. Start the engine of the assisting
vehicle and let it run at approximately
2,000 rpm for a few minutes. Then
start your vehicle.
10.
Keep your vehicle operating for at
least 30 minutes at idle or driving to
assure your battery receives enough
charge to be able to start on its
own after the vehicle is shut off. A
complete dead battery may require
as long as 60 minutes runtime to fully
recharge it. If vehicle is run for less,
the battery may not restart.
If your vehicle will not start after a few
attempts, it probably requires servicing.
In this event please seek qualified
assistance. If the cause of your battery
discharging is not apparent, have your
vehicle checked by an authorized
HYUNDAI dealer.
Disconnect the jumper cables in the
exact reverse order you connected them:
1. Disconnect the jumper cable from the
black, negative (-) chassis ground of
your vehicle (4).
2. Disconnect the other end of the
jumper cable from the black, negative
(-) battery/chassis ground of the
assisting vehicle (3).
3. Disconnect the second jumper cable
from the red, positive (+) battery/
jumper terminal of the assisting
vehicle (2).
4. Disconnect the other end of the
jumper cable from the red, positive (+)
jumper terminal of your vehicle (1).
Information
NOTICE
To prevent damage to your vehicle:
Only use a 12-volt power supply
(battery or jumper system) to jump
start your vehicle.
Do not attempt to jump start your
vehicle by push-starting.